Page 65 of 136
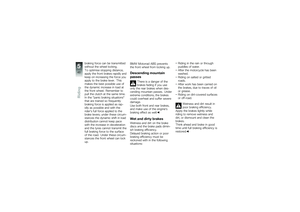
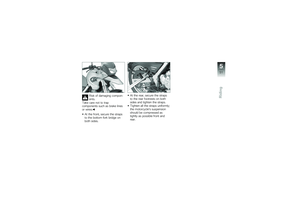
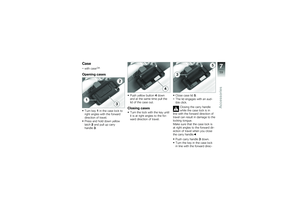
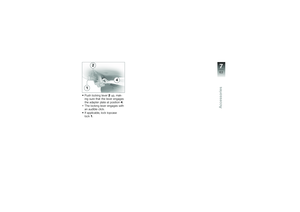
Push locking lever2up, mak-ing sure that the lever engagesthe adapter plate at position4.
The locking lever engages withan audible click.
If applicable, lock topcaselock1.
7
63
zAccessories
Page 66 of 136
Page 67 of 136

Maintenance
Maintenance
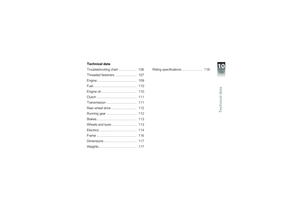
Notes . . . . . . . . . . . . . . . . . . . . . . . . . . . . . . . 66
Toolkit . . . . . . . . . . . . . . . . . . . . . . . . . . . . . . 66
Engine oil . . . . . . . . . . . . . . . . . . . . . . . . . . . 66
Brake system . . . . . . . . . . . . . . . . . . . . . . . 68
Brake pads . . . . . . . . . . . . . . . . . . . . . . . . . 68
Brake fluid . . . . . . . . . . . . . . . . . . . . . . . . . . 70
Coolant . . . . . . . . . . . . . . . . . . . . . . . . . . . . . 72
Clutch . . . . . . . . . . . . . . . . . . . . . . . . . . . . . . 73
Tyres . . . . . . . . . . . . . . . . . . . . . . . . . . . . . . . 74
Rims . . . . . . . . . . . . . . . . . . . . . . . . . . . . . . . . 74
Chain . . . . . . . . . . . . . . . . . . . . . . . . . . . . . . . 75
Wheels . . . . . . . . . . . . . . . . . . . . . . . . . . . . . 76
BMW Motorrad front-wheel
stand . . . . . . . . . . . . . . . . . . . . . . . . . . . . . . . 83
Fuses . . . . . . . . . . . . . . . . . . . . . . . . . . . . . . . 84
Bulbs . . . . . . . . . . . . . . . . . . . . . . . . . . . . . . . 85
Air filter . . . . . . . . . . . . . . . . . . . . . . . . . . . . . 91
Jump starting . . . . . . . . . . . . . . . . . . . . . . . 92
Battery . . . . . . . . . . . . . . . . . . . . . . . . . . . . . . 93
Body panels . . . . . . . . . . . . . . . . . . . . . . . . 96
8
65
zMaintenance
Page 68 of 136

Notes
The "Maintenance" chapter de-scribes straightforward proced-ures for checking and replacingcertain wear parts.
Special tightening torques are lis-ted as applicable. The tighteningtorques for the threaded fasten-ers on your motorcycle are listedin the section entitled "Technicaldata".
You will find information on moreextensive maintenance and repairwork in the Repair Manual onDVD for your motorcycle, whichis available from your authorisedBMW Motorrad dealer.
Some of the work calls for spe-cial tools and a thorough know-ledge of motorcycle technology.If you are in doubt consult a spe-cialist workshop, preferably yourauthorised BMW Motorrad deal-er.
Toolkit
1Open-ended spanner
Width across flats 24
Open-ended spanner
Width across flats 15
2Open-ended spanner
Width across flats 14/19
3Spark plug wrench
4Reversible-blade screw-driver with star-head andplain tips
Small screwdriver withstar-head tip
5Torx bit, T25
Torx wrench, T45
6Spare fuses with puller tool
Minifuses, 4 A, 7.5 A, 10 Aand 15 A
Engine oil
Checking engine oil level
The engine can seize if theoil level is low, and this canlead to accidents.
Always make sure that the oillevel is correct.
The oil level varies with thetemperature of the oil. Thehigher the temperature, the high-er the level of oil in the sump.Checking the oil level with theengine cold or after no more thana short ride will lead to misinter-pretation; this in turn, means thatthe engine will be operated withthe incorrect quantity of oil.
In order to ensure that the en-gine oil level is read correctly,check the oil level only after alengthy trip.
8
66
zMaintenance
Page 69 of 136
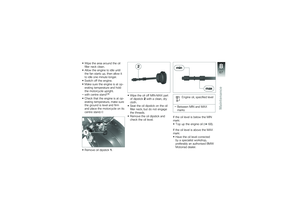
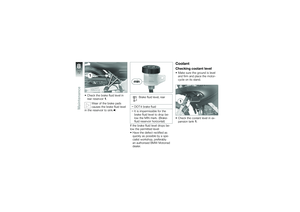
Wipe the area around the oilfiller neck clean.
Allow the engine to idle untilthe fan starts up, then allow itto idle one minute longer.
Switch off the engine.
Make sure the engine is at op-erating temperature and holdthe motorcycle upright.
with centre standOE
Check that the engine is at op-erating temperature, make surethe ground is level and firmand place the motorcycle on itscentre stand.
Remove oil dipstick1.
Wipe the oil off MIN-MAX partof dipstick2with a clean, drycloth.
Seat the oil dipstick on the oilfiller neck, but do not engagethe threads.
Remove the oil dipstick andcheck the oil level.
Engine oil, specified level
Between MIN and MAXmarks
If the oil level is below the MINmark:
Top up the engine oil (68).
If the oil level is above the MAXmark:
Have the oil level correctedby a specialist workshop,preferably an authorised BMWMotorrad dealer.
8
67
zMaintenance
Page 70 of 136

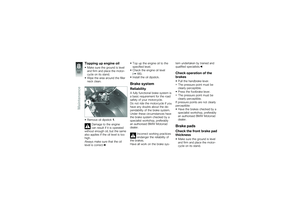
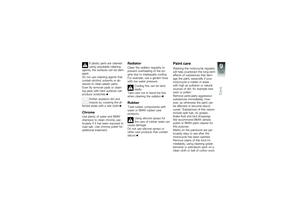
Topping up engine oil
Make sure the ground is leveland firm and place the motor-cycle on its stand.
Wipe the area around the fillerneck clean.
Remove oil dipstick1.
Damage to the enginecan result if it is operatedwithout enough oil, but the samealso applies if the oil level is toohigh.
Always make sure that the oillevel is correct.
Top up the engine oil to thespecified level.
Check the engine oil level(66).
Install the oil dipstick.
Brake system
Reliability
A fully functional brake system isa basic requirement for the roadsafety of your motorcycle.
Do not ride the motorcycle if youhave any doubts about the de-pendability of the brake system.
Under these circumstances havethe brake system checked by aspecialist workshop, preferablyan authorised BMW Motorraddealer.
Incorrect working practicesendanger the reliability ofthe brakes.
Have all work on the brake sys-
tem undertaken by trained andqualified specialists.
Check operation of the
brakes
Pull the handbrake lever.
The pressure point must beclearly perceptible.
Press the footbrake lever.
The pressure point must beclearly perceptible.
If pressure points are not clearlyperceptible:
Have the brakes checked by aspecialist workshop, preferablyan authorised BMW Motorraddealer.
Brake pads
Check the front brake pad
thickness
Make sure the ground is leveland firm and place the motor-cycle on its stand.
8
68
zMaintenance
Page 71 of 136
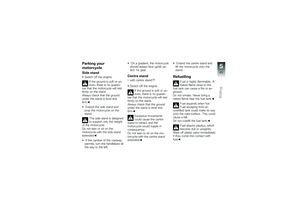
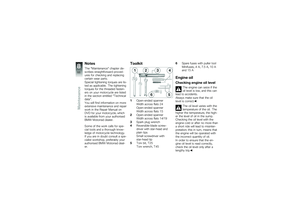
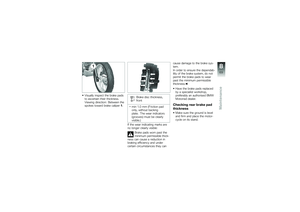
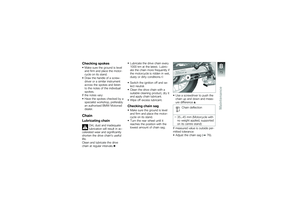
Visually inspect the brake padsto ascertain their thickness.Viewing direction: Between thespokes toward brake caliper1.
Brake disc thickness,front
min 1.0 mm (Friction padonly, without backingplate. The wear indicators(grooves) must be clearlyvisible.)
If the wear indicating marks areno longer clearly visible:
Brake pads worn past theminimum permissible thick-ness can cause a reduction inbraking efficiency and undercertain circumstances they can
cause damage to the brake sys-tem.
In order to ensure the dependab-ility of the brake system, do notpermit the brake pads to wearpast the minimum permissiblethickness.
Have the brake pads replacedby a specialist workshop,preferably an authorised BMWMotorrad dealer.
Checking rear brake pad
thickness
Make sure the ground is leveland firm and place the motor-cycle on its stand.
8
69
zMaintenance
Page 72 of 136

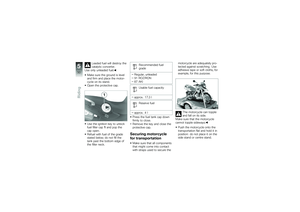
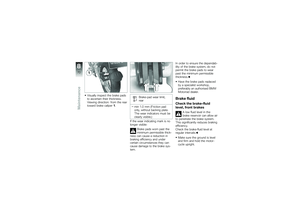
Visually inspect the brake padsto ascertain their thickness.Viewing direction: from the reartoward brake caliper1.
Brake-pad wear limit,rear
min 1.0 mm (Friction padonly, without backing plate.The wear indicators must beclearly visible.)
If the wear indicating mark is nolonger visible:
Brake pads worn past theminimum permissible thick-ness can cause a reduction inbraking efficiency and undercertain circumstances they cancause damage to the brake sys-tem.
In order to ensure the dependab-ility of the brake system, do notpermit the brake pads to wearpast the minimum permissiblethickness.
Have the brake pads replacedby a specialist workshop,preferably an authorised BMWMotorrad dealer.
Brake fluid
Check the brake-fluid
level, front brakes
A low fluid level in thebrake reservoir can allow airto penetrate the brake system.This significantly reduces brakingefficiency.
Check the brake-fluid level atregular intervals.
Make sure the ground is leveland firm and hold the motor-cycle upright.
8
70
zMaintenance