2010 BMW MOTORRAD G 650 GS Rider's Manual (in English)
-
 1
1 -
 2
2 -
 3
3 -
 4
4 -
 5
5 -
 6
6 -
 7
7 -
 8
8 -
 9
9 -
 10
10 -
 11
11 -
 12
12 -
 13
13 -
 14
14 -
 15
15 -
 16
16 -
 17
17 -
 18
18 -
 19
19 -
 20
20 -
 21
21 -
 22
22 -
 23
23 -
 24
24 -
 25
25 -
 26
26 -
 27
27 -
 28
28 -
 29
29 -
 30
30 -
 31
31 -
 32
32 -
 33
33 -
 34
34 -
 35
35 -
 36
36 -
 37
37 -
 38
38 -
 39
39 -
 40
40 -
 41
41 -
 42
42 -
 43
43 -
 44
44 -
 45
45 -
 46
46 -
 47
47 -
 48
48 -
 49
49 -
 50
50 -
 51
51 -
 52
52 -
 53
53 -
 54
54 -
 55
55 -
 56
56 -
 57
57 -
 58
58 -
 59
59 -
 60
60 -
 61
61 -
 62
62 -
 63
63 -
 64
64 -
 65
65 -
 66
66 -
 67
67 -
 68
68 -
 69
69 -
 70
70 -
 71
71 -
 72
72 -
 73
73 -
 74
74 -
 75
75 -
 76
76 -
 77
77 -
 78
78 -
 79
79 -
 80
80 -
 81
81 -
 82
82 -
 83
83 -
 84
84 -
 85
85 -
 86
86 -
 87
87 -
 88
88 -
 89
89 -
 90
90 -
 91
91 -
 92
92 -
 93
93 -
 94
94 -
 95
95 -
 96
96 -
 97
97 -
 98
98 -
 99
99 -
 100
100 -
 101
101 -
 102
102 -
 103
103 -
 104
104 -
 105
105 -
 106
106 -
 107
107 -
 108
108 -
 109
109 -
 110
110 -
 111
111 -
 112
112 -
 113
113 -
 114
114 -
 115
115 -
 116
116 -
 117
117 -
 118
118 -
 119
119 -
 120
120 -
 121
121 -
 122
122 -
 123
123 -
 124
124 -
 125
125 -
 126
126 -
 127
127 -
 128
128 -
 129
129 -
 130
130 -
 131
131 -
 132
132 -
 133
133 -
 134
134 -
 135
135

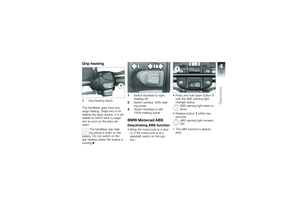
What is the design
baseline for BMW
Motorrad ABS?
Within the limits imposed byphysics, BMW Motorrad ABS en-sures directional stability on anysurface. The system is not op-timised for special requirem")

momentum take over and evenBMW Motorrad ABS is unable tocounteract their effects.6
56
zEngineering details")

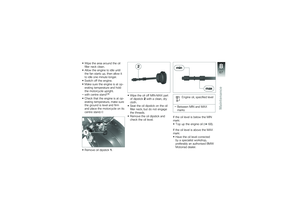
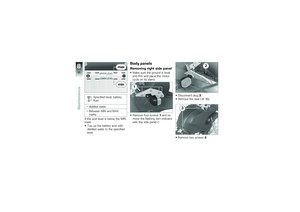
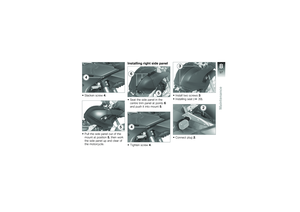
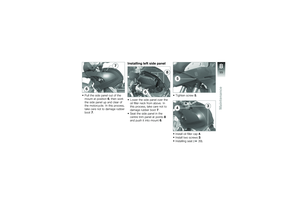
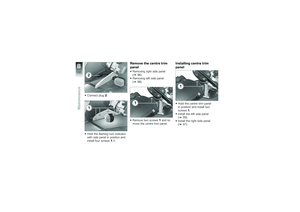
Accessories
Accessories
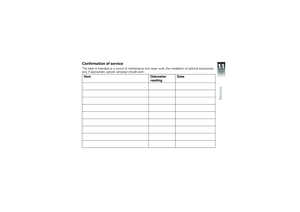
General instructions . . . . . . . . . . . . . . . . . 58
Power sockets . . . . . . . . . . . . . . . . . . . . . . 58
Case . . . . . . . . . . . . . . . . . . . . . . . . . .")

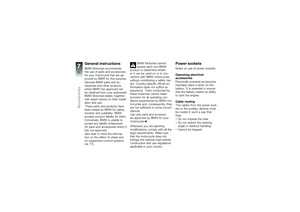
General instructions
BMW Motorrad recommendsthe use of parts and accessoriesfor your motorcycle that are ap-proved by BMW for this purpose.
Genuine BMW parts and ac-cessories and other productswhich")

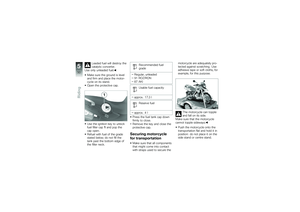
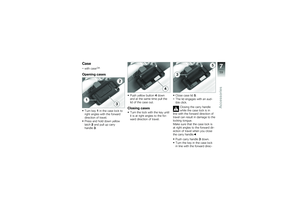
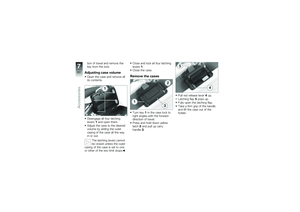
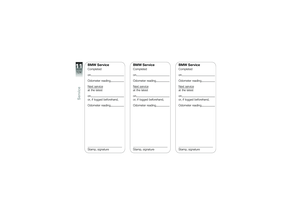
Case
with caseOA
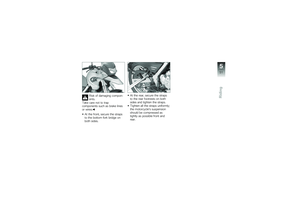
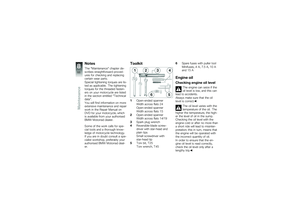
Opening cases
Turn key1in the case lock toright angles with the forwarddirection of travel.
Press and hold down yellowlatch2and pull up carryhandle3.
Push yellow button4downand at th")

tion of travel and remove thekey from the lock.
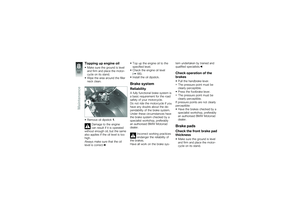
Adjusting case volume
Open the case and remove allits contents.
Disengage all four latchinglevers1and open them.
Adjust the case to the desiredvolume b")

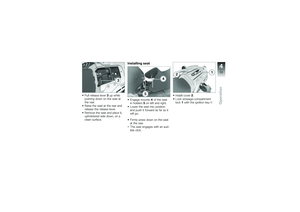
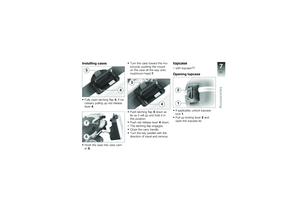
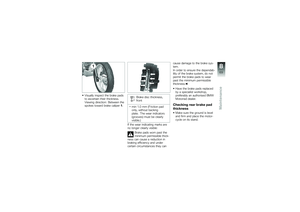
Installing cases
Fully open latching flap5, if ne-cessary pulling up red releaselever4.
Hook the case into case carri-er6.
Turn the case toward the mo-torcycle, pushing the mounton the case all the w")

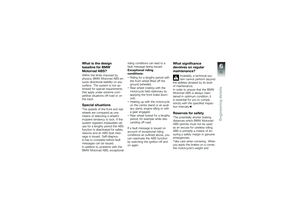
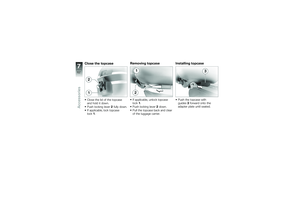
Close the topcase
Close the lid of the topcaseand hold it down.
Push locking lever2fully down.
If applicable, lock topcaselock1.
Removing topcase
If applicable, unlock topcaselock1.
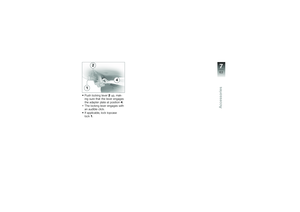
Push locking leve")