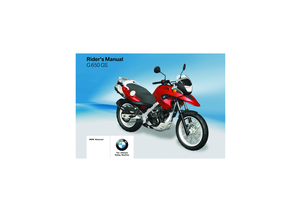
2010 BMW MOTORRAD G 650 GS Rider's Manual (in English)
-
 1
1 -
 2
2 -
 3
3 -
 4
4 -
 5
5 -
 6
6 -
 7
7 -
 8
8 -
 9
9 -
 10
10 -
 11
11 -
 12
12 -
 13
13 -
 14
14 -
 15
15 -
 16
16 -
 17
17 -
 18
18 -
 19
19 -
 20
20 -
 21
21 -
 22
22 -
 23
23 -
 24
24 -
 25
25 -
 26
26 -
 27
27 -
 28
28 -
 29
29 -
 30
30 -
 31
31 -
 32
32 -
 33
33 -
 34
34 -
 35
35 -
 36
36 -
 37
37 -
 38
38 -
 39
39 -
 40
40 -
 41
41 -
 42
42 -
 43
43 -
 44
44 -
 45
45 -
 46
46 -
 47
47 -
 48
48 -
 49
49 -
 50
50 -
 51
51 -
 52
52 -
 53
53 -
 54
54 -
 55
55 -
 56
56 -
 57
57 -
 58
58 -
 59
59 -
 60
60 -
 61
61 -
 62
62 -
 63
63 -
 64
64 -
 65
65 -
 66
66 -
 67
67 -
 68
68 -
 69
69 -
 70
70 -
 71
71 -
 72
72 -
 73
73 -
 74
74 -
 75
75 -
 76
76 -
 77
77 -
 78
78 -
 79
79 -
 80
80 -
 81
81 -
 82
82 -
 83
83 -
 84
84 -
 85
85 -
 86
86 -
 87
87 -
 88
88 -
 89
89 -
 90
90 -
 91
91 -
 92
92 -
 93
93 -
 94
94 -
 95
95 -
 96
96 -
 97
97 -
 98
98 -
 99
99 -
 100
100 -
 101
101 -
 102
102 -
 103
103 -
 104
104 -
 105
105 -
 106
106 -
 107
107 -
 108
108 -
 109
109 -
 110
110 -
 111
111 -
 112
112 -
 113
113 -
 114
114 -
 115
115 -
 116
116 -
 117
117 -
 118
118 -
 119
119 -
 120
120 -
 121
121 -
 122
122 -
 123
123 -
 124
124 -
 125
125 -
 126
126 -
 127
127 -
 128
128 -
 129
129 -
 130
130 -
 131
131 -
 132
132 -
 133
133 -
 134
134 -
 135
135

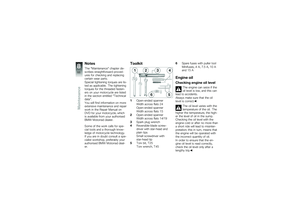
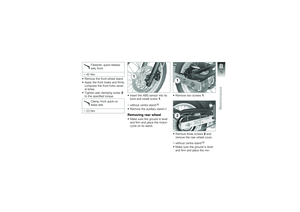
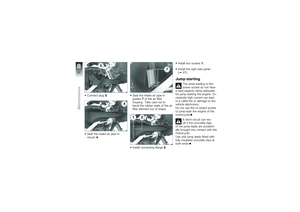
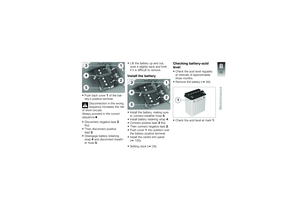
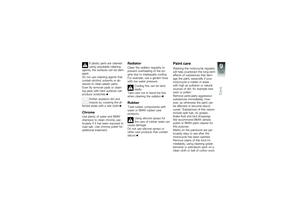
Push back cover1of the bat-terys positive terminal.
Disconnection in the wrongsequence increases the riskof short-circuits.
Always proceed in the correctsequence.
Disconnect negative lead2first.
The")

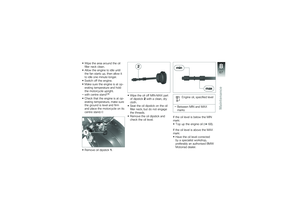
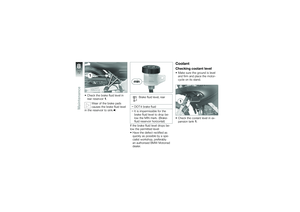
Specified level, batteryfluid
distilled water
Between MIN and MAXmarks
If the acid level is below the MINmark:
Top up the battery acid withdistilled water to the specifiedlevel.
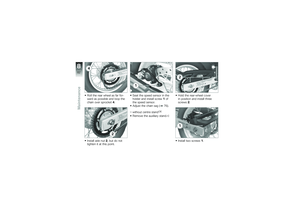
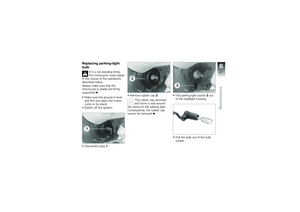
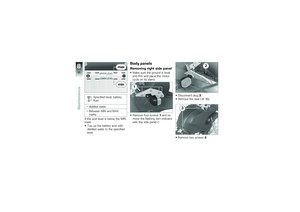
Body panels
Removing")

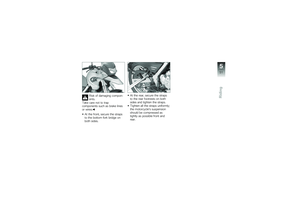
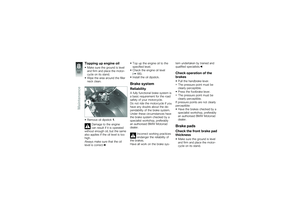
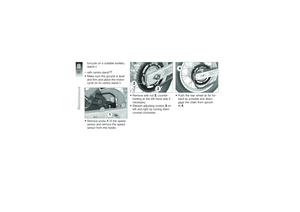
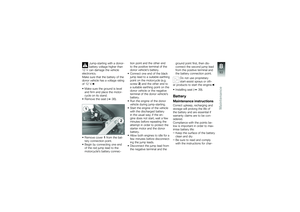
Slacken screw4.
Pull the side panel out of themount at position5, then workthe side panel up and clear ofthe motorcycle.
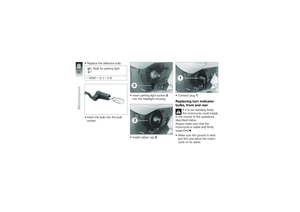
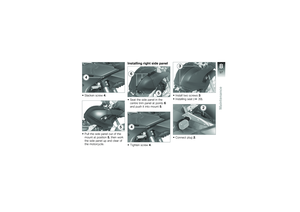
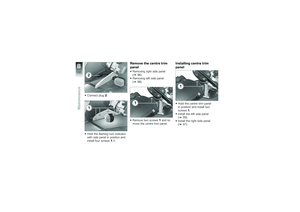
Installing right side panel
Seat the side panel in thecentre trim panel at poi")

Hold the flashing turn indicatorwith side panel in position andinstall four screws1.
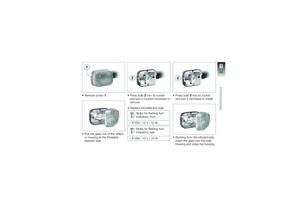
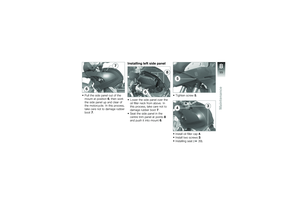
Removing left side panel
Make sure the ground is leveland firm and place the motor-cycle on its stand.
Remove four")

Pull the side panel out of themount at position6, then workthe side panel up and clear ofthe motorcycle. In this process,take care not to damage rubberboot7.
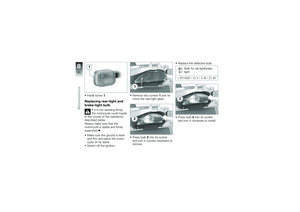
Installing left side panel
Lower the side")

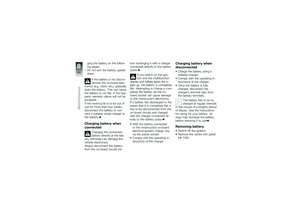
Connect plug2.
Hold the flashing turn indicatorwith side panel in position andinstall four screws1.
Remove the centre trim
panel
Removing right side panel(96).
Removing left side panel(98).
Remove tw")

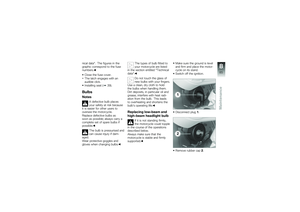
Care
Care
Care products . . . . . . . . . . . . . . . . . . . . . 102
Washing motorcycle . . . . . . . . . . . . . . . 102
Cleaning easily damaged compon-
ents . . . . . . . . . . . . . . . . . . . .")

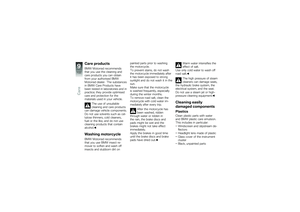
Care products
BMW Motorrad recommendsthat you use the cleaning andcare products you can obtainfrom your authorised BMWMotorrad dealer. The substancesin BMW Care Products havebeen tested in laboratori")