Page 13 of 136
General view, left side
1Battery (underneath centretrim panel) (93)
2Oil dipstick and engine-oilfiller neck (66)
3Seat lock (38)
4Power socket (58)
5Coolant-level indicator(72)
2
11
zGeneral views
Page 24 of 136
Fuel down to reserve
Warning light for fuel downto reserve shows.
Lack of fuel can result inthe engine misfiring andcutting out unexpectedly. Mis-firing can damage the catalyticconverter; a hazardous situationcan result if the engine cuts outunexpectedly.
Do not run the fuel tank dry.
Possible cause:
The fuel tank contains no morethan the reserve quantity of fuel.
Reserve fuel
approx. 4 l
Refuelling (49).
Insufficient engine oil
pressure
Warning light for engine oilpressure shows.
The oil pressure in the lube-oilsystem is too low. Stop immedi-ately and switch off the engine ifthe warning light shows.
The insufficient oil pres-sure warning does not fulfilthe function of an oil gauge. Theonly way of checking whetherthe oil level is correct is to checkwith the oil dipstick.
Possible cause:
Engine-oil level too low.
Check the engine oil level(66).
If the oil level is too low:
Top up the engine oil (68).
Possible cause:
If the engine oil level is correct:
Riding when engine-oilpressure is low can resultin engine damage.
Do not continue your journey.
Have the fault rectified asquickly as possible by aspecialist workshop, preferablyan authorised BMW Motorraddealer.
Coolant temperature too
high
Warning light for coolanttemperature shows.
Continuing to ride when theengine is overheated couldresult in engine damage.
You must comply with the in-structions below.
3
22
zStatus indicators
Page 46 of 136
Checklist
Use the following checklist tocheck important functions, set-tings and wear limits before youride off.
Brakes
Brake-fluid levels, front and rear
Clutch
Shock absorber setting andspring preload
Tyre-tread depth and tyrepressures
Cases correctly installed andluggage secured
At regular intervals:
Engine oil level (every refuellingstop)
Brake-pad wear (every thirdrefuelling stop)
Tension and lubrication of thedrive chain
Starting
Side stand
You cannot start the motorcyclewith the side stand extended anda gear engaged. The engine willswitch itself off if you start it withthe gearbox in neutral and thenengage a gear before retractingthe side stand.
Gearbox
You can start the engine whenthe gearbox is in neutral or if youpull the clutch with a gear en-gaged.
Starting engine
Kill switch1in run positiona.
Gearbox lubrication is en-sured only when the engineis running. Inadequate lubrica-tion can result in damage to thegearbox.
Do not allow the motorcycle toroll for a lengthy period of time orpush it a long distance with theengine switched off.
Switch on the ignition.
ABS self-diagnosis isperformed. (45)
5
44
zRiding
Page 68 of 136
Notes
The "Maintenance" chapter de-scribes straightforward proced-ures for checking and replacingcertain wear parts.
Special tightening torques are lis-ted as applicable. The tighteningtorques for the threaded fasten-ers on your motorcycle are listedin the section entitled "Technicaldata".
You will find information on moreextensive maintenance and repairwork in the Repair Manual onDVD for your motorcycle, whichis available from your authorisedBMW Motorrad dealer.
Some of the work calls for spe-cial tools and a thorough know-ledge of motorcycle technology.If you are in doubt consult a spe-cialist workshop, preferably yourauthorised BMW Motorrad deal-er.
Toolkit
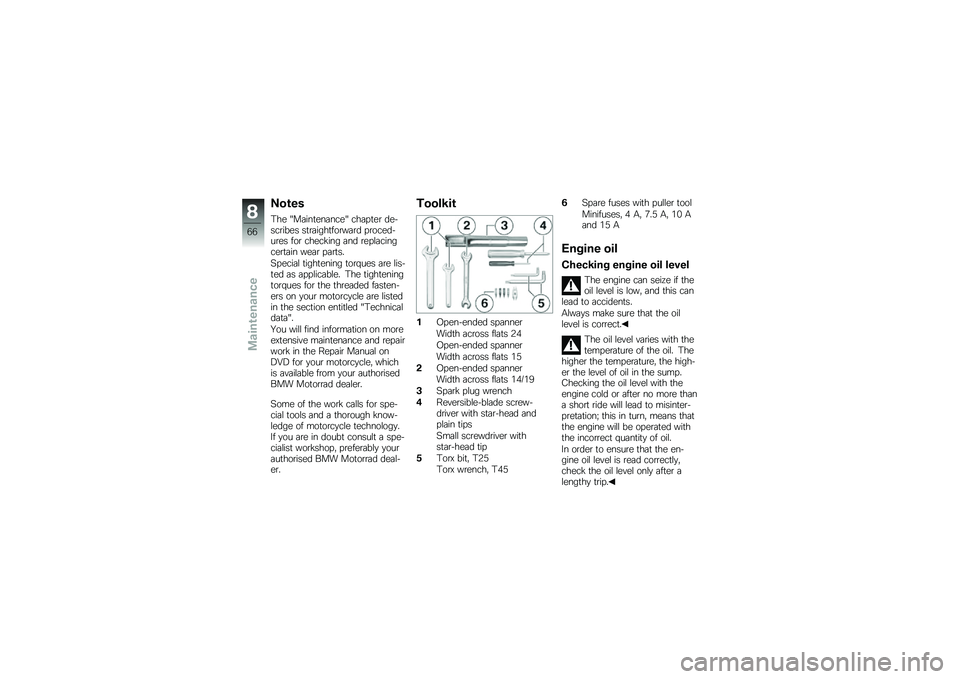
1Open-ended spanner
Width across flats 24
Open-ended spanner
Width across flats 15
2Open-ended spanner
Width across flats 14/19
3Spark plug wrench
4Reversible-blade screw-driver with star-head andplain tips
Small screwdriver withstar-head tip
5Torx bit, T25
Torx wrench, T45
6Spare fuses with puller tool
Minifuses, 4 A, 7.5 A, 10 Aand 15 A
Engine oil
Checking engine oil level
The engine can seize if theoil level is low, and this canlead to accidents.
Always make sure that the oillevel is correct.
The oil level varies with thetemperature of the oil. Thehigher the temperature, the high-er the level of oil in the sump.Checking the oil level with theengine cold or after no more thana short ride will lead to misinter-pretation; this in turn, means thatthe engine will be operated withthe incorrect quantity of oil.
In order to ensure that the en-gine oil level is read correctly,check the oil level only after alengthy trip.
8
66
zMaintenance
Page 69 of 136
Wipe the area around the oilfiller neck clean.
Allow the engine to idle untilthe fan starts up, then allow itto idle one minute longer.
Switch off the engine.
Make sure the engine is at op-erating temperature and holdthe motorcycle upright.
with centre standOE
Check that the engine is at op-erating temperature, make surethe ground is level and firmand place the motorcycle on itscentre stand.
Remove oil dipstick1.
Wipe the oil off MIN-MAX partof dipstick2with a clean, drycloth.
Seat the oil dipstick on the oilfiller neck, but do not engagethe threads.
Remove the oil dipstick andcheck the oil level.
Engine oil, specified level
Between MIN and MAXmarks
If the oil level is below the MINmark:
Top up the engine oil (68).
If the oil level is above the MAXmark:
Have the oil level correctedby a specialist workshop,preferably an authorised BMWMotorrad dealer.
8
67
zMaintenance
Page 70 of 136
Topping up engine oil
Make sure the ground is leveland firm and place the motor-cycle on its stand.
Wipe the area around the fillerneck clean.
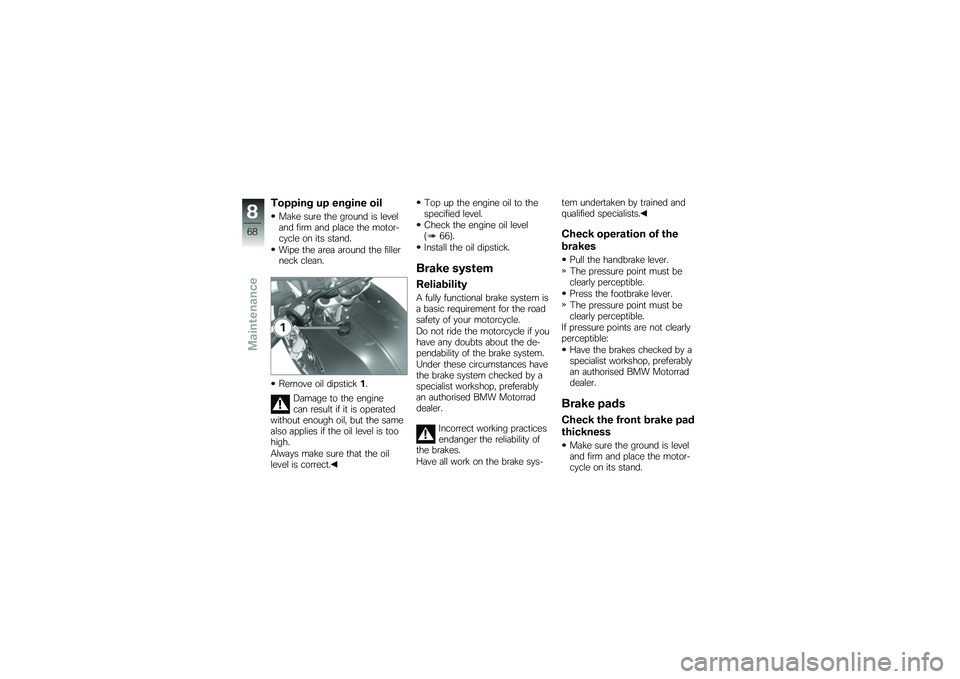
Remove oil dipstick1.
Damage to the enginecan result if it is operatedwithout enough oil, but the samealso applies if the oil level is toohigh.
Always make sure that the oillevel is correct.
Top up the engine oil to thespecified level.
Check the engine oil level(66).
Install the oil dipstick.
Brake system
Reliability
A fully functional brake system isa basic requirement for the roadsafety of your motorcycle.
Do not ride the motorcycle if youhave any doubts about the de-pendability of the brake system.
Under these circumstances havethe brake system checked by aspecialist workshop, preferablyan authorised BMW Motorraddealer.
Incorrect working practicesendanger the reliability ofthe brakes.
Have all work on the brake sys-
tem undertaken by trained andqualified specialists.
Check operation of the
brakes
Pull the handbrake lever.
The pressure point must beclearly perceptible.
Press the footbrake lever.
The pressure point must beclearly perceptible.
If pressure points are not clearlyperceptible:
Have the brakes checked by aspecialist workshop, preferablyan authorised BMW Motorraddealer.
Brake pads
Check the front brake pad
thickness
Make sure the ground is leveland firm and place the motor-cycle on its stand.
8
68
zMaintenance
Page 87 of 136
nical data". The figures in thegraphic correspond to the fusenumbers.
Close the fuse cover.
The latch engages with anaudible click.
Installing seat (39).
Bulbs
Notes
A defective bulb placesyour safety at risk becauseit is easier for other users tooversee the motorcycle.
Replace defective bulbs assoon as possible; always carry acomplete set of spare bulbs ifpossible.
The bulb is pressurised andcan cause injury if dam-aged.
Wear protective goggles andgloves when changing bulbs.
The types of bulb fitted toyour motorcycle are listedin the section entitled "Technicaldata".
Do not touch the glass ofnew bulbs with your fingers.Use a clean, dry cloth to holdthe bulbs when handling them.Dirt deposits, in particular oil andgrease, interfere with heat radi-ation from the bulb. This leadsto overheating and shortens thebulb's operating life.
Replacing low-beam and
high-beam headlight bulb
If it is not standing firmly,the motorcycle could topplein the course of the operationsdescribed below.
Always make sure that themotorcycle is stable and firmlysupported.
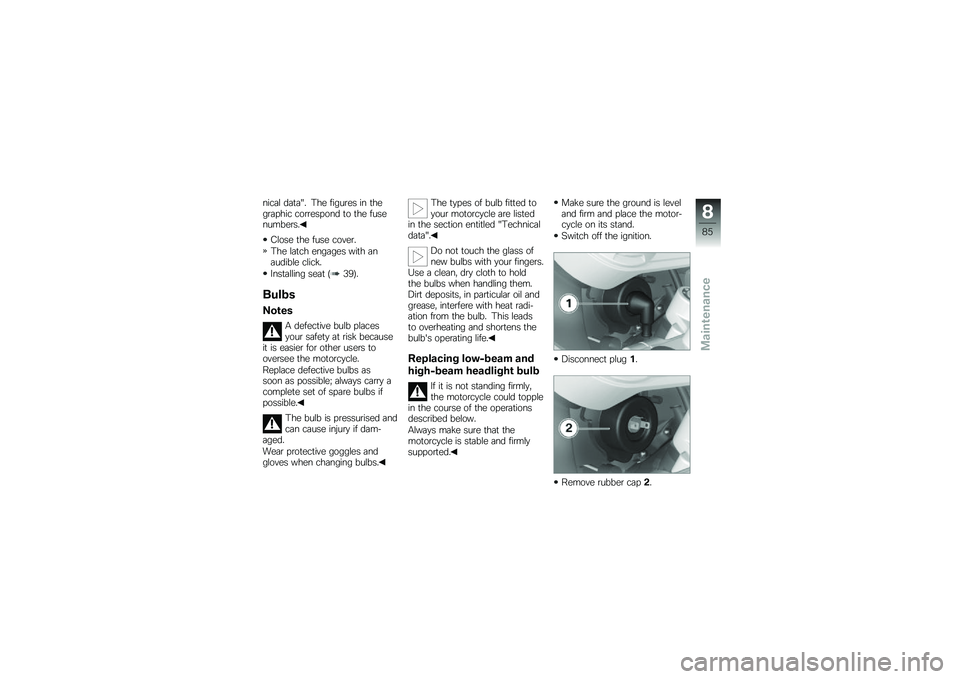
Make sure the ground is leveland firm and place the motor-cycle on its stand.
Switch off the ignition.
Disconnect plug1.
Remove rubber cap2.
8
85
zMaintenance
Page 100 of 136
Hold the flashing turn indicatorwith side panel in position andinstall four screws1.
Removing left side panel
Make sure the ground is leveland firm and place the motor-cycle on its stand.
Remove four screws1and re-move the flashing turn indicatorwith the side panel.
Disconnect plug2.
Remove the seat (38).
Remove two screws3.
Remove oil filler cap4.
Slacken screw5.
8
98
zMaintenance