Page 49 of 360

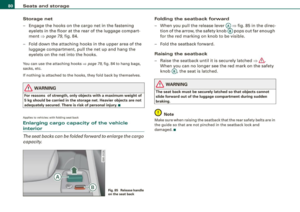
Emergency locking of the passenger's door
If the power locking system fails (power failure), you will
need to lock the passenger door separately.
! a,
Fig. 42 Emergency
locking of the
passenger's door
An emergency locking mechanism is integrated in the edge
of the passenger's door {only visible when the door is open).
- Take the mechanical key out of the master key~
page 40.
- Open the door.
-Pull the protective cover out of the hole ~ fig . 42.
- Insert the mechanical key into the inner slot and turn it to the right as far as it can go .
After you close th e door, you will no longer be able to open it from
the outside. The door can be opened from the inside by pulling once on the door handle. •
Contro ls and eq uip
ment
Opening and closing
Opening and closing rear lid/trunk lid
Opening the rear lid
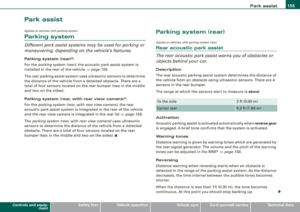
Fig. 43 Driver's door:
remote rear lid release
Fig . 44 Position of
handle in the rear lid
- Press the middle button c:::5 on the remote control master
key for at least one second, or
- Pull the release bu tton
c:::5 in the driver's door~ fig. 43.
The rear lid unlocks and opens, or
- Press the handle on the rear lid
~ fig. 44.
Closing the rear lid
- Pull the rear lid down at the grip on the inside and allow
it to drop gently to close it~ & .
~
Vehicle care I I irechnical data
Page 50 of 360

Opening and closing
& WARNING
• After closing the rear lid, always pull up on it to make sure that
it is properly closed. Otherwise it could open suddenly when the
vehicle is moving .
• To help prevent poisonous exhaust gas from being drawn into
the vehicle, always keep the rear lid closed while driving . Never
transport objects larger than those which fit completely into the
luggage area, because then the rear lid cannot be fully closed.
• Never leave your vehicle unattended especially with the rear lid
left open. A child could crawl into the car through the luggage
compartment and pull the lid shut, becoming trapped and unable
to get out. To reduce the risk of personal injury, never let children
play in or around your vehicle. Always keep the rear lid as well as
the vehicle doors closed when not in use.
• Always ensure that no one is within range of the rear lid when
it is moving, in particular close to the hinges -fingers or hands can
be pinched .
[ i J Tips
• When the vehicle is locked, the rear lid can be opened separately
by pressing the button
cs on the master key. When you close the
rear lid again, it locks automatically.
• If the rear lid is open or not properly closed when the ignition is
turned on, the door and rear lid warning=>
page 21 appears in the
instrument cluster display. •
Power windows
Controls
The driver can operate the window regulator for the
driver's door with the left switch and the window regu
lator for the passenger's door with the right switch.
Fig. 45 Driver's door:
power window
switches
If the respective switch is pushed or pulled the window will
open or close. The power window switches have a
two-posi
tion function:
Opening the windows
- Push the switch to the first stop and hold it there until the
window has lowered to the desired position.
- Push the switch briefly to the
second stop: the window
will automatically open all the way.
Closing the windows
- Pull the switch up to the first stop and hold it there until
the window has risen to the desired position.
- Pull the switch quickly to the
second position: the
w indow will automatically close all the way. .,
Page 51 of 360

& WARNING
• Do not leave children unattended in the vehicle, especially with
access to vehicle keys. Unsupervised use of the keys can result in
starting of the engine and use of vehicle systems such as power
windows, etc. which could result in serious injury.
• Remember -you can still open or close the power windows for
about ten minutes after the ignition is switched off. Only when
either of the doors are opened are the power windows switched
off.
• Be careful when closing the windows . Check to see that no one
is in the way, or serious injury could result!
• Always remove the ignition key whenever you leave your
vehicle.
• If you lock your vehicle from the outside, no one, especially chil
dren, should remain in the vehicle.
• Do not stick anything on the windows or the windshield that
may interfere with the driver's field of vision.
[ i) Tips
• When you open the doors, the windows automatically lower
about 10 mm .
• Afte r the ignition has been switched off , the windows can still be
opened or closed for about 10 minutes . The window regulators are
not switched until the driver's or passenger 's door is opened. •
Controls and equip
ment
Opening and closing
Convenience opening /closing
The windows and the panoramic tilting sunroof can be
opened and closed with the mechanical key or the emer
gency key.
Convenience opening feature
~ N 0
"' "' m
Fig. 46 Key turns for
opening and closing
- Use the emergency key or pull the mechanical key out of
the master key::} page
40.
- Insert the key into the lock of the driver's door.
Turn the key to position ::} fig. 46
@ until all the
windows have reached the desired position and the
panoramic tilting sunroof is tilted.
Convenience closing feature
-Use the emergency key or pull the mechanical key out of
the master key::} page
40.
Turn the key in the lock of the driver's door to the lock
position @ until the windows and the panoramic tilting
sunroof are closed::}& .
When the panoramic tilting sunroof is tilted/closed, the electric sun
shade * is also opened /closed. ._
I • •
Page 52 of 360

Opening and closing
& WARNING
• Never close the windows and thepanoramic tilting sunroof
inattentively and without checking -there is risk of injury.
• You must always watch when the windows are being raised so
that no one can be trapped. If you release the key, the closing
action is immediately canceled.
• Always read and heed WARNING~
& in "General description"
on
page 41 . •
Correcting window regulator malfunction
After disconnecting the vehicle battery, the one-touch up
and down feature must be activated again.
- Pull and hold the power window switch until the window
is completely closed.
- Release the switch.
- Pull the switch again for one second. The automatic closing/opening is now reactivated. •
Valet parking
Through the "valet parking" feature the luggage compart
ment of your vehicle is secured from unauthorized access
during the valet parking service.
Fig . 47 Valet parking
button
With "valet parking" activated, the rear lid cannot be
opened.
- Take the mechanical key out of the master key=>
page 40.
- Open the glove box=> page 89 and activate => fig. 47 the
"valet parking" feature by pressing the [VALET] button.
The indicator light in t he switch illuminates.
- Close the glove box and lock it with the mechanical key.
- Lock both rear seat backs with the mechanical key
=> page 82.
-Lock the luggage compartment pass -through with the
mechanical key=>
page 82.
-Leave the master key with the service personnel for
parking and keep the mechanical key with you.
When the "valet parking" feature is activated:
Page 53 of 360

• the unlocking button for the rear lid~ in the driver's door is
inactive
• the button
~ on the master key is inactive
• the opening hand le in the rear lid is inactive.
T he vehic le can be driven and locked and unlocked with the master
key. Access to the luggage compartment is blocked. •
Panoramic tilting sunroof
Tilting and closing
""' CT;B ,;;.
;i N 0 ,;
"' CX)
Fig. 4 8 Sec tio n of
he adlin er: Sw itch fo r
pa noram ic til ting
s u nro of
To tilt the panoramic t ilting sunroof, press the switc h
brie fly.
To close the panoramic tilting sunroof, pu ll the sw itch
brie fly.
To set an intermediate position, press/pull the switch until the roof reaches the desired position.
After the ignition is switched off, you can sti ll operate the Panorama
for about 10 minutes . As soon as the driver's or passenger's door is
opened, the switch is inoperative.
Con tro ls and eq uip
ment
Op ening and clo sing
S un blind
The sun b lind can be opened and closed manually in any position .
& WARNING
Pay careful attention when clo sing the panoramic tilting sunroof -
other wise seriou s injury could re sult! For t his r easo n, a lwa ys
remove the ignition key when leaving the vehi cle.
• Never le ave children or per sons requiring a ssist ance alone in
the v ehicle , e spe cially when they cou ld acce ss the vehi cle ke ys.
Un supervised use of the ke ys c an re sult in the engine being
s ta rted or use of vehicle system s such as the pow er windows, etc.
whi ch co uld r esult in serio us injur y. The door s could b e locked
with th e re m ote ke y, del aying h elp in an em ergency .
• The panor ami c tilting sunro of w ill continue to operate until the
igniti on ke y has been r em oved and one of th e front d oors ha s been
o pened .
0 Note
Always close your panoramic tilting sunroof when leaving your
vehicle . Sudden rain can cause damage to the interior equipment of
your vehicle, particularly the electronic equipment.
[ i ] Tip s
• Information on convenience opening/closing=> page 49. •
Vehicle care I I irechnical data
Page 54 of 360

Opening and closing
Emergency closing of the panoramic tilting
sunroof
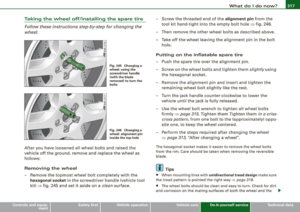
The panoramic tilting sunroof can be closed manually in
an emergency.
"' "' N 0 ,;
"' (D
Fig. 49 Section of
. .. . ..... ..• . ... .. . ..•.. ...• headliner : Unscrewing
L._--==~~=--__:; lighting unit
Fig . 50 Section from
headliner: Crank for
emergency operation
If the panorama sunroof detects an object in its path when
it is closing, it will open again automatically. In this case,
you can close the roof with the power emergency closing
function.
Emergency closing function
- Within five seconds after the sunroof opens automati
cally, pull the switch until the roof closes. The driver's
and front passenger's doors must be closed.
- If the power emergency closing funct ion is not possible,
you must close the roof mechanically .
Mechanical emergency closing
-You will find the screwdr iver in the vehicle tool kit
=;> page 310 and the crank in the fuse cover::::;> page 320,
fig. 247.
- Remove the screw ::::;> fig. 49 -Arrow- from the lighting
unit and pull the lighting unit out carefully.
- Push the crank into the hexagonal hole as far as it will go
::::;> fig. 50 and turn it. The roof will close.
Ii ] Tips
The crank is easier to turn if you use the screwdriver handle (vehicle
tool kit) as an aid .•
Page 55 of 360

Clear vision
Lights
Switching the lights on and off -'t.5--
0 9
" l8
Fig. 51 Ins trument
pane l: H eadlight
co ntr ol sw itch
Switching on AUTO -Automatic headlight
control*
- Tur n t he light switch to AUTO => fig. 51 .
Turning on the side marker lights
-Tur n t he head light co ntrol switc h to :oo~.
Switching on low beams
- Tu rn t he headlight contro l sw itc h to ~D.
Switching off the lights
- Tur n t he headlight control switc h to 0.
The low beams only il luminate with the ignition turned on.
With the side marker lights or headlights switched on, the symbol next to t he light switch illuminates
::oo: .
Con tro ls and eq uip
ment
Clear vision
A UTO -Automat ic headlight contro l*
With the switch in the AUTO position, the low beams are switched
on automatically depending on the ambient ligh t, for e xample in a
tunnel, at dusk and when it is raining or snowing. When the low
b ea ms are switche d on, th e
:oo : symbol comes on . The low beams
remain switched on regardless of the ambient light when you turn
on the fog lights .
When you turn off the ignition, the low beams are automatica lly
switched off .
On vehicles with a rain senso r* the head ligh ts switch on au tomat i
cally after a few windshield wiper passes. However, the instrument
lighting will n ot be switched on.
With automatic headligh t control, you a lso have the high-beam
function available . However, if you have not switched high beams
back to low beams wh ile driving with automatic headlight control,
only the low beams come on the next time you turn on automatic
head light control. In order to return to high beams again, you f irst
have to pul l the high beam lever back to the normal position and
t hen pu sh the lever forward .
Light sens or* m alfun ctio n
In the event of a ligh t sensor* malfunct ion, the driver is no tifi ed in
the instrument cluster display:
Automatic driving light s/autom atic wiper s defective
For safety reasons, the low beams are turned on permanently with
the switch in
AUTO . However, you can continue to turn the lights on
and o ff using the light switch. Have the light sensor checked as soon
as possible at an authorized Audi dealer or other qualified work -
shop .
~
Vehicle care I I irechnical data
Page 56 of 360

Clear vision
& WARNING
Automatic headlights are only intended to assist the driver. They do not relieve the driver of his responsibility to check the head
lights and to turn them on manually according to the current light
and visibility conditions. For example, fog cannot be detected by
the light sensors. So always switch on the headlights under these
weather conditions and when driving in the dark
tD .
[ i ) Tips
• The light sensor* for headlight control is located in the rear view
mirror mount. You should therefore not apply any stickers to the
windshield in this area in order to prevent malfunctions or failures.
• The sensitivity level for the light sensor* set at the factory can be
changed in the MMI* menu ~
page 55 in the automatic driving
lights function.
• When you remove your key from the ignition while the vehicle's
lights are turned on, a buzzer sounds as long as the driver's door is
open.
• Please obey all laws when using the lighting systems described
here.
• The coming home/leaving home function* is available only with
the switch in the AUTO position. •
Fog lights
Fig. 52 Fog light
switch
To turn on the fog lights }D, press button (D => fig. 52.
- To turn on the rear fog lights
Ot press button @.
Fog lights
The side marker lights or low beams must be switched on. When the
fog lights are switched on, the green check light at the edge of the
switch comes on.
If automatic driving light control AUTO is activated, the low beams
are switched on when the fog lights are turned on.
Rear fog lights
Low beams or side marker lights with fog lights must be turned on.
When the rear fog lights are turned on, the yellow check light at the
edge of the switch comes on.
0 Note
The rear fog lights should only be turned on in accordance with
traffic regulation, as the lights are bright for following traffic. •