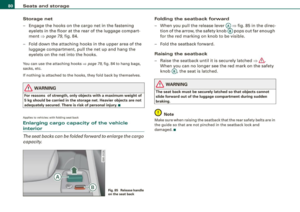
Page 73 of 360

Applies to vehicles : w it h manua lly adj ustab le seats
Adjusting the seat
Position and shape of the seat can be adjusted manually
to ensure safe and comfortable seating.
Read and follow the warning notices=> & before you
adjust your seat.
Fore-and-aft adjustment
- Pull the lever CD=> page 70, fig. 71 up and push the seat
to the desired position.
- Release the lever CD and continue to move the seat until
it locks into place.
Lengthening or shortening upper thigh support*
- Lift the button @ under the seat cushion. The front seat
cushion moves forward under spring force.
- Push the seat cushion back when you have finished using
it.
Adjusting seat cushion angle*
- Pull or push the lever ®=> page 70, fig. 71 up or down
(pumping motion).
Adjusting the curvature of the lumbar support*
- Push the switch plate @forward or backward to increase
or reduce the curvature.
Adjusting the height of the lumbar support*
- Push the switch plate© up or down to position the
curvature higher or lower.
Controls and equip
ment
Seats and storage
Raising or lowering seat height
- Pull or push the lever©=> page 70, fig. 71 up or down
(pumping motion) .
Adjusting seat back angle
-Remove weight from the seat back (do not lean against
it).
- Turn the hand wheel©=> page
70, fig. 71 to adjust the
angle of the seat back accordingly.
& WARNING
• Adjust the driver's seat only when the vehicle is stationary. You
risk an accident otherwise.
• Exercise caution when adjusting the seats. Adjusting the seat
carelessly or without checking can pinch hands and fingers.
• While the vehicle is moving, the seat backs of the front seats
must not be inclined too far to the rear because the effectiveness
of the safety belts and the airbag system is severely compromised
- there is a risk of injury. •
I • •
Page 74 of 360

Seats and storage
Applies 10 vehicles: with manually adjustab le seats
Easy entry function
The easy entry function makes it easier for the rear
passengers to enter and leave the vehicle.
Fig . 72 Driver's seat:
Latch on the seat back
Tilt the seat back forward and push the front
seats forward
- Lift the latch
=} fig. 72.
- Hold the latch and tilt the seat back forward.
- Release the latch and push the seat forward.
Push the front seats back and fold the seat back
up
- Push the front seat back
before you fold the seat backs
up . Otherwise the seat cannot be pushed back to its orig
inal position.
& WARNING
Always be certain that the front seats are upright and securely
latched when you drive. •
Power front seat adjustment
Applies to vehicles: with power adjustable seats
Seat adjustment controls
The operating logic for the switches corresponds to the
construction and function of the seat.
.,
~ 9
"' "' m
Fig . 73 Front seat:
Controls for seat
adjustment
The switches to adjust the seat cushion and the seat back corre
spond to the layout, the design and the function of the seat. The
seats are adjusted by moving the switches following this logic.
Controls
© Lumbar support
@ Seat adjustment
© Seat back and head restraint height adjustment*
© Upper thigh support *•
Page 75 of 360

Applies to vehicles: w it h p ow er adju stable seats
Adjusting the seat
Position, angle and shape of the seat can be adjusted
electrically to ensure safe and comfortable seating.
Read and follow the warning notices~ & before you
adjust your seat.
Adjusting the curvature of the lumbar support* - Push the switch plate@forward or backward to increase
or reduce the curvature.
Adjusting the height of the lumbar support*
- Push the switch plate@ up or down to position the
curvature higher or lower.
Fore-and-aft adjustment
-Push the switch @ forward or backward ~ page 72,
fig. 73.
Adjusting seat height - Pull or push the switch @ up or down.
Front seat cushion up/ down
- Press the switch@ at the front up or down.
Rear seat cushion up / down
- Press the switch @ at the rear up or down.
Adjusting seat back angle - Push the switch @ forward or backward.
Controls and equip
ment
Seats and storage
Head restraint height adjustment*
- Press the switch @ from up to down or the other way .
Lengthening or shortening upper thigh support*
- Lift the button@ under the seat cushion. The front seat
cushion moves forward under spring force.
- Push the seat cush ion back when you have fin ished using
it.
& WARNING
• Adjust the driver's seat only when the vehicle is stationary. You
risk an accident otherwise.
• The power adjustment for the front seats also works with the
ignition switched off or with the ignition key removed . For this
reason, children should never be left unattended in the vehicle -
they could be injured!
• Exercise caution when adjusting the seat height. Unsupervised
or careless seat adjustment can pinch fingers or hands causing
injuries.
• While the vehicle is moving, the seat backs of the front seats
must not be inclined too far to the rear because the effectiveness
of the safety belts and the airbag system is severely compromised
- there is a risk of injury. •
I • •
Page 76 of 360

Seats and storage
Applies to vehicles: with power adjustable seats
Easy entry function
The easy entry function makes it easier for the rear
passengers to enter and leave the vehicle.
Fig. 74 Driver's seat:
Controls for easy entry
assist
Folding down the front seat backs
- Lift the latch
~ fig. 74.
- Tilt the seatback forward.
Moving the front seats forward Press and hold the switch
© until the seat has reached
the desired position.
Moving front seats back
- Press and hold the switch
@ until the seat has reached
the desired position. The seat stops automatically when
it has reached its starting position again.
To make it easier to enter and leave the rear seat, the seatbacks of
the front seats can be folded forward and the head restraints are
automatically lowered. At the same time, the front seats can be
moved forward and back. When
the front seats are moved forward, their original position is
stored. When it is moved back, the seat automatically stops in this
position . To move the seat even further back, you have to release the
switch
@ and reactivate it.
The head restraints from the front seats, depending on the seat height that has been set, are automatically retracted when the seat
backs are folded down. They return to their original position again
when the seatbacks for the front seats are raised.
[ i ] Tips
With the driver's or passenger's door closed, the corresponding
switch to move the seat is inoperative. •
Seat memory
Applies to vehicles: with seat memo ry
Memory for driver's seat
The seat adjustment settings for two drivers can be stored
using the memory buttons in the driver's door.
Fig. 75 Driver 's door:
Seat memory
In addition to the setting for the driver's seat, the exterior rear view
mirror setting can be stored and recalled through seat memory if
the vehicle is properly equipped. .,
Page 77 of 360

Storing and recalling settings
With the help of the memory buttons 1 and 2
~ page 74, fig. 75 the
settings for two different drivers can be stored and recalled
~ page 75.
The current settings are also automatically stored on the remote
control key being used when the vehicle is locked. When the vehicle
is unlocked, the settings stored on the remote control key being
used are automatically recalled.
Turning seat memory on and off
If the [ ON /OFF
I switch is depressed, the seat memory is inoperative.
The word
OFF in the [ON/OFF I switch illuminates.
All the stored settings are retained . We recommend using the
I ON/OFF I switch and deactivating the seat memory if the vehicle is
only going to be used
temporarily by a driver whose settings are not
going to be stored. •
Applies to vehicles : w ith seat m emo ry
Storing and recalling settings
Before you can store or recall your settings, the [ON/OFF]
switch on the seat memory must be engaged (not raised).
Storing settings
- Adjust the driver's seat .
- Adjust the two exterior mirrors.
- Press the [SET] button and hold it down. In addition ,
press one of the memory buttons for at least one second.
- Release the buttons. The settings are now stored under
the corresponding memory button.
Controls and equip
ment
Seats and storage
Recalling settings If the driver's door is open, tap the corresponding
memory button briefly.
If the driver's door is closed, press the appropriate
memory button until the stored position is reached.
Successful storage is confirmed audibly and by the light in the [SETI
button illuminating ~ page 74, fig. 75.
When the vehicle is
locked, the current settings are stored and
assigned to the remote control key. But the settings stored on
memory buttons 1 to 2 are not deleted. They can be recalled at any
time. When the vehicle is
unlocked, the settings stored on the
remote control key are restored.
If your vehicle is driven by other persons using your remote control
key, you should save your individual seat position on one of the
memory buttons. You can recall your settings again simply and
conveniently by pressing the corresponding memory button. When
the vehicle is locked, these settings are automatically re-assigned to
the remote control key and stored.
& WARNING
• For safety reasons, the seat setting can only be recalled when
the vehicle is stationary -otherwise you risk having an accident .
• In an emergency the recall procedure can be cancelled by
pressing the [
ON/OFF I switch or by tapping of the the memory
buttons. •
I • •
Page 78 of 360

Seats and storage
Applies to vehicles: with seat memory
Activating remote control key memory
To be able to recall the stored settings with the remote
control key, the function has to be activated in the radio
or MM/*.
Fig. 76 MMI display:
Driver's seat
-Select: Function button [CAR]> Seat adjustment>
Driver's seat > Key mem. profile> On .
[ i ] Tips
If you do not want another driver to store their settings on the
remote key, switch off the Memory function using the radio or MMI*
or the
I OFF ) button => page 74. •
Head restraints
Adjusting the front head restraints
Head restraints that are adjusted according to body size,
along with the seat bealt, offer effective protection.
Fig. 77 Front seat:
Adjusting the head
restraint
Fig . 78 Front seat:
Adjusting head restraint electrically*
Raising/Lowering the head restraint
- The head restraints on the front seats can be adjusted to
provide safe support to head and neck at the optimum
height~ fig. 77. When optimally adjusted, the top of the
restraint should be level with the top of the head
~ page 173, "Proper adjustment of head restraints". ~
Page 79 of 360

- Grasp the sides of the head restraint with both hands
und stellen Sie die gewunschte Position ein.
Electric height adjustment*
- Push the switch up or down
~ page 76, fig. 78 to adjust
the height of the head restraint.
- Adjust the headrests so the upper edge is as even as
possible with the top of your head
~ page 76, fig. 77
~ page 173, "Proper adjustment of head restraints".
Refer to~ page 173, "Proper adjustment of head restraints" for
guidelines on how to adjust the height of the front head restraints
to suit the occupant's body size.
& WARNING
• Driving without head restraints or with head restraints that are
not properly adjusted increases the risk of serious or fatal neck
injury dramatically .
• Read and heed all WARNINGS~
page 173.
[ i J Tips
Correctly adjusted head restraints and safety belts are an extremely
effective combination of safety features.•
Con tro ls and eq uip
ment
Seats and storage
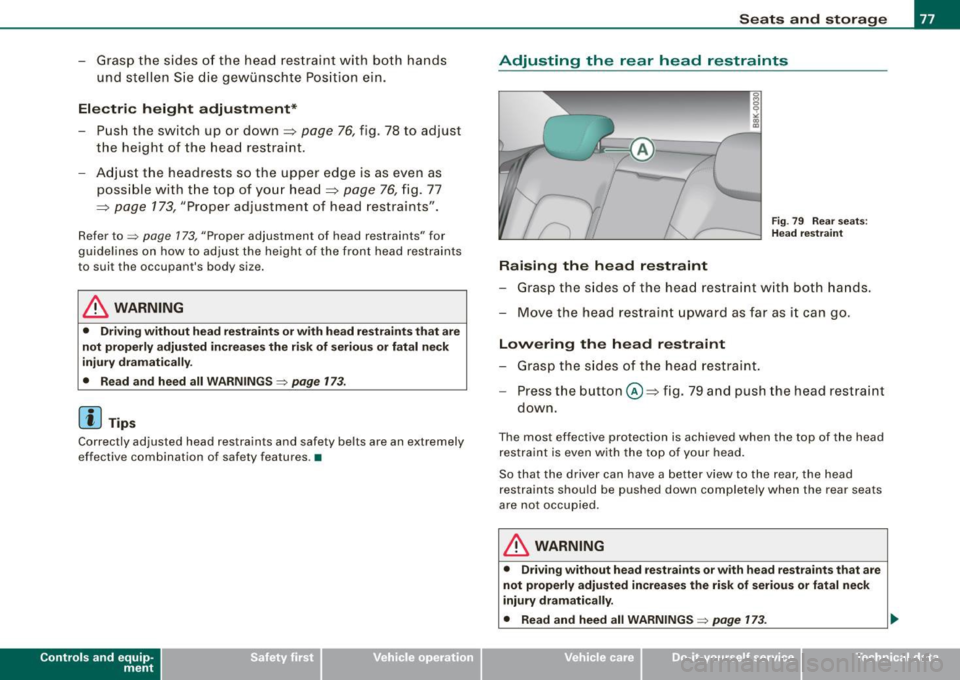
Adjusting the rear head restraints
Fig . 79 Rear seats:
Head restraint
Raising the head restraint
- Grasp the sides of the head restraint with both hands.
- Move the head restraint upward as far as it can go.
Lowering the head restraint
- Grasp the sides of the head restraint.
- Press the button@~ fig. 79 and push the head restraint
down.
The most effective protection is achieved when the top of the head
restraint is even with the top of your head.
So that the driver can have a better view to the rear, the head
restraints should be pushed down completely when the rear seats
are not occupied.
& WARNING
• Driving without head restraints or with head restraints that are
not properly adjusted increases the risk of serious or fatal neck
injury dramatically.
• Read and heed all WARNINGS =>
page 173. _.,
Vehicle care I I irechnical data
Page 80 of 360

Seats and storage
[ i J Tips
Correctly adjusted head restraints and safety belts are an extremely
effective combination of safety features. •
Center armrest
The center armrest can be adjusted to several levels.
Adjusting the center armrest
Fig. 80 Armrest
between the
driver's /front
passenger's seats .
To adjust the angle, raise the armrest from the starting
position detent by detent => fig. 80.
To bring the armrest back into the starting position, raise
it out of the top detent and fold it back down.
The armrest can slide forward and back.•
Luggage compartment
Loading luggage compartment
Items of luggage must be stowed securely.
Fig. 81 Place heavy
objects as far forward
as possible.
Note the following to preserve the vehicle's good handling
characteristics.
- Distribute the load as evenly as possible.
- Place heavy objects as far forward as possible => fig. 81.
- Secure the items of luggage with the cargo net* or with
non -elastic retaining straps to the tie-down rings*
=> page 79.
& WARNING
• Loose objects in the luggage compartment can slide about
suddenly and alter the vehicle's handling characteristics.
• Loose objects in the passenger compartment can fly forward
during abrupt maneuvers or accidents and injure occupants.
• Always store objects in the luggage compartment and use suit-
able straps, particularly with heavy objects. •