Page 405 of 2453
AC(diag)-28
Diagnostic Procedure for Actuators
HVAC SYSTEM (AUTO A/C) (DIAGNOSTICS)
C: AIR MIX DOOR ACTUATOR
TROUBLE SYMPTOM:
Outlet air temperature does not change.
WIRING DIAGRAM:
AC-01340
B2353412 891011 12 13 14 15 16567
B282A:
B283B282
B23567
B:A:
51
1345726
AUTO A/CCONTROL MODULE
PA S S E N G E R ' S A I R M I XDOOR ACTUATOR
B3907653
DRIVER'S AIR MIXDOOR ACTUATOR
B390
A15B8A4B22A8B9A12B21
B283B:
1234567891014151617181920212223111213242526
13
Page 408 of 2453
AC(diag)-31
Diagnostic Procedure for Sensors
HVAC SYSTEM (AUTO A/C) (DIAGNOSTICS)
8. Diagnostic Procedure for Sensors
A: AMBIENT SENSOR
TROUBLE SYMPTOM:
Fan speed is not switched when the fan speed control dial is in AUTO position.
WIRING DIAGRAM:
AC-01341
B283
F78
B1B14
B:
21
F78
12
1011
1413
B26B25
C3C10
F108
B361
B280
B281
B:
C:
5467821931022 23111213141524 25 26 2716171828 29192021 30
B280B:B281
567821943102422 2325111213141526 27281617181920 21
C:
1234567891011121314
B361
123 8910411 12 13 14 15 165671718
F108
AUTO A/CCONTROL MODULE
AMBIENT SENSOR
BODY INTEGRATED UNIT
THROUGH JOINT CONNECTOR
B283B:
1234567891014151617181920212223111213242526
Page 410 of 2453
AC(diag)-33
Diagnostic Procedure for Sensors
HVAC SYSTEM (AUTO A/C) (DIAGNOSTICS)
B: IN-VEHICLE SENSOR
TROUBLE SYMPTOM:
Blower fan speed, outlet port and inlet port do not change after turning the AUTO switch to ON
WIRING DIAGRAM:
AC-01342
A:B282
12345678910 11 12 13 14 15 16
i55
A:B282
A15A5
21
i55
12
AUTO A/CCONTROL MODULE
IN-VEHICLESENSOR
Page 412 of 2453
AC(diag)-35
Diagnostic Procedure for Sensors
HVAC SYSTEM (AUTO A/C) (DIAGNOSTICS)
C: EVAPORATOR SENSOR
WIRING DIAGRAM:
AC-00831
A13A15
B8812
EVAPORATORSENSOR
B88
B282A:AUTO A/CCONTROL MODULE
12123412 891011 12 13 14 15 16567
B282A:
Page 414 of 2453
AC(diag)-37
Diagnostic Procedure for Sensors
HVAC SYSTEM (AUTO A/C) (DIAGNOSTICS)
D: SUNLOAD SENSOR
TROUBLE SYMPTOM:
•Sensor identifies that sunlight is at maximum. Then, A/C system is controlled to COOL side.
•Sensor identifies that sunlight is at minimum. Then, A/C system is controlled to HOT side.
NOTE:
When the sunload sensor check is performed indoors or in the shade, it could be diagnosed as having an
open circuit. Always check the sunload sensor with the sun shining on it.
WIRING DIAGRAM:
AC-00832
A:B282
12345678910 11 12 13 14 15 16
i51
A:B282
A8A6
21
i3
B38
i51
12
AUTO A/C CONTROL MODULE
32
1234 5678910 11 12 13 14 15 16 17 18 19 20
B38
SUNLOADSENSOR
Page 419 of 2453

IM (diag)-3
General Description
IMMOBILIZER (DIAGNOSTICS)
2. General Description
A: CAUTION
CAUTION:
•The airbag system wiring harnesses and con-
nectors are yellow. Do not use electrical test
equipment on these circuits.
•Be careful not to damage the airbag system
wiring harness.
•While diagnostic items are being checked, do
not operate radios, portable telephones, etc.
which emit electromagnetic waves near or in-
side the vehicle.
•When turning the ignition switch to ON or
OFF while diagnostic items are being checked,
do not allow keys with different ID codes close
to the ignition switch. If the ignition key is in a
key holder, remove it from the holder before
carrying out diagnosis.
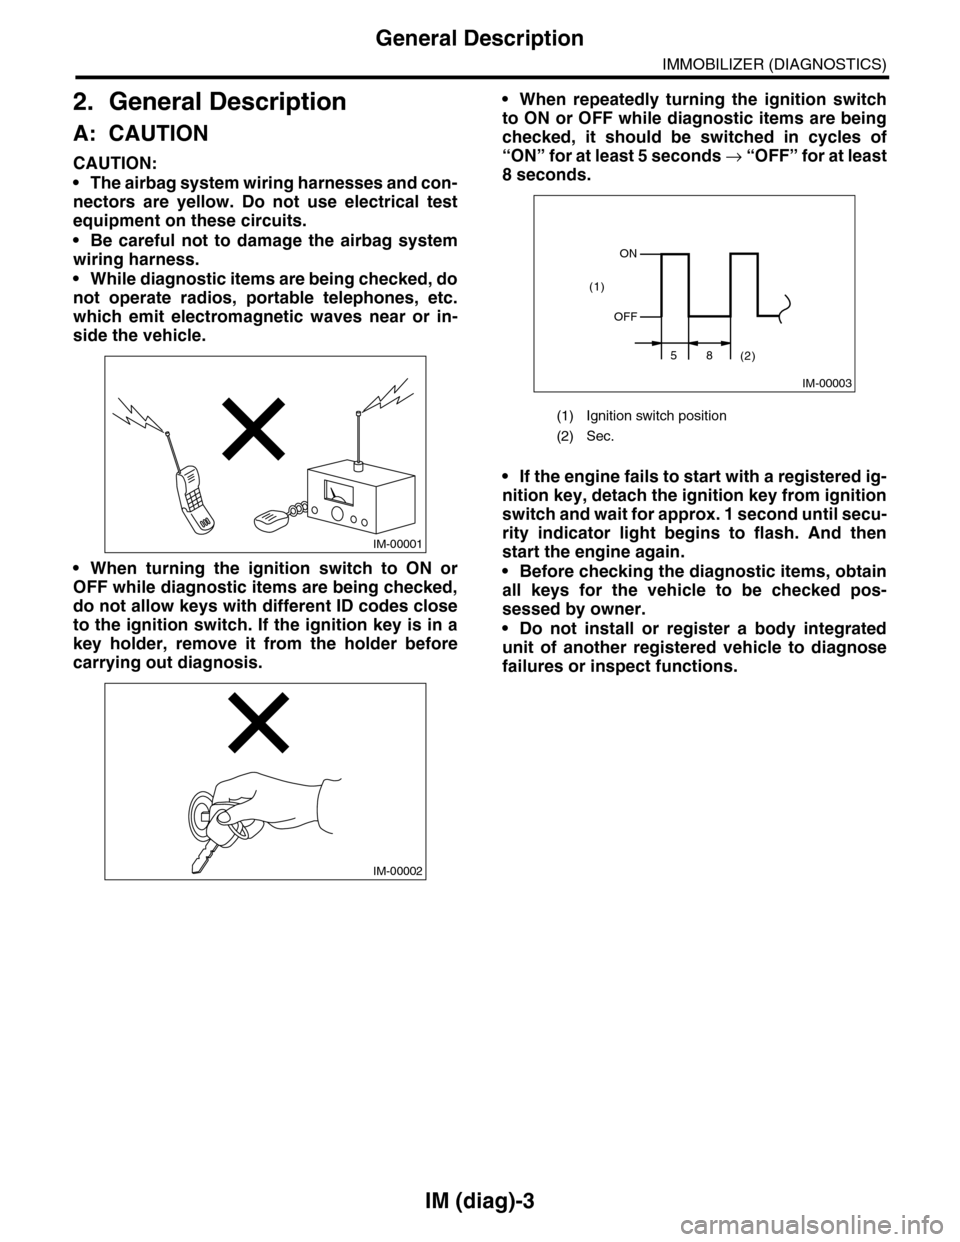
•When repeatedly turning the ignition switch
to ON or OFF while diagnostic items are being
checked, it should be switched in cycles of
“ON” for at least 5 seconds → “O F F ” fo r a t le a s t
8 seconds.
•If the engine fails to start with a registered ig-
nition key, detach the ignition key from ignition
switch and wait for approx. 1 second until secu-
rity indicator light begins to flash. And then
start the engine again.
•Before checking the diagnostic items, obtain
all keys for the vehicle to be checked pos-
sessed by owner.
•Do not install or register a body integrated
unit of another registered vehicle to diagnose
failures or inspect functions.
IM-00001
IM-00002
(1) Ignition switch position
(2) Sec.
IM-00003
ON
OFF
58(2)
(1)
Page 422 of 2453
IM (diag)-6
Immobilizer Control Module I/O Signal
IMMOBILIZER (DIAGNOSTICS)
4. Immobilizer Control Module I/O
Signal
A: WIRING DIAGRAM
1. IMMOBILIZER
System.>
Page 426 of 2453

IM (diag)-10
Diagnostics Chart for Security Indicator Light
IMMOBILIZER (DIAGNOSTICS)
8. Diagnostics Chart for Security Indicator Light
A: INSPECTION
1. CHECK SECURITY INDICATOR LIGHT CIRCUIT
WIRING DIAGRAM:
IM-00141
MAIN SBF
SBF-3
BATTERY
WARNING BOX
BODY INTEGRATED UNIT
i116
F/B NO.7
F/B NO.12
IGNITIONSWITCH
A33C2B7C9C8
2
1
E
A1
M/B NO.8
SBF-8
B22
i84A:
B280B:
B281C:
567821943102422 23 25111213141526 27281617181920 21
B281i84
1234567891011121314151617181920212223242526272829303132333435
5467821931022 231112131415242526 2716171828 29192021 30
B280A:C:B:
5i124
i102
i97
i98
SECURITYINDICATORLIGHT
JOINT CONNECTOR
i116
12345678910i98
i97
12345678910111213141516171819202122
: TERMINAL NO. OPTIONAL ARRANGEMENT AMONG 16, 17 AND 18
1*
1*
1*
Step Check Yes No
1CHECK SECURITY INDICATOR LIGHT.
1) Turn the ignition switch to OFF.
2) Disconnect the harness connector from
body integrated unit.
3) Connect the resistor (100 Ω) between body
integrated unit harness connector terminal
(i84) No. 33 and chassis ground.
Does the security indicator
light illuminate?
Go to step 2.Go to step 5.