Page 1559 of 2453

EX(H6DO)-5
Front Exhaust Pipe
EXHAUST
B: INSTALLATION
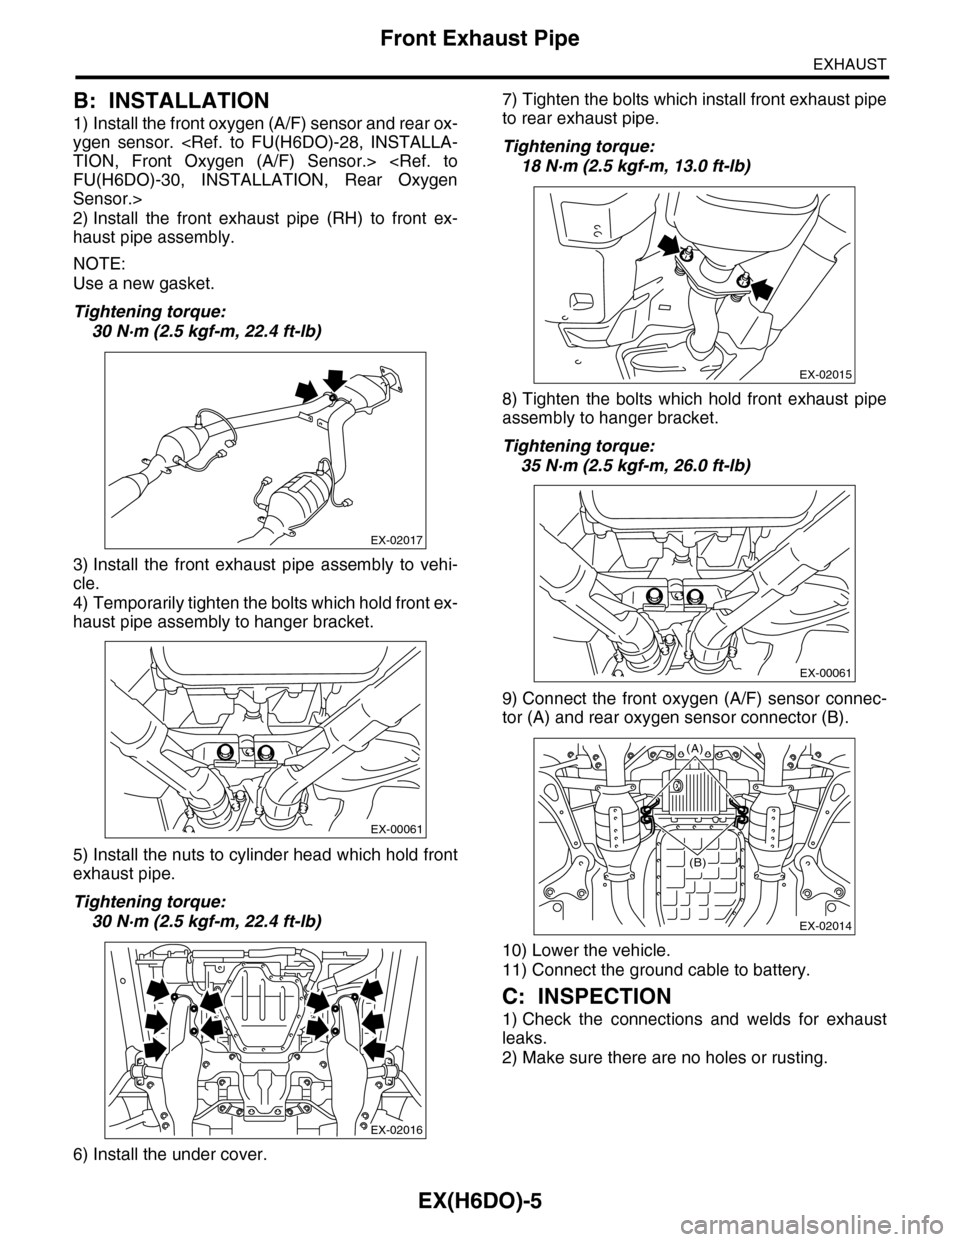
1) Install the front oxygen (A/F) sensor and rear ox-
ygen sensor.
TION, Front Oxygen (A/F) Sensor.>
FU(H6DO)-30, INSTALLATION, Rear Oxygen
Sensor.>
2) Install the front exhaust pipe (RH) to front ex-
haust pipe assembly.
NOTE:
Use a new gasket.
Tightening torque:
30 N·m (2.5 kgf-m, 22.4 ft-lb)
3) Install the front exhaust pipe assembly to vehi-
cle.
4) Temporarily tighten the bolts which hold front ex-
haust pipe assembly to hanger bracket.
5) Install the nuts to cylinder head which hold front
exhaust pipe.
Tightening torque:
30 N·m (2.5 kgf-m, 22.4 ft-lb)
6) Install the under cover.
7) Tighten the bolts which install front exhaust pipe
to rear exhaust pipe.
Tightening torque:
18 N·m (2.5 kgf-m, 13.0 ft-lb)
8) Tighten the bolts which hold front exhaust pipe
assembly to hanger bracket.
Tightening torque:
35 N·m (2.5 kgf-m, 26.0 ft-lb)
9) Connect the front oxygen (A/F) sensor connec-
tor (A) and rear oxygen sensor connector (B).
10) Lower the vehicle.
11) Connect the ground cable to battery.
C: INSPECTION
1) Check the connections and welds for exhaust
leaks.
2) Make sure there are no holes or rusting.
EX-02017
EX-00061
EX-02016
EX-02015
EX-00061
EX-02014
(A)
(B)
Page 1571 of 2453

FU(H6DO)-10
General Description
FUEL INJECTION (FUEL SYSTEMS)
C: CAUTION
•Wear work clothing, including a cap, protective goggles and protective shoes during operation.
•Remove contamination including dirt and corrosion before removal, installation or disassembly.
•Keep the disassembled parts in order and protect them from dust and dirt.
•Before removal, installation or disassembly, be sure to clarify the failure. Avoid unnecessary removal, in-
stallation, disassembly and replacement.
•Be careful not to burn yourself, because each part on the vehicle is hot after running.
•Be sure to tighten fasteners including bolts and nuts to the specified torque.
•Place shop jacks or rigid racks at the specified points.
•Before disconnecting connectors of sensors or units, be sure to disconnect the ground cable from the bat-
tery.
•Place “NO FIRE” signs near the working area.
•Be careful not to spill fuel on the floor.
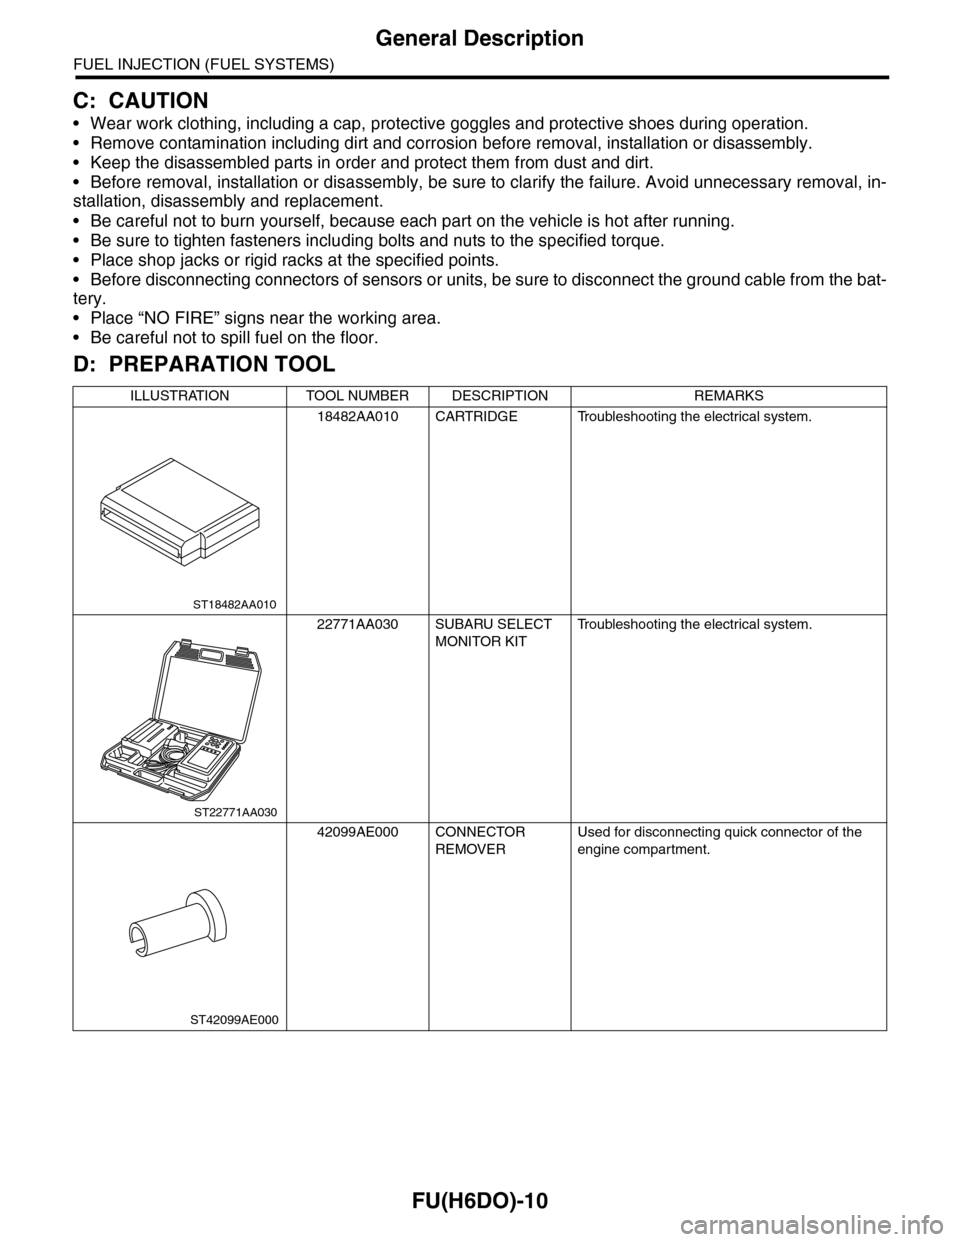
D: PREPARATION TOOL
ILLUSTRATION TOOL NUMBER DESCRIPTION REMARKS
18482AA010 CARTRIDGE Troubleshooting the electrical system.
22771AA030 SUBARU SELECT
MONITOR KIT
Tr o u b l e s h o o t i n g t h e e l e c t r i c a l s y s t e m .
42099AE000 CONNECTOR
REMOVER
Used for disconnecting quick connector of the
engine compartment.
ST18482AA010
ST22771AA030
ST42099AE000
Page 1572 of 2453
FU(H6DO)-11
Throttle Body
FUEL INJECTION (FUEL SYSTEMS)
2. Throttle Body
A: REMOVAL
1) Remove the collector cover.
2) Disconnect the ground cable from battery.
3) Remove the air intake chamber.
IN(H6DO)-6, REMOVAL, Air Intake Chamber.>
4) Disconnect the connectors from the throttle posi-
tion sensor.
5) Disconnect the engine coolant hoses (A) from
throttle body.
6) Remove the bolts (B) which secure throttle body
to intake manifold.
B: INSTALLATION
Install in the reverse order of removal.
NOTE:
Use new O-rings.
Tightening torque:
8 N·m (0.8 kgf-m, 5.9 ft-lb)
FU-02111
FU-02112
(A)(B)
(B)
(A)
Page 1573 of 2453

FU(H6DO)-12
Intake Manifold
FUEL INJECTION (FUEL SYSTEMS)
3. Intake Manifold
A: REMOVAL
1) Remove the collector cover.
2) Release the fuel pressure.
37, RELEASING OF FUEL PRESSURE, PROCE-
DURE, Fuel.>
3) Disconnect the ground cable from battery.
4) Open the fuel filler flap lid, and remove the fuel
filler cap.
5) Remove the air cleaner case and air intake
chamber.
Cleaner Case.>
Air Intake Chamber.>
6) Remove the generator.
REMOVAL, Generator.>
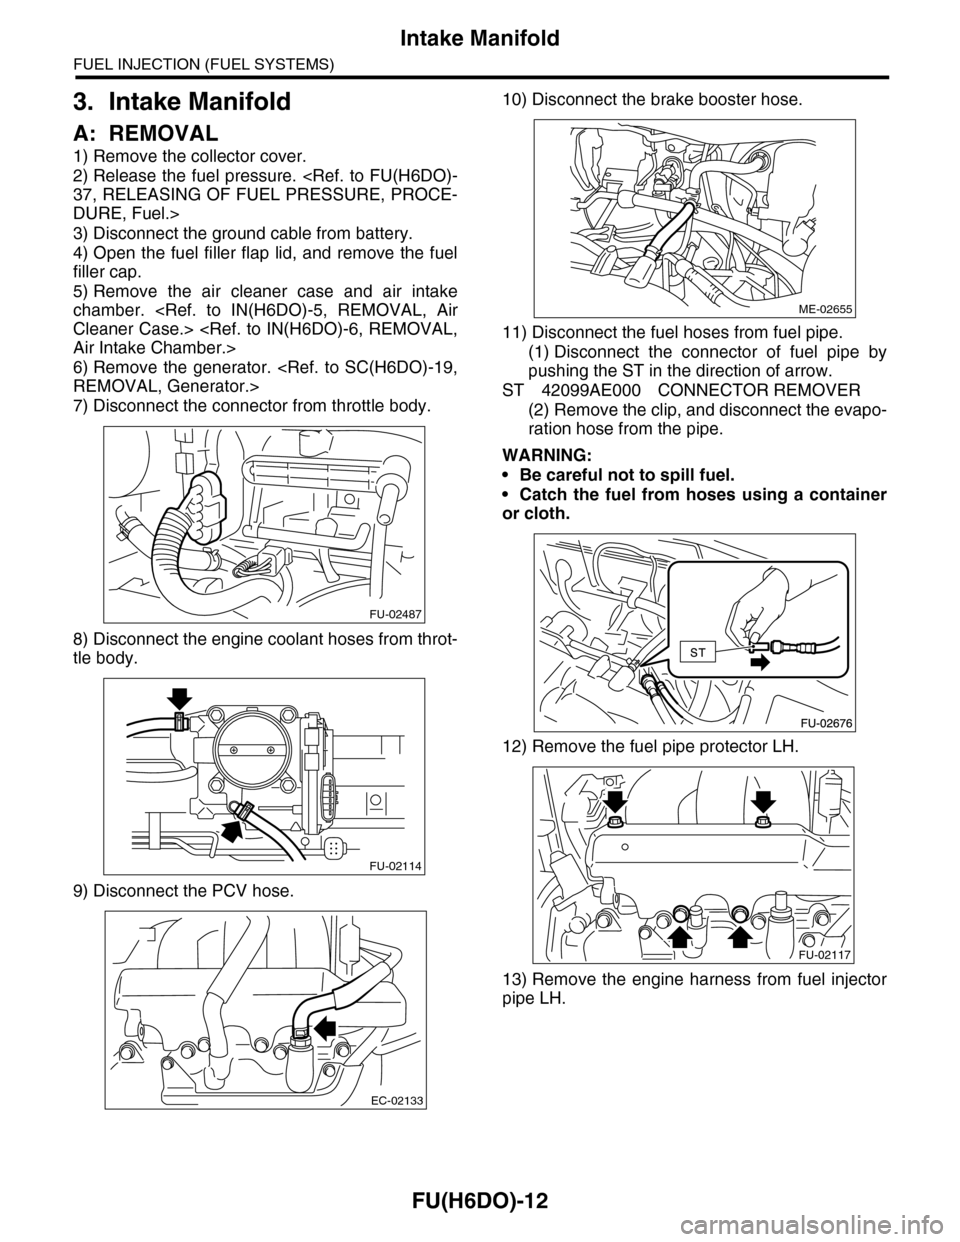
7) Disconnect the connector from throttle body.
8) Disconnect the engine coolant hoses from throt-
tle body.
9) Disconnect the PCV hose.
10) Disconnect the brake booster hose.
11) Disconnect the fuel hoses from fuel pipe.
(1) Disconnect the connector of fuel pipe by
pushing the ST in the direction of arrow.
ST 42099AE000 CONNECTOR REMOVER
(2) Remove the clip, and disconnect the evapo-
ration hose from the pipe.
WARNING:
•Be careful not to spill fuel.
•Catch the fuel from hoses using a container
or cloth.
12) Remove the fuel pipe protector LH.
13) Remove the engine harness from fuel injector
pipe LH.
FU-02487
FU-02114
EC-02133
ME-02655
FU-02117
Page 1576 of 2453
FU(H6DO)-15
Intake Manifold
FUEL INJECTION (FUEL SYSTEMS)
11) Connect the engine coolant hoses to throttle
body.
12) Connect the connector to throttle body.
13) Install the generator.
INSTALLATION, Generator.>
14) Install the air cleaner case and air intake cham-
ber.
Cleaner Case.>
TION, Air Intake Chamber.>
15) Install the fuse of fuel pump to main fuse box.
16) Connect the ground cable to the battery.
17) Install the collector cover.
C: DISASSEMBLY
1) Remove the engine harness from intake mani-
fold.
2) Remove the throttle body.
11, REMOVAL, Throttle Body.>
3) Remove the manifold absolute pressure sensor.
solute Pressure Sensor.>
4) Remove the purge control solenoid valve.
to EC(H6DO)-6, REMOVAL, Purge Control Sole-
noid Valve.>
5) Loosen the clamp which holds fuel injector pipe
to fuel hose, and then disconnect the pipe from fuel
hose.
6) Remove the bolts which install fuel pipes on in-
take manifold.
FU-02114
FU-02487FU-02124
FU-02125
FU-02126
Page 1578 of 2453
FU(H6DO)-17
Engine Coolant Temperature Sensor
FUEL INJECTION (FUEL SYSTEMS)
4. Engine Coolant Temperature
Sensor
A: REMOVAL
1) Remove the collector cover.
2) Disconnect the ground cable from battery.
3) Disconnect the connectors from the engine cool-
ant temperature sensor.
4) Remove the engine coolant temperature sensor.
B: INSTALLATION
Install in the reverse order of removal.
Tightening torque:
18 N·m (1.8 kgf-m, 13.3 ft-lb)
FU-00572
FU-00572
Page 1579 of 2453
FU(H6DO)-18
Crankshaft Position Sensor
FUEL INJECTION (FUEL SYSTEMS)
5. Crankshaft Position Sensor
A: REMOVAL
1) Remove the collector cover.
2) Disconnect the ground cable from battery.
3) Remove the air intake chamber.
IN(H6DO)-6, REMOVAL, Air Intake Chamber.>
4) Remove the service hole cover.
5) Remove the crankshaft position sensor.
6) Disconnect the connector from crankshaft posi-
tion sensor.
B: INSTALLATION
Install in the reverse order of removal.
Tightening torque:
6.4 N·m (0.65 kgf-m, 4.7 ft-lb)
FU-02127
FU-02128
FU-02128
Page 1580 of 2453
FU(H6DO)-19
Camshaft Position Sensor
FUEL INJECTION (FUEL SYSTEMS)
6. Camshaft Position Sensor
A: REMOVAL
1) Remove the collector cover.
2) Disconnect the ground cable from battery.
3) Remove the generator harness from fuel pipe
protector LH.
4) Remove the fuel pipe protector LH.
5) Disconnect the connector from camshaft posi-
tion sensor LH.
6) Remove the camshaft position sensor LH.
7) Remove the camshaft position sensor RH in the
same procedure as LH.
B: INSTALLATION
Install in the reverse order of removal.
Tightening torque:
Camshaft position sensor
6.4 N·m (0.65 kgf-m, 4.7 ft-lb)
Fuel pipe protector
19 N·m (1.9 kgf-m, 14 ft-lb)
FU-02117
FU-02129
FU-02130