Page 228 of 2453
EB-9
General Description
EXTERIOR BODY PANELS
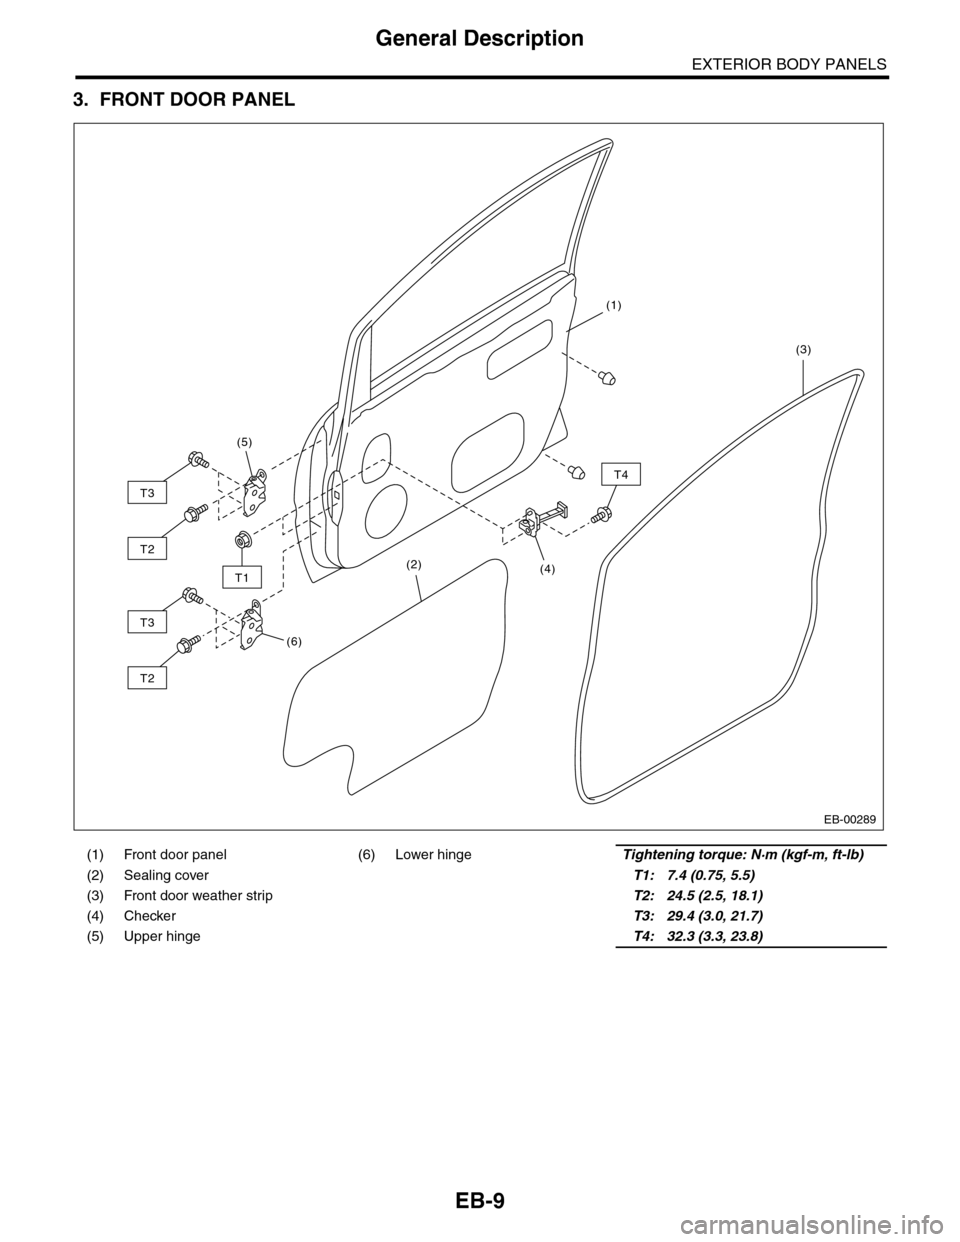
3. FRONT DOOR PANEL
(1) Front door panel (6) Lower hingeTightening torque: N·m (kgf-m, ft-lb)
(2) Sealing cover T1: 7.4 (0.75, 5.5)
(3) Front door weather strip T2: 24.5 (2.5, 18.1)
(4) Checker T3: 29.4 (3.0, 21.7)
(5) Upper hinge T4: 32.3 (3.3, 23.8)
EB-00289
T4
T1
T3
T2
T3
T2
(6)
(2)
(5)
(1)
(3)
(4)
Page 229 of 2453
EB-10
General Description
EXTERIOR BODY PANELS
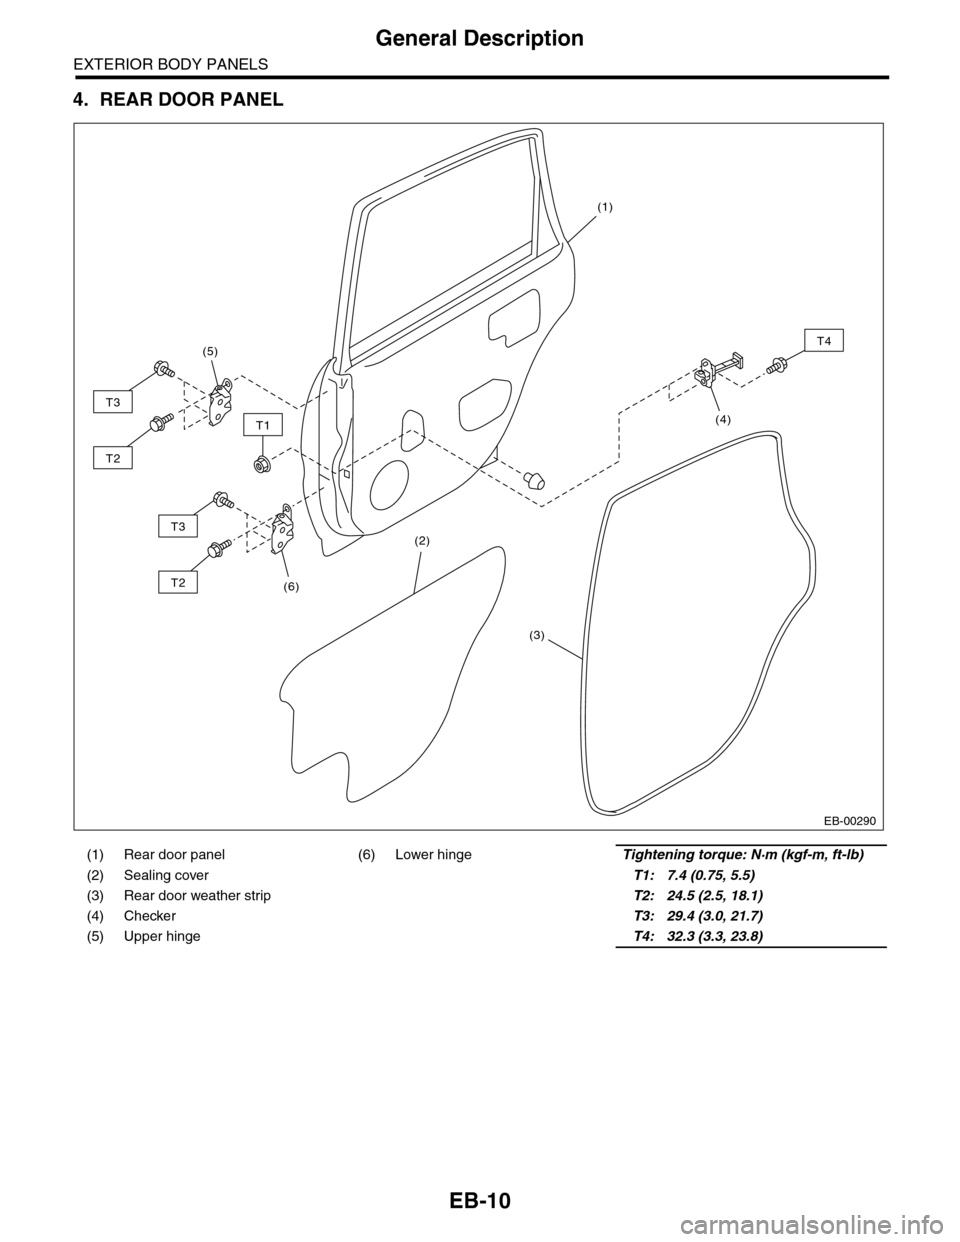
4. REAR DOOR PANEL
(1) Rear door panel (6) Lower hingeTightening torque: N·m (kgf-m, ft-lb)
(2) Sealing cover T1: 7.4 (0.75, 5.5)
(3) Rear door weather strip T2: 24.5 (2.5, 18.1)
(4) Checker T3: 29.4 (3.0, 21.7)
(5) Upper hinge T4: 32.3 (3.3, 23.8)
EB-00290
T1
T3
T2
(5)
(1)
T3
T2(6)
T4
(4)
(2)
(3)
Page 231 of 2453
EB-12
General Description
EXTERIOR BODY PANELS
D: PREPARATION TOOL
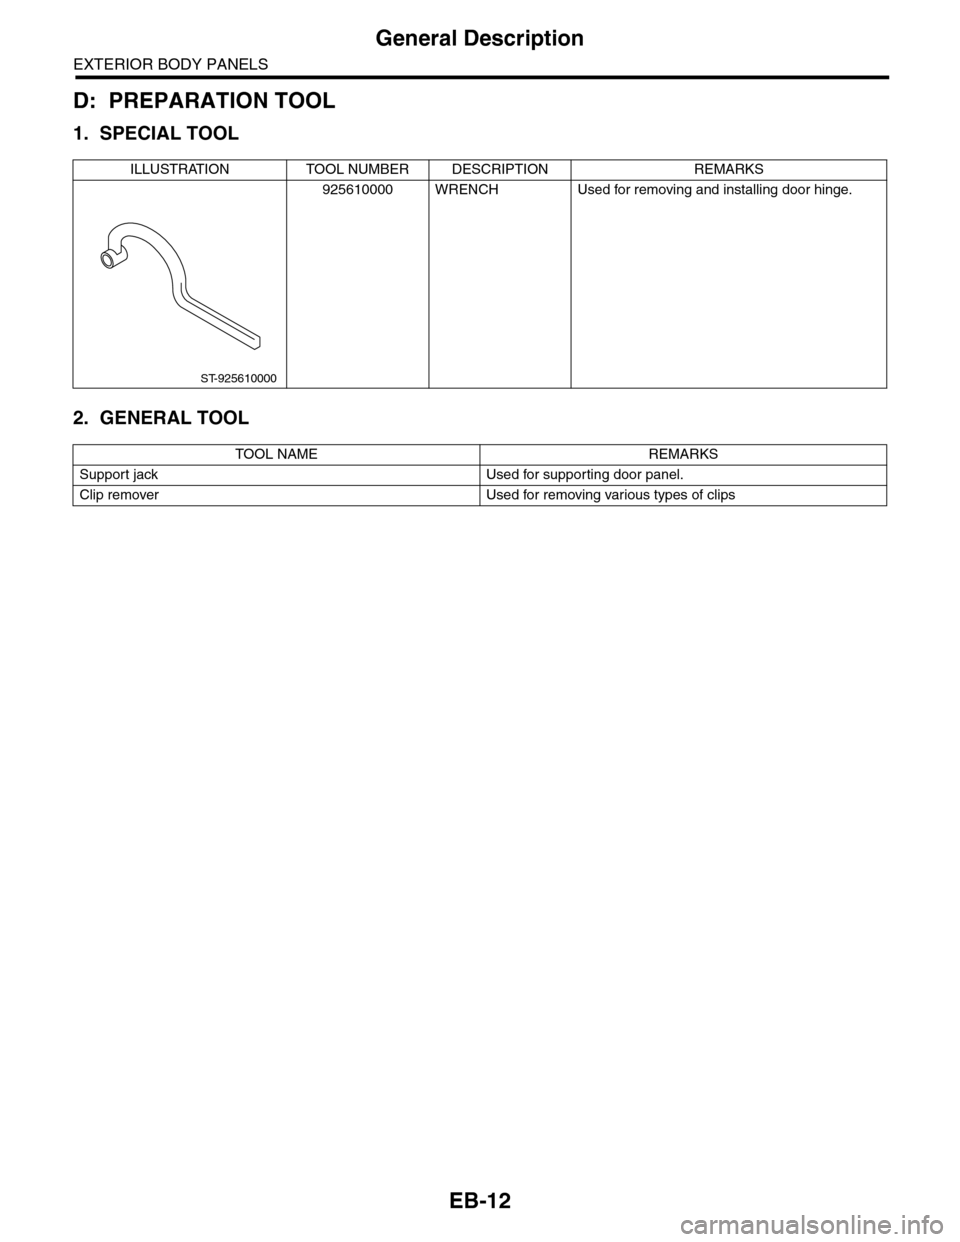
1. SPECIAL TOOL
2. GENERAL TOOL
ILLUSTRATION TOOL NUMBER DESCRIPTION REMARKS
925610000 WRENCH Used for removing and installing door hinge.
TOOL NAME REMARKS
Support jack Used for supporting door panel.
Clip remover Used for removing various types of clips
ST-925610000
Page 235 of 2453

EB-16
Front Door
EXTERIOR BODY PANELS
4. Front Door
A: REMOVAL
1) Disconnect the ground cable from battery.
2) Remove the front door trim.
MOVAL, Door Trim.>
3) Remove the outer mirror assembly.
GW-13, REMOVAL, Outer Mirror Assembly.>
4) Remove the front door speaker.
REMOVAL, Front Speaker.>
5) Remove the sealing cover.
MOVAL, Front Sealing Cover.>
6) Remove the front door glass.
REMOVAL, Front Door Glass.>
7) Remove the door sash, and remove the front
door regulator and motor assemblies.
10, REMOVAL, Front Regulator and Motor Assem-
bly.>
8) Remove the front inner remote.
REMOVAL, Front Inner Remote.>
9) Remove the front door latch assembly.
SL-36, REMOVAL, Front Door Latch and Door
Lock Actuator Assembly.>
10) Remove the front outer handle.
REMOVAL, Front Outer Handle.>
11) Remove the front door weather strip.
NOTE:
If the weather strip clip is removed with excessive
force, the weather strip may be damaged. Be sure
to use clip remover to remove.
12) Remove the bolts and nuts to remove the door
checker.
13) Remove the instrument panel lower cover or
glove box lower cover.
Instrument Panel Lower Cover.> or
REMOVAL, Glove Box.>
14) Disconnect the connector of door harness from
body harness.
15) Put a wooden block on jack and place jack un-
der the front door. Support the door with a jack to
protect it from damage.
16) Remove the door-side bolts for upper and low-
er hinges to remove front door panel.
17) Remove the door hinge from vehicle.
EB-00141
EB-00154
EB-00151
EB-00013
EB-00015
Page 236 of 2453
EB-17
Front Door
EXTERIOR BODY PANELS
B: INSTALLATION
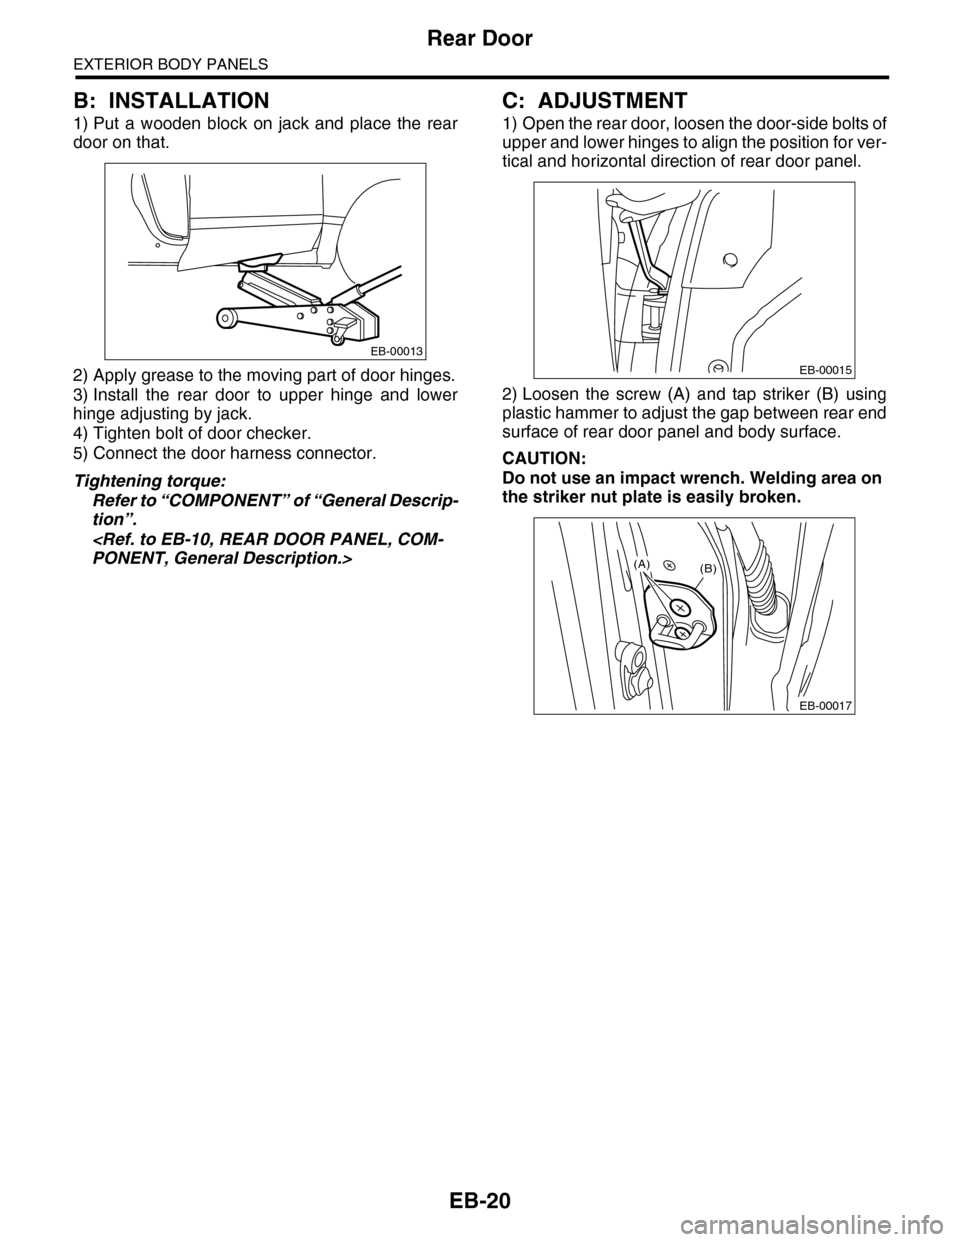
1) Put a wooden block on jack and place the front
door on that.
2) Apply grease to the sliding area of door hinges,
and install the door hinge to vehicle.
3) Install the front door to upper hinge and lower
hinge adjusting by jack.
4) Tighten bolt of door checker.
5) Connect door harness connector, and install the
instrument panel lower cover.
6) Install the front pillar lower trim.
Tightening torque:
Refer to “COMPONENT” of “General Descrip-
tion”.
PONENT, General Description.>
C: ADJUSTMENT
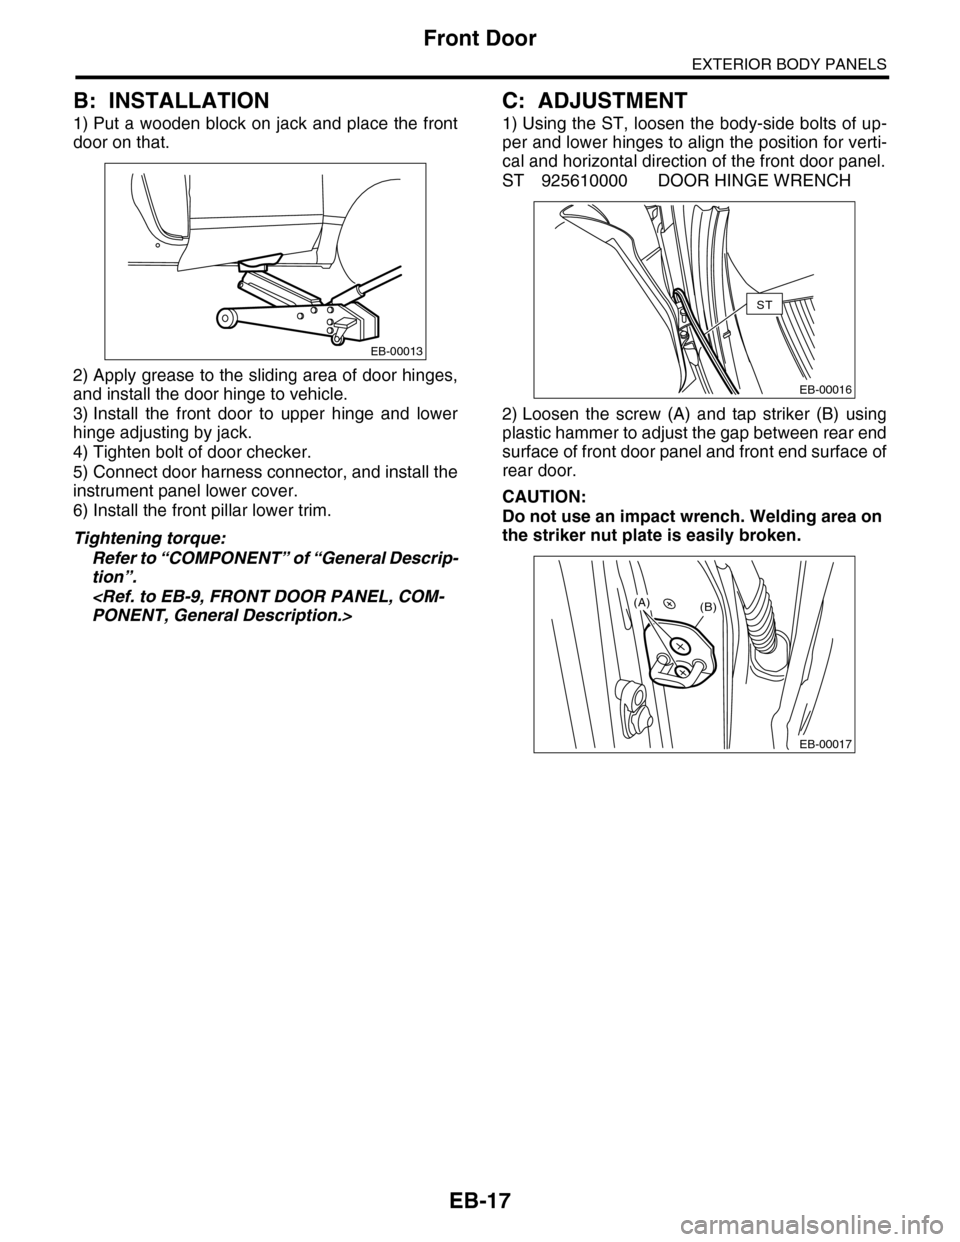
1) Using the ST, loosen the body-side bolts of up-
per and lower hinges to align the position for verti-
cal and horizontal direction of the front door panel.
ST 925610000 DOOR HINGE WRENCH
2) Loosen the screw (A) and tap striker (B) using
plastic hammer to adjust the gap between rear end
surface of front door panel and front end surface of
rear door.
CAUTION:
Do not use an impact wrench. Welding area on
the striker nut plate is easily broken.
EB-00013
EB-00016
ST
EB-00017
(B)(A)
Page 237 of 2453
EB-18
Front Sealing Cover
EXTERIOR BODY PANELS
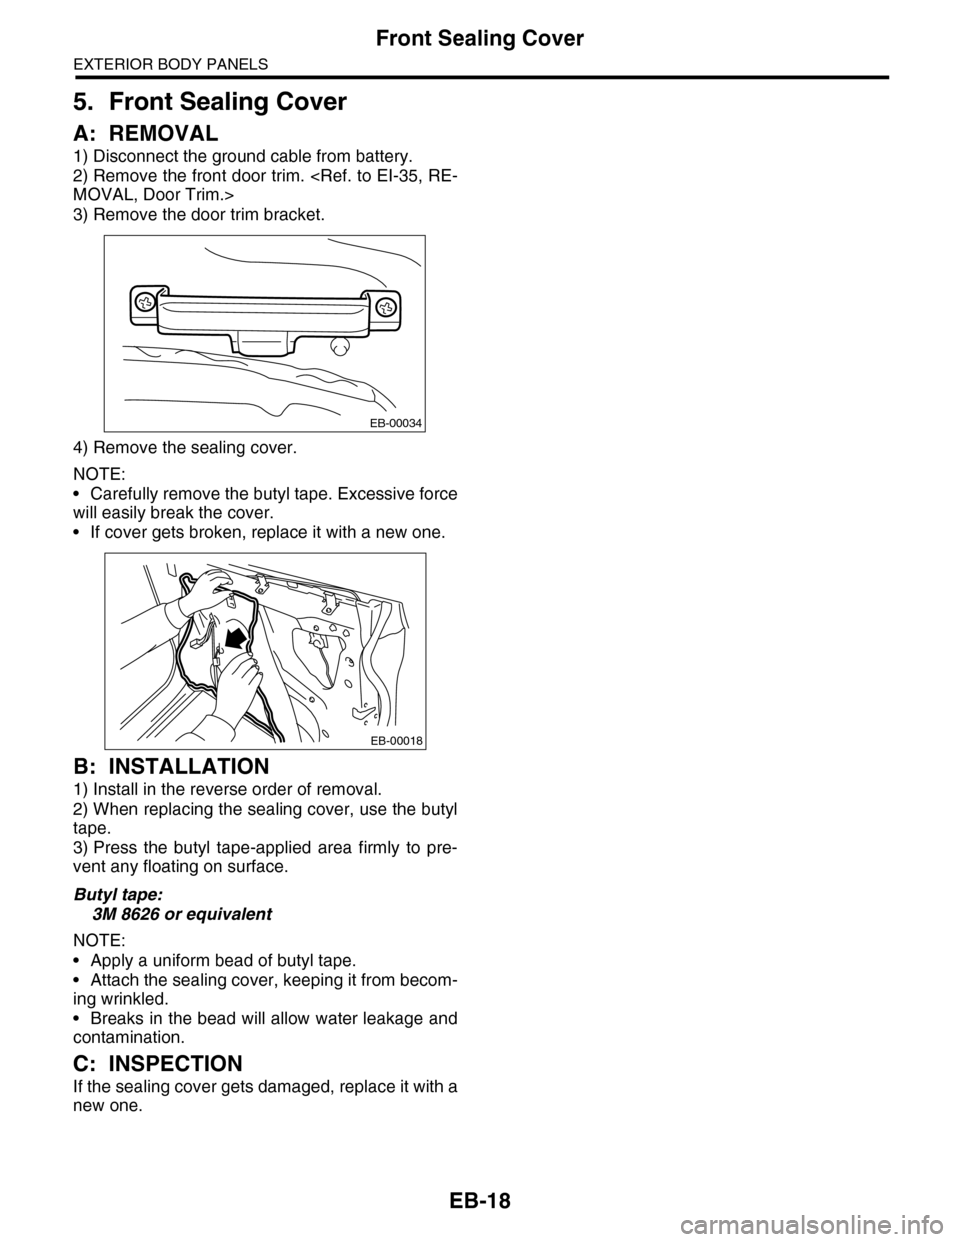
5. Front Sealing Cover
A: REMOVAL
1) Disconnect the ground cable from battery.
2) Remove the front door trim.
MOVAL, Door Trim.>
3) Remove the door trim bracket.
4) Remove the sealing cover.
NOTE:
•Carefully remove the butyl tape. Excessive force
will easily break the cover.
•If cover gets broken, replace it with a new one.
B: INSTALLATION
1) Install in the reverse order of removal.
2) When replacing the sealing cover, use the butyl
tape.
3) Press the butyl tape-applied area firmly to pre-
vent any floating on surface.
Butyl tape:
3M 8626 or equivalent
NOTE:
•Apply a uniform bead of butyl tape.
•Attach the sealing cover, keeping it from becom-
ing wrinkled.
•Breaks in the bead will allow water leakage and
contamination.
C: INSPECTION
If the sealing cover gets damaged, replace it with a
new one.
EB-00034
EB-00018
Page 238 of 2453
EB-19
Rear Door
EXTERIOR BODY PANELS
6. Rear Door
A: REMOVAL
1) Disconnect the ground cable from battery.
2) Remove the rear door trim.
MOVAL, Door Trim.>
3) Remove the rear speaker.
MOVAL, Rear Speaker.>
4) Remove the sealing cover.
MOVAL, Rear Sealing Cover.>
5) Remove the rear door glass.
REMOVAL, Rear Door Glass.>
6) Remove the door sash and rear door regulator
and motor assemblies.
AL, Rear Regulator and Motor Assembly.>
7) Remove the rear inner remote.
REMOVAL, Rear Inner Remote.>
8) Remove the rear door latch.
MOVAL, Rear Door Latch and Door Lock Actuator
Assembly.>
9) Remove the rear outer handle.
REMOVAL, Rear Outer Handle.>
10) Remove the rear door inner weather strip.
NOTE:
If the weather strip clip is removed with excessive
force, the weather strip may be damaged. Be sure
to use clip remover to remove.
11) Remove the bolts and nuts to remove the door
checker.
12) Pull the door harness connector inside the cen-
ter pillar, then disconnect the connector.
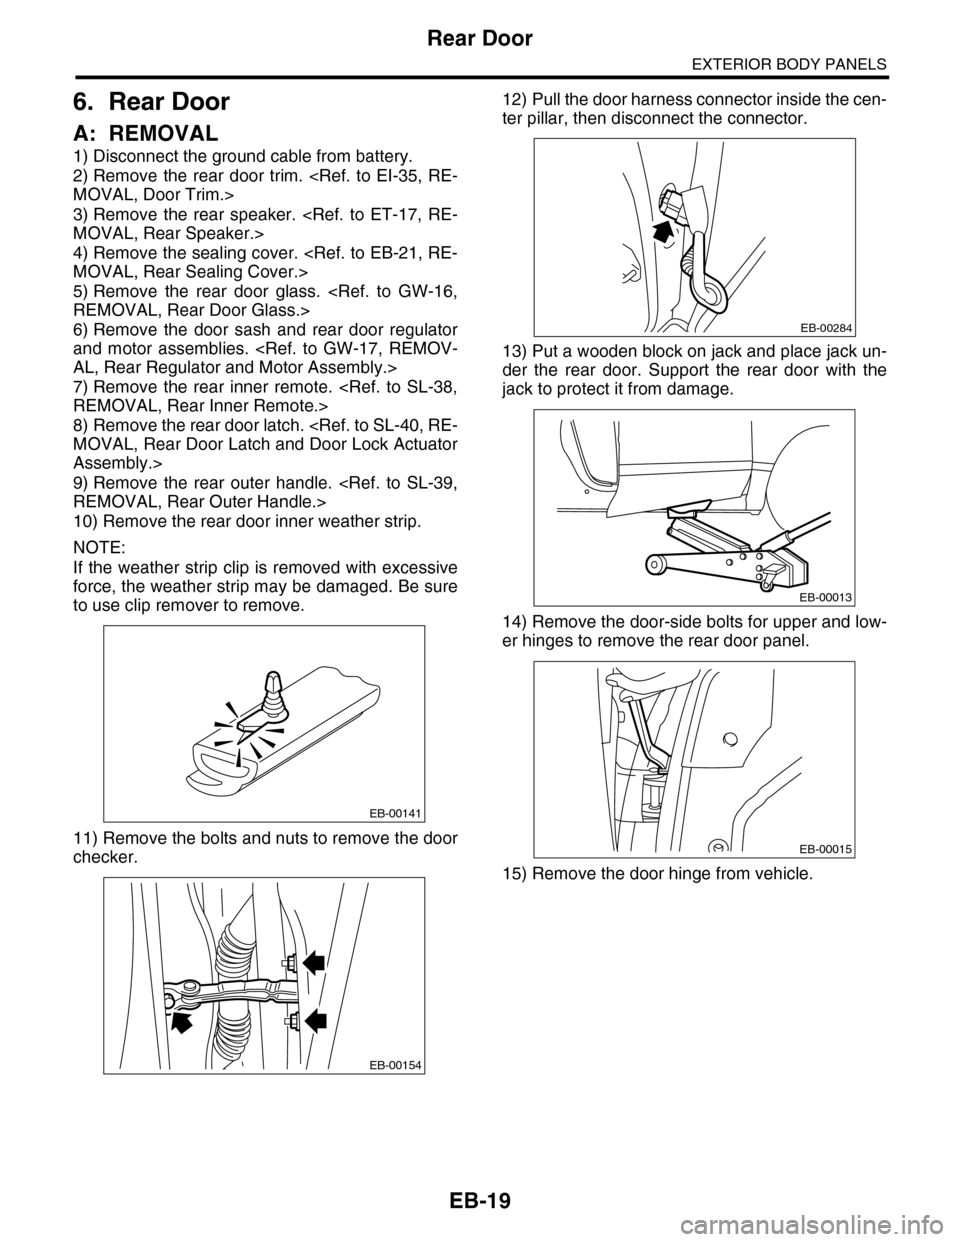
13) Put a wooden block on jack and place jack un-
der the rear door. Support the rear door with the
jack to protect it from damage.
14) Remove the door-side bolts for upper and low-
er hinges to remove the rear door panel.
15) Remove the door hinge from vehicle.
EB-00141
EB-00154
EB-00284
EB-00013
EB-00015
Page 239 of 2453
EB-20
Rear Door
EXTERIOR BODY PANELS
B: INSTALLATION
1) Put a wooden block on jack and place the rear
door on that.
2) Apply grease to the moving part of door hinges.
3) Install the rear door to upper hinge and lower
hinge adjusting by jack.
4) Tighten bolt of door checker.
5) Connect the door harness connector.
Tightening torque:
Refer to “COMPONENT” of “General Descrip-
tion”.
PONENT, General Description.>
C: ADJUSTMENT
1) Open the rear door, loosen the door-side bolts of
upper and lower hinges to align the position for ver-
tical and horizontal direction of rear door panel.
2) Loosen the screw (A) and tap striker (B) using
plastic hammer to adjust the gap between rear end
surface of rear door panel and body surface.
CAUTION:
Do not use an impact wrench. Welding area on
the striker nut plate is easily broken.
EB-00013
EB-00015
EB-00017
(B)(A)