Page 65 of 281
31A-22
FRONT AXLE COMPONENTS
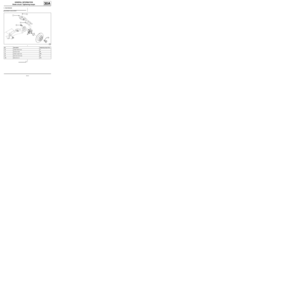
Front brake disc: Description
31A
I - PREPARATION OPERATION FOR CHECK
Position the vehicle on a two-post lift (see Vehicle:
Towing and lifting) (02A, Lifting equipment).
Remove the wheel (see 35A, Wheels and tyres,
Wheel: Removal - Refitting, page 35A-1) .
II - CHECKING OPERATION FOR PART
CONCERNED
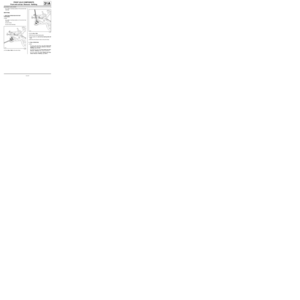
Position the Palmer tool (1) to measure the disc thick-
ness.Measure the thickness of the disc at 4 points in order
(90˚ apart).
Compare the values with those recommended by the
manufacturer (see 30A, General information, Brake:
Specifications, page 30A-19) .
III - FINAL OPERATION
Replace the discs if necessary (see 31A, Front axle
components, Front brake disc: Removal - Refitting,
page 31A-19) .
Refit the wheel (see 35A, Wheels and tyres, Wheel:
Removal - Refitting, page 35A-1) . Note:
Use a Palmer type tool to check the thickness of the
disc.
117057
88310
Page 66 of 281

31A-23
FRONT AXLE COMPONENTS
Front driveshaft hub carrier: Removal - Refitting
31A
REMOVAL
I - REMOVAL PREPARATION OPERATION
aPosition the vehicle on a two-post lift (see Vehicle:
Towing and lifting) (MR 411, 02A, Lifting equip-
ment).
aRemove:
-the front wheel on the side in question (see 35A,
Wheels and tyres, Wheel: Removal - Refitting,
page 35A-1) ,
-the front brake pads of the side in question (see
31A, Front axle components, Front brake pads:
Removal - Refitting, page 31A-1) ,
aRemove:
-the front brake calliper mounting (see 31A, Front
axle components, Front brake calliper mount-
ing: Removal - Refitting, page 31A-14) ,
-the front brake disc (see 31A, Front axle compo-
nents, Front brake disc: Removal - Refitting,
page 31A-19) ,
-the front wheel speed sensor on the hub carrier
(see 38C, Anti-lock braking system, Front wheel
speed sensor: Removal - Refitting, page 38C-
15) .II - OPERATION FOR REMOVAL OF PART
CONCERNED
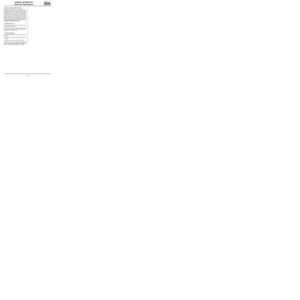
aPosition the (Rou. 604-01).
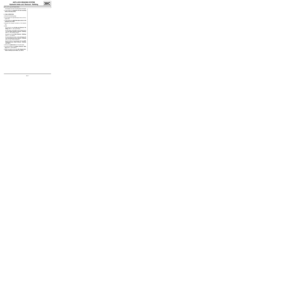
aRemove the hub nut (1) .
aRemove:
-the nut (2) from the track rod end,
-the bolt (3) from the lower ball joint. Special tooling required
Rou. 604-01Hub locking tool.
Tav. 476Ball joint extractor.
Tav. 1420-01Screw jack for tools Tav.
1420, Tav.1050-04 , Tar.
1454, Tar. 1850.
Tightening torquesm
shock absorber lower
bolts105 Nm
front driveshaft lower
arm ball joint bolt105 Nm
ABS wiring bracket bolt8 Nm
track rod end nut37 N.m
hub nut280 Nm
guide pin upper bolt29 Nm
119543
119222
Page 67 of 281
31A-24
FRONT AXLE COMPONENTS
Front driveshaft hub carrier: Removal - Refitting
31A
aRemove:
-the track rod end using the (Tav. 476),
-the front driveshaft lower arm ball joint.aRemove:
-the bolt (4) from the ABS wiring bracket,
-the ABS wiring bracket,
-the shock absorber lower studs (5) .
aSeparate the driveshaft from the hub carrier using
the (Tav. 1420-01).
aRemove the front driveshaft hub carrier.
REFITTING
I - REFITTING OPERATION FOR PART
CONCERNED
aRefit:
-the front driveshaft hub carrier,
-the driveshaft into the front driveshaft hub-carrier,
-the shock absorber lower bolts.
aTorque tighten the shock absorber lower bolts
(105 Nm).
aFit the front driveshaft lower arm ball joint.
119345
WARNING
To prevent any damage, do not use the lower
arm as support for the lifting system.
119221
Page 68 of 281

31A-25
FRONT AXLE COMPONENTS
Front driveshaft hub carrier: Removal - Refitting
31A
aCheck that the bush (6) is correctly fitted on the front
driveshaft lower arm ball joint.
aRefit the front driveshaft lower arm ball joint bolt.
aTorque tighten the front driveshaft lower arm ball
joint bolt (105 Nm).
aRefit:
-the ABS wiring bracket,
-the ABS wiring bracket bolt.
aTorque tighten the ABS wiring bracket bolt (8 Nm).
aPosition the track rod.
aRefit the track rod end nut.
aTorque tighten the track rod end nut (37 N.m).
aRefit the hub nut using the (Rou. 604-01).
aTorque tighten the hub nut (280 Nm).
II - FINAL OPERATION
aRefit:
-the front wheel speed sensor on the hub carrier,
-the front brake disc (see 31A, Front axle compo-
nents, Front brake disc: Removal - Refitting,
page 31A-19) ,
-the front brake calliper mounting (see 31A, Front
axle components, Front brake calliper mount-
ing: Removal - Refitting, page 31A-14) .
aFit the front brake calliper.
aRefit the upper bolt on the guide pin while holding
the nut.aTorque tighten the guide pin upper bolt (29 Nm).
aRefit:
-the front brake pads (see 31A, Front axle compo-
nents, Front brake pads: Removal - Refitting,
page 31A-1) ,
-the wheel (see 35A, Wheels and tyres, Wheel:
Removal - Refitting, page 35A-1) .
119223
Page 69 of 281

31A-26
FRONT AXLE COMPONENTS
Front hub carrier bearing: Removal - Refitting
31A
REMOVAL
I - REMOVAL PREPARATION OPERATION
aPosition the vehicle on a two-post lift ( (see Vehicle:
Towing and lifting) ).
aRemove:
-the front wheel on the side in question (see 35A,
Wheels and tyres, Wheel: Removal - Refitting,
page 35A-1) ,
-the front brake pads (see 31A, Front axle compo-
nents, Front brake pads: Removal - Refitting,
page 31A-1) ,
-the calliper mounting (see 31A, Front axle com-
ponents, Front brake calliper mounting: Re-
moval - Refitting, page 31A-14) ,
-the brake disc (see 31A, Front axle components,
Front brake disc: Removal - Refitting, page 31A-
19) ,
-the front driveshaft hub carrier (see 31A, Front
axle components, Front driveshaft hub carrier:
Removal - Refitting, page 31A-23) .II - OPERATION FOR REMOVAL OF PART
CONCERNED
aRemove:
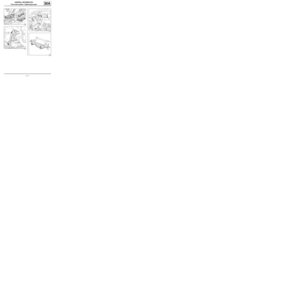
-the hub (1) using a hydraulic press, applying force
with a pipe 65 mm (2) in diameter,
-the circlip (3) .
aRemove the internal bush (4) from the hub using an
extractor with jaws (5) . WARNING
In order to prevent irreversible damage to the front
hub bear ing:
-Do not loosen or tighten the driveshaft nut when
the wheels are on the ground.
-Do not place the vehicle with its wheels on the
ground when the driveshaft has been loosened or
removed.
WARNING
To ensure that the wheel speed sensor works prop-
erly, do not mark the sensor target on the bearing.20786
101230
Page 70 of 281
31A-27
FRONT AXLE COMPONENTS
Front hub carrier bearing: Removal - Refitting
31A
aRemove the bearing (6) using a hydraulic press, tak-
ing hold of the outer bush with a pipe 65 mm in di-
ameter (7) .
REFITTING
I - REFITTING PREPARATIONS OPERATION
aAlways replace:
-the front hub carrier bearing,
-the circlip.
aUse a degreasing product to clean the inner and out-
er surfaces of the new bearing which are in contact
with the stub axle carrier and the hub.aUsing the cleaning station, clean:
-the stub axle carrier surfaces in contact with the
new bearing,
-the hub surfaces in contact with the new bearing.
aIt is essential to check the condition of the hub sur-
face and the hub carrier bore before refitting the
bearing.
118947117348
Note:
Replace the bear ing if the hub carrier is faulty.
Page 71 of 281

31A-28
FRONT AXLE COMPONENTS
Front hub carrier bearing: Removal - Refitting
31A
II - REFITTING OPERATION FOR PART
CONCERNED
aRefit the bearing using a hydraulic press, taking hold
of the outer bush with a pipe with an outer diame-
ter of 70 mm (8) .
aRefit the circlip.aRefit the hub (9) using a hydraulic press, taking hold
of the bearing's internal bush with a pipe with an
outer diameter of 50 mm (10) .
III - FINAL OPERATION.
aRefit:
-the front driveshaft hub carrier (see 31A, Front
axle components, Front driveshaft hub carrier:
Removal - Refitting, page 31A-23) ,
-the brake disc (see 31A, Front axle components,
Front brake disc: Removal - Refitting, page 31A-
19) ,
-the calliper mounting (see 31A, Front axle com-
ponents, Front brake calliper mounting: Re-
moval - Refitting, page 31A-14) ,
-the front brake pads (see 31A, Front axle compo-
nents, Front brake pads: Removal - Refitting,
page 31A-1) ,
-the front wheel on the side in question (see 35A,
Wheels and tyres, Wheel: Removal - Refitting,
page 35A-1) .
114182
WARNING
Do not press the bearing's inner bush so as to
avoid damaging the bearing (very high shrink-fit-
ting force).
Note:
the black side of the bearing must be fitted on the
circlip side.
114183
Page 72 of 281

31A-29
FRONT AXLE COMPONENTS
Front shock absorber and spring: Removal - Refitting31A
REMOVAL
I - REMOVAL PREPARATION OPERATION
aPosition the vehicle on a two-post lift (see Vehicle:
Towing and lifting) (02A, Lifting equipment).
aDisconnect the battery (see ) (80A, Battery).
aRemove the front wheels (see 35A, Wheels and ty-
res, Wheel: Removal - Refitting, page 35A-1) .II - OPERATION FOR REMOVAL OF PART
CONCERNED
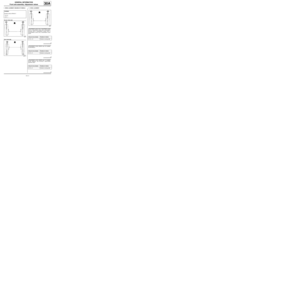
aDetach the wiring (1) from the wheel speed sensor.
aRemove:
-the bolt (2) of the wheel speed sensor wiring brack-
et,
-the wheel speed sensor wiring bracket,
-the shock absorber base nuts (3) ,
-the shock absorber base bolts.
aHang the hub carrier on the body using a safety
strap(s).
aRemove:
-the windscreen wiper arms (see Windscreen wip-
er arm: Removal - Refitting) ,
-the scuttle panel grille (see Scuttle panel grille:
Removal - Refitting) (56A, Exterior equipment),
-the shock absorber nut cover. Equipment required
safety strap(s)
spanner for shock absorber rod nut
Tightening torquesm
new shock absorber rod
nut62 N.m
new shock absorber
base nuts105 N.m
wheel speed sensor wir-
ing bracket bolt8 N.m
119221