2009 MERCEDES-BENZ GL SUV ECU
[x] Cancel search: ECUPage 274 of 309
!
Always use wheel bolts ;to fit the
"Minispare" emergency spare wheel*.
Using other wheel bolts to fit the
"Minispare" emergency spare wheel* could
damage the brake system.
i Wheel bolts 2can be found with the
"Minispare" emergency spare wheel*.
X Clean the wheel and wheel hub contact
surfaces. X
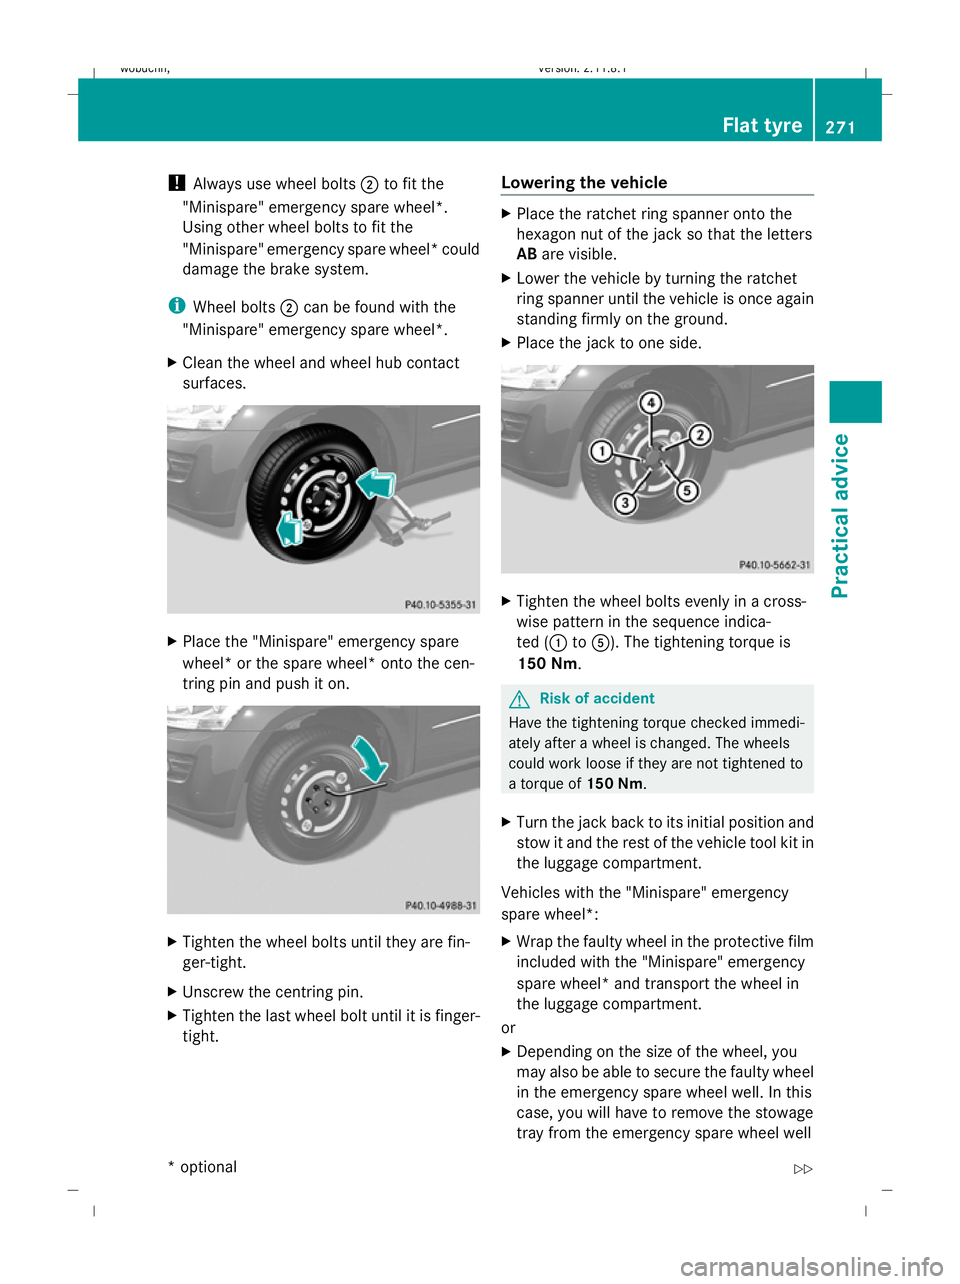
Place the "Minispare" emergency spare
wheel* or the spare wheel* onto the cen-
tring pin and push it on. X
Tighten the wheel bolts until they are fin-
ger-tight.
X Unscrew the centring pin.
X Tighten the last wheel bolt until it is finger-
tight. Lowering the vehicle X
Place the ratchet ring spanner onto the
hexagon nut of the jack so that the letters
AB are visible.
X Lower the vehicle by turning the ratchet
ring spanner until the vehicle is once again
standing firmly on the ground.
X Place the jack to one side. X
Tighten the wheel bolts evenly in a cross-
wise pattern in the sequence indica-
ted (: toA). The tightening torque is
150 Nm. G
Risk of accident
Have the tightening torque checked immedi-
ately after a wheel is changed. The wheels
could work loose if they are not tightened to
a torque of 150 Nm.
X Turn the jack back to its initial position and
stow it and the rest of the vehicle tool kit in
the luggage compartment.
Vehicles with the "Minispare" emergency
spare wheel*:
X Wrap the faulty wheel in the protective film
included with the "Minispare" emergency
spare wheel* and transport the wheel in
the luggage compartment.
or
X Depending on the size of the wheel, you
may also be able to secure the faulty wheel
in the emergency spare wheel well. In this
case, you will have to remove the stowage
tray from the emergency spare wheel well Flat tyre
271Practical advice
* optional
X164_AKB; 2; 3, en-GB
wobuchh,
Version: 2.11.8.1 2009-03-31T14:14:58+02:00 - Seite 271 Z
Dateiname: 6515431202_buchblock.pdf; erzeugt am 01. Apr 2009 00:18:13; WK
Page 275 of 309
and stow it securely in the luggage com-
partment.
Vehicles with a spare wheel*:
X Use the bolts to secure the faulty wheel to
the exterior spare wheel bracket*.
i Do not activate the tyre pressure moni-
tor* until the defective tyre has been
removed from the vehicle. Battery
Notes on the vehicle battery
In order for the battery to achieve the maxi-
mum possible service life, it must always be
sufficiently charged.
Have the battery charge checked more fre-
quently if you use the vehicle mainly for short
trips or if you leave it standing idle for a
lengthy period.
To prevent damage from corrosion, only
replace the battery with one that has a central
ventilation cover.
Consult a Mercedes-Benz Service Centre if
you wish to leave your vehicle parked up for
a long period of time. G
Risk of injury
Comply with safety precautions and take pro-
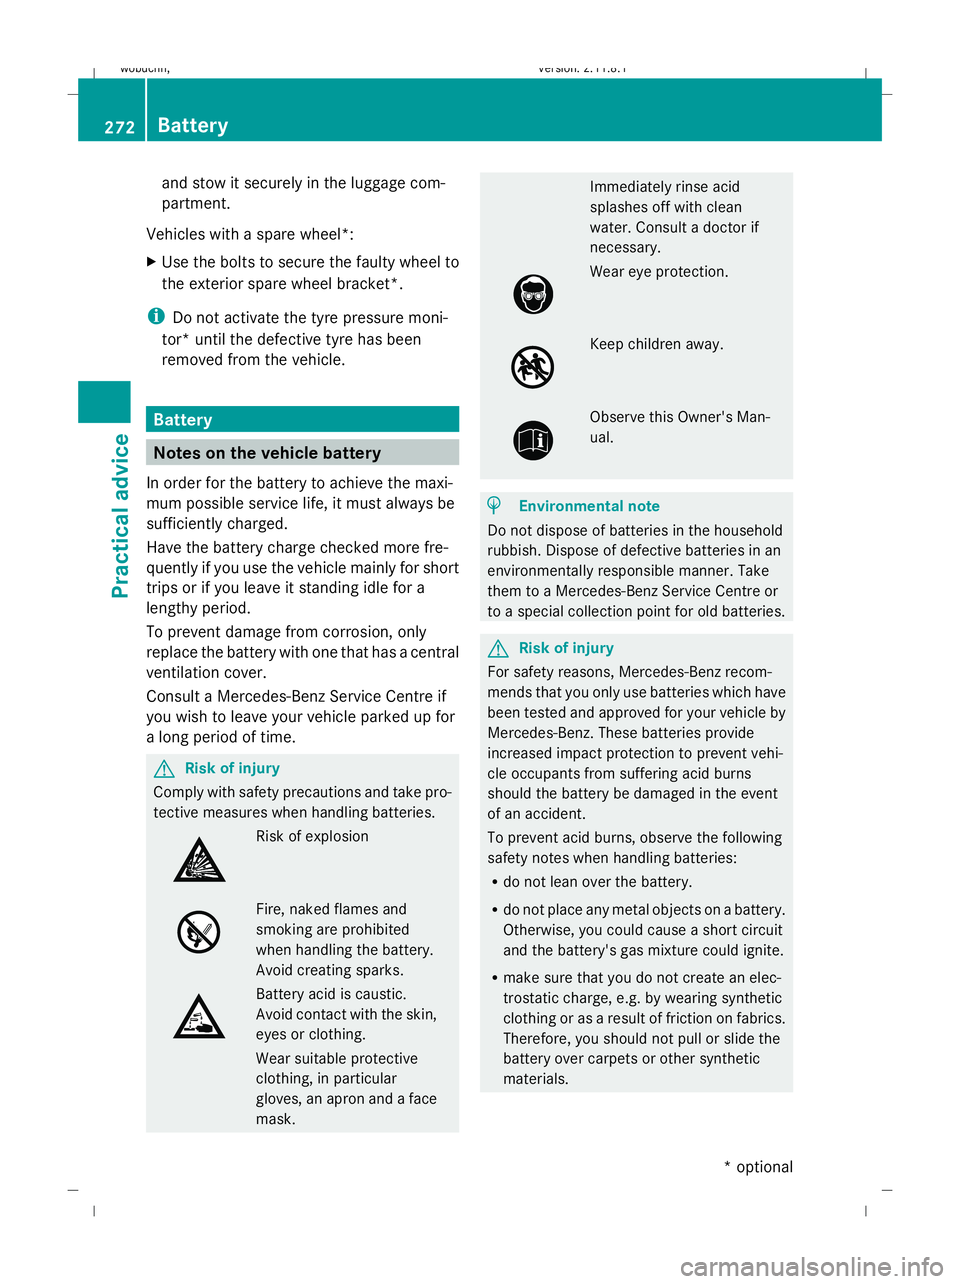
tective measures when handling batteries. Risk of explosion
Fire, naked flames and
smoking are prohibited
when handling the battery.
Avoid creating sparks. Battery acid is caustic.
Avoid contact with the skin,
eyes or clothing.
Wear suitable protective
clothing, in particular
gloves, an apron and a face
mask. Immediately rinse acid
splashes off with clean
water. Consult a doctor if
necessary.
Wear eye protection.
Keep children away.
Observe this Owner's Man-
ual.
H
Environmental note
Do not dispose of batteries in the household
rubbish. Dispose of defective batteries in an
environmentally responsible manner. Take
them to a Mercedes-Benz Service Centre or
to a special collection point for old batteries. G
Risk of injury
For safety reasons, Mercedes-Benz recom-
mends that you only use batteries which have
been tested and approved for your vehicle by
Mercedes-Benz. These batteries provide
increased impact protection to prevent vehi-
cle occupants from suffering acid burns
should the battery be damaged in the event
of an accident.
To prevent acid burns, observe the following
safety notes when handling batteries:
R do not lean over the battery.
R do not place any metal objects on a battery.
Otherwise, you could cause a short circuit
and the battery's gas mixture could ignite.
R make sure that you do not create an elec-
trostatic charge, e.g. by wearing synthetic
clothing or as a result of friction on fabrics.
Therefore, you should not pull or slide the
battery over carpets or other synthetic
materials. 272
BatteryPractical advice
* optional
X164_AKB; 2; 3, en-GB
wobuchh,
Version: 2.11.8.1 2009-03-31T14:14:58+02:00 - Seite 272
Dateiname: 6515431202_buchblock.pdf; erzeugt am 01. Apr 2009 00:18:14; WK
Page 279 of 309
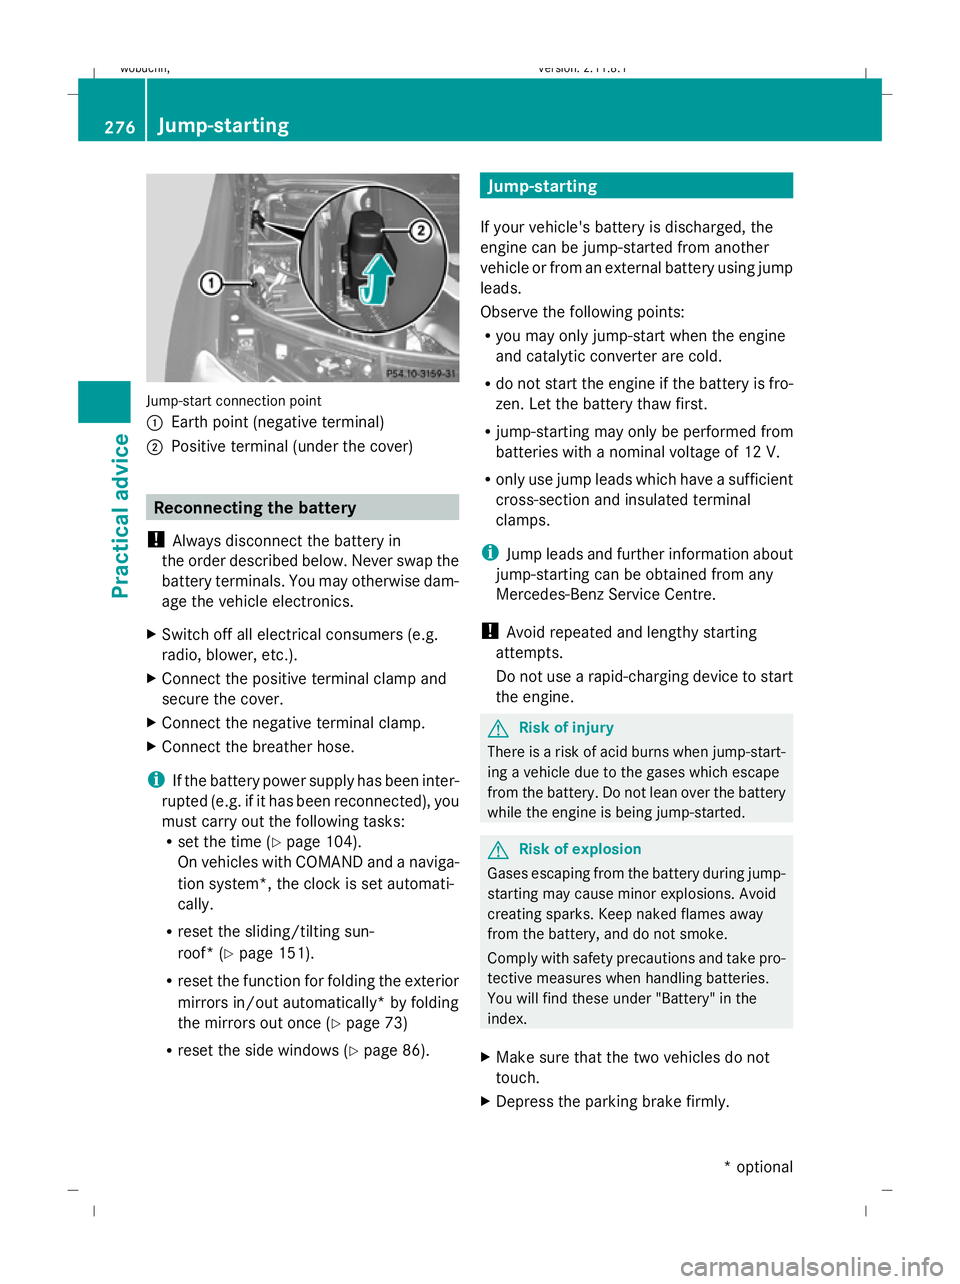
Jump-start connection point
:
Earth point (negative terminal)
; Positive terminal (under the cover) Reconnecting the battery
! Always disconnect the battery in
the order described below. Never swap the
battery terminals. You may otherwise dam-
age the vehicle electronics.
X Switch off all electrical consumers (e.g.
radio, blower, etc.).
X Connect the positive terminal clamp and
secure the cover.
X Connect the negative terminal clamp.
X Connect the breather hose.
i If the battery power supply has been inter-
rupted (e.g. if it has been reconnected), you
must carry out the following tasks:
R set the time (Y page 104).
On vehicles with COMAND and a naviga-
tion system*, the clock is set automati-
cally.
R reset the sliding/tilting sun-
roof* (Y page 151).
R reset the function for folding the exterior
mirrors in/out automatically* by folding
the mirrors out once (Y page 73)
R reset the side windows ( Ypage 86). Jump-starting
If your vehicle's battery is discharged, the
engine can be jump-started from another
vehicle or from an external battery using jump
leads.
Observe the following points:
R you may only jump-start when the engine
and catalytic converter are cold.
R do not start the engine if the battery is fro-
zen. Let the battery thaw first.
R jump-starting may only be performed from
batteries with a nominal voltage of 12 V.
R only use jump leads which have a sufficient
cross-section and insulated terminal
clamps.
i Jump leads and further information about
jump-starting can be obtained from any
Mercedes-Benz Service Centre.
! Avoid repeated and lengthy starting
attempts.
Do not use a rapid-charging device to start
the engine. G
Risk of injury
There is a risk of acid burns when jump-start-
ing a vehicle due to the gases which escape
from the battery. Do not lean over the battery
while the engine is being jump-started. G
Risk of explosion
Gases escaping from the battery during jump-
starting may cause minor explosions. Avoid
creating sparks. Keep naked flames away
from the battery, and do not smoke.
Comply with safety precautions and take pro-
tective measures when handling batteries.
You will find these under "Battery" in the
index.
X Make sure that the two vehicles do not
touch.
X Depress the parking brake firmly. 276
Jump-startingPractical advice
* optional
X164_AKB; 2; 3, en-GB
wobuchh,
Version: 2.11.8.1 2009-03-31T14:14:58+02:00 - Seite 276
Dateiname: 6515431202_buchblock.pdf; erzeugt am 01. Apr 2009 00:18:17; WK
Page 281 of 309
It is better to have the vehicle transported
than to have it towed.
When towing, observe the legal requirements
in all countries concerned.
! When towing, pull away slowly and
smoothly. If the tractive power is too high,
the vehicles could be damaged.
! Do not use the towing eye for recovery,
as this could damage the vehicle. If in
doubt, recover the vehicle with a crane.
! You may tow the vehicle for a maximum
of 50 km. A towing speed of 50 km/h must
not be exceeded.
For towing distances over 50 km, the entire
vehicle must be lifted up and transported.
! On vehicles with KEYLESS GO*, use the
key instead of the Start/Stop button. Turn
the key to position 2in the ignition lock and
shift the automatic transmission to N. Then
turn the key back to 0and leave it in the
ignition lock.
! Only secure the tow cable or towing bar
to the towing eyes. You could otherwise
damage the vehicle.
R Tow-starting the vehicle is not permitted.
R The vehicle may not be towed with the front
or rear axle raised.
R If the vehicle has suffered transmission
damage, have it carried away on a trans-
porter or trailer.
R If the engine does not start, try jump-start-
ing it (Y page 276).
R If it is not possible to jump-start the vehicle,
have it towed to the nearest qualified spe-
cialist workshop, e.g. a Mercedes-Benz
Service Centre.
R If you are towing the vehicle, move the
automatic transmission selector lever to N
and turn the key to position
2 (Y page 63) in the ignition lock.
R Before towing the vehicle, make sure that
the battery is connected and charged. Oth-
erwise:
- you cannot switch on the ignition.
- you cannot shift the transmission to posi-
tion N.
- you have no support when braking.
i Switch off the automatic locking feature
before the vehicle is towed (Y page 107).
Otherwise, you could be locked out when
pushing or towing the vehicle.
Deactivate tow-away protection*
(Y page 55) before the vehicle is towed. Fitting the towing eye
Vehicles with a trailer tow hitch*: if you
intend to use the vehicle for towing, fit the ball
coupling and connect the towbar to this.
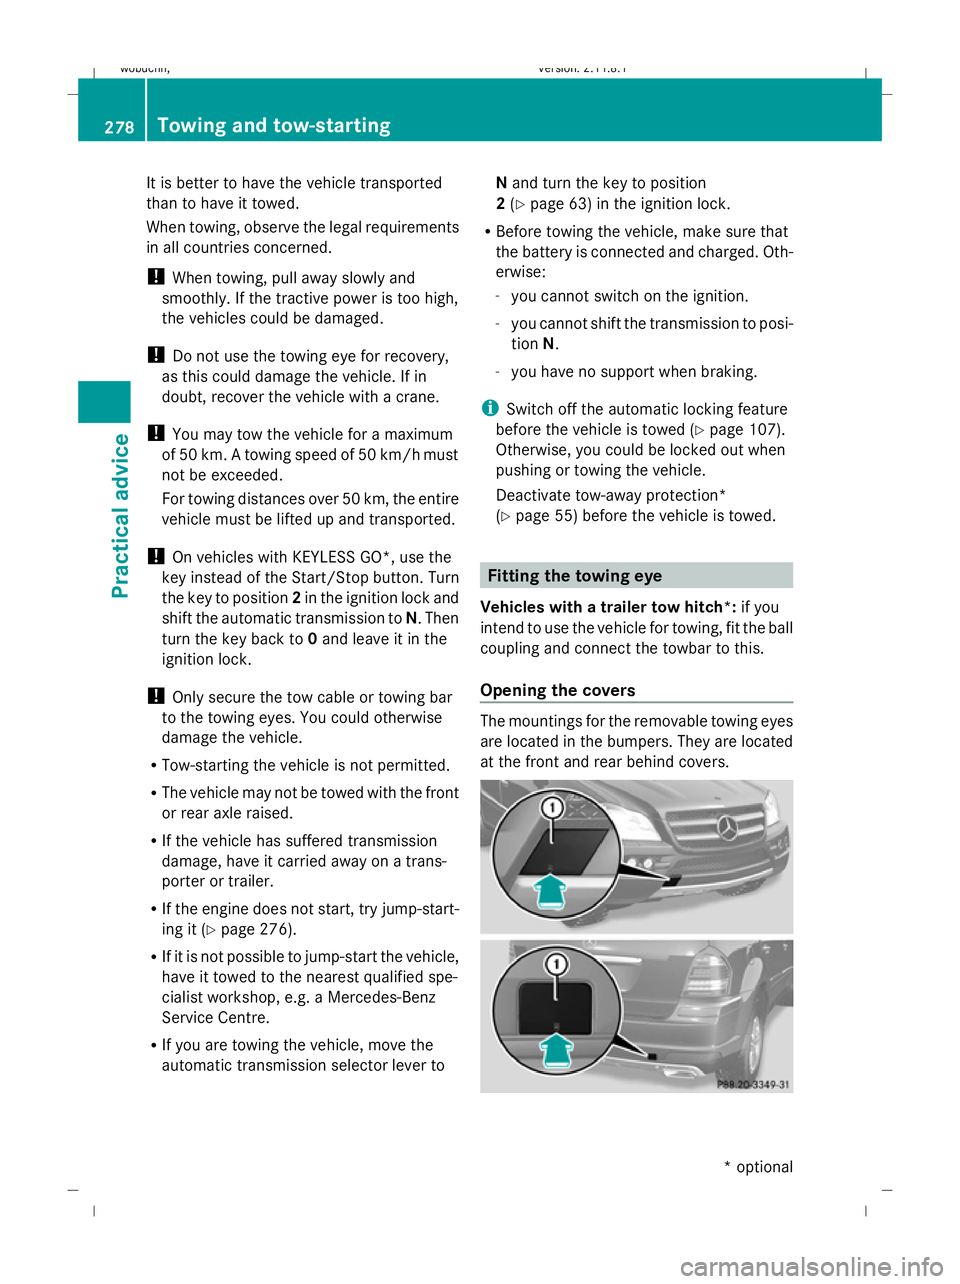
Opening the covers The mountings for the removable towing eyes
are located in the bumpers. They are located
at the front and rear behind covers. 278
Towing and tow-startingPractical advice
* optional
X164_AKB; 2; 3, en-GB
wobuchh,
Version: 2.11.8.1 2009-03-31T14:14:58+02:00 - Seite 278
Dateiname: 6515431202_buchblock.pdf; erzeugt am 01. Apr 2009 00:18:19; WK
Page 282 of 309
X
Press cover :inwards on the marking in
the direction of the arrow.
X Take cover :off the opening.
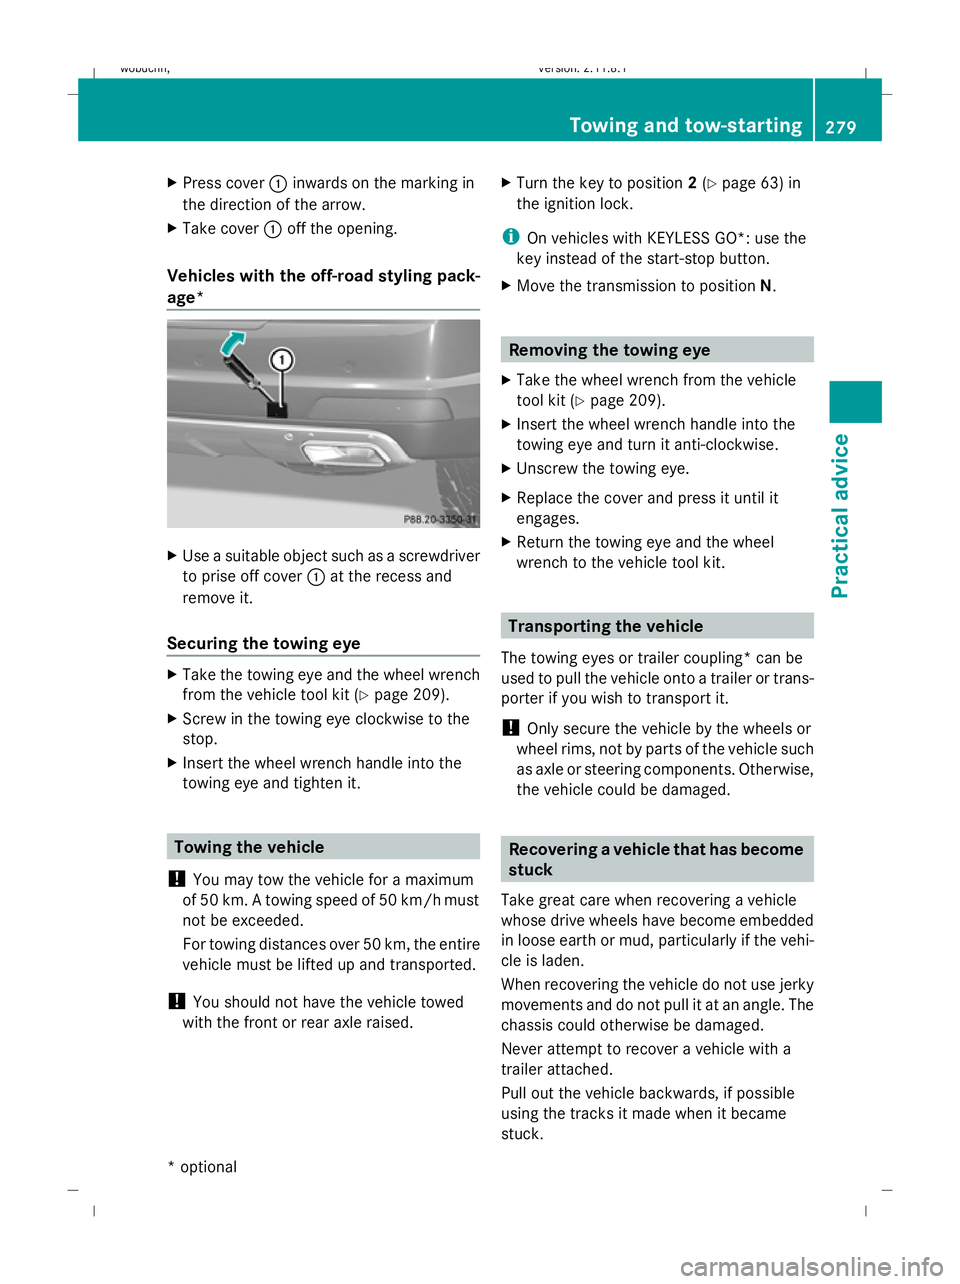
Vehicles with the off-road styling pack-
age* X
Use a suitable object such as a screwdriver
to prise off cover :at the recess and
remove it.
Securing the towing eye X
Take the towing eye and the wheel wrench
from the vehicle tool kit (Y page 209).
X Screw in the towing eye clockwise to the
stop.
X Insert the wheel wrench handle into the
towing eye and tighten it. Towing the vehicle
! You may tow the vehicle for a maximum
of 50 km. A towing speed of 50 km/hm ust
not be exceeded.
For towing distances over 50 km, the entire
vehicle must be lifted up and transported.
! You should not have the vehicle towed
with the front or rear axle raised. X
Turn the key to position 2(Y page 63) in
the ignition lock.
i On vehicles with KEYLESS GO*: use the
key instead of the start-stop button.
X Move the transmission to position N. Removing the towing eye
X Take the wheel wrench from the vehicle
tool kit (Y page 209).
X Insert the wheel wrench handle into the
towing eye and turn it anti-clockwise.
X Unscrew the towing eye.
X Replace the cover and press it until it
engages.
X Return the towing eye and the wheel
wrench to the vehicle tool kit. Transporting the vehicle
The towing eyes or trailer coupling* can be
used to pull the vehicle onto a trailer or trans-
porter if you wish to transport it.
! Only secure the vehicle by the wheels or
wheel rims, not by parts of the vehicle such
as axle or steering components. Otherwise,
the vehicle could be damaged. Recovering a vehicle that has become
stuck
Take great care when recovering a vehicle
whose drive wheels have become embedded
in loose earth or mud, particularly if the vehi-
cle is laden.
When recovering the vehicle do not use jerky
movements and do not pull it at an angle. The
chassis could otherwise be damaged.
Never attempt to recover a vehicle with a
trailer attached.
Pull out the vehicle backwards, if possible
using the tracks it made when it became
stuck. Towing and tow-starting
279Practical advice
* optional
X164_AKB; 2; 3, en-GB
wobuchh,
Version: 2.11.8.1 2009-03-31T14:14:58+02:00 - Seite 279 Z
Dateiname: 6515431202_buchblock.pdf; erzeugt am 01. Apr 2009 00:18:20; WK
Page 284 of 309

Before changing a fuse
X Park the vehicle.
X Switch off all electrical consumers.
X Remove the key from the ignition lock. Dashboard fuse boxes
!
Do not use a pointed object such as a
screwdriver to open the cover in the dash-
board. You could damage the dashboard or
the cover.
X To open: open the front-passenger door.
X Pull cover :outwards in the direction of
the arrow and remove it.
X To close: clip in cover :at the front.
X Fold cover :inwards until it engages.
X Close the front-passenger door. Fuse box in the engine compartment
Illustrated: GL 320 CDI X
To open: open the bonnet (Y page 174).
X Remove moisture from the fuse box using
a dry cloth.
X Fold clamps ;upwards.
X Fold up fuse box cover :and remove it
towards the front of the vehicle.
X To close: check whether the rubber seal is
lying correctly in lid :.
X Insert lid :into the bracket at the rear of
the fuse box.
! The cover must be fitted properly; other-
wise, moisture or dirt could affect the oper-
ation of the fuses.
X Fold down lid :and secure with
clamps ;.
X Close the bonnet (Y page 175). Fuse box in the luggage compartment
X
To open: open the tailgate.
X Turn catch :in the direction of the arrow.
X Open cover ;downwards. Fuses
281Practical advice
X164_AKB; 2; 3, en-GB
wobuchh, Version: 2.11.8.1 2009-03-31T14:14:58+02:00 - Seite 281 Z
Dateiname: 6515431202_buchblock.pdf; erzeugt am 01. Apr 2009 00:18:21; WK