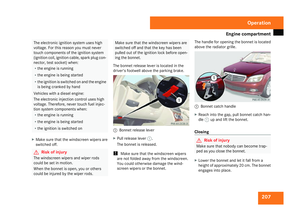
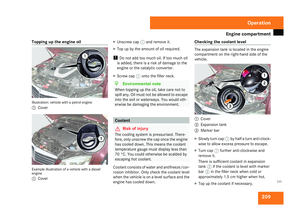
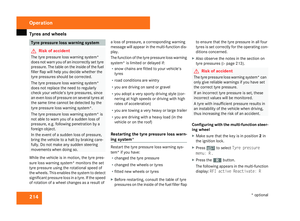
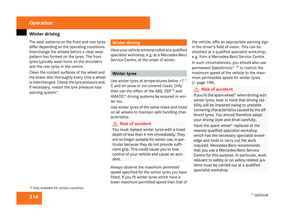
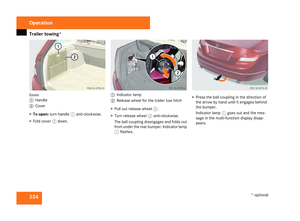
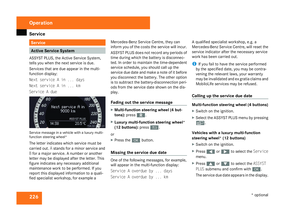
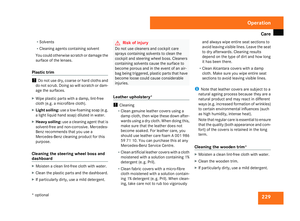
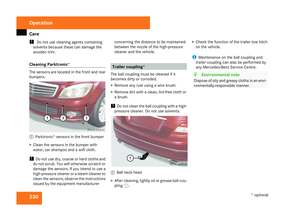
Page 177 of 377

Sliding sunroof
1741
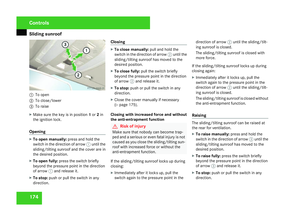
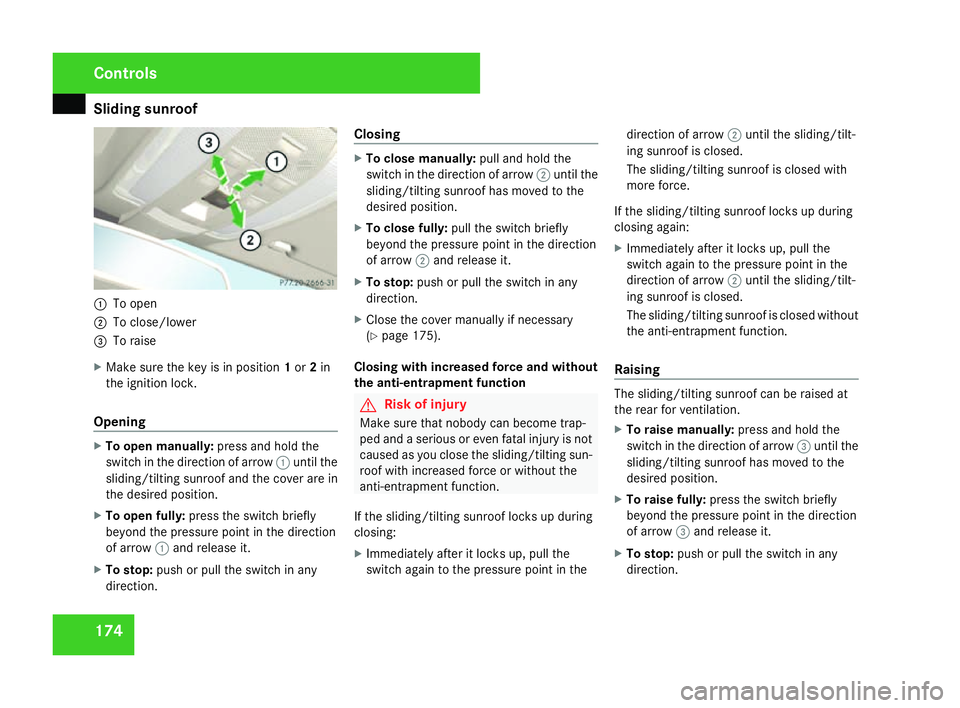
To open
2 To close/lower
3 To raise
X Make sure the key is in position 1or 2in
the ignition lock .
Opening X
To open manually: press and hold the
switch in the direction of arrow 1until th e
sliding/tilting sunroof and the cover are in
the desired position.
X To open fully: press the switch briefl y
beyond the pressure point in the direction
of arrow 1and release it.
X To stop: push or pull the switch in any
direction. Closin
g X
To close manually: pull and hold the
switch in the direction of arrow 2until th e
sliding/tilting sunroof has moved to the
desired position.
X To close fully: pull the switch briefl y
beyond the pressure point in the direction
of arrow 2and release it.
X To stop: push or pull the switch in any
direction.
X Close the cover manually if necessary
(Y page 175).
Closing with increased force and without
the anti-entrapment function G
Risk of injury
Make sure that nobody can become trap -
ped and a serious or even fatal injury is not
caused as you close the sliding/tilting sun-
roof with increased force or without the
anti-entrapment function .
If the sliding/tilting sunroof locks up during
closing:
X Immediately after it locks up, pull the
switch again to the pressure point in the direction of arrow
2until the sliding/tilt -
ing sunroof is closed.
The sliding/tilting sunroof is closed with
more force.
If the sliding/tilting sunroof locks up durin g
closing again:
X Immediately after it locks up, pull the
switch again to the pressure point in the
direction of arrow 2until the sliding/tilt -
ing sunroof is closed.
The sliding/tilting sunroof is closed without
the anti-entrapment function .
Raisin g The sliding/tilting sunroof can be raised at
the rear for ventilation.
X
To raise manually: press and hold the
switch in the direction of arrow 3until th e
sliding/tilting sunroof has moved to the
desired position.
X To raise fully: press the switch briefl y
beyond the pressure point in the direction
of arrow 3and release it.
X To stop: push or pull the switch in any
direction. Controls
204_AKB; 2; 3, en-G
B
mkalafa , 2007-06-26T23:11:51+02:00 - Seite 174
Page 178 of 377

Sliding sunroof
175
Lowering and closing X
To lower manually: pull and hold the
switch in the direction of arrow 2until th e
sliding/tilting sunroof has moved to the
desired position.
X To lower fully: pull the switch briefl y
beyond the pressure point in the direction
of arrow 2and release it.
X To stop: push or pull the switch in any
direction.
Rain-closing feature *When the key is in position
0in the ignition
lock or is removed, the sliding/tilting sunroof
closes automatically:
R If it starts to rain
R At extreme outside temperatures
R After 6 hours
R If there is a malfunction in the power supply
The rear of the sliding/tilting sunroof is then
raised in order to ventilate the interior of the
vehicle .
i The sliding/tilting sunroof is opened
slightly again if it is obstructed while being closed by the rain-closing feature. The rain-
closing feature is then deactivated.
i The sliding/tilting sunroof does not close
if:
R It is raised at the rear
R It is blocked
R No rain is falling on the windscreen (e.g.
because the vehicle is under a bridge or
in a carport)
Opening and closing the cover The cover functions as a sunblind. When you
open the sliding/tilting sunroof, the cover
moves back with it.
When the sliding/tilting sunroof is closed or
raised at the rear, you can open or close the
cover manually.
Resetting the sliding/tilting sunroof
Reset the sliding/tilting sunroof if it does not
open smoothly: Sliding/tilting sunroof operation
1 To open
2 To close/lower
3 To raise
X Make sure the key is in position 1or 2in
the ignition lock .
X Press and hold the switch in the direction
of arrow 3until the sliding/tilting sunroo f
is fully raised at the rear.
X Keep the switch pressed for an additional
second.
X Make sure that the sliding/tilting sunroof
can be opened or closed fully again
(Y page 174).
X If this is not the case, visit a qualified spe-
cialist workshop. Controls
* optional
204_AKB; 2; 3, en-GB
mkalafa
, 2007-06-26T23:11:51+02:00 - Seite 175
Page 179 of 377

Sliding sunroof
176 Panorama sliding sunroof*
Panorama sliding sunroof G
Risk of injury
Make sure that nobody can become trap -
ped when closing the panorama sliding sun-
roof. If danger threatens, release the switc h
and push it briefly in any direction to stop
the panorama sliding sunroof. G
Risk of injury
The glass in the panorama sliding sunroof
could break in an accident. If you are not
wearing a seat belt, there is a risk that yo u
could be thrown through the opening in the
event of the vehicle overturning. Therefore,
always wear a seat belt to reduce the ris k
of injuries.
! Only open the panorama sliding sunroof
if it is free of snow and ice. Otherwise, mal-
functions may occur.
Do not allow anything to protrude from the
panorama sliding sunroof. The seals could
otherwise be damaged.
i When the panorama sliding sunroof is
open, resonance noises may occur as well as the usual airflow noises. They are caused
by minor pressure fluctuations in the vehi-
cle interior. Change the position of the pan-
orama sliding sunroof or open a side
window slightly to reduce or eliminate
these noises.
i It is also possible to open and close the
panorama sliding sunroof from the outsid e
using the "Summer opening" (Y page 111 )
and the "Convenience clos-
ing" (Y page 112) features respectively.
The switch is located on the overhead contro l
panel at the front. 1
To open
2 To close/lower
3 To raise X
Make sure that the key is in position 1or
2 in the ignition lock .
Opening
X To open manually: press and hold the
switch in the direction of arrow 1until th e
panorama sliding sunroof has moved to the
desired position .
X To open fully: press the switch briefl y
beyond the pressure point in the direction
of arrow 1and release it.
X To stop: push or pull the switch in any
direction.
Closin g
X To close manually: press and hold the
switch in the direction of arrow 2until th e
panorama sliding sunroof has moved to the
desired position .
X To close fully: pull the switch briefl y
beyond the pressure point in the direction
of arrow 2and release it.
X To stop: push or pull the switch in any
direction. Controls
* optional
204_AKB; 2; 3, en-G
B
mkalafa , 2007-06-26T23:11:51+02:00 - Seite 176
Page 180 of 377

Sliding sunroof
177
Closing with increased force and without
the anti-entrapment function G
Risk of injury
Make sure that nobody can become trap -
ped and a serious or even fatal injury is not
caused as you close the panorama sliding
sunroof with increased force or without the
anti-entrapment function .
If the panorama sliding sunroof locks up dur-
ing closing:
X Immediately after it locks up, pull the
switch again to the pressure point in the
direction of arrow 2until the panoram a
sliding sunroof is closed.
The panorama sliding sunroof is closed
with more force.
If the panorama sliding sunroof locks up dur-
ing closing again:
X Immediately after it locks up, pull the
switch again to the pressure point in the
direction of arrow 2until the panoram a
sliding sunroof is closed.
The panorama sliding sunroof is closed
without the anti-entrapment function. Raisin
g
The panorama sliding sunroof can be raised
at the rear for ventilation.
X To raise manually: press and hold the
switch in the direction of arrow 3until th e
panorama sliding sunroof has moved to the
desired position .
X To raise fully: briefly press the switch
beyond the pressure point in the direction
of arrow 3and release it.
X To stop: push or pull the switch in any
direction.
Lowering and closin g
X To lower manually: press and hold the
switch in the direction of arrow 2until th e
panorama sliding sunroof has moved to the
desired position .
X To lower fully: briefly pull the switch
beyond the pressure point in the direction
of arrow 2and release it.
X To stop: push or pull the switch in any
direction. Roller sunblinds The roller sunblinds provide protection from
the sun. The two roller sunblinds can only be
opened and closed together when the pano-
rama sliding sunroof is closed . G
Risk of injury
Make sure that nobody can become trap -
ped as you open or close the roller sun-
blinds.
The switch is on the overhead control panel. 1
To open
2 To close
3 To open
X Make sure that the key is in position 1or
2 in the ignition lock . Cont
rols
204_AKB; 2; 3, en-GB
mkalafa,
2007-06-26T23:11:51+02:00 - Seite 177
Page 181 of 377

Sliding sunroof
178
Opening
X
To open manually: press the switch in the
direction of arrow 1or3 until the roller
sunblinds have moved to the desired posi -
tion.
X To open fully :briefly press the switc h
beyond the pressure point in the direction
of arrow 1or3 .
X To stop: push or pull the switch in any
direction.
Closin g
X To close manually: pull the switch in the
direction of arrow 2or until the roller sun-
blinds have moved to the desired position.
X To close fully :briefly pull the switc h
beyond the pressure point in the direction
of arrow 2.
X To stop: push or pull the switch in any
direction.
Rain-closing feature *When the key is in position
0in the ignition
lock or is removed, the panorama sliding sun-
roof closes automatically: R
if it starts to rain
R at extreme outside temperatures
R after 6 hour s
R if there is a malfunction in the power supply
The panorama sliding sunroof remains raised
at the rear in order to allow ventilation of the
vehicle interior .
i The panorama sliding sunroof does not
close if:
R it is raised at the rear
R it is blocked
R no rain is falling within the field of the rain
sensor in the windscreen (e.g. because
the vehicle is under a bridge or in a car -
port )
Resetting the panorama sliding sunroo f
and the roller sunblinds Reset the panorama sliding sunroof and the
roller sunblinds if the panorama sliding sun-
roof or the roller sunblinds do not ope
n
smoothly. 1
To open
2 To close/lower
3 To raise
X Make sure that the key is in position 1or
2 in the ignition lock .
X Pull and hold the switch to the pressure
point in the direction of arrow 2and hold
it until the roller sunblinds are fully closed.
X Keep the switch pulled for an additional
second.
X Press and hold the switch to the pressure
point in the direction of arrow 1and hold
it until the roller sunblinds are fully opened.
X Press the switch to the pressure point in
the direction of arrow 1and hold it until Control
s
* optional
204_AKB; 2; 3, en-GB
mkalafa,
2007-06-26T23:11:51+02:00 - Seite 178
Page 182 of 377

Loading and stowing
179
the panorama sliding sunroof is open about
10 cm
.
X Pull the switch to the pressure point in the
direction of arrow 2and hold it until th e
panorama sliding sunroof is fully closed.
X Keep the switch pulled for an additional
second.
X Check that the panorama sliding sunroo f
can be fully automatically opened agai n
( Y page 176).
X If this is not the case, consult a qualified
specialist workshop. Loading and stowing
Cup holder
G
Risk of injury
Keep the cup holder closed while the vehi-
cle is in motion. Otherwise, vehicle occu -
pants could be injured by objects being
thrown around if you:
R brake sharply
R change direction suddenly
R have an accident
Only use the cup holders for containers of
the right size and which have lids. Other-
wise, the drinks could spill.
Cup holders should not be used for hot
drinks. Otherwise, you may scald yourself. Cup holder* in the centre console 1
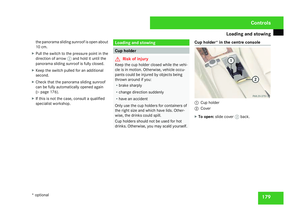
Cup holder
2 Cove r
X To open: slide cover 2back. Controls
* optional
204_AKB; 2; 3, en-GB
mkalafa,
2007-06-26T23:11:51+02:00 - Seite 179
Page 183 of 377

Loading and stowing
180
Fitting/removing the cup holder
Removing
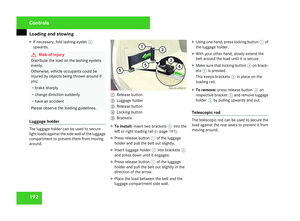
1
Driver's side groove
2 Front-passenger side groove
3 Retainer
X Carefully pry off groove 2on the front-
passenger side with a suitable tool until
retainer 3is visible.
X Pull the cup holder slightly upwards until
the stop.
X Carefully pry off groove 1on the driver's
side with a suitable tool. At the same time,
pull the cup holder upwards a little until the
stop.
X Alternately pry the groove on driver's side
1 and front-passenger side 2. Simulta -neously pull the cup holder upwards until it
can be removed.
Fittin g 1
Wedge-shaped upper section of the cup
holder
2 Left and right grooves
3 Left and right tongues
X Insert left and right grooves 2of the cup
holder into side tongues 3. Simultane-
ously insert the cup holder in such a wa y
that the wedge of the upper section of cu p
holder 1faces forwards.
X Press the cup holder down until it engages
on the front-passenger side. Cup holder in the rear seat armrest
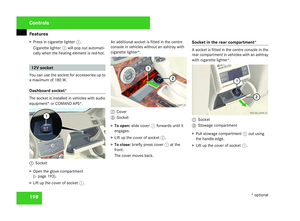
1
Release butto n
2 Cup holder
X To open: fold down the rear seat armrest.
X Lift the cover of the rear seat armrest.
X Press release button 1.
Cup holder 2folds out to the front.
X Fold the cover of the rear seat armrest back
down again if necessary.
X To close: lift the cover of the rear seat arm-
rest.
X Fold cup holder 2back until it engages. Controls
204_AKB; 2; 3, en-GB
mkalafa,
2007-06-26T23:11:51+02:00 - Seite 180
Page 184 of 377

Loading and stowing
181Roof rack system*
G
Risk of accident and injury
An incorrectly secured roof rack, ski rack
or load could work loose from the vehicle.
These objects may then be thrown around
and can injure you or others or cause an
accident. Follow the roof rack/ski rack
manufacturers' installation instructions
and special instructions for use.
The roof load raises the vehicle's centre of
gravity, thereby affecting vehicle handling.
You must always observe the maximum
roof load of 100 kg. Always adapt your driv-
ing style to the prevailing road, traffic and
weather conditions and drive with particu -
lar care if the roof is laden.
i Mercedes-Benz roof racks have been spe-
cially developed and tested in accordance
with Mercedes-Benz standards. These roof
racks comply with DIN standard 75302 and
are additionally subjected to crash and
durability tests.
! Mercedes-Benz recommends that you
only use roof rack systems which have
been tested and approved for Mercedes- Benz vehicles. This helps to prevent dam-
age to the vehicle.
Position the load on the roof rack in such
a
way that the vehicle is not damaged, even
when it is in motion .
Make sure that, depending on the vehicle's
equipment, you can raise the sliding/tilting
sunroof* or panorama sliding/tilting sun-
roof* fully and open the boot lid/tailgate
fully.
Saloon 1
Covers
! To avoid damaging or scratching the cov-
ers, do not use metallic or hard objects to
open them. X
Open covers 1carefully in the direction of
the arrow .
X Fold covers 1upwards.
X Only secure the roof rack to the anchorage
points under covers 1.
Observe the manufacturer's installation
instructions.
Estate X
Secure the roof rack to the roof rails.
Observe the manufacturer's installation
instructions. Luggage net in the front-passenge
r
footwell G
Risk of injury
Only place lightweight objects in the lug-
gage net. Do not use it to transport heavy,
sharp-edged or fragile objects. The luggage
net cannot secure the objects sufficiently
in the event of an accident. Control
s
* optional
204_AKB; 2; 3, en-GB
mkalafa,
2007-06-26T23:11:51+02:00 - Seite 181