Page 233 of 377

Car
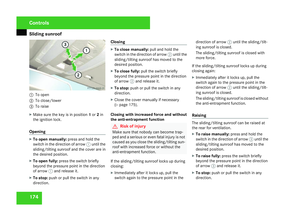
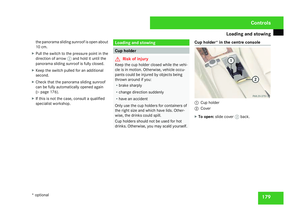
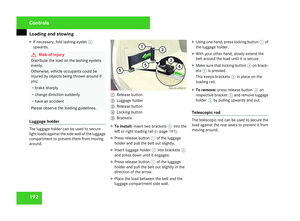
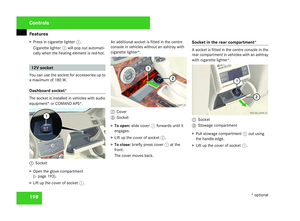
e 230
!
Do not use cleaning agents containing
solvents because these can damage the
wooden trim.
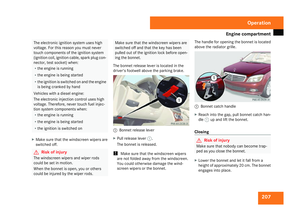
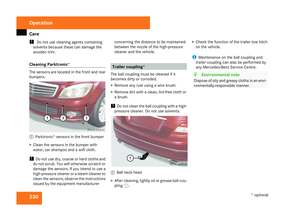
Cleaning Parktronic* The sensors are located in the front and rear
bumpers.
1
Parktronic* sensors in the front bumper
X Clean the sensors in the bumper wit h
water, car shampoo and a soft cloth.
! Do not use dry, coarse or hard cloths and
do not scrub. You will otherwise scratch or
damage the sensors. If you intend to use a
high-pressure cleaner or a steam cleaner to
clean the sensors, observe the instructions
issued by the equipment manufacturer concerning the distance to be maintained
between the nozzle of the high-pressure
cleaner and the vehicle. Trailer coupling*
The ball coupling must be cleaned if it
becomes dirty or corroded.
X Remove any rust using a wire brush.
X Remove dirt with a clean, lint-free cloth or
a brush.
! Do not clean the ball coupling with a high -
pressure cleaner. Do not use solvents.
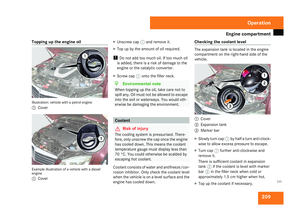
1 Ball neck hea d
X After cleaning, lightly oil or grease ball cou -
pling 1. X
Check the function of the trailer tow hitch
on the vehicle .
i Maintenance on the ball coupling and
trailer coupling can also be performed by
any Mercedes-Benz Service Centre. H
Environmental not
e
Dispose of oily and greasy cloths in an envi -
ronmentally-responsible manner. Operation
* optional
204_AKB; 2; 3, en-GB
mkalafa,
2007-06-26T23:11:51+02:00 - Seite 230
Page 234 of 377
231
Where will I find...?
...........................232
Display messages ............................. 236
Troubleshooting ................................ 276
Locking/unlocking in an emer-
gency ................................................. 300
Resetting triggered NECK-PRO
head restraints .................................. 303
Changing the batteries .....................304
Changing the bulbs ...........................305
Replacing the wiper blades ..............312
Flat tyre ............................................. 313
Battery ............................................... 324
Jump-starting .................................... 328
Towing and tow-starting ..................329
Fuses .................................................. 332 Practical advice
204_AKB; 2; 3, en-GB
mkalafa,
2007-06-26T23:11:51+02:00 - Seite 231
Page 235 of 377

Where will I find...?
232 Where will I find...?
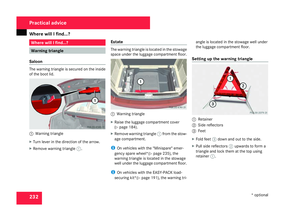
Warning triangle
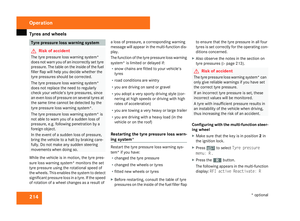
Saloon The warning triangle is secured on the insid
e
of the boot lid. 1
Warning triangle
X Turn lever in the direction of the arrow.
X Remove warning triangle 1. Estat
e The warning triangle is located in the stowage
space under the luggage compartment floor.
1
Warning triangle
X Raise the luggage compartment cover
(Y page 184).
X Remove warning triangle 1from the stow-
age compartment.
i On vehicles with the "Minispare" emer-
gency spare wheel*(Y page 235), the
warning triangle is located in the stowage
well under the luggage compartment floor.
i On vehicles with the EASY-PACK load-
securing kit*( Ypage 191), the warning tri- angle is located in the stowage well under
the luggage compartment floor.
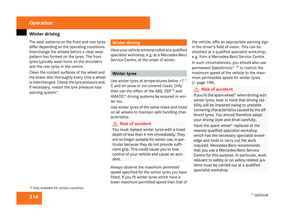
Setting up the warning triangle 1
Retainer
2 Side reflector s
3 Feet
X Fold feet 3down and out to the side.
X Pull side reflectors 2upwards to form a
triangle and lock them at the top using
retainer 1. Practical advice
* optional
204_AKB; 2; 3, en-GB
mkalafa,
2007-06-26T23:11:51+02:00 - Seite 232
Page 236 of 377
Where will I find...?
233First-aid kit
i Check the expiry dates of the first-aid kit
contents annually, and replace them if nec-
essary.
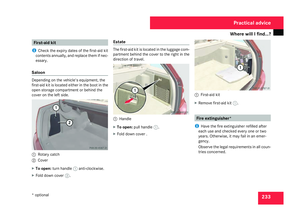
Saloon Depending on the vehicle's equipment, th
e
first-aid kit is located either in the boot in the
open storage compartment or behind the
cover on the left side .1
Rotary catch
2 Cove r
X To open: turn handle 1anti-clockwise.
X Fold down cover 2. Estat
e The first-aid kit is located in the luggage com-
partment behind the cover to the right in the
direction of travel.
1
Handl e
X To open: pull handle 1.
X Fold down cover . 1
First-aid kit
X Remove first-aid kit 1. Fire extinguisher*
i Have the fire extinguisher refilled after
each use and checked every one or two
years. Otherwise, it may fail in an emer -
gency.
Observe the legal requirements in all coun-
tries concerned. Practical advice
* optional
204_AKB; 2; 3, en-GB
mkalafa,
2007-06-26T23:11:51+02:00 - Seite 233
Page 237 of 377

Where will I find...?
234
The fire extinguisher is located underneath
the front of the driver's seat.
1
Tab
2 Fire extinguishe r
X Pull tab 1upwards.
X Remove fire extinguisher 2. Vehicle tool kit, TIREFIT kit, jack
,
spare wheel* and "Minispare" emer-
gency spare wheel*
The vehicle tool kit, TIREFIT kit etc. can be
found on the left of the stowage well under
the boot/luggage compartment floor.
X Saloon: open the stowage well under the
floor of the boot (Y page 184).
X Estate: open the stowage well under th e
floor of the luggage compartment
( Y page 184).
The vehicle tool kit contains :
R A towing ey e
R A wheel wrench
R A folding wheel chock
R Spare fuses
R A pair of glove s G
Risk of injury
The jack is designed only to raise and hol d
the vehicle for a short time while a whee l
is being changed.
If you are carrying out work on the vehicle,
you must use stands.
Make sure that the jack is placed on a firm ,
non-slip and level surface. Do not us e wooden blocks or similar objects as a jac
k
underlay. Otherwise the jack will not be
able to achieve its load-bearing capacit y
due to the restricted height.
Do not start the engine at any time while a
wheel is being changed.
Do not lie under the vehicle when it is bein g
supported by the jack. If you do not raise
the vehicle as described, it could slip off the
jack (e.g. if the engine is started or a door
or the boot lid is opened or closed) and you
could be seriously injured.
Do not lie under the vehicle when it is being
supported by the jack. If you do not raise
the vehicle as described, it could slip off the
jack (e.g. if the engine is started or a door
or the boot lid/tailgate is opened or closed)
and you could be seriously injured.
i When using the jack, you should also
observe the safety notes in the "Flat tyre"
section (Y page 313). Practical advice
* optional
204_AKB; 2; 3, en-GB
mkalafa,
2007-06-26T23:11:51+02:00 - Seite 234
Page 238 of 377
Where will I find...?
235
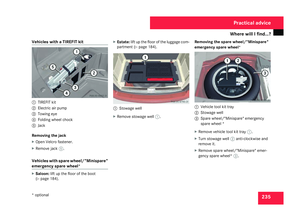
Vehicles with a TIREFIT kit
1
TIREFIT kit
2 Electric air pump
3 Towing eye
4 Folding wheel chock
5 Jack
Removing the jack
X Open Velcro fastener.
X Remove jack 5.
Vehicles with spare wheel/"Minispare "
emergency spare wheel* X
Saloon: lift up the floor of the boot
( Y page 184). X
Estate: lift up the floor of the luggage com -
partment (Y page 184). 1
Stowage well
X Remove stowage well 1. Removing the spare wheel/"Minispare"
emergency spare wheel
* 1
Vehicle tool kit tray
2 Stowage well
3 Spare wheel/"Minispare" emergency
spare wheel *
X Remove vehicle tool kit tray 1.
X Turn stowage well 2anti-clockwise and
remove it.
X Remove spare wheel/"Minispare" emer-
gency spare wheel* 3. Practical advice
* optional
204_AKB; 2; 3, en-GB
mkalafa,
2007-06-26T23:11:51+02:00 - Seite 235
Page 239 of 377

Display
messages 23
6 Setting up the folding wheel chock
The folding wheel chock serves as an addi-
tional measure for securing the vehicle, e.g.
when a wheel is being changed. 1
To fold the plates upwards
2 To fold out the lower plate
3 To insert the plate
X Fold both plates 1upwards.
X Fold out lower plate 2.
X Guide the lugs on the lower plate fully int o
the openings in base plate 3. Display messages
Note
s
The on-board computer shows warnings or
malfunctions in the multi-function display .
Certain display messages are accompanie d
by a warning tone or a continuous tone.
The multi-function display shows high priorit y
display messages in red. In the following
tables, these display messages are printed in
red.
Please respond in accordance with the dis-
play messages and follow the additional
notes in this Owner's Manual.
Vehicles with multi-function steering
wheel (4-button) Use the
íbutton on the multi-function
steering wheel to fade out low-priority mes-
sages. You cannot fade out display messages
of the highest priority. The multi-function dis-
play shows these messages continuously
until the causes for the messages have been
remedied.
The on-board computer saves some display
messages. Calling up display messages
( Y page 128). For some display messages, the
_symbol
appears in the multi-function display. More
detailed information on these display mes-
sages can be found below under "Text mes-
sages" or "Symbol messages".
Vehicles with a luxury multi-function
steering wheel* (12-button ) Use the
Lor the #button on the luxury
multi-function steering wheel to fade out low-
priority messages. You cannot fade out dis-
play messages of the highest priority. The
multi-function display shows these messages
continuously until the causes for the mes-
sages have been remedied.
The on-board computer saves some display
messages. Calling up display messages
( Y page 140).
All vehicles G
Risk of accident
No messages can be displayed if instru -
ment cluster and/or the multi-function dis-
play fail .
This means that you will not see information
about the driving situation, such as the
speed, outside temperature, warning/indi- Practical advice
* optional
204_AKB; 2; 3, en-GB
mkalafa,
2007-06-26T23:11:51+02:00 - Seite 236
Page 240 of 377

Display
messages 23
7 cator lamps, display messages or system
failures. The vehicle's handling character-
istics may be affected. Adjust your driving
style and speed accordingly .
Immediately consult a qualified specialist
workshop which has the necessary special-
ist knowledge and tools to carry out the
work required. Mercedes-Benz recom-
mends that you use a Mercedes-Benz
Service Centre for this purpose. In particu- lar, work relevant to safety or on safety-
related systems must be carried out at
a
qualified specialist workshop.
Before starting a journey, check that the
warning and indicator lamps are operatin g
correctly .
X Turn the key to position 2in the ignition
lock .
or X
Press the KEYLESS GO button* twice.
All warning and indicator lamps (except for
the main-beam indicator lamp and the turn
signal indicator lamps) light up and the
multi-function display is activated.
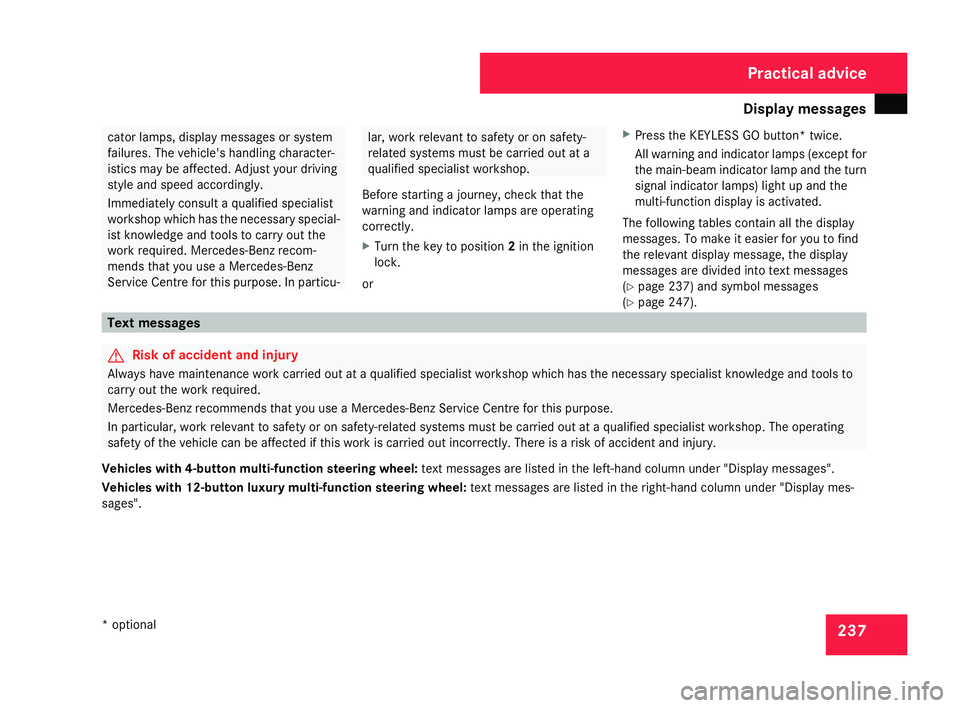
The following tables contain all the display
messages. To make it easier for you to find
the relevant display message, the display
messages are divided into text messages
( Y page 237) and symbol messages
( Y page 247). Text messages
G
Risk of accident and injury
Always have maintenance work carried out at a qualified specialist workshop which has the necessary specialist knowledge and tools to
carry out the work required .
Mercedes-Benz recommends that you use a Mercedes-Benz Service Centre for this purpose.
In particular, work relevant to safety or on safety-related systems must be carried out at a qualified specialist workshop. The operating
safety of the vehicle can be affected if this work is carried out incorrectly. There is a risk of accident and injury.
Vehicles with 4-button multi-function steering wheel: text messages are listed in the left-hand column under "Display messages".
Vehicles with 12-button luxury multi-function steering wheel: text messages are listed in the right-hand column under "Display mes-
sages". Practical advice
* optional
204_AKB; 2; 3, en-GB
mkalafa,
2007-06-26T23:11:51+02:00 - Seite 237