Page 1399 of 3061
EC-316
< SERVICE INFORMATION >
DTC P0182, P0183 FTT SENSOR
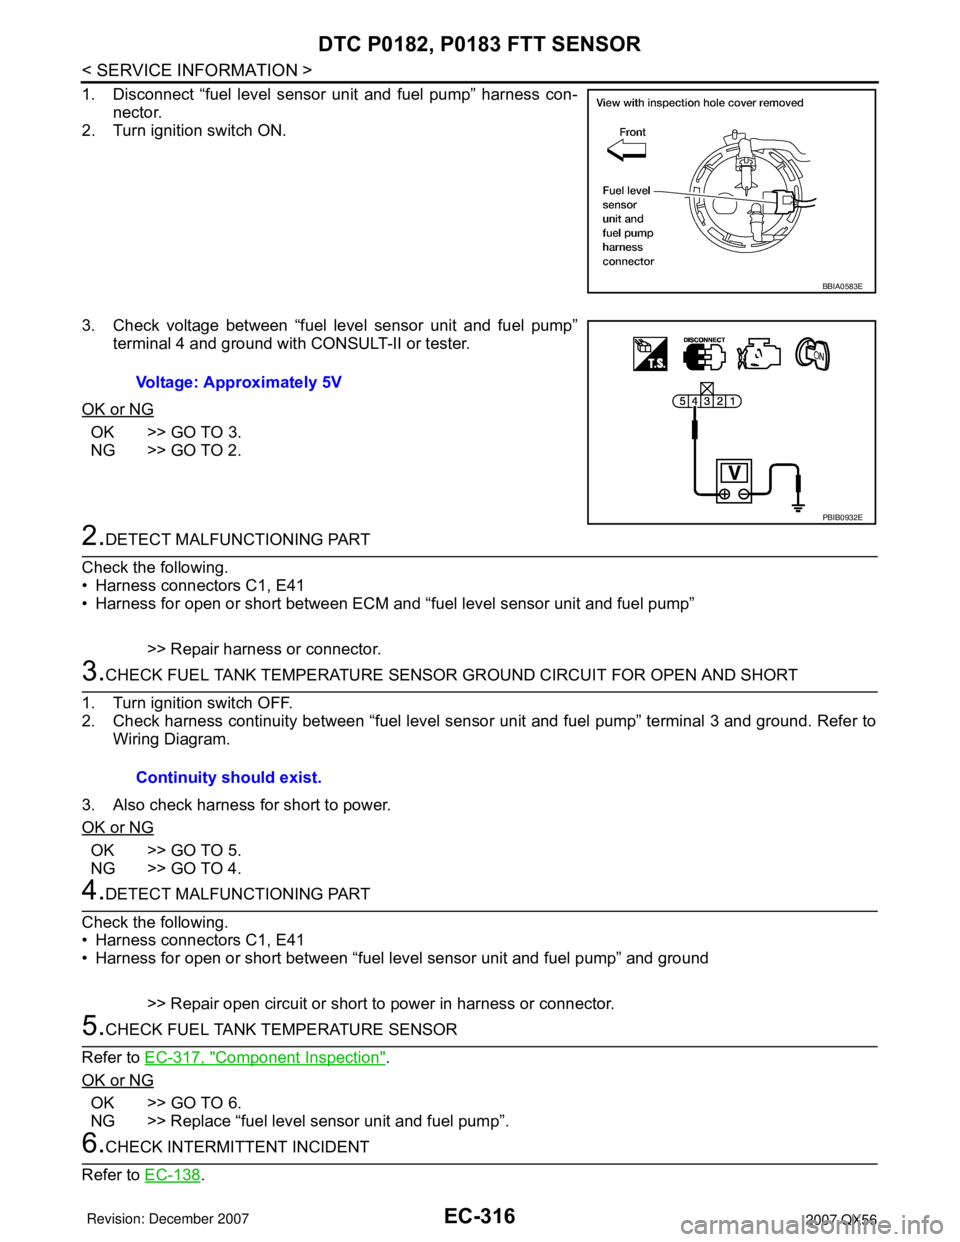
1. Disconnect “fuel level sensor unit and fuel pump” harness con-
nector.
2. Turn ignition switch ON.
3. Check voltage between “fuel level sensor unit and fuel pump”
terminal 4 and ground with CONSULT-II or tester.
OK or NG
OK >> GO TO 3.
NG >> GO TO 2.
2.DETECT MALFUNCTIONING PART
Check the following.
• Harness connectors C1, E41
• Harness for open or short between ECM and “fuel level sensor unit and fuel pump”
>> Repair harness or connector.
3.CHECK FUEL TANK TEMPERATURE SENSOR GROUND CIRCUIT FOR OPEN AND SHORT
1. Turn ignition switch OFF.
2. Check harness continuity between “fuel level sensor unit and fuel pump” terminal 3 and ground. Refer to
Wiring Diagram.
3. Also check harness for short to power.
OK or NG
OK >> GO TO 5.
NG >> GO TO 4.
4.DETECT MALFUNCTIONING PART
Check the following.
• Harness connectors C1, E41
• Harness for open or short between “fuel level sensor unit and fuel pump” and ground
>> Repair open circuit or short to power in harness or connector.
5.CHECK FUEL TANK TEMPERATURE SENSOR
Refer to EC-317, "
Component Inspection".
OK or NG
OK >> GO TO 6.
NG >> Replace “fuel level sensor unit and fuel pump”.
6.CHECK INTERMITTENT INCIDENT
Refer to EC-138
.
BBIA0583E
Voltage: Approximately 5V
PBIB0932E
Continuity should exist.
Page 1403 of 3061
EC-320
< SERVICE INFORMATION >
DTC P0222, P0223 TP SENSOR
Wiring Diagram
INFOID:0000000003531818
Specification data are reference values and are measured between each terminal and ground.
CAUTION:
Do not use ECM ground terminals when measuring input/output voltage. Doing so may result in dam-
age to the ECM's transistor. Use a ground other than ECM terminals, such as the ground.
BBWA1683E
Page 1405 of 3061
EC-322
< SERVICE INFORMATION >
DTC P0222, P0223 TP SENSOR
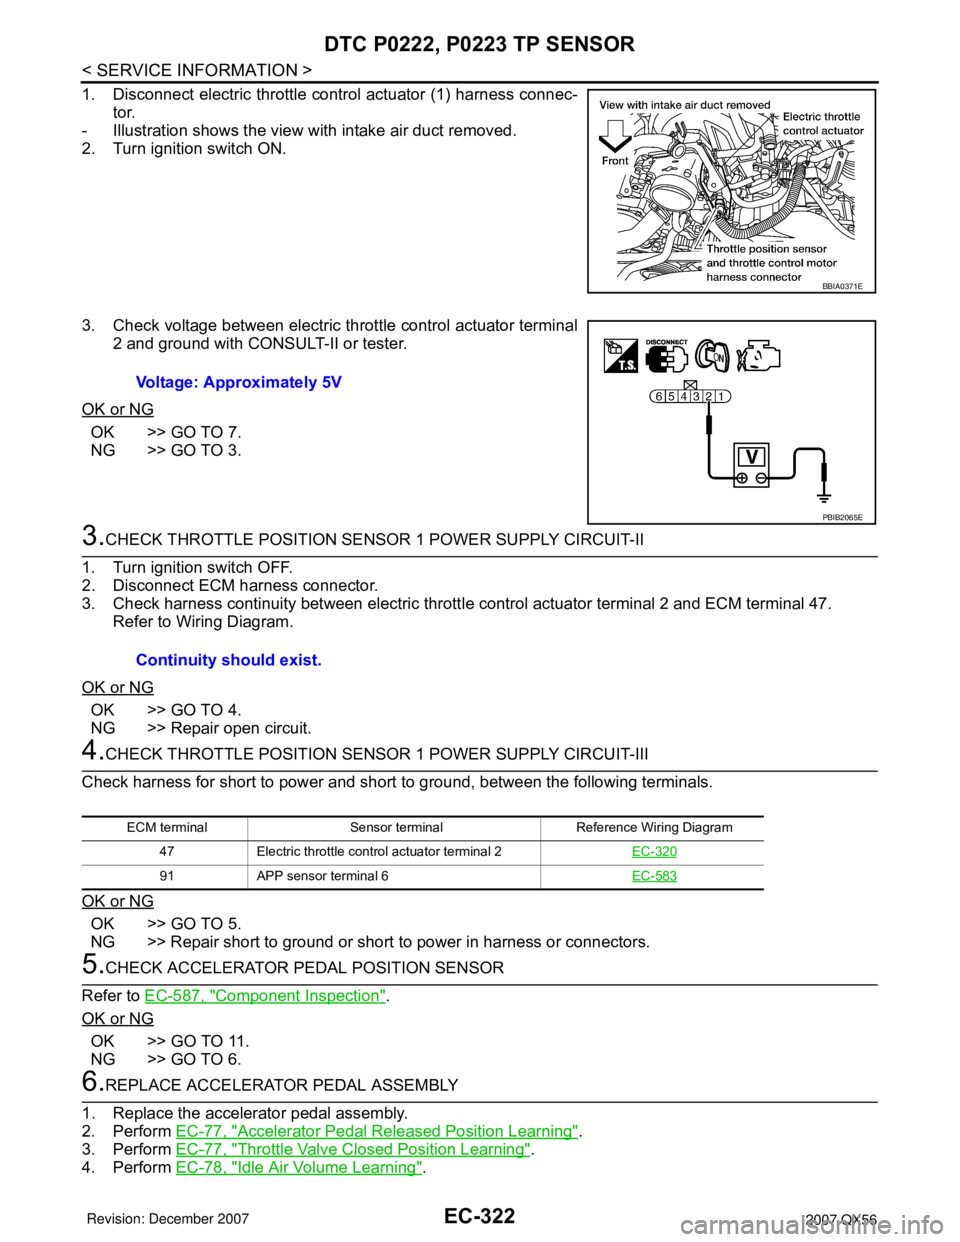
1. Disconnect electric throttle control actuator (1) harness connec-
tor.
- Illustration shows the view with intake air duct removed.
2. Turn ignition switch ON.
3. Check voltage between electric throttle control actuator terminal
2 and ground with CONSULT-II or tester.
OK or NG
OK >> GO TO 7.
NG >> GO TO 3.
3.CHECK THROTTLE POSITION SENSOR 1 POWER SUPPLY CIRCUIT-II
1. Turn ignition switch OFF.
2. Disconnect ECM harness connector.
3. Check harness continuity between electric throttle control actuator terminal 2 and ECM terminal 47.
Refer to Wiring Diagram.
OK or NG
OK >> GO TO 4.
NG >> Repair open circuit.
4.CHECK THROTTLE POSITION SENSOR 1 POWER SUPPLY CIRCUIT-III
Check harness for short to power and short to ground, between the following terminals.
OK or NG
OK >> GO TO 5.
NG >> Repair short to ground or short to power in harness or connectors.
5.CHECK ACCELERATOR PEDAL POSITION SENSOR
Refer to EC-587, "
Component Inspection".
OK or NG
OK >> GO TO 11.
NG >> GO TO 6.
6.REPLACE ACCELERATOR PEDAL ASSEMBLY
1. Replace the accelerator pedal assembly.
2. Perform EC-77, "
Accelerator Pedal Released Position Learning".
3. Perform EC-77, "
Throttle Valve Closed Position Learning".
4. Perform EC-78, "
Idle Air Volume Learning".
BBIA0371E
Voltage: Approximately 5V
PBIB2065E
Continuity should exist.
ECM terminal Sensor terminal Reference Wiring Diagram
47 Electric throttle control actuator terminal 2EC-320
91 APP sensor terminal 6EC-583
Page 1406 of 3061
DTC P0222, P0223 TP SENSOR
EC-323
< SERVICE INFORMATION >
C
D
E
F
G
H
I
J
K
L
MA
EC
N
P O
>>INSPECTION END
7.CHECK THROTTLE POSITION SENSOR 1 GROUND CIRCUIT FOR OPEN AND SHORT
1. Turn ignition switch OFF.
2. Disconnect ECM harness connector.
3. Check harness continuity between electric throttle control actuator terminal 4 and ECM terminal 66.
Refer to Wiring Diagram.
4. Also check harness for short to ground and short to power.
OK or NG
OK >> GO TO 8.
NG >> Repair open circuit or short to ground or short to power in harness or connectors.
8.CHECK THROTTLE POSITION SENSOR 1 INPUT SIGNAL CIRCUIT FOR OPEN AND SHORT
1. Check harness continuity between ECM terminal 50 and electric throttle control actuator terminal 1.
Refer to Wiring Diagram.
2. Also check harness for short to ground and short to power.
OK or NG
OK >> GO TO 9.
NG >> Repair open circuit or short to ground or short to power in harness or connectors.
9.CHECK THROTTLE POSITION SENSOR
Refer to EC-323, "
Component Inspection".
OK or NG
OK >> GO TO 11.
NG >> GO TO 10.
10.REPLACE ELECTRIC THROTTLE CONTROL ACTUATOR
1. Replace the electric throttle control actuator.
2. Perform EC-77, "
Throttle Valve Closed Position Learning".
3. Perform EC-78, "
Idle Air Volume Learning".
>>INSPECTION END
11 .CHECK INTERMITTENT INCIDENT
Refer to EC-138
.
>>INSPECTION END
Component InspectionINFOID:0000000003531820
THROTTLE POSITION SENSOR
1. Reconnect all harness connectors disconnected.
2. Perform EC-77, "
Throttle Valve Closed Position Learning".
3. Turn ignition switch ON.
4. Set selector lever to D position. Continuity should exist.
Continuity should exist.
Page 1412 of 3061
DTC P0300 - P0308 MULTIPLE CYLINDER MISFIRE, NO. 1 - 8 CYLINDER MIS-
FIRE
EC-329
< SERVICE INFORMATION >
C
D
E
F
G
H
I
J
K
L
MA
EC
N
P O
Check compression pressure. Refer to EM-64, "On-Vehicle Service".
OK or NG
OK >> GO TO 10.
NG >> Check pistons, piston rings, valves, valve seats and cylinder head gaskets.
10.CHECK FUEL PRESSURE
1. Install all removed parts.
2. Release fuel pressure to zero. Refer to EC-80, "
Fuel Pressure Check" .
3. Install fuel pressure gauge and check fuel pressure. Refer to EC-80, "
Fuel Pressure Check" .
OK or NG
OK >> GO TO 12.
NG >> GO TO 11.
11 .DETECT MALFUNCTIONING PART
Check the following.
• Fuel pump and circuit (Refer to EC-613
.)
• Fuel pressure regulator (Refer to EC-80, "
Fuel Pressure Check" .)
• Fuel lines
• Fuel filter for clogging
>> Repair or replace.
12.CHECK IGNITION TIMING
Check the following items. Refer to EC-71, "
Basic Inspection" .
OK or NG
OK >> GO TO 13.
NG >> Follow the EC-71, "
Basic Inspection" .
13.CHECK A/F SENSOR 1 INPUT SIGNAL
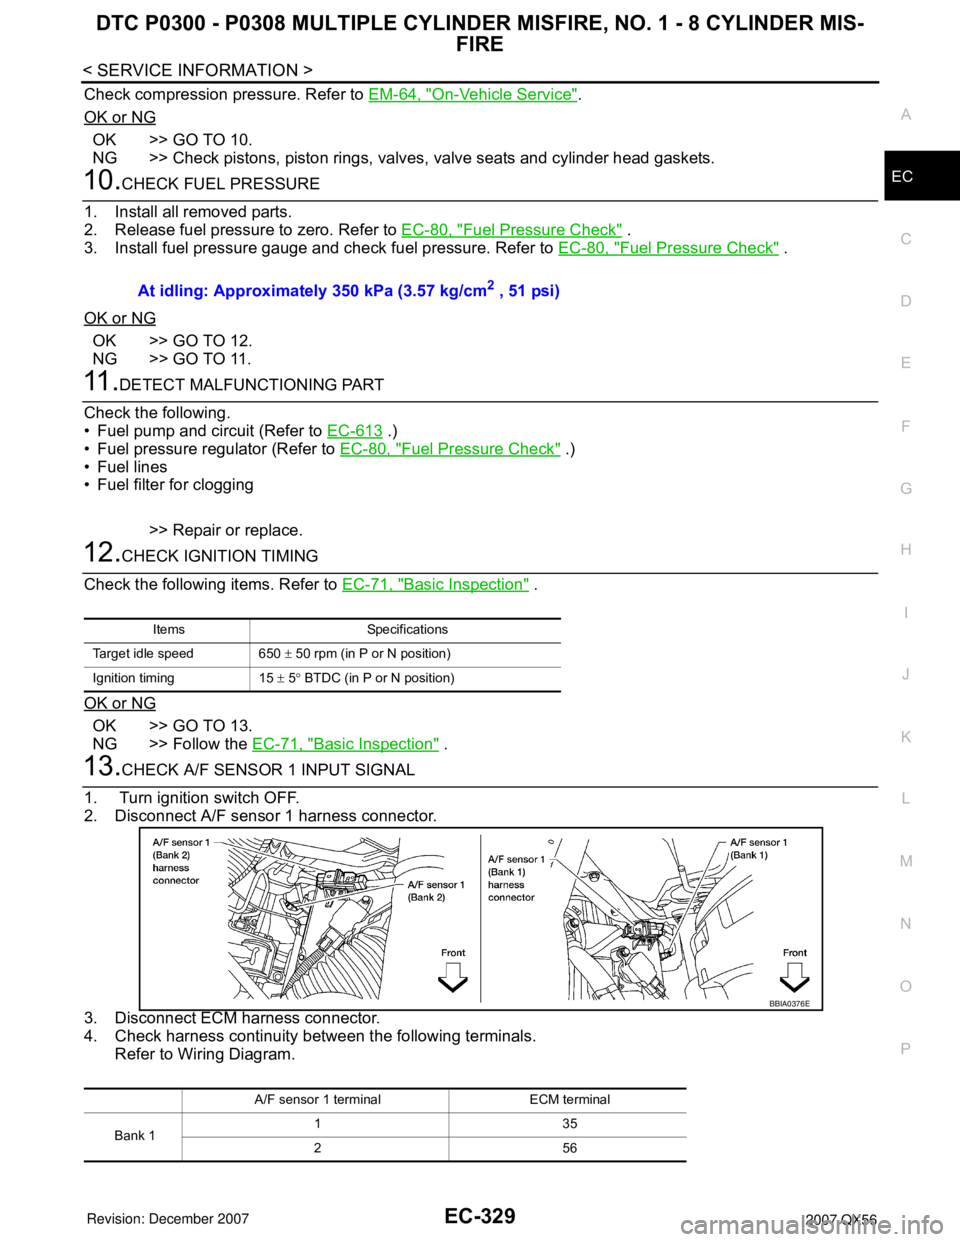
1. Turn ignition switch OFF.
2. Disconnect A/F sensor 1 harness connector.
3. Disconnect ECM harness connector.
4. Check harness continuity between the following terminals.
Refer to Wiring Diagram.At idling: Approximately 350 kPa (3.57 kg/cm
2 , 51 psi)
Items Specifications
Target idle speed 650 ± 50 rpm (in P or N position)
Ignition timing 15 ± 5° BTDC (in P or N position)
A/F sensor 1 terminal ECM terminal
Bank 1135
256
BBIA0376E
Page 1413 of 3061
EC-330
< SERVICE INFORMATION >
DTC P0300 - P0308 MULTIPLE CYLINDER MISFIRE, NO. 1 - 8 CYLINDER MIS-
FIRE
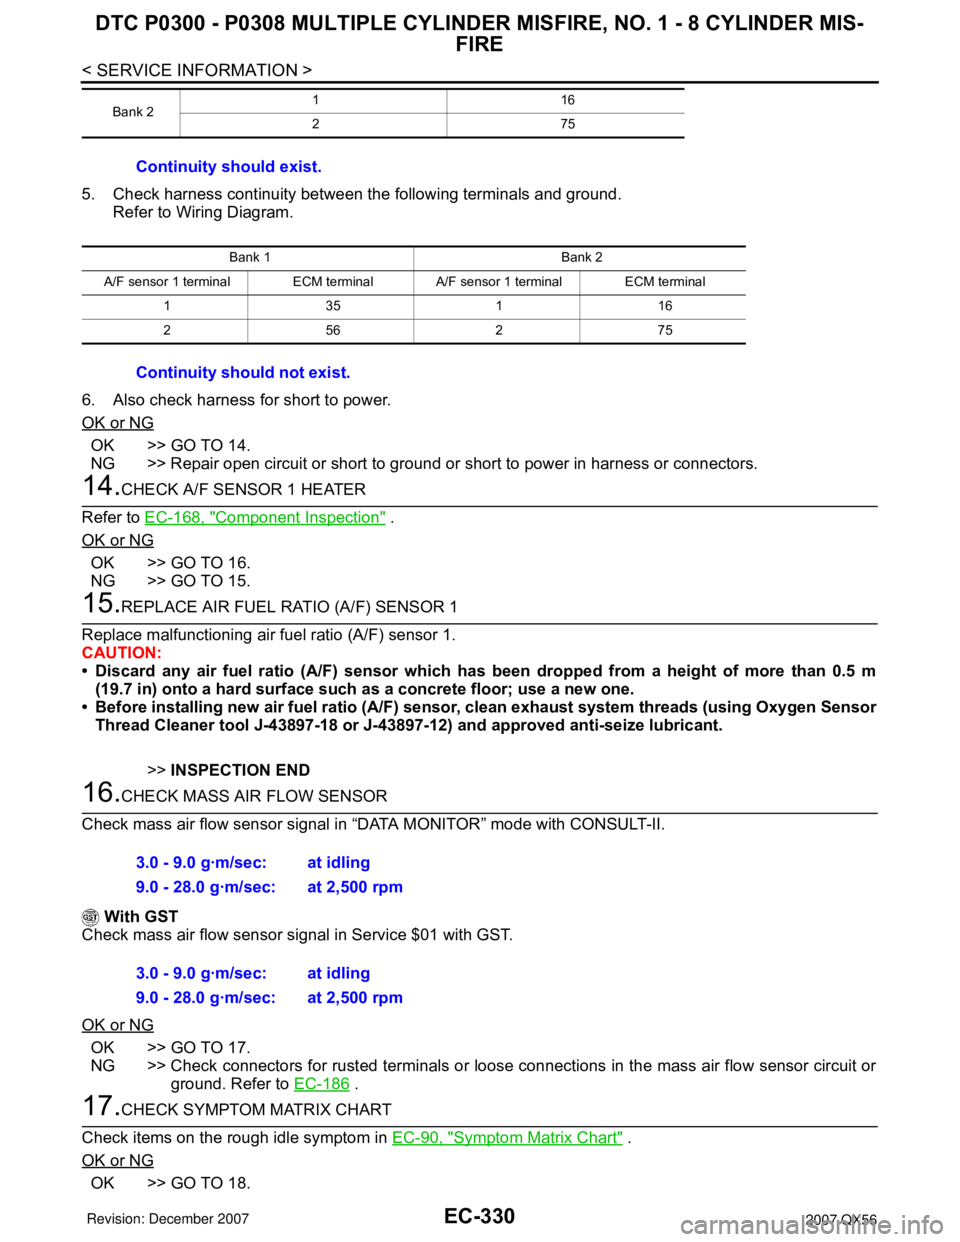
5. Check harness continuity between the following terminals and ground.
Refer to Wiring Diagram.
6. Also check harness for short to power.
OK or NG
OK >> GO TO 14.
NG >> Repair open circuit or short to ground or short to power in harness or connectors.
14.CHECK A/F SENSOR 1 HEATER
Refer to EC-168, "
Component Inspection" .
OK or NG
OK >> GO TO 16.
NG >> GO TO 15.
15.REPLACE AIR FUEL RATIO (A/F) SENSOR 1
Replace malfunctioning air fuel ratio (A/F) sensor 1.
CAUTION:
• Discard any air fuel ratio (A/F) sensor which has been dropped from a height of more than 0.5 m
(19.7 in) onto a hard surface such as a concrete floor; use a new one.
• Before installing new air fuel ratio (A/F) sensor, clean exhaust system threads (using Oxygen Sensor
Thread Cleaner tool J-43897-18 or J-43897-12) and approved anti-seize lubricant.
>>INSPECTION END
16.CHECK MASS AIR FLOW SENSOR
Check mass air flow sensor signal in “DATA MONITOR” mode with CONSULT-II.
With GST
Check mass air flow sensor signal in Service $01 with GST.
OK or NG
OK >> GO TO 17.
NG >> Check connectors for rusted terminals or loose connections in the mass air flow sensor circuit or
ground. Refer to EC-186
.
17.CHECK SYMPTOM MATRIX CHART
Check items on the rough idle symptom in EC-90, "
Symptom Matrix Chart" .
OK or NG
OK >> GO TO 18.
Bank 2116
275
Continuity should exist.
Bank 1 Bank 2
A/F sensor 1 terminal ECM terminal A/F sensor 1 terminal ECM terminal
135116
256275
Continuity should not exist.
3.0 - 9.0 g·m/sec: at idling
9.0 - 28.0 g·m/sec: at 2,500 rpm
3.0 - 9.0 g·m/sec: at idling
9.0 - 28.0 g·m/sec: at 2,500 rpm
Page 1416 of 3061
DTC P0327, P0328, P0332, P0333 KS
EC-333
< SERVICE INFORMATION >
C
D
E
F
G
H
I
J
K
L
MA
EC
N
P O
Wiring DiagramINFOID:0000000003531828
Specification data are reference values and are measured between each terminal and ground.
CAUTION:
Do not use ECM ground terminals when measuring input/output voltage. Doing so may result in dam-
age to the ECM's transistor. Use a ground other than ECM terminals, such as the ground.
BBWA2094E
Page 1417 of 3061
EC-334
< SERVICE INFORMATION >
DTC P0327, P0328, P0332, P0333 KS
Diagnosis Procedure
INFOID:0000000003531829
1.CHECK KNOCK SENSOR INPUT SIGNAL CIRCUIT FOR OPEN AND SHORT-I
1. Turn ignition switch OFF.
2. Disconnect ECM harness connector.
3. Check resistance between ECM terminals 15, 36 and ground. Refer to Wiring Diagram.
NOTE:
It is necessary to use an ohmmeter which can measure more than 10 MΩ.
4. Also check harness for short to ground and short to power.
OK or NG
OK >> GO TO 5.
NG >> GO TO 2.
2.CHECK KNOCK SENSOR INPUT SIGNAL CIRCUIT FOR OPEN AND SHORT-II
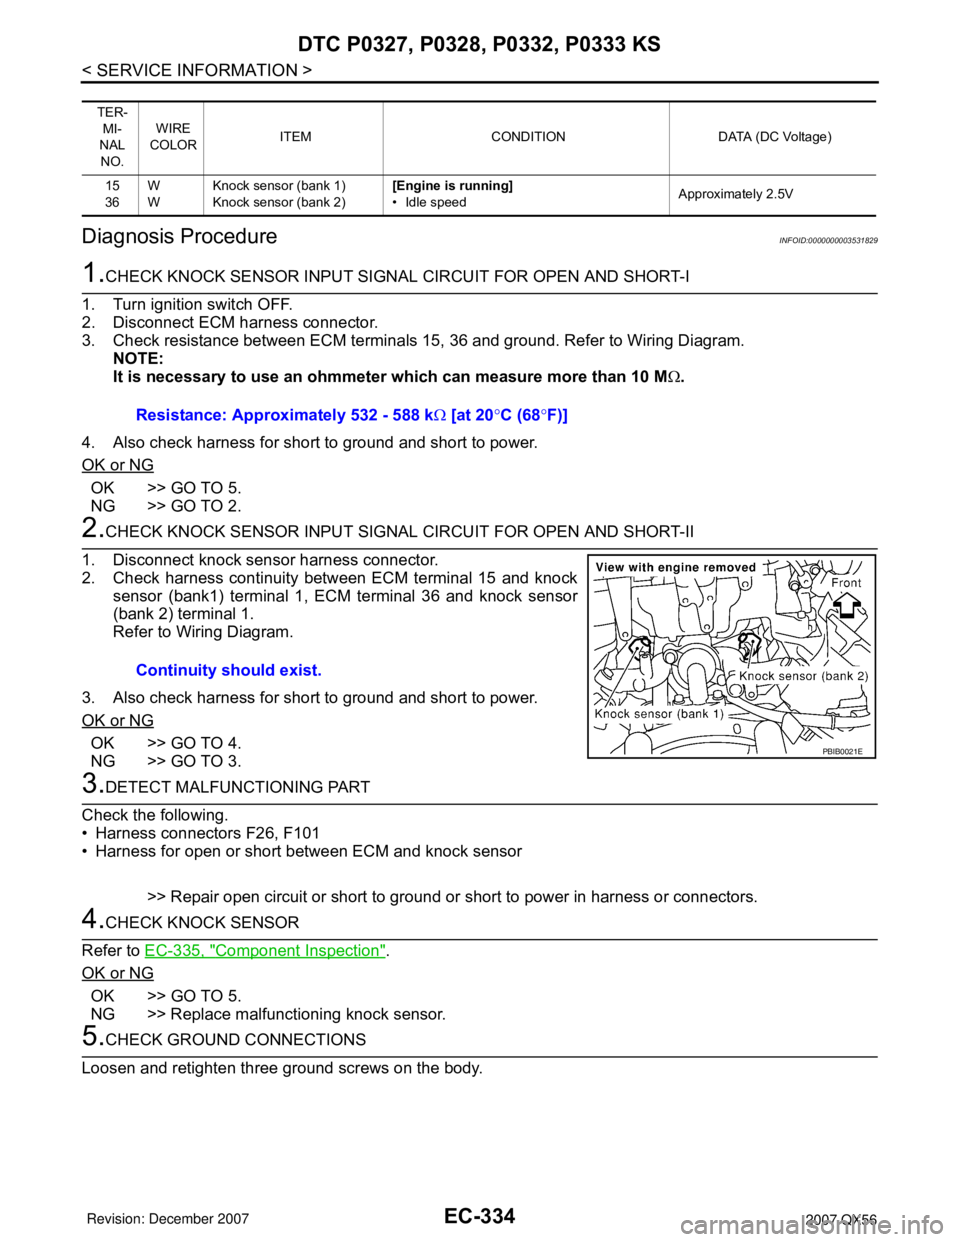
1. Disconnect knock sensor harness connector.
2. Check harness continuity between ECM terminal 15 and knock
sensor (bank1) terminal 1, ECM terminal 36 and knock sensor
(bank 2) terminal 1.
Refer to Wiring Diagram.
3. Also check harness for short to ground and short to power.
OK or NG
OK >> GO TO 4.
NG >> GO TO 3.
3.DETECT MALFUNCTIONING PART
Check the following.
• Harness connectors F26, F101
• Harness for open or short between ECM and knock sensor
>> Repair open circuit or short to ground or short to power in harness or connectors.
4.CHECK KNOCK SENSOR
Refer to EC-335, "
Component Inspection".
OK or NG
OK >> GO TO 5.
NG >> Replace malfunctioning knock sensor.
5.CHECK GROUND CONNECTIONS
Loosen and retighten three ground screws on the body.
TER-
MI-
NAL
NO.WIRE
COLORITEM CONDITION DATA (DC Voltage)
15
36W
WKnock sensor (bank 1)
Knock sensor (bank 2)[Engine is running]
• Idle speedApproximately 2.5V
Resistance: Approximately 532 - 588 kΩ [at 20°C (68°F)]
Continuity should exist.
PBIB0021E