2006 INFINITI M35 light
[x] Cancel search: lightPage 5500 of 5621
TROUBLE DIAGNOSIS FOR SYMPTOMS
TF-35
C
E
F
G
H
I
J
K
L
MA
B
TF
Revision: 2006 January2006 M35/M45
4. CHECK AWD CONTROL UNIT
Check AWD control unit input/output signal. Refer to TF-20, "
AWD Control Unit Input/Output Signal Reference
Va l u e s" .
OK or NG
OK >> GO TO 5.
NG >> Check AWD control unit pin terminals for damage or loose connection with harness connector. If
any items are damaged, repair or replace damaged parts.
5. CHECK OUTPUT SIGNAL WITH UNIFIED METER AND A/C AMP.
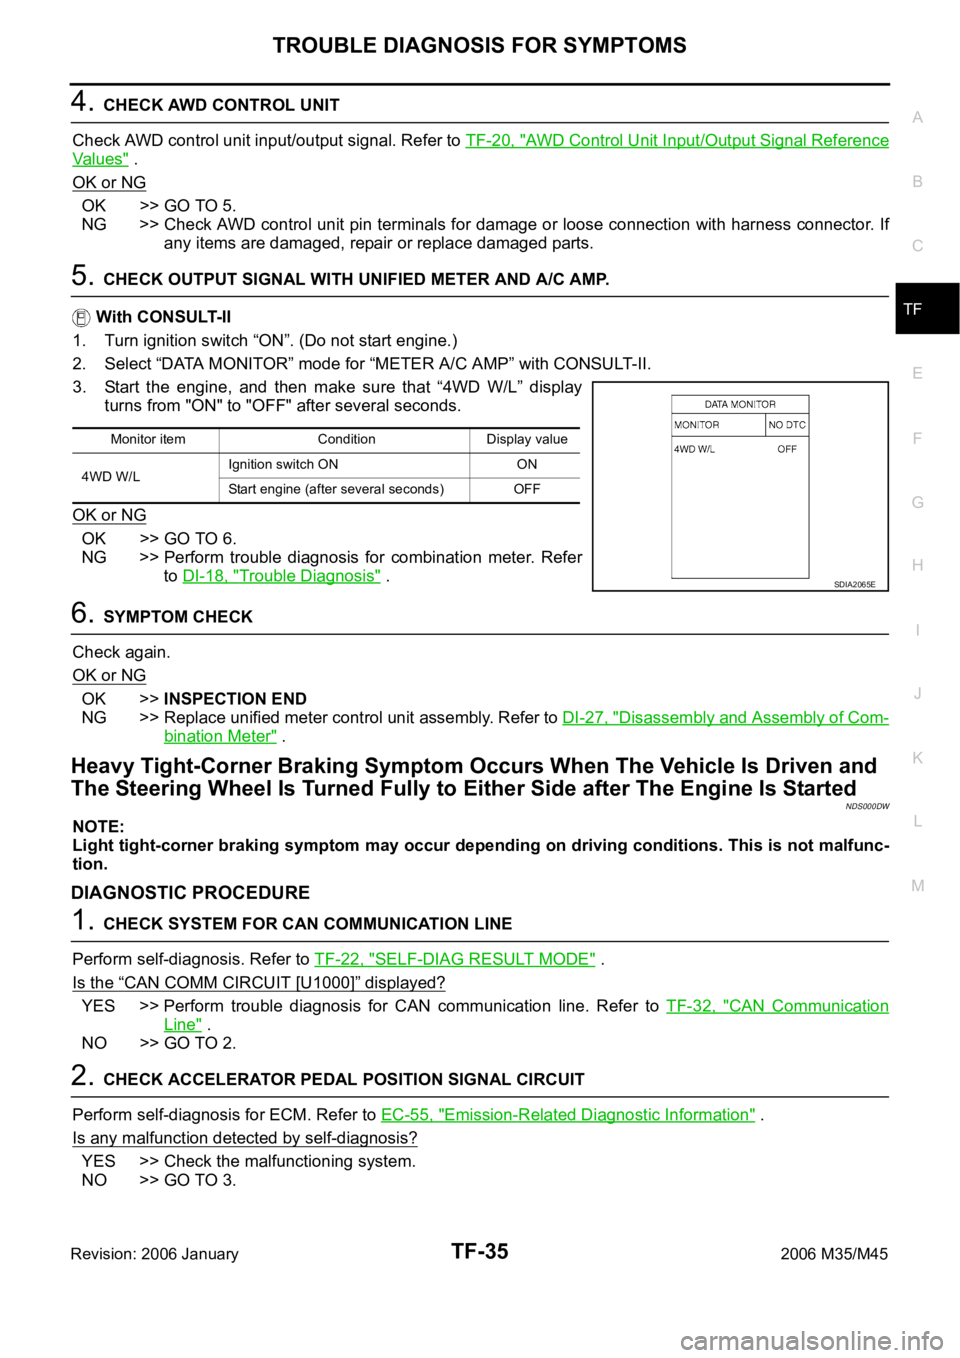
With CONSULT-II
1. Turn ignition switch “ON”. (Do not start engine.)
2. Select “DATA MONITOR” mode for “METER A/C AMP” with CONSULT-II.
3. Start the engine, and then make sure that “4WD W/L” display
turns from "ON" to "OFF" after several seconds.
OK or NG
OK >> GO TO 6.
NG >> Perform trouble diagnosis for combination meter. Refer
to DI-18, "
Trouble Diagnosis" .
6. SYMPTOM CHECK
Check again.
OK or NG
OK >>INSPECTION END
NG >> Replace unified meter control unit assembly. Refer to DI-27, "
Disassembly and Assembly of Com-
bination Meter" .
Heavy Tight-Corner Braking Symptom Occurs When The Vehicle Is Driven and
The Steering Wheel Is Turned Fully to Either Side after The Engine Is Started
NDS000DW
NOTE:
Light tight-corner braking symptom may occur depending on driving conditions. This is not malfunc-
tion.
DIAGNOSTIC PROCEDURE
1. CHECK SYSTEM FOR CAN COMMUNICATION LINE
Perform self-diagnosis. Refer to TF-22, "
SELF-DIAG RESULT MODE" .
Is the
“CAN COMM CIRCUIT [U1000]” displayed?
YES >> Perform trouble diagnosis for CAN communication line. Refer to TF-32, "CAN Communication
Line" .
NO >> GO TO 2.
2. CHECK ACCELERATOR PEDAL POSITION SIGNAL CIRCUIT
Perform self-diagnosis for ECM. Refer to EC-55, "
Emission-Related Diagnostic Information" .
Is any malfunction detected by self-diagnosis?
YES >> Check the malfunctioning system.
NO >> GO TO 3.
Monitor item Condition Display value
4WD W/LIgnition switch ON ON
Start engine (after several seconds) OFF
SDIA2065E
Page 5501 of 5621
TF-36
TROUBLE DIAGNOSIS FOR SYMPTOMS
Revision: 2006 January2006 M35/M45
3. CHECK SYSTEM FOR AWD SOLENOID
Perform trouble diagnosis for AWD solenoid system. Refer to TF-28, "
AWD Solenoid" .
OK or NG
OK >> GO TO 4.
NG >> Repair or replace damaged parts.
4. CHECK ELECTRIC CONTROLLED COUPLING
1. Turn ignition switch “OFF”.
2. Set the selector lever to “N” (neutral) position and disengage the parking brake.
3. Lift up the vehicle.
4. Rotate the rear propeller shaft by hand.
5. Hold front propeller shaft lightly.
Does front propeller shaft rotate?
YES >> Replace electric controlled coupling for mechanical malfunction (clutch sticking etc.). Refer to TF-
45, "Disassembly and Assembly" .
NO >> GO TO 5.
5. SYMPTOM CHECK
Check again.
OK or NG
OK >>INSPECTION END
NG >> GO TO 6.
6. CHECK AWD CONTROL UNIT
Check AWD control unit input/output signal. Refer to TF-20, "
AWD Control Unit Input/Output Signal Reference
Va l u e s" .
OK or NG
OK >>INSPECTION END
NG >> Check AWD control unit pin terminals for damage or loose connection with harness connector. If
any items are damaged, repair or replace damaged parts.
Vehicle Does Not Enter AWD Mode Even Though AWD Warning Lamp Turned to
OFF
NDS000DX
DIAGNOSTIC PROCEDURE
1. CHECK AWD WARNING LANP
Turn ignition switch “ON”. (Do not start engine.)
Does AWD warning lamp turn on?
YES >> GO TO 2.
NO >> Go to TF-33, "
AWD Warning Lamp Does Not Turn ON When The Ignition Switch Is Turned to ON"
.
2. CHECK SYSTEM FOR CAN COMMUNICATION LINE
Perform self-diagnosis. Refer to TF-22, "
SELF-DIAG RESULT MODE" .
Is the
“CAN COMM CIRCUIT [U1000]” displayed?
YES >> Perform trouble diagnosis for CAN communication line. Refer to TF-32, "CAN Communication
Line" .
NO >> GO TO 3.
Page 5549 of 5621
WT-24
TROUBLE DIAGNOSES
Revision: 2006 January2006 M35/M45
LOW TIRE PRESSURE WARNING CONTROL UNIT PART NUMBER
Operation Procedure
1. Perform “CONSULT-II Start Procedure”. Refer to GI-39, "CONSULT-II Start Procedure" .
2. The part number described on low tire pressure warning control unit sticker is displayed.
Diagnosis Procedure with Warning Lamp Function (Without CONSULT-II)NES000K6
DESCRIPTION
During driving, the low tire pressure warning system receives the signal transmitted from the transmitter
installed in each wheel, and gives alarms when the tire pressure becomes low. The control unit (low tire pres-
sure warning control unit) of this system has pressure judgement and trouble diagnosis functions.
FUNCTION
When the low tire pressure warning system detects low inflation pressure or another unusual symptom, the
warning lamps in the combination meter comes on. To start the self-diagnostic results mode, ground terminal
of the tire pressure warning check connector. The malfunction location is indicated by the warning lamp flash-
ing and the buzzer sounds. Regarding location of tire pressure warning check connector, refer to PG-63,
"HARNESS" .
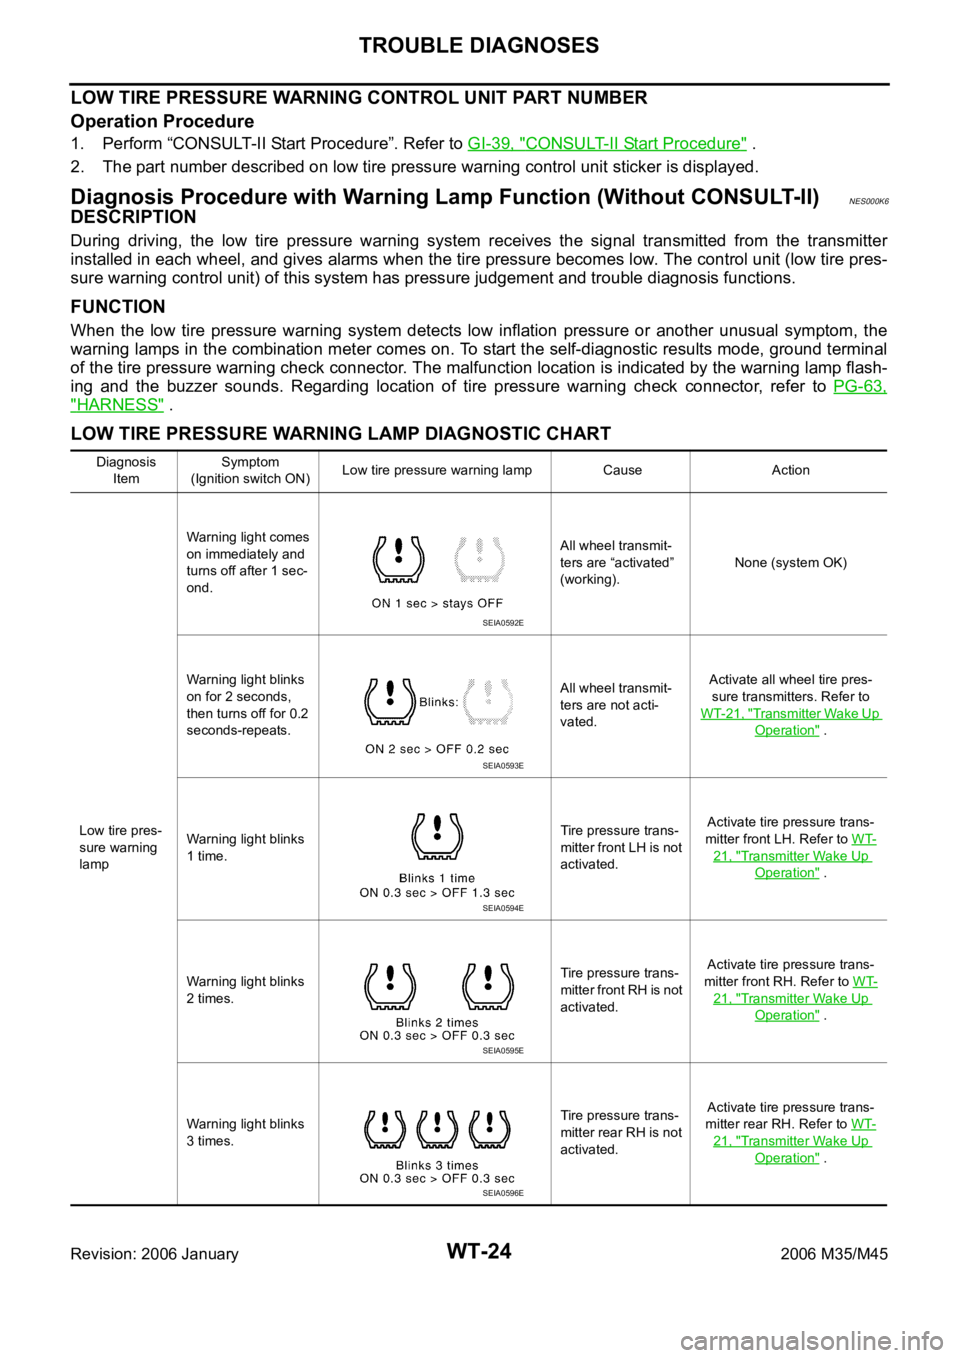
LOW TIRE PRESSURE WARNING LAMP DIAGNOSTIC CHART
Diagnosis
ItemSymptom
(Ignition switch ON)Low tire pressure warning lamp Cause Action
Low tire pres-
sure warning
lampWarning light comes
on immediately and
turns off after 1 sec-
ond.All wheel transmit-
ters are “activated”
(working).None (system OK)
Warning light blinks
on for 2 seconds,
then turns off for 0.2
seconds-repeats.All wheel transmit-
ters are not acti-
vated.Activate all wheel tire pres-
sure transmitters. Refer to
WT-21, "
Transmitter Wake Up
Operation" .
Warning light blinks
1 time.Tire pressure trans-
mitter front LH is not
activated.Activate tire pressure trans-
mitter front LH. Refer to WT-
21, "Transmitter Wake Up
Operation" .
Warning light blinks
2 times.Tire pressure trans-
mitter front RH is not
activated.Activate tire pressure trans-
mitter front RH. Refer to WT-
21, "Transmitter Wake Up
Operation" .
Warning light blinks
3 times.Tire pressure trans-
mitter rear RH is not
activated.Activate tire pressure trans-
mitter rear RH. Refer to WT-
21, "Transmitter Wake Up
Operation" .
SEIA0592E
SEIA0593E
SEIA0594E
SEIA0595E
SEIA0596E
Page 5550 of 5621
TROUBLE DIAGNOSES
WT-25
C
D
F
G
H
I
J
K
L
MA
B
WT
Revision: 2006 January2006 M35/M45
NOTE:
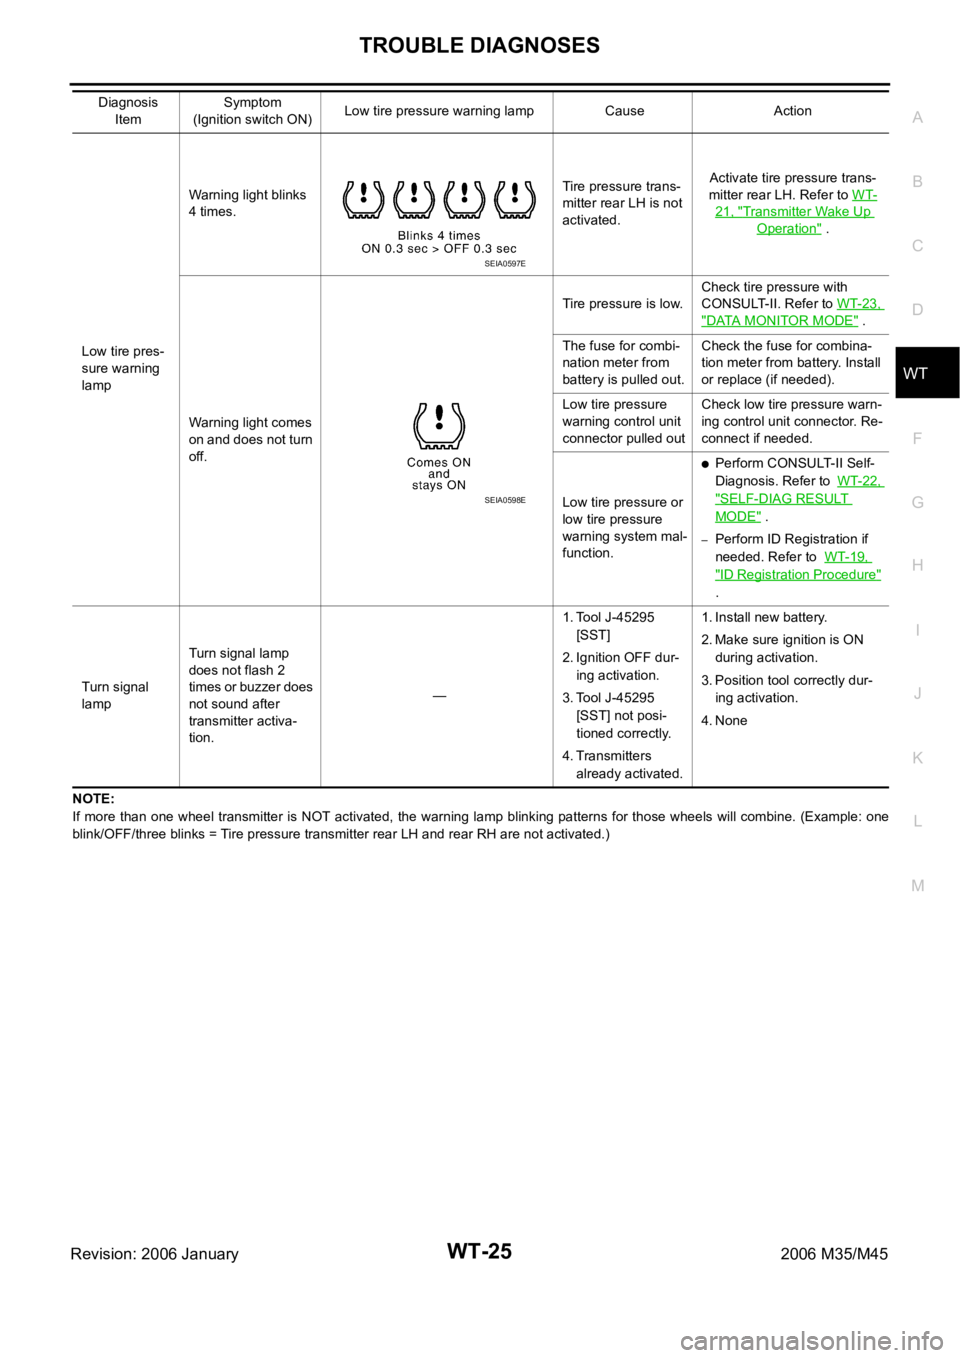
If more than one wheel transmitter is NOT activated, the warning lamp blinking patterns for those wheels will combine. (Example: one
blink/OFF/three blinks = Tire pressure transmitter rear LH and rear RH are not activated.) Low tire pres-
sure warning
lampWarning light blinks
4 times.Tire pressure trans-
mitter rear LH is not
activated.Activate tire pressure trans-
mitter rear LH. Refer to WT-
21, "Transmitter Wake Up
Operation" .
Warning light comes
on and does not turn
off.Tire pressure is low.Check tire pressure with
CONSULT-II. Refer to WT-23,
"DATA MONITOR MODE" .
The fuse for combi-
nation meter from
battery is pulled out.Check the fuse for combina-
tion meter from battery. Install
or replace (if needed).
Low tire pressure
warning control unit
connector pulled outCheck low tire pressure warn-
ing control unit connector. Re-
connect if needed.
Low tire pressure or
low tire pressure
warning system mal-
function.
Perform CONSULT-II Self-
Diagnosis. Refer to WT-22,
"SELF-DIAG RESULT
MODE" .
–Perform ID Registration if
needed. Refer to WT-19,
"ID Registration Procedure"
.
Turn signal
lampTurn signal lamp
does not flash 2
times or buzzer does
not sound after
transmitter activa-
tion.—1. Tool J-45295
[SST]
2. Ignition OFF dur-
ing activation.
3. Tool J-45295
[SST] not posi-
tioned correctly.
4. Transmitters
already activated.1. Install new battery.
2. Make sure ignition is ON
during activation.
3. Position tool correctly dur-
ing activation.
4. None Diagnosis
ItemSymptom
(Ignition switch ON)Low tire pressure warning lamp Cause Action
SEIA0597E
SEIA0598E
Page 5569 of 5621

WW-2Revision: 2006 January2006 M35/M45 CHECK VALVE INSPECTION ............................. 46
Inspection of Front Wiper and Washer Switch Circuit ... 46
Removal and Installation of Front Wiper and Washer
Switch ..................................................................... 46
REMOVAL ........................................................
... 46
INSTALLATION .................................................... 46
Removal and Installation of Washer Tank .............. 47
REMOVAL ........................................................
... 47
INSTALLATION .................................................... 47
Removal and Installation of Washer Pump ............. 48
REMOVAL ........................................................
... 48
INSTALLATION .................................................... 48
CIGARETTE LIGHTER ............................................. 49
Wiring Diagram — CIGAR — ................................. 49
Removal and Installation ........................................ 50
REMOVAL ........................................................
... 50
INSTALLATION .................................................... 50POWER SOCKET ..................................................... 51
Wiring Diagram — P/SCKT — ................................ 51
Removal and Installation of Center Console Box
Power Socket .......................................................... 52
REMOVAL ............................................................ 52
INSTALLATION .................................................... 52
Removal and Installation of Center Console Box
Rear Side Power Socket ......................................... 52
REMOVAL ............................................................ 52
INSTALLATION .................................................... 52
HORN ........................................................................ 53
Wiring Diagram — HORN — .................................. 53
Removal and Installation ......................................... 54
REMOVAL ............................................................ 54
INSTALLATION .................................................... 54
Page 5577 of 5621
WW-10
FRONT WIPER AND WASHER SYSTEM
Revision: 2006 January2006 M35/M45
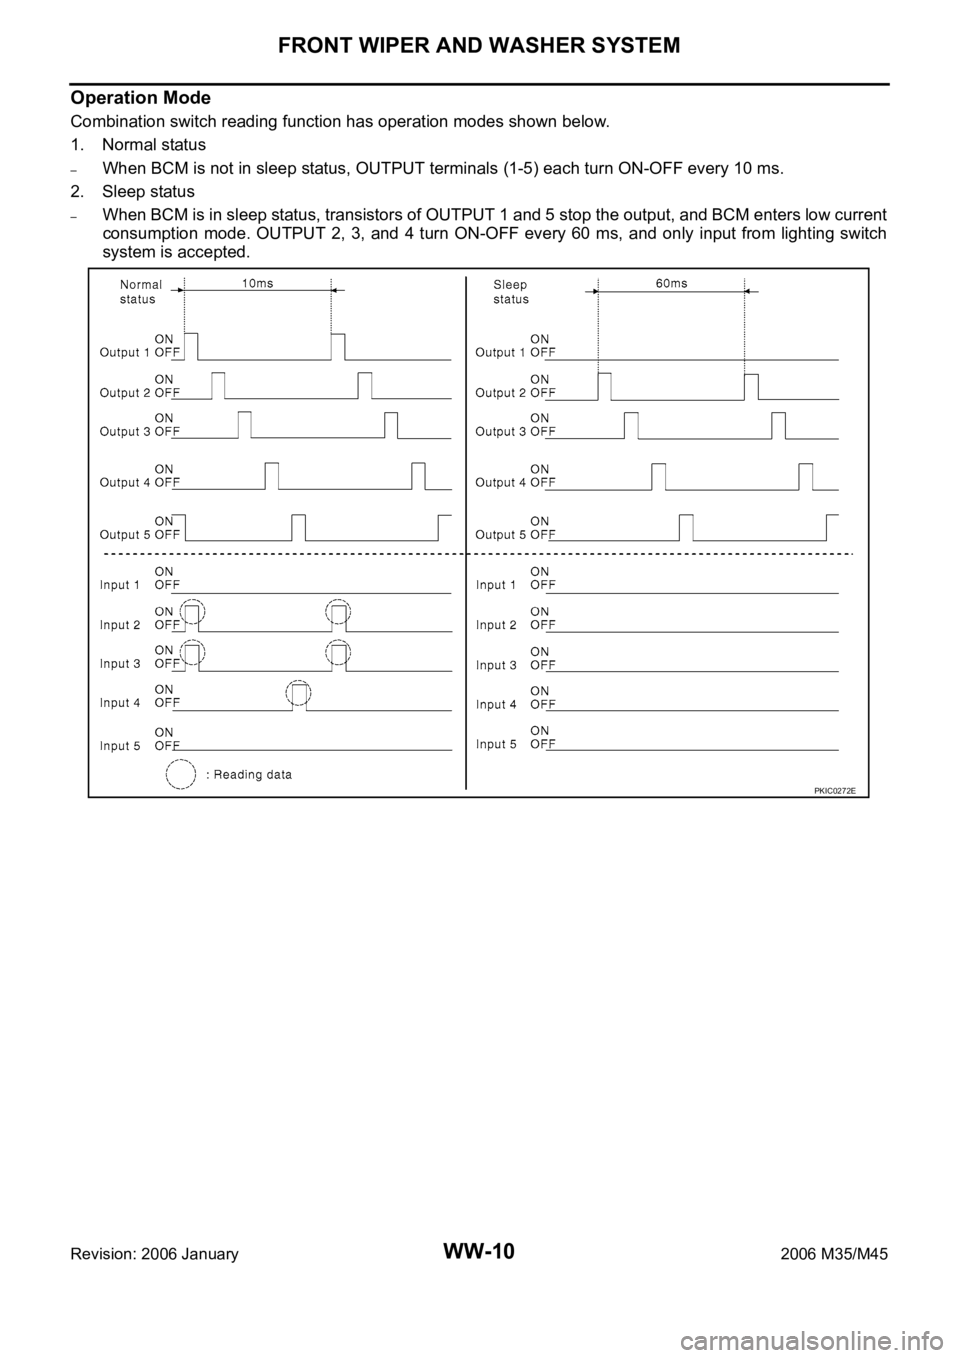
Operation Mode
Combination switch reading function has operation modes shown below.
1. Normal status
–When BCM is not in sleep status, OUTPUT terminals (1-5) each turn ON-OFF every 10 ms.
2. Sleep status
–When BCM is in sleep status, transistors of OUTPUT 1 and 5 stop the output, and BCM enters low current
consumption mode. OUTPUT 2, 3, and 4 turn ON-OFF every 60 ms, and only input from lighting switch
system is accepted.
PKIC0272E
Page 5584 of 5621
FRONT WIPER AND WASHER SYSTEM
WW-17
C
D
E
F
G
H
I
J
L
MA
B
WW
Revision: 2006 January2006 M35/M45
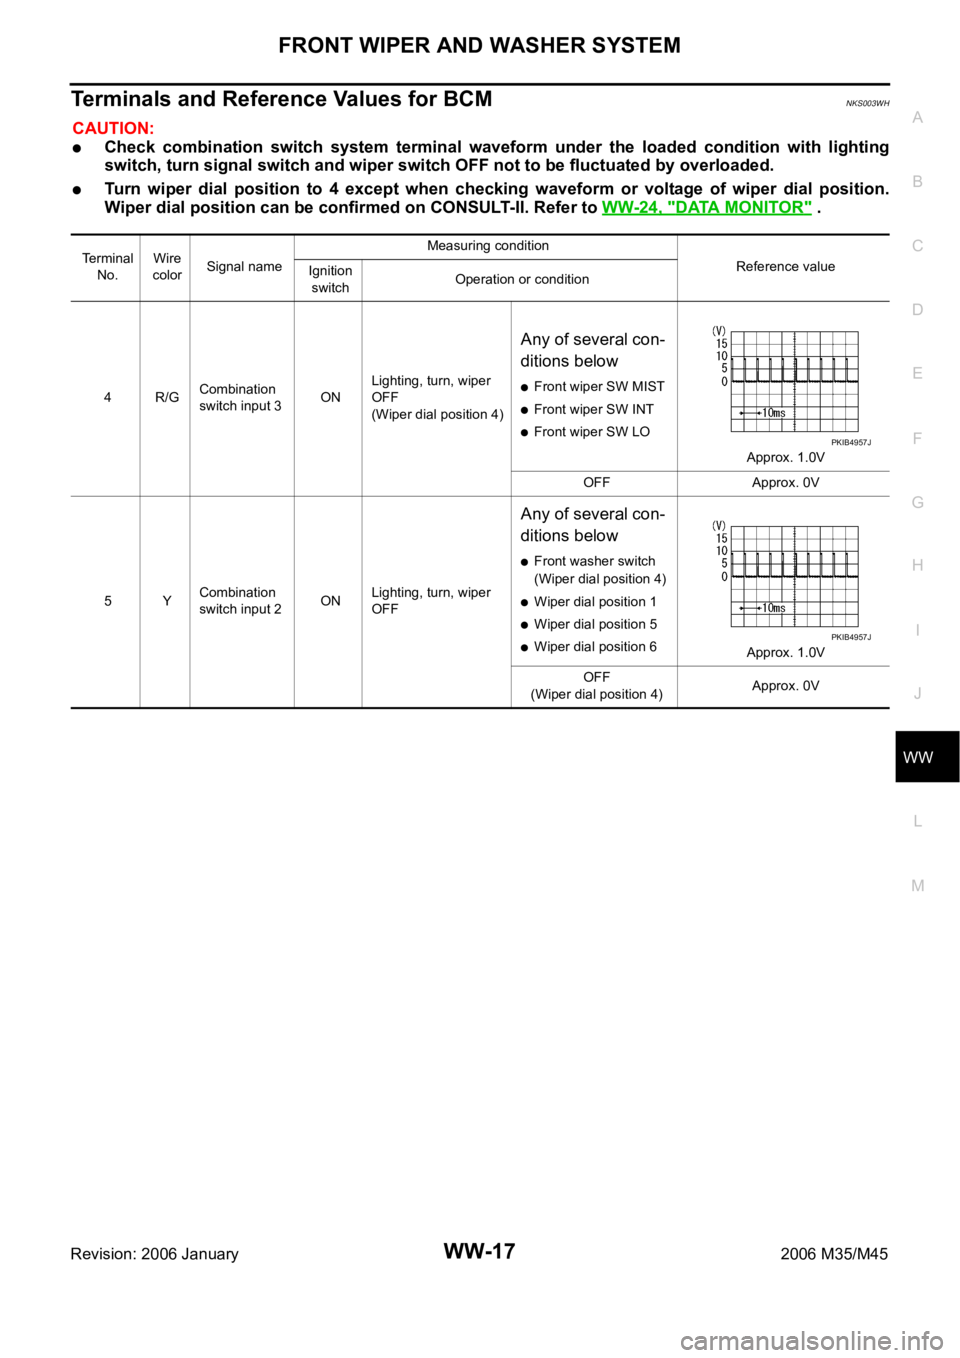
Terminals and Reference Values for BCMNKS003WH
CAUTION:
Check combination switch system terminal waveform under the loaded condition with lighting
switch, turn signal switch and wiper switch OFF not to be fluctuated by overloaded.
Turn wiper dial position to 4 except when checking waveform or voltage of wiper dial position.
Wiper dial position can be confirmed on CONSULT-II. Refer to WW-24, "
DATA MONITOR" .
Terminal
No.Wire
colorSignal nameMeasuring condition
Reference value
Ignition
switchOperation or condition
4R/GCombination
switch input 3ONLighting, turn, wiper
OFF
(Wiper dial position 4)
Any of several con-
ditions below
Front wiper SW MIST
Front wiper SW INT
Front wiper SW LO
Approx. 1.0V
OFF Approx. 0V
5YCombination
switch input 2ONLighting, turn, wiper
OFF
Any of several con-
ditions below
Front washer switch
(Wiper dial position 4)
Wiper dial position 1
Wiper dial position 5
Wiper dial position 6
Approx. 1.0V
OFF
(Wiper dial position 4)Approx. 0V
PKIB4957J
PKIB4957J
Page 5585 of 5621
WW-18
FRONT WIPER AND WASHER SYSTEM
Revision: 2006 January2006 M35/M45
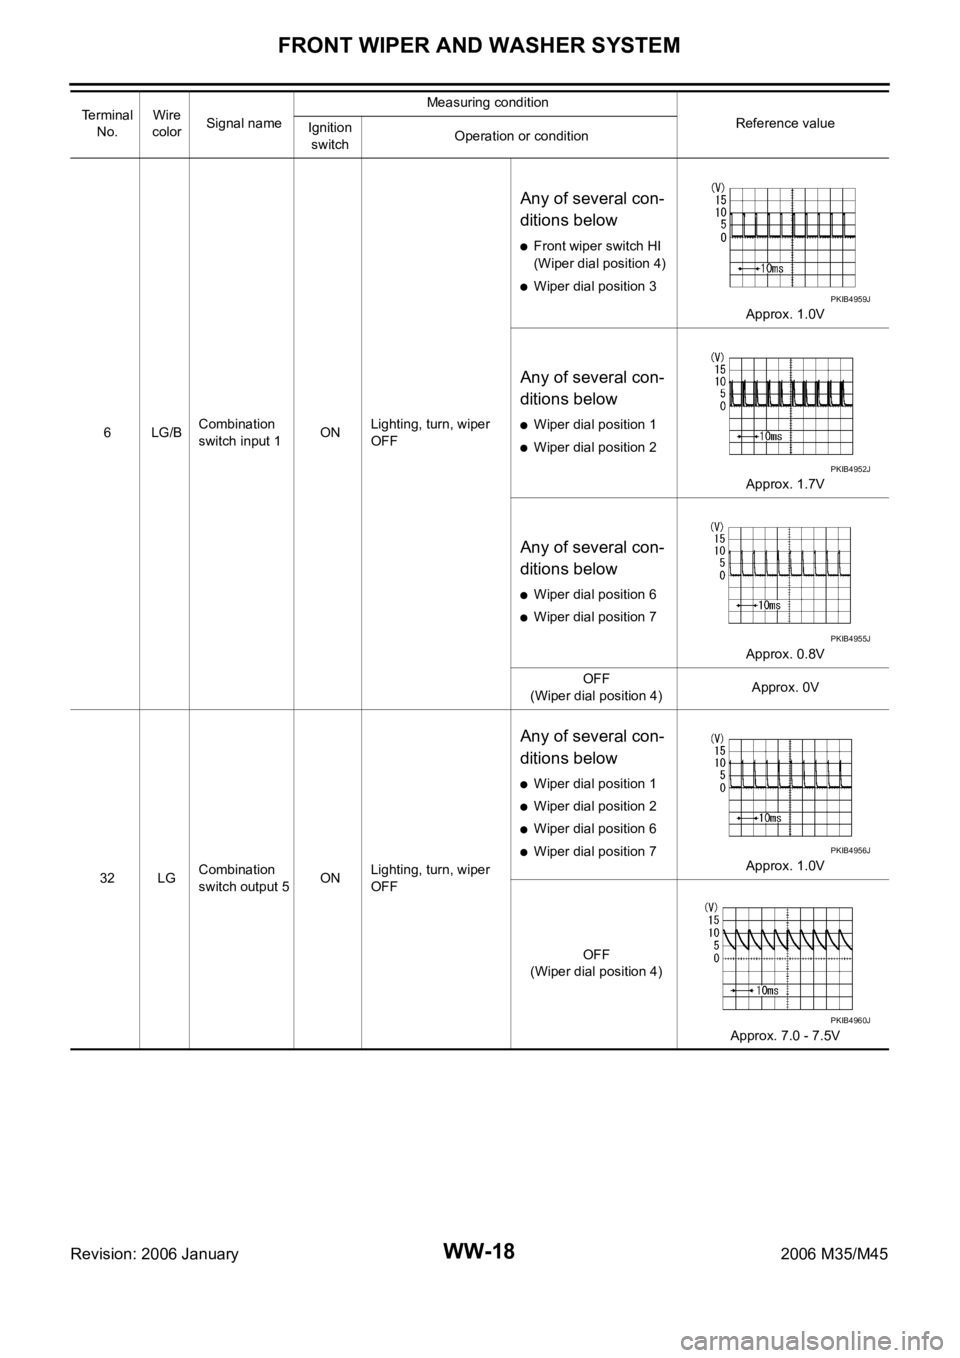
6LG/BCombination
switch input 1ONLighting, turn, wiper
OFF
Any of several con-
ditions below
Front wiper switch HI
(Wiper dial position 4)
Wiper dial position 3
Approx. 1.0V
Any of several con-
ditions below
Wiper dial position 1
Wiper dial position 2
Approx. 1.7V
Any of several con-
ditions below
Wiper dial position 6
Wiper dial position 7
Approx. 0.8V
OFF
(Wiper dial position 4)Approx. 0V
32 LGCombination
switch output 5ONLighting, turn, wiper
OFF
Any of several con-
ditions below
Wiper dial position 1
Wiper dial position 2
Wiper dial position 6
Wiper dial position 7
Approx. 1.0V
OFF
(Wiper dial position 4)
Approx. 7.0 - 7.5V Te r m i n a l
No.Wire
colorSignal nameMeasuring condition
Reference value
Ignition
switchOperation or condition
PKIB4959J
PKIB4952J
PKIB4955J
PKIB4956J
PKIB4960J