2006 INFINITI M35 Ras
[x] Cancel search: RasPage 2937 of 5621
![INFINITI M35 2006 Factory Service Manual EC-1394
[VK45DE]
DTC P2A00, P2A03 A/F SENSOR 1
Revision: 2006 January2006 M35/M45
4. CLEAR THE SELF-LEARNING DATA
With CONSULT-II
1. Start engine and warm it up to normal operating temperature.
2. Se INFINITI M35 2006 Factory Service Manual EC-1394
[VK45DE]
DTC P2A00, P2A03 A/F SENSOR 1
Revision: 2006 January2006 M35/M45
4. CLEAR THE SELF-LEARNING DATA
With CONSULT-II
1. Start engine and warm it up to normal operating temperature.
2. Se](/manual-img/42/57023/w960_57023-2936.png)
EC-1394
[VK45DE]
DTC P2A00, P2A03 A/F SENSOR 1
Revision: 2006 January2006 M35/M45
4. CLEAR THE SELF-LEARNING DATA
With CONSULT-II
1. Start engine and warm it up to normal operating temperature.
2. Select “SELF-LEARNING CONT” in “WORK SUPPORT” mode with CONSULT- I I .
3. Clear the self-learning control coefficient by touching “CLEAR”.
4. Run engine for at least 10 minutes at idle speed.
Is the 1st trip DTC P0171, P0172, P0174 or P0175 detected?
Is it difficult to start engine?
Without CONSULT-II
1. Start engine and warm it up to normal operating temperature.
2. Turn ignition switch OFF.
3. Disconnect mass air flow sensor (1) harness connector.
4. Restart engine and let it idle for at least 5 seconds.
5. Stop engine and reconnect mass air flow sensor harness con-
nector.
6. Make sure DTC P0102 is displayed.
7. Erase the DTC memory. Refer to EC-778, "
HOW TO ERASE
EMISSION-RELATED DIAGNOSTIC INFORMATION" .
8. Make sure DTC P0000 is displayed.
9. Run engine for at least 10 minutes at idle speed.
Is the 1st trip DTC P0171, P0172, P0174 or P0175 detected?
Is it difficult to start engine?
Ye s o r N o
Yes >> Perform trouble diagnosis for DTC P0171, P0174 or P0172, P0175. Refer to EC-1044, "DTC
P0171, P0174 FUEL INJECTION SYSTEM FUNCTION" or EC-1055, "DTC P0172, P0175 FUEL
INJECTION SYSTEM FUNCTION" .
No >> GO TO 5.
SEF968Y
PBIB2682E
Page 3165 of 5621
![INFINITI M35 2006 Factory Service Manual EM-102
[VQ35DE]
CYLINDER HEAD
Revision: 2006 January2006 M35/M45
If the engine speed is out of the specified range, check battery liquid for proper gravity. Check the
engine speed aga INFINITI M35 2006 Factory Service Manual EM-102
[VQ35DE]
CYLINDER HEAD
Revision: 2006 January2006 M35/M45
If the engine speed is out of the specified range, check battery liquid for proper gravity. Check the
engine speed aga](/manual-img/42/57023/w960_57023-3164.png)
EM-102
[VQ35DE]
CYLINDER HEAD
Revision: 2006 January2006 M35/M45
If the engine speed is out of the specified range, check battery liquid for proper gravity. Check the
engine speed again with normal battery gravity.
If compression pressure is below minimum value, check valve clearances and parts associated with
combustion chamber (valve, valve seat, piston, piston ring, cylinder bore, cylinder head, cylinder head
gasket). After the checking, measure compression pressure again.
If some cylinder has low compression pressure, pour small amount of engine oil into the spark plug hole
of the cylinder to re-check it for compression.
–If the added engine oil improves the compression, piston rings may be worn out or damaged. Check
piston rings and replace if necessary.
–If the compression pressure remains at low level despite the addition of engine oil, valves may be mal-
functioning. Check valves for damage. Replace valve or valve seat accordingly.
If two adjacent cylinders have respectively low compression pressure and their compression remains
low even after the addition of engine oil, cylinder head gaskets are leaking. In such a case, replace cyl-
inder head gaskets.
9. After inspection is completed, install removed parts.
10. Start the engine, and make sure that the engine runs smoothly.
11. Perform trouble diagnosis. If DTC appears, erase it. Refer to EC-100, "
TROUBLE DIAGNOSIS" .
ComponentsNBS004NS
Removal and InstallationNBS004NT
REMOVAL
1. Remove camshaft. Refer to EM-84, "CAMSHAFT" .
NOTE:
It is also possible to perform the following steps 2 and 3 just before removing camshaft.
1. Engine rear lower slinger 2. Cylinder head (left bank) 3. Cylinder head bolt
4. Cylinder head (right bank) 5. Cylinder head gasket (right bank)6. Cylinder head gasket (left bank)
7. Oil level gauge guide
SBIA0581E
Page 3297 of 5621
![INFINITI M35 2006 Factory Service Manual EM-234
[VK45DE]
CYLINDER HEAD
Revision: 2006 January2006 M35/M45
If the engine speed is out of specified range, check battery liquid for proper gravity. Check engine
speed again with normal INFINITI M35 2006 Factory Service Manual EM-234
[VK45DE]
CYLINDER HEAD
Revision: 2006 January2006 M35/M45
If the engine speed is out of specified range, check battery liquid for proper gravity. Check engine
speed again with normal](/manual-img/42/57023/w960_57023-3296.png)
EM-234
[VK45DE]
CYLINDER HEAD
Revision: 2006 January2006 M35/M45
If the engine speed is out of specified range, check battery liquid for proper gravity. Check engine
speed again with normal battery gravity.
If compression pressure is below minimum value, check valve clearances and parts associated with
combustion chamber (valve, valve seat, piston, piston ring, cylinder bore, cylinder head, cylinder head
gasket). After the checking, measure compression pressure again.
If some cylinders have low compression pressure, pour small amount of engine oil into the spark plug
hole of the cylinder to re-check it for compression.
–If the added engine oil improves the compression, piston rings may be worn out or damaged. Check the
piston rings and replace if necessary.
–If the compression pressure remains at low level despite the addition of engine oil, valves may be mal-
functioning. Check valves for damage. Replace valve or valve seat accordingly.
If two adjacent cylinders have respectively low compression pressure and their compression remains
low even after the addition of engine oil, cylinder head gaskets are leaking. In such a case, replace cyl-
inder head gaskets.
8. After inspection is completed, install removed parts in the reverse order of removal.
9. Start engine, and make sure that engine runs smoothly.
10. Perform trouble diagnosis. If DTC appears, erase it. Refer to EC-811, "
TROUBLE DIAGNOSIS" .
ComponentsNBS004PG
Removal and InstallationNBS004PH
REMOVAL
1. Remove engine assembly from vehicle. Refer to EM-244, "ENGINE ASSEMBLY" .
2. Remove exhaust manifold. Refer to EM-183, "
EXHAUST MANIFOLD AND THREE WAY CATALYST" .
3. Remove camshaft. Refer to EM-215, "
CAMSHAFT" .
1. Engine coolant temperature sensor 2. Washer 3. Cylinder head gasket (left bank)
4. Harness bracket 5. Cylinder head (right bank) 6. Cylinder head bolt
7. Cylinder head gasket (right bank) 8. Cylinder head bolt 9. Cylinder head (left bank)
PBIC2756E
Page 3401 of 5621

FFD-24
FRONT FINAL DRIVE ASSEMBLY
Revision: 2006 January2006 M35/M45
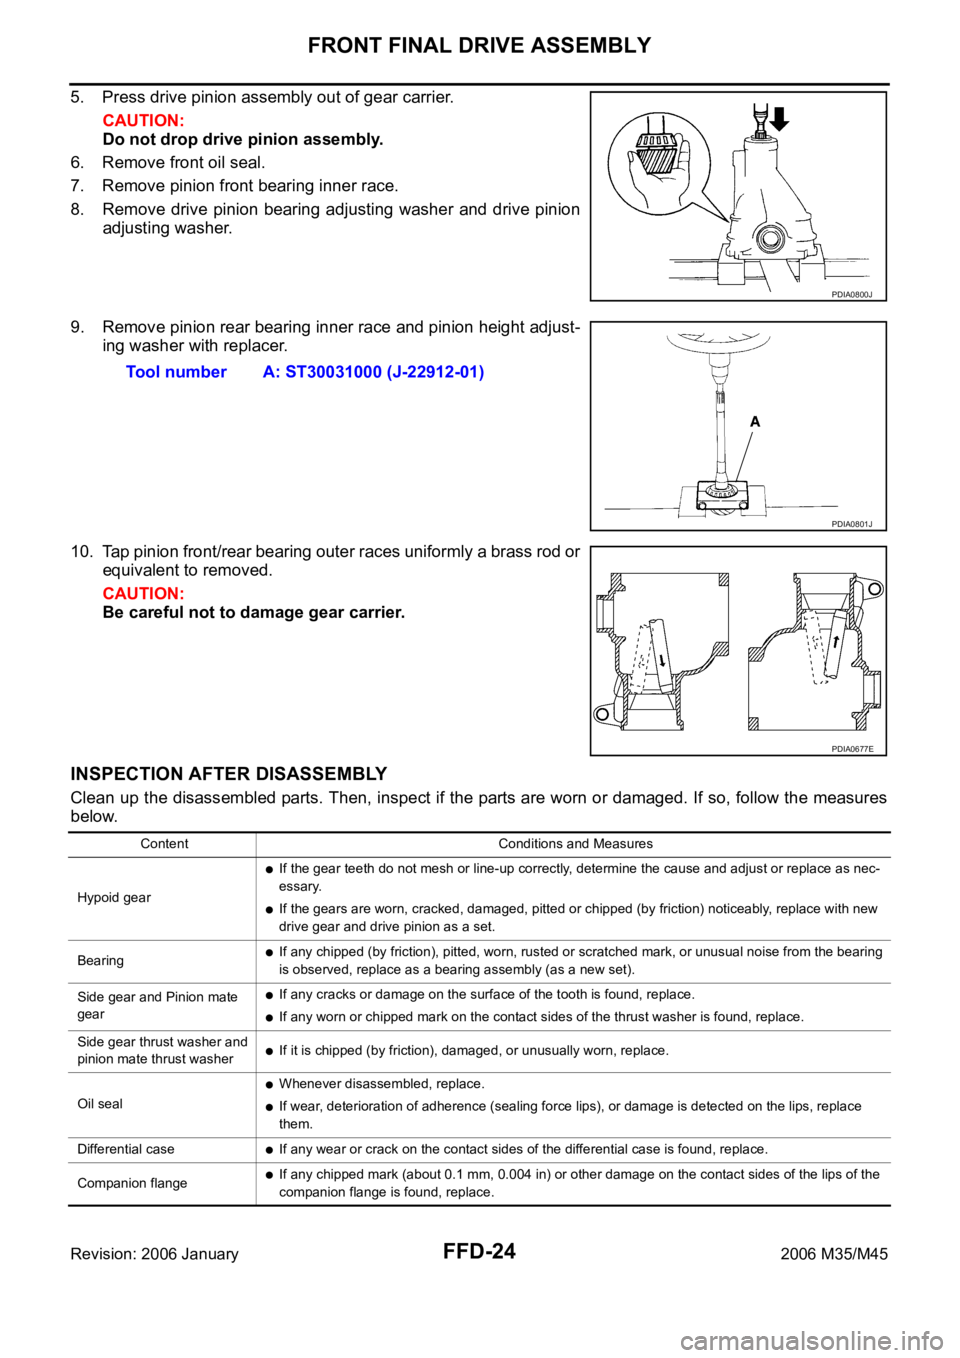
5. Press drive pinion assembly out of gear carrier.
CAUTION:
Do not drop drive pinion assembly.
6. Remove front oil seal.
7. Remove pinion front bearing inner race.
8. Remove drive pinion bearing adjusting washer and drive pinion
adjusting washer.
9. Remove pinion rear bearing inner race and pinion height adjust-
ing washer with replacer.
10. Tap pinion front/rear bearing outer races uniformly a brass rod or
equivalent to removed.
CAUTION:
Be careful not to damage gear carrier.
INSPECTION AFTER DISASSEMBLY
Clean up the disassembled parts. Then, inspect if the parts are worn or damaged. If so, follow the measures
below.
PDIA0800J
Tool number A: ST30031000 (J-22912-01)
PDIA0801J
PDIA0677E
Content Conditions and Measures
Hypoid gear
If the gear teeth do not mesh or line-up correctly, determine the cause and adjust or replace as nec-
essary.
If the gears are worn, cracked, damaged, pitted or chipped (by friction) noticeably, replace with new
drive gear and drive pinion as a set.
Bearing
If any chipped (by friction), pitted, worn, rusted or scratched mark, or unusual noise from the bearing
is observed, replace as a bearing assembly (as a new set).
Side gear and Pinion mate
gear
If any cracks or damage on the surface of the tooth is found, replace.
If any worn or chipped mark on the contact sides of the thrust washer is found, replace.
Side gear thrust washer and
pinion mate thrust washer
If it is chipped (by friction), damaged, or unusually worn, replace.
Oil seal
Whenever disassembled, replace.
If wear, deterioration of adherence (sealing force lips), or damage is detected on the lips, replace
them.
Differential case
If any wear or crack on the contact sides of the differential case is found, replace.
Companion flange
If any chipped mark (about 0.1 mm, 0.004 in) or other damage on the contact sides of the lips of the
companion flange is found, replace.
Page 3468 of 5621

PRECAUTIONS
GI-5
C
D
E
F
G
H
I
J
K
L
MB
GI
Revision: 2006 January2006 M35/M45
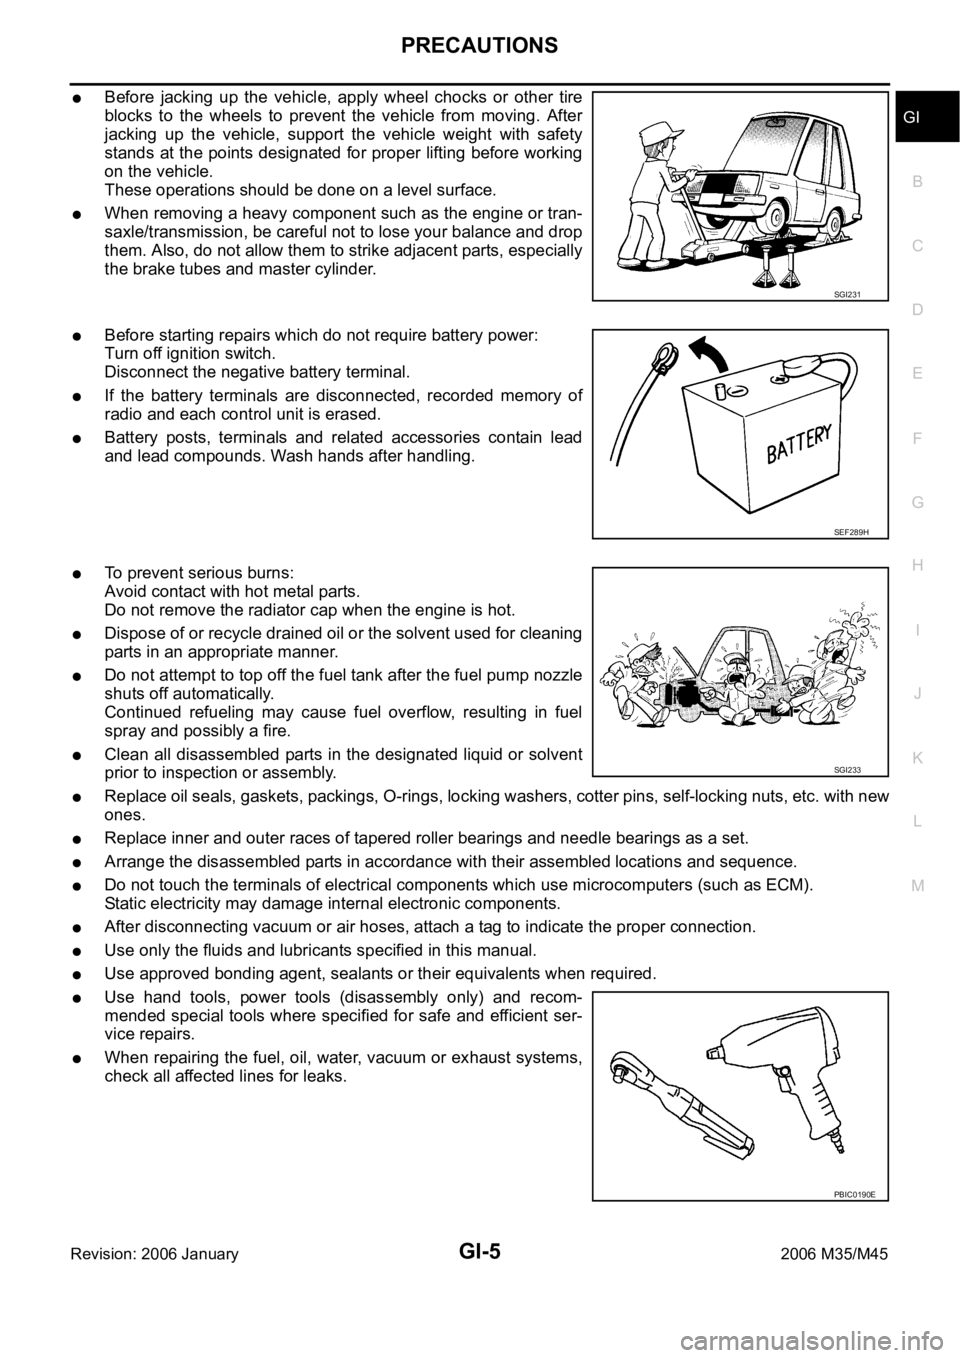
Before jacking up the vehicle, apply wheel chocks or other tire
blocks to the wheels to prevent the vehicle from moving. After
jacking up the vehicle, support the vehicle weight with safety
stands at the points designated for proper lifting before working
on the vehicle.
These operations should be done on a level surface.
When removing a heavy component such as the engine or tran-
saxle/transmission, be careful not to lose your balance and drop
them. Also, do not allow them to strike adjacent parts, especially
the brake tubes and master cylinder.
Before starting repairs which do not require battery power:
Turn off ignition switch.
Disconnect the negative battery terminal.
If the battery terminals are disconnected, recorded memory of
radio and each control unit is erased.
Battery posts, terminals and related accessories contain lead
and lead compounds. Wash hands after handling.
To prevent serious burns:
Avoid contact with hot metal parts.
Do not remove the radiator cap when the engine is hot.
Dispose of or recycle drained oil or the solvent used for cleaning
parts in an appropriate manner.
Do not attempt to top off the fuel tank after the fuel pump nozzle
shuts off automatically.
Continued refueling may cause fuel overflow, resulting in fuel
spray and possibly a fire.
Clean all disassembled parts in the designated liquid or solvent
prior to inspection or assembly.
Replace oil seals, gaskets, packings, O-rings, locking washers, cotter pins, self-locking nuts, etc. with new
ones.
Replace inner and outer races of tapered roller bearings and needle bearings as a set.
Arrange the disassembled parts in accordance with their assembled locations and sequence.
Do not touch the terminals of electrical components which use microcomputers (such as ECM).
Static electricity may damage internal electronic components.
After disconnecting vacuum or air hoses, attach a tag to indicate the proper connection.
Use only the fluids and lubricants specified in this manual.
Use approved bonding agent, sealants or their equivalents when required.
Use hand tools, power tools (disassembly only) and recom-
mended special tools where specified for safe and efficient ser-
vice repairs.
When repairing the fuel, oil, water, vacuum or exhaust systems,
check all affected lines for leaks.
SGI231
SEF289H
SGI233
PBIC0190E
Page 3488 of 5621

SERVICE INFORMATION FOR ELECTRICAL INCIDENT
GI-25
C
D
E
F
G
H
I
J
K
L
MB
GI
Revision: 2006 January2006 M35/M45
SERVICE INFORMATION FOR ELECTRICAL INCIDENTPFP:00000
How to Check Terminal NAS0007P
CONNECTOR AND TERMINAL PIN KIT
Use the connector and terminal pin kits listed below when replacing connectors or terminals.
The connector and terminal pin kits contain some of the most commonly used NISSAN/INFINITI connectors
and terminals. For detailed connector and terminal pin replacement procedures, refer to the latest NISSAN/
INFINITI CONNECTOR AND TERMINAL PIN SERVICE MANUAL.
HOW TO PROBE CONNECTORS
Connector damage and an intermittent connection can result from improperly probing of the connector during
circuit checks.
The probe of a digital multimeter (DMM) may not correctly fit the connector cavity. To correctly probe the con-
nector, follow the procedures below using a “T” pin. For the best contact grasp the “T” pin using an alligator
clip.
Probing from Harness Side
Standard type (not waterproof type) connector should be probed
from harness side with “T” pin.
If the connector has a rear cover such as a ECM connector,
remove the rear cover before probing the terminal.
Do not probe waterproof connector from harness side. Damage
to the seal between wire and connector may result.
Probing from Terminal Side
FEMALE TERMINAL
There is a small notch above each female terminal. Probe each
terminal with the “T” pin through the notch.
Do not insert any object other than the same type male terminal
into female terminal.
Tool number
(Kent-Moore No.)
To o l n a m eDescription
-
(J38751-95NI)
Connector and terminal
pin kit (NISSAN)
-
(J38751-95INF)
Connector and terminal
pin kit (INFINITI)
-
(J42992-98KIT)
OBD and terminal repair
kit
-
(J42992-2000UPD)
OBD-II Connector Kit
Update
WAIA0004EWAIA0005E
SGI841
SEL265V
Page 3496 of 5621

SERVICE INFORMATION FOR ELECTRICAL INCIDENT
GI-33
C
D
E
F
G
H
I
J
K
L
MB
GI
Revision: 2006 January2006 M35/M45
no voltage; short is further down the circuit than SW1.
With SW1 closed, relay and solenoid disconnected and the DMM leads across both fuse terminals, check
for voltage.
voltage; short is between SW1 and the relay (point B).
no voltage; short is further down the circuit than the relay.
With SW1 closed, relay contacts jumped with fused jumper wire check for voltage.
voltage; short is down the circuit of the relay or between the relay and the disconnected solenoid (point C).
no voltage; retrace steps and check power to fuse block.
Ground Inspection
Ground connections are very important to the proper operation of electrical and electronic circuits. Ground
connections are often exposed to moisture, dirt and other corrosive elements. The corrosion (rust) can
become an unwanted resistance. This unwanted resistance can change the way a circuit works.
Electronically controlled circuits are very sensitive to proper grounding. A loose or corroded ground can drasti-
cally affect an electronically controlled circuit. A poor or corroded ground can easily affect the circuit. Even
when the ground connection looks clean, there can be a thin film of rust on the surface.
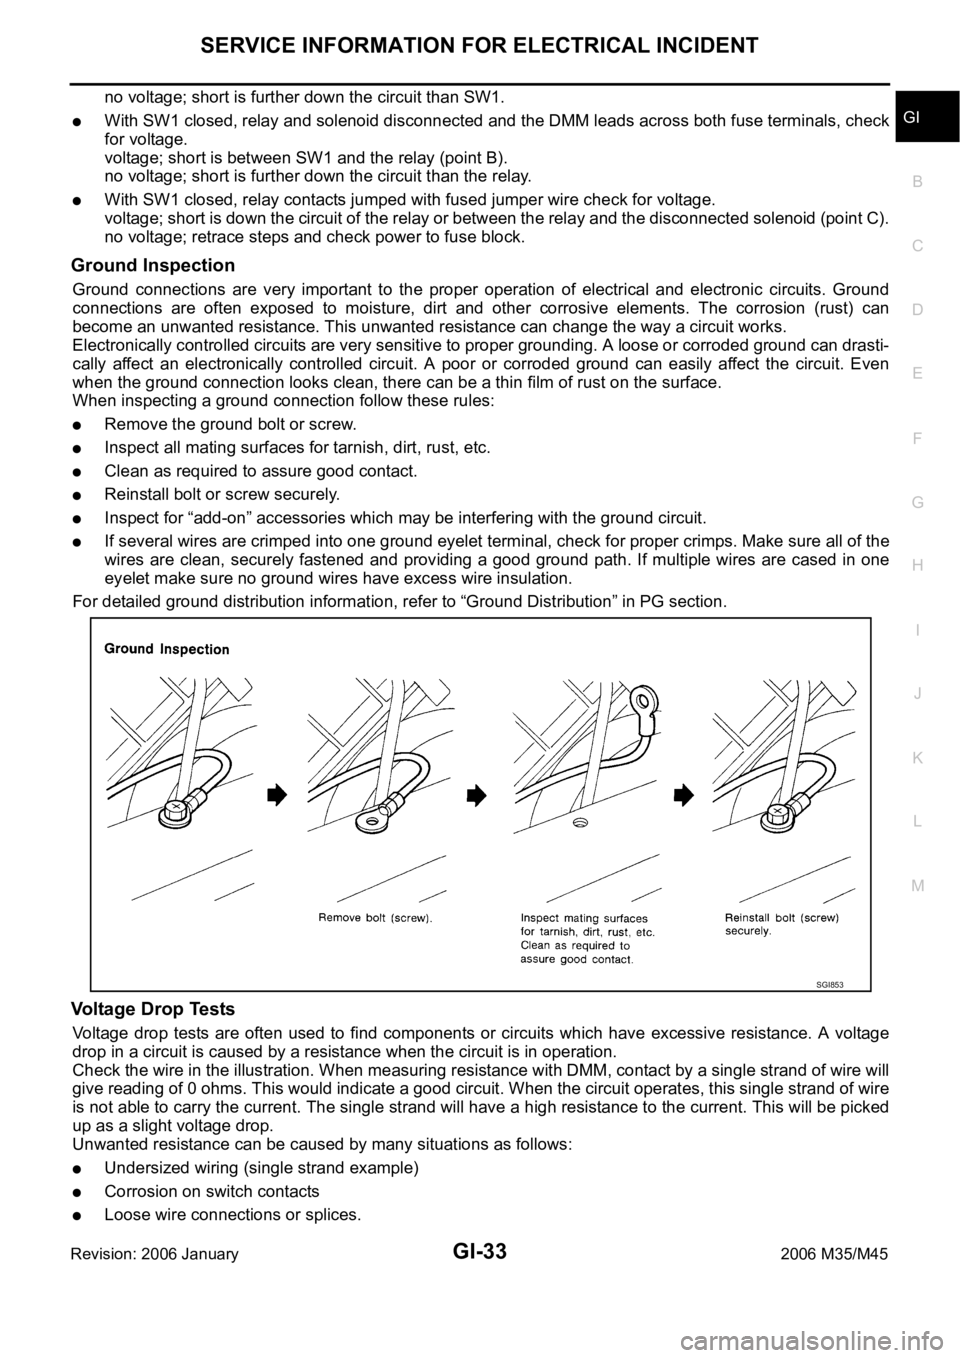
When inspecting a ground connection follow these rules:
Remove the ground bolt or screw.
Inspect all mating surfaces for tarnish, dirt, rust, etc.
Clean as required to assure good contact.
Reinstall bolt or screw securely.
Inspect for “add-on” accessories which may be interfering with the ground circuit.
If several wires are crimped into one ground eyelet terminal, check for proper crimps. Make sure all of the
wires are clean, securely fastened and providing a good ground path. If multiple wires are cased in one
eyelet make sure no ground wires have excess wire insulation.
For detailed ground distribution information, refer to “Ground Distribution” in PG section.
Voltage Drop Tests
Voltage drop tests are often used to find components or circuits which have excessive resistance. A voltage
drop in a circuit is caused by a resistance when the circuit is in operation.
Check the wire in the illustration. When measuring resistance with DMM, contact by a single strand of wire will
give reading of 0 ohms. This would indicate a good circuit. When the circuit operates, this single strand of wire
is not able to carry the current. The single strand will have a high resistance to the current. This will be picked
up as a slight voltage drop.
Unwanted resistance can be caused by many situations as follows:
Undersized wiring (single strand example)
Corrosion on switch contacts
Loose wire connections or splices.
SGI853
Page 3501 of 5621

GI-38
CONSULT-II CHECKING SYSTEM
Revision: 2006 January2006 M35/M45
CONSULT-II CHECKING SYSTEMPFP:00000
DescriptionNAS0007S
CONSULT-II is a hand-held type tester. When it is connected with a diagnostic connector equipped on the
vehicle side, it will communicate with the control unit equipped in the vehicle and then enable various
kinds of diagnostic tests.
Refer to “CONSULT-II Software Operation Manual” for more information.
Function and System Application NAS0007T
x: Applicable
*: NISSAN Anti-Theft System (INFINITI/NISSAN Vehicle Immobilizer System) Diagnostic test
modeFunction
ENGINE
A/T
AIR BAG
METER A/C AMP
BCM
AUTO DRIVE POS.
ABS (Including VDC)
NATS (IVIS/NATS) *
IPDM E/R
ICC
ALL MODE AWD/4WD
INTELLIGENT KEY
LDW
AIR PRESSURE MONITOR
RAS/HICAS
ADAPTIVE LIGHT
PRECRASH SEATBELT
MULTI AV
Work supportThis mode enables a technician to adjust
some devices faster and more accurately by
following the indications on CONSULT-II.x - - - xxx -- x- xxx- x- -
Self-diagnostic
resultsSelf-diagnostic results can be read and
erased quickly.xxxxxxxxxxxxxxxxxx
Trouble diagnos-
tic recordCurrent self-diagnostic results and all trouble
diagnostic records previously stored can be
read.--x---------------
Data monitor Input/Output data in the ECU can be read. x x - x x x x - x xxxxxxxxx
CAN diagnosis
support monitorThe condition of CAN communication line
can be read.xx- xxxx- xxxxxxxxxx
Active testDiagnostic Test Mode in which CONSULT-II
drives some actuators apart from the ECUs
and also shifts some parameters in a speci-
fied range.x- - - xxx -xxxxxxxx- -
DTC & SRT con-
firmationThe results of SRT (System Readiness Test)
and the self-diagnosis status/result can be
confirmed.x- ----------------
DTC work sup-
portThe operating condition to confirm Diagnosis
Trouble Codes can be selected.xx----------------
ECU (ECM/TCM)
part numberECU (ECM/TCM) part number can be read. xx - - xxx -- xxxxxxxxx
ECU discrimi-
nated No.Classification number of a replacement ECU
can be read to prevent an incorrect ECU from
being installed.-- x---------------
Function testThis mode can show results of self-diagnosis
of ECU with either 'OK' or 'NG'. For engines,
more practical tests regarding sensors/
switches and/or actuators are available.xxx---x-----------
Control unit ini-
tializationAll registered ignition key IDs in NATS com-
ponents can be initialized and new IDs can
be registered.-- -----x----------
AV COMM moni-
torThe condition of AV communication can be
Indicated.------------ ---- -x