2006 INFINITI M35 combination meter
[x] Cancel search: combination meterPage 4472 of 5621

HEADLAMP (FOR USA) - XENON TYPE -
LT-45
C
D
E
F
G
H
I
J
L
MA
B
LT
Revision: 2006 January2006 M35/M45
HEADLAMP OPERATION
Low Beam Operation
With the lighting switch in 2ND position, the BCM receives input signal requesting the headlamps to illuminate.
This input signal is communicated to the IPDM E/R across the CAN communication lines. The CPU located in
the IPDM E/R controls the headlamp low relay coil, which when energized, directs power
through 15A fuse (No. 76, located in IPDM E/R)
through IPDM E/R terminal 20
to front combination lamp RH terminal 8,
through 15A fuse (No. 86, located in IPDM E/R)
through IPDM E/R terminal 30
to front combination lamp LH terminal 8.
Ground is supplied
to front combination lamp RH terminal 4
to front combination lamp LH terminal 4
through grounds E22 and E43.
With power and ground supplied, low beam headlamps illuminate.
High Beam Operation/Flash-to-Pass Operation
With the lighting switch in 2ND position and placed in HIGH or PASS position, the BCM receives input signal
requesting the headlamp high beams and low beams to illuminate. This input signal is communicated to the
IPDM E/R across the CAN communication lines. The CPU located in the IPDM E/R controls the headlamp
high relay coil and low relay coil, which when energized, directs power
through 15A fuse (No. 76, located in IPDM E/R)
through IPDM E/R terminal 20
to front combination lamp RH terminal 8,
through 15A fuse (No. 86, located in IPDM E/R)
through IPDM E/R terminal 30
to front combination lamp LH terminal 8,
through 10A fuse (No. 72, located in IPDM E/R)
through IPDM E/R terminal 27
to front combination lamp RH terminal 6,
through 10A fuse (No. 74, located in IPDM E/R)
through IPDM E/R terminal 28
to front combination lamp LH terminal 6.
Ground is supplied
to front combination lamp RH terminal 4
to front combination lamp LH terminal 4
to front combination lamp RH terminal 2
to front combination lamp LH terminal 2
through grounds E22 and E43.
With power and ground supplied, the high beam and low beam headlamps illuminate.
The unified meter and A/C amp. that received the high beam request signal by BCM across the CAN commu-
nication makes a high beam indicator lamp turn on in the combination meter.
Page 4493 of 5621

LT-66
HEADLAMP (FOR USA) - XENON TYPE -
Revision: 2006 January2006 M35/M45
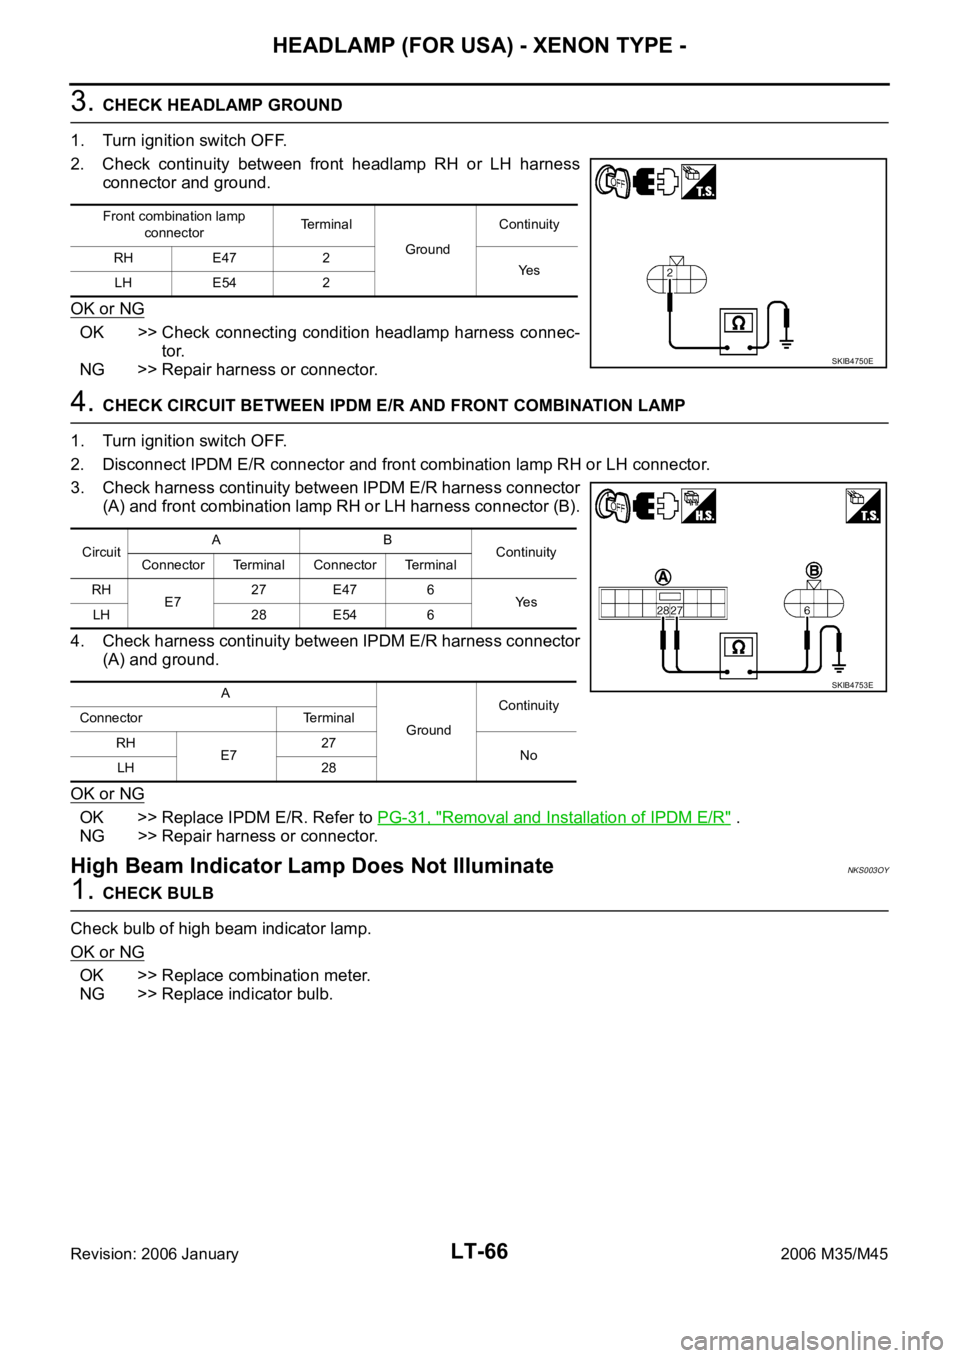
3. CHECK HEADLAMP GROUND
1. Turn ignition switch OFF.
2. Check continuity between front headlamp RH or LH harness
connector and ground.
OK or NG
OK >> Check connecting condition headlamp harness connec-
tor.
NG >> Repair harness or connector.
4. CHECK CIRCUIT BETWEEN IPDM E/R AND FRONT COMBINATION LAMP
1. Turn ignition switch OFF.
2. Disconnect IPDM E/R connector and front combination lamp RH or LH connector.
3. Check harness continuity between IPDM E/R harness connector
(A) and front combination lamp RH or LH harness connector (B).
4. Check harness continuity between IPDM E/R harness connector
(A) and ground.
OK or NG
OK >> Replace IPDM E/R. Refer to PG-31, "Removal and Installation of IPDM E/R" .
NG >> Repair harness or connector.
High Beam Indicator Lamp Does Not IlluminateNKS003OY
1. CHECK BULB
Check bulb of high beam indicator lamp.
OK or NG
OK >> Replace combination meter.
NG >> Replace indicator bulb.
Front combination lamp
connectorTerminal
GroundContinuity
RH E47 2
Ye s
LH E54 2
SKIB4750E
CircuitAB
Continuity
Connector Terminal Connector Terminal
RH
E727 E47 6
Ye s
LH 28 E54 6
A
GroundContinuity
Connector Terminal
RH
E727
No
LH 28
SKIB4753E
Page 4507 of 5621

LT-80
HEADLAMP (FOR CANADA) - DAYTIME LIGHT SYSTEM -
Revision: 2006 January2006 M35/M45
OUTLINE
Power is supplied at all times
to headlamp high relay, located in IPDM E/R (intelligent power distribution module engine room) and
to headlamp low relay, located in IPDM E/R, from battery direct,
through 15A fuse (No. 71, located in IPDM E/R)
to CPU (central processing unit), located in IPDM E/R,
through 15A fuse (No. 78, located in IPDM E/R)
to CPU, located in IPDM E/R,
through 50A fusible link (letter F, located in fuse and fusible link block)
to BCM terminal 55,
through 10A fuse [No. 21, located in fuse block (J/B)]
to BCM terminal 42 and
to combination meter terminal 23,
through 10A fuse (No. 32, located in IPDM E/R)
to daytime light relay terminals 2 and 5,
through 10A fuse [No. 19, located in fuse block (J/B)]
to unified meter and A/C amp. terminal 54,
through 10A fuse [No. 22, located in fuse block (J/B)]
to key slot terminal 1.
When the ignition switch is in ON or START position, power is supplied
to CPU, located in IPDM E/R,
through 15A fuse [No. 1, located in fuse block (J/B)]
to BCM terminal 38,
through 10A fuse [No. 14, located in fuse block (J/B)]
to combination meter terminal 12,
through 10A fuse [No. 12, located in fuse block (J/B)]
to unified meter and A/C amp. terminal 53.
Ground is supplied
to BCM terminal 52
to combination meter terminals 9, 10, and 11
to unified meter and A/C amp. terminal 55 and 71
to push-button ignition switch (push switch) terminal 1
to key slot terminal 8
through grounds M16 and M70,
to IPDM E/R terminals 38 and 51
through grounds E22 and E43.
Page 4508 of 5621

HEADLAMP (FOR CANADA) - DAYTIME LIGHT SYSTEM -
LT-81
C
D
E
F
G
H
I
J
L
MA
B
LT
Revision: 2006 January2006 M35/M45
HEADLAMP OPERATION
Low Beam Operation
With the lighting switch in 2ND position, the BCM receives input signal requesting the headlamps to illuminate.
This input signal is communicated to IPDM E/R across the CAN communication lines. The CPU located in the
IPDM E/R controls the headlamp low relay coil, which when energized, directs power
through 15A fuse (No. 76, located in IPDM E/R)
through IPDM E/R terminal 20
to front combination lamp RH terminal 8,
through 15A fuse (No. 86, located in IPDM E/R)
through IPDM E/R terminal 30
to front combination lamp LH terminal 8.
Ground is supplied
to front combination lamp RH terminal 4
to front combination lamp LH terminal 4
through grounds E22 and E43.
With power and ground supplied, low beam headlamps illuminate.
High Beam Operation (When Daytime Light Does Not Operate)/Flash-to-Pass Operation
With the lighting switch in 2ND position and placed in HIGH BEAM or PASSING position, the BCM receives
input signal requesting headlamp high beams to illuminate. High beam request signal is communicated to the
IPDM E/R across the CAN communication lines. The CPU located in the IPDM E/R controls headlamp high
relay coil and low relay coil, which when energized, directs power
through 10A fuse (No. 72, located in IPDM E/R)
through IPDM E/R terminal 27
through front combination lamp RH terminals 6 and 2
to daytime light relay terminal 3,
through 10A fuse (No. 74, located in IPDM E/R)
through IPDM E/R terminal 28
to front combination lamp LH terminal 6,
through 15A fuse (No. 76, located in IPDM E/R)
through IPDM E/R terminal 20
to front combination lamp RH terminal 8,
through 15A fuse (No. 86, located in IPDM E/R)
through IPDM E/R terminal 30
to front combination lamp LH terminal 8.
Ground is supplied
to daytime light relay terminal 4
to front combination lamp RH terminal 4
to front combination lamp LH terminal 2
to front combination lamp LH terminal 4
through grounds E22 and E43.
With the power and ground supplied, the headlamp high beam and low headlamp illuminate.
High beam indicator illuminates when combination meter receives input signal requesting high beam indicator
to illuminate. This is communicated to BCM across the CAN communication lines.
Page 4520 of 5621

HEADLAMP (FOR CANADA) - DAYTIME LIGHT SYSTEM -
LT-93
C
D
E
F
G
H
I
J
L
MA
B
LT
Revision: 2006 January2006 M35/M45
INSPECTION FOR PARKING BRAKE SWITCH CIRCUIT
1. CHECK BRAKE INDICATOR
1. Turn ignition switch ON.
2. When parking brake is switched ON/OFF, it checks whether the brake indicator lamp of combination meter
lights up / puts out the light.
OK or NG
OK >> INSPECTION END
NG >> GO TO 2.
2. CHECK PARKING BRAKE SWITCH SIGNAL
1. Turn ignition switch OFF.
2. Disconnect parking brake switch connector.
3. Turn ignition switch ON.
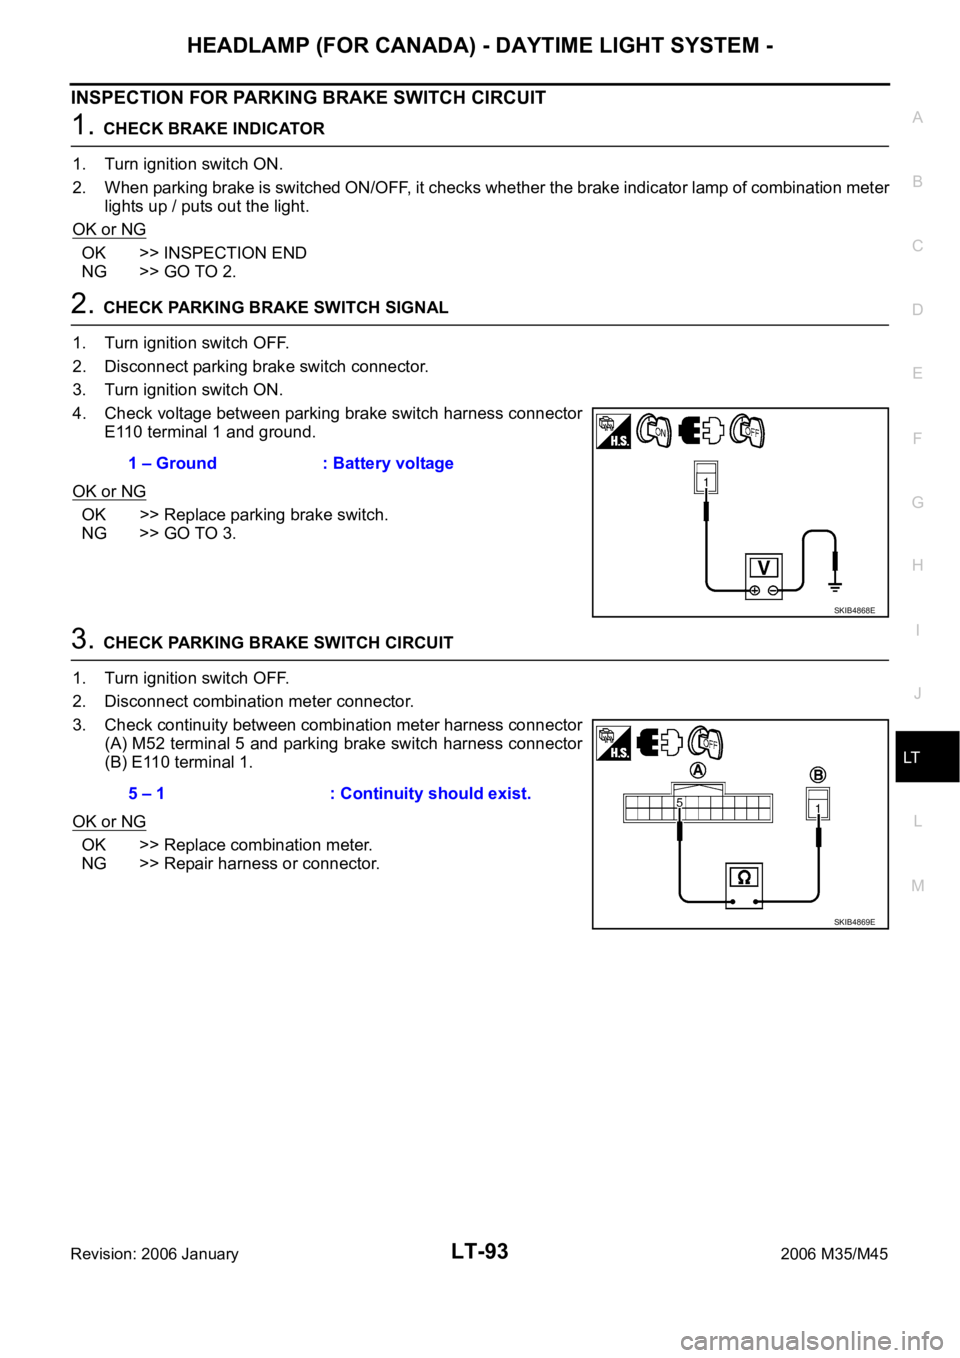
4. Check voltage between parking brake switch harness connector
E110 terminal 1 and ground.
OK or NG
OK >> Replace parking brake switch.
NG >> GO TO 3.
3. CHECK PARKING BRAKE SWITCH CIRCUIT
1. Turn ignition switch OFF.
2. Disconnect combination meter connector.
3. Check continuity between combination meter harness connector
(A) M52 terminal 5 and parking brake switch harness connector
(B) E110 terminal 1.
OK or NG
OK >> Replace combination meter.
NG >> Repair harness or connector.1 – Ground : Battery voltage
SKIB4868E
5 – 1 : Continuity should exist.
SKIB4869E
Page 4557 of 5621

LT-130
AUTO LIGHT SYSTEM
Revision: 2006 January2006 M35/M45
ACTIVE TEST
Operation Procedure
1. Touch “HEAD LAMP” on “SELECT TEST ITEM” screen.
2. Touch “ACTIVE TEST” on “SELECT DIAG MODE” screen.
3. Touch item to be tested and check operation of the selected item.
4. During the operation check, touching “BACK” deactivates the operation.
Display Item List
NOTE:
This item is tested only for CANADA models.
Symptom ChartNKS003QA
Test item Description
TAIL LAMP Allows tail lamp relay to operate by switching ON-OFF.
FR FOG LAMP Allows front fog lamp relay to operate by switching ON-OFF.
DAYTIME RUNNING LIGHT
NOTEAllows daytime light relay to operate by switching ON-OFF.
HEAD LAMP (HI, LO) Allows headlamp relay to operate by switching ON-OFF.
Phenomenon Malfunction system and reference
Parking lamps and headlamps will not illuminate when outside
of the vehicle becomes dark. (Lighting switch 1ST position and
2ND position operate normally.)
Parking lamps and headlamp will not go out when outside of the
vehicle becomes light. (Lighting switch 1ST position and 2ND
position operate normally.)
Headlamps go out when outside of the vehicle becomes light,
but parking lamps stay on.
Refer to LT-128, "WORK SUPPORT" .
Refer to LT-131, "Lighting Switch Inspection" .
Refer to LT-131, "Optical Sensor System Inspection" .
If above systems are normal, replace BCM.
Parking lamps illuminate when outside of the vehicle becomes
dark, but headlamps stay off. (Lighting switch 1ST position and
2ND position operate normally.)
Refer to LT-128, "WORK SUPPORT" .
Refer to LT-131, "Optical Sensor System Inspection" .
If above systems are normal, replace BCM.
With the ignition key in ACC position, headlamps, clearance
lamps, tail lamps, etc. will not go out when the driver's door is
opened.
Refer toBL-96, "Check Door Switch" .
If above system is normal, replace BCM.
Auto light adjustment system will not operate. (Lighting switch
AUTO, 1ST position and 2ND position operate normally.)
Refer to LT-131, "Optical Sensor System Inspection" .
If above system is normal, replace BCM.
Auto light adjustment system of combination meter will not oper-
ate.
CAN communication line inspection between BCM and combi-
nation meter: Refer to BCS-15, "
CAN Communication Inspec-
tion Using CONSULT-II (Self-Diagnosis)" .
Page 4562 of 5621

ACTIVE AFS
LT-135
C
D
E
F
G
H
I
J
L
MA
B
LT
Revision: 2006 January2006 M35/M45
System DescriptionNKS003QF
AFS control unit controls AFS and headlamp auto aiming.
The following signals are input to AFS control unit via CAN communication:
Steering angle sensor signal
A/T position indicator signal
Low beam status signal
Vehicle speed signal
Engine speed signal
Other signals are input as follows:
AFS switch signal from AFS switch connected to AFS control unit
Height sensor signal from height sensor connected to AFS control unit
Swivel position sensor signal from swivel position sensor built into both right and left swivel actuators con-
nected to AFS control unit
In response to the state of control, AFS control unit switches commands of AFS off indicator signal sent to uni-
fied meter and A/C amp. via CAN communication; and then turns on/off or blinks AFS off indicator lamp built in
the combination meter.
AFS (ADAPTIVE FRONT-LIGHTING SYSTEM)
AFS increases viewability of cornering direction by changing light axis automatically to the direction of travel
with low beam headlamps during vehicle's cornering.
AFS switch allows AFS function to be stopped.
AFS control unit determines the current vehicle conditions by each received signals, and sends commands to
the low beam headlamp to swivel. With the headlamps (HIGH/LOW) illuminated, the AFS switch on, engine
running and the A/T select lever in any position but range P or range R, the low beam headlamps are opera-
tive by AFS control unit commands.
As the steering wheel is turned to the left (right), the left (right) low beam headlamp will automatically swivel
angle in accordance with the steering angle and vehicle speed, and stop the operation when the steering
wheel is returned to the straight-ahead position.
Swivel operation allows drive signal to be sent to the swivel actuator on the side that AFS control unit is actu-
ated. Step motor built in swivel actuator adjusts low beam projector of headlamp to swivel angle that matches
drive signal. Swivel position sensor built in swivel actuator detects swivel angle and transmits a swivel position
sensor signal to the AFS control unit. AFS control unit monitors if swivel operation is performed normally via
swivel position sensor signal.
Swivel operation
*1: Included high beam illuminated.
*2: The swivel operates when running at approx. 25 km/h (15.5 MPH). When swivel operation is started, it works on until vehicle
stops.
*3: The low beam headlamps perform small movements when AFS control unit detects start of the engine. This is normal with ini-
tialization of swivel actuator by AFS control unit.Low beam
statusA/T selector
lever positionVehicle speed AFS switch Engine speed Low beam
headlamp LH
(swivel)Low beam
headlamp RH
(swivel)
Left turn
Illuminated*
1Except P, R
Running*2ONWhile engine
running*3
Right turn
Illuminated*1Except P, R Irrespective ONWhile engine
running*3
Page 4565 of 5621

LT-138
ACTIVE AFS
Revision: 2006 January2006 M35/M45
through front combination lamp RH terminal 21.
Swivel position sensor detects swivel angle during ignition switch ON, and transmits swivel position sensor
signals to the AFS control unit:
When ignition switch is turn to ON position, power is supplied
to front combination lamp RH terminal 15
through AFS control unit terminal 4.
When ignition switch is turn to ON position, swivel position sensor input signal is supplied
to AFS control unit terminal 9
through front combination lamp RH terminal 14.
Ground is supplied
to front combination lamp RH terminal 19
through AFS control unit terminal 2.
The low beam headlamp RH starts to swivel to the right.
The swivel motor driving signals are blocked and the swivel motion stops when the steering angle reaches
approximately more than 80 degrees (predetermined). The low beam headlamp will not swivel any further no
matter how further right. As the steering wheel is turned back to the left, the swivel motor driving signals (both
1-phase and 2-phase) will be reversed, causing low beam headlamp RH to start swiveling to the left. When
steering angle becomes smaller than predetermined value, the low beam headlamp is set in the straight-
ahead position, swivel motor driving signals are blocked and low beam headlamps stop swiveling.
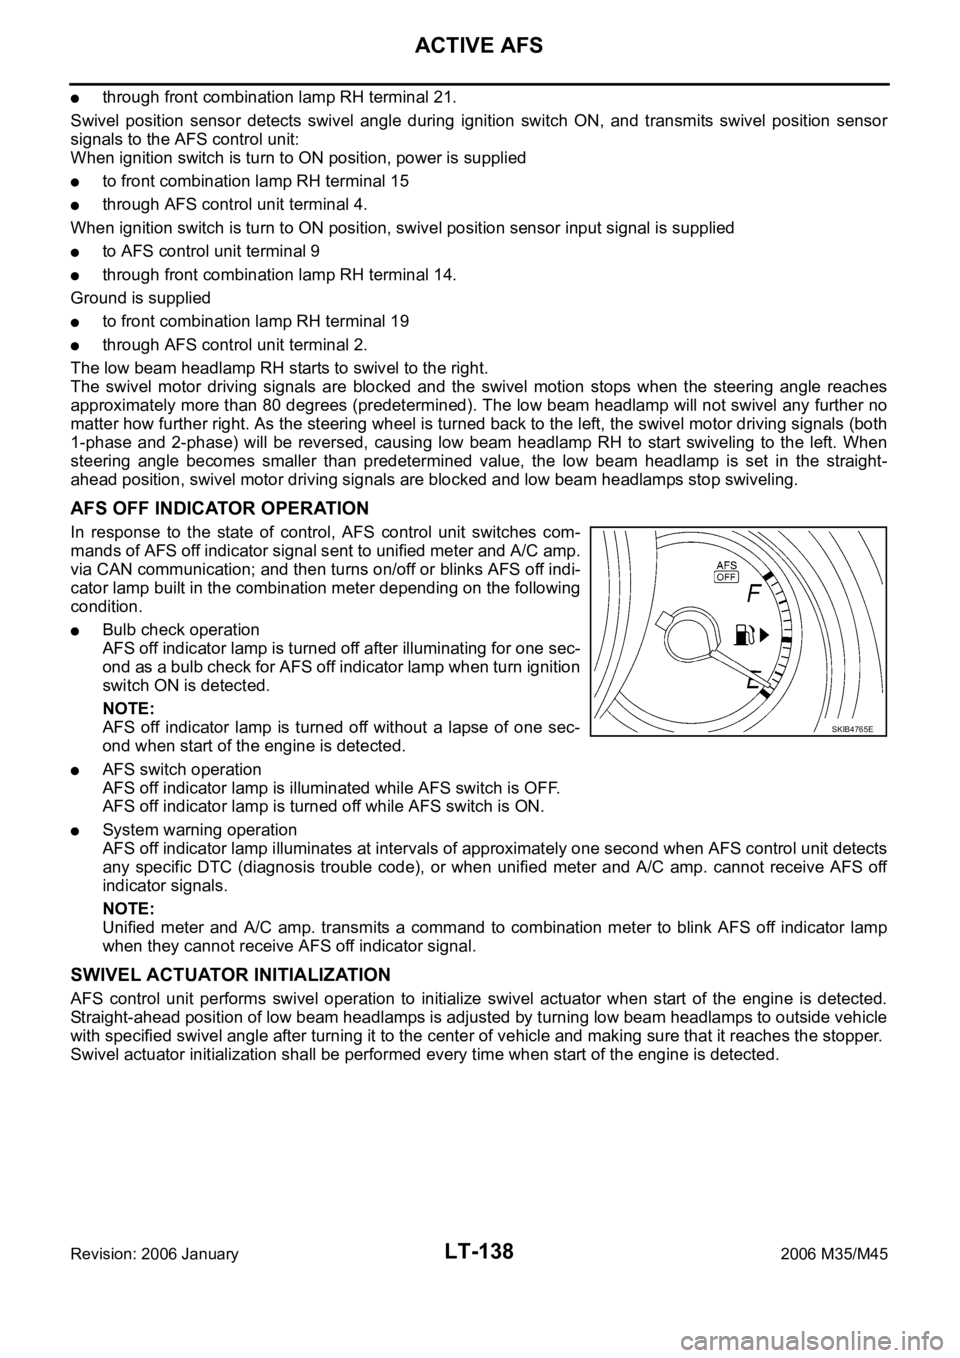
AFS OFF INDICATOR OPERATION
In response to the state of control, AFS control unit switches com-
mands of AFS off indicator signal sent to unified meter and A/C amp.
via CAN communication; and then turns on/off or blinks AFS off indi-
cator lamp built in the combination meter depending on the following
condition.
Bulb check operation
AFS off indicator lamp is turned off after illuminating for one sec-
ond as a bulb check for AFS off indicator lamp when turn ignition
switch ON is detected.
NOTE:
AFS off indicator lamp is turned off without a lapse of one sec-
ond when start of the engine is detected.
AFS switch operation
AFS off indicator lamp is illuminated while AFS switch is OFF.
AFS off indicator lamp is turned off while AFS switch is ON.
System warning operation
AFS off indicator lamp illuminates at intervals of approximately one second when AFS control unit detects
any specific DTC (diagnosis trouble code), or when unified meter and A/C amp. cannot receive AFS off
indicator signals.
NOTE:
Unified meter and A/C amp. transmits a command to combination meter to blink AFS off indicator lamp
when they cannot receive AFS off indicator signal.
SWIVEL ACTUATOR INITIALIZATION
AFS control unit performs swivel operation to initialize swivel actuator when start of the engine is detected.
Straight-ahead position of low beam headlamps is adjusted by turning low beam headlamps to outside vehicle
with specified swivel angle after turning it to the center of vehicle and making sure that it reaches the stopper.
Swivel actuator initialization shall be performed every time when start of the engine is detected.
SKIB4765E