Page 87 of 5267
When Monitored:
With the ignition on. Battery voltage greater than 10.4 volts. TIPM requesting Fuel Pump operation.
Set Condition:
An open condition has been detected in the Fuel Pump Control circuit by the TIPM. One Trip Fault. Three
good trips to turn off the MIL.
Possible Causes
(A109) FUEL PUMP CONTROL OUTPUT CIRCUIT OPEN
FUEL PUMP
TIPM
Always perform the Pre-Diagnostic Troubleshooting procedure before proceeding. (Refer to 9 - ENGINE -
DIAGNOSIS AND TESTING).
Diagnostic Test
1.FUEL PUMP OPERATION
Ignition on, engine not running.
With a scan tool under the PCM Actuators, actuate the Fuel Pump.
Is the Fuel Pump operating?
Ye s>>
Refer to the INTERMITTENT CONDITION Diagnostic Procedure.
Perform the POWERTRAIN VERIFICATION TEST. (Refer to 9 - ENGINE - STANDARD PROCEDURE)
No>>
Go To 2
2.FUEL PUMP CONTROL OPERATION FROM THE PCM
Turn the ignition off.
Disconnect the C1 TIPM harness connector.
Ignition on, engine not running.
Using the scan tool under the PCM Actuators, actuate the Fuel Pump.
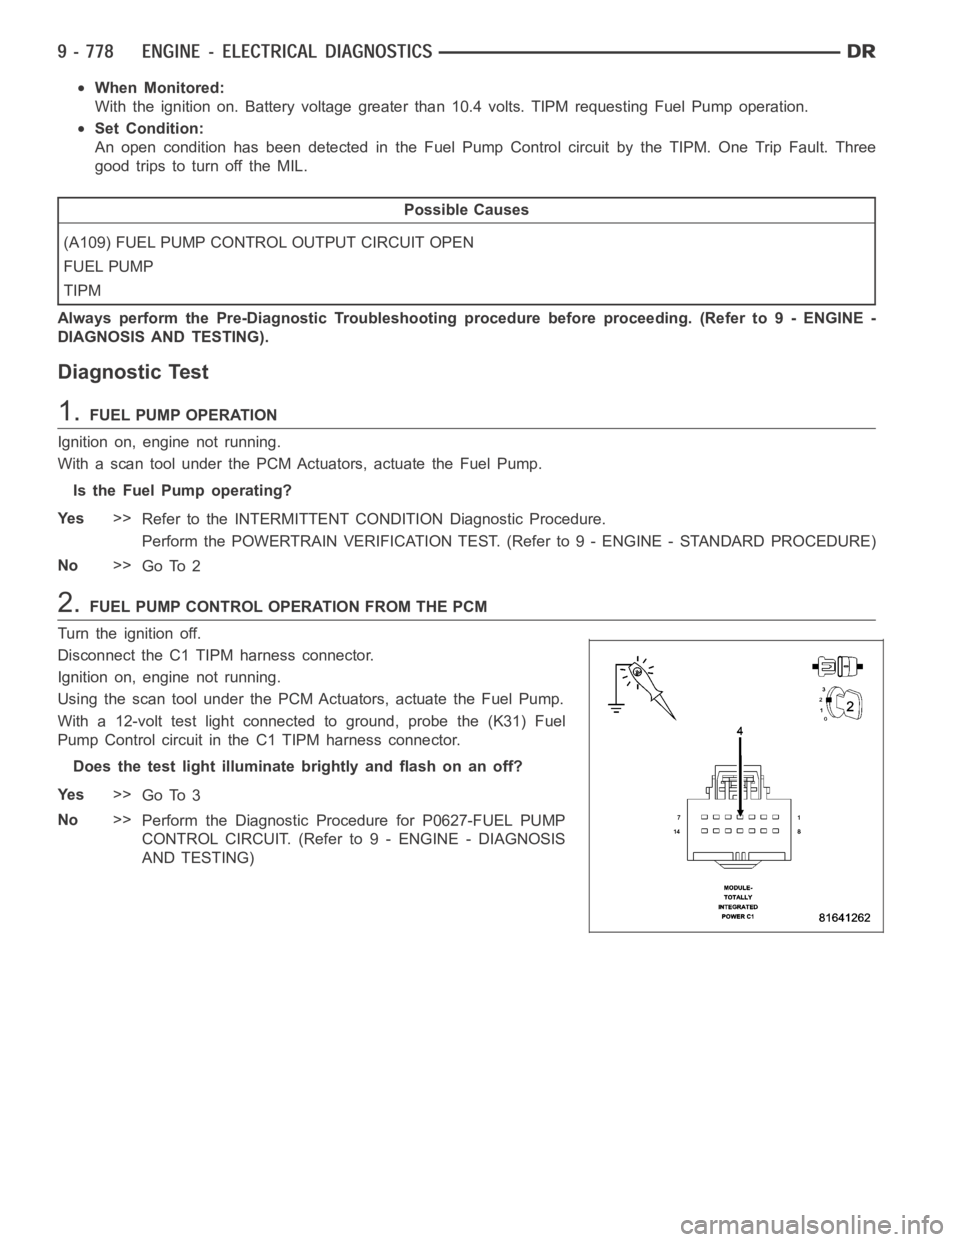
With a 12-volt test light connected to ground, probe the (K31) Fuel
Pump Control circuit in the C1 TIPM harness connector.
Does the test light illuminate brightly and flash on an off?
Ye s>>
Go To 3
No>>
Perform the Diagnostic Procedure for P0627-FUEL PUMP
CONTROL CIRCUIT. (Refer to 9 - ENGINE - DIAGNOSIS
AND TESTING)
Page 88 of 5267
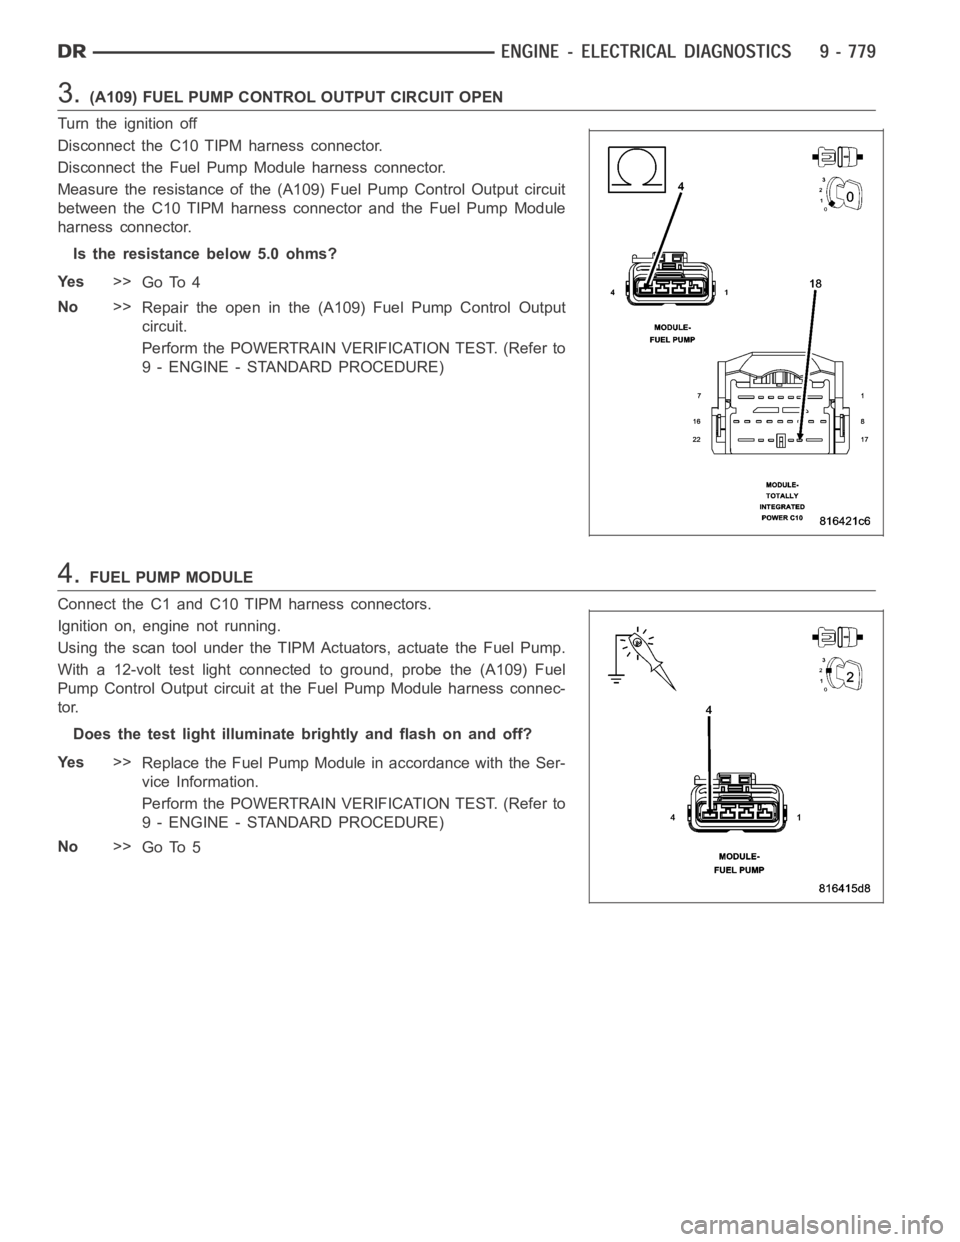
3.(A109) FUEL PUMP CONTROL OUTPUT CIRCUIT OPEN
Turn the ignition off
Disconnect the C10 TIPM harness connector.
Disconnect the Fuel Pump Module harness connector.
Measure the resistance of the (A109) Fuel Pump Control Output circuit
between the C10 TIPM harness connector and the Fuel Pump Module
harness connector.
Is the resistance below 5.0 ohms?
Ye s>>
Go To 4
No>>
Repair the open in the (A109) Fuel Pump Control Output
circuit.
Perform the POWERTRAIN VERIFICATION TEST. (Refer to
9 - ENGINE - STANDARD PROCEDURE)
4.FUEL PUMP MODULE
Connect the C1 and C10 TIPM harness connectors.
Ignition on, engine not running.
Using the scan tool under the TIPM Actuators, actuate the Fuel Pump.
With a 12-volt test light connected to ground, probe the (A109) Fuel
Pump Control Output circuit at the Fuel Pump Module harness connec-
tor.
Does the test light illuminate brightly and flash on and off?
Ye s>>
Replace the Fuel Pump Module in accordance with the Ser-
vice Information.
Perform the POWERTRAIN VERIFICATION TEST. (Refer to
9 - ENGINE - STANDARD PROCEDURE)
No>>
Go To 5
Page 92 of 5267
3.(A109) FUEL PUMP CONTROL OUTPUT CIRCUIT HIGH RESISTANCE
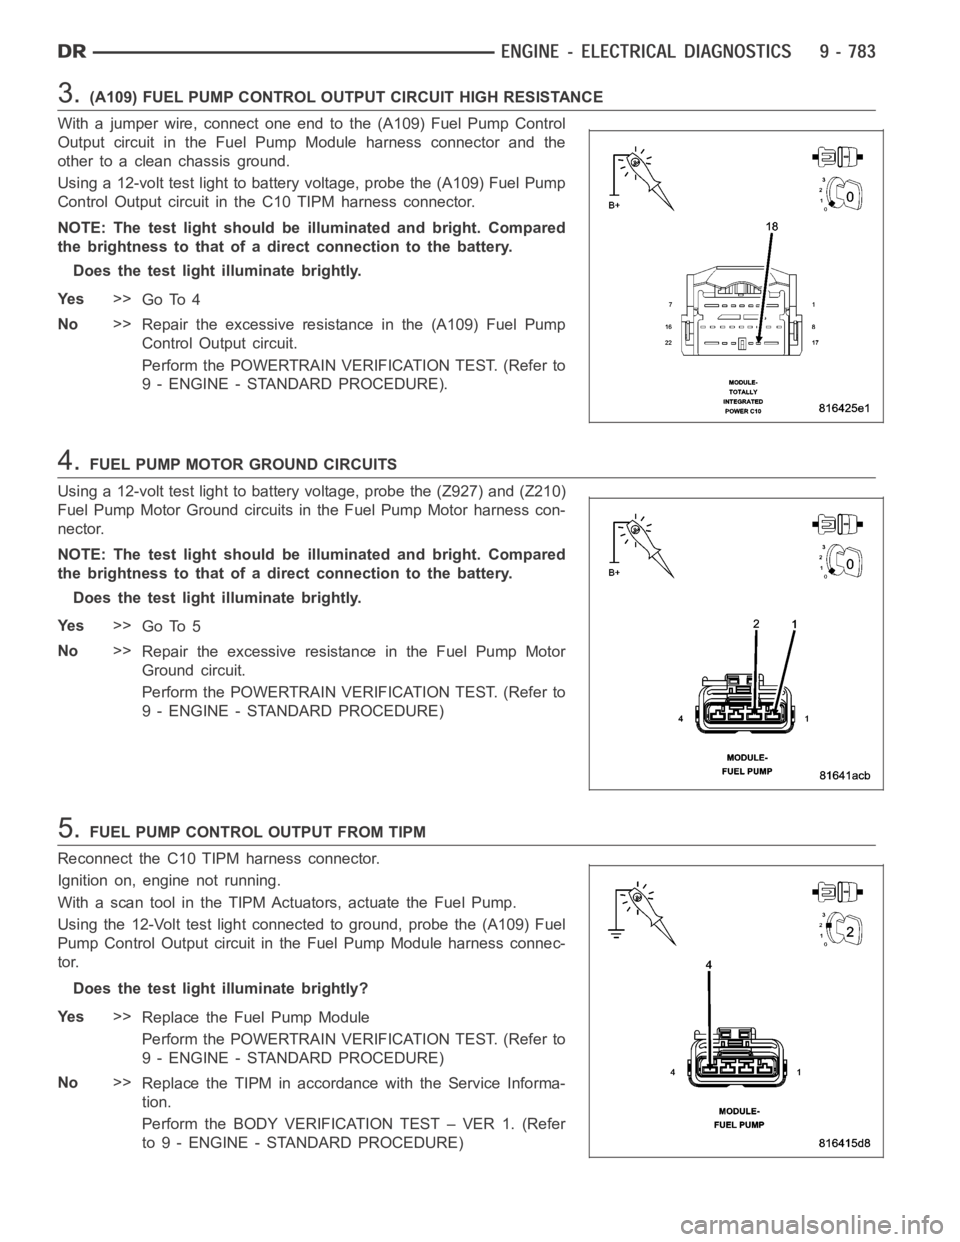
With a jumper wire, connect one end to the (A109) Fuel Pump Control
Output circuit in the Fuel Pump Module harness connector and the
other to a clean chassis ground.
Using a 12-volt test light to battery voltage, probe the (A109) Fuel Pump
Control Output circuit in the C10 TIPM harness connector.
NOTE: The test light should be illuminated and bright. Compared
the brightness to that of a direct connection to the battery.
Does the test light illuminate brightly.
Ye s>>
Go To 4
No>>
Repair the excessive resistance in the (A109) Fuel Pump
Control Output circuit.
Perform the POWERTRAIN VERIFICATION TEST. (Refer to
9 - ENGINE - STANDARD PROCEDURE).
4.FUEL PUMP MOTOR GROUND CIRCUITS
Using a 12-volt test light to battery voltage, probe the (Z927) and (Z210)
Fuel Pump Motor Ground circuits in the Fuel Pump Motor harness con-
nector.
NOTE: The test light should be illuminated and bright. Compared
the brightness to that of a direct connection to the battery.
Does the test light illuminate brightly.
Ye s>>
Go To 5
No>>
Repair the excessive resistance in the Fuel Pump Motor
Ground circuit.
Perform the POWERTRAIN VERIFICATION TEST. (Refer to
9 - ENGINE - STANDARD PROCEDURE)
5.FUEL PUMP CONTROL OUTPUT FROM TIPM
Reconnect the C10 TIPM harness connector.
Ignition on, engine not running.
With a scan tool in the TIPM Actuators, actuate the Fuel Pump.
Using the 12-Volt test light connected to ground, probe the (A109) Fuel
Pump Control Output circuit in the Fuel Pump Module harness connec-
tor.
Does the test light illuminate brightly?
Ye s>>
Replace the Fuel Pump Module
Perform the POWERTRAIN VERIFICATION TEST. (Refer to
9 - ENGINE - STANDARD PROCEDURE)
No>>
Replace the TIPM in accordance with the Service Informa-
tion.
Perform the BODY VERIFICATION TEST – VER 1. (Refer
to 9 - ENGINE - STANDARD PROCEDURE)
Page 99 of 5267
2.MDS SOLENOID NO.1
Turn the ignition off.
Gain access to the MDS Solenoid No.1.
Disconnect the MDS Solenoid No.1 harness connector.
Ignition on, engine not running.
Turn off all accessories.
Using a 12-volt test light connected to the (Z42) Ground circuit, probe
the (K451) MDS Solenoid No.1 Control circuit.
With a scan tool, actuate the MDS Solenoid 1.
Does the 12-volt test light flash on and off?
Ye s>>
Go To 7
No>>
Go To 3
3.(Z42) GROUND CIRCUIT OPEN
Turn the ignition off.
Using a 12-volt test light connected to the 12-volts, probe the (Z42)
Ground circuit in the MDS Solenoid No.1 harness connector.
Does the test light illuminate brightly?
Ye s>>
Go To 4
No>>
Repair the open in the (Z42) Ground circuit.
Perform the POWERTRAIN VERIFICATION TEST. (Refer
to 9 - ENGINE - STANDARD PROCEDURE)
Page 104 of 5267
2.MDS SOLENOID NO.4
Turn the ignition off.
Gain access to the MDS Solenoid No.4.
Disconnect the MDS Solenoid No.4 harness connector.
Ignition on, engine not running.
Turn off all accessories.
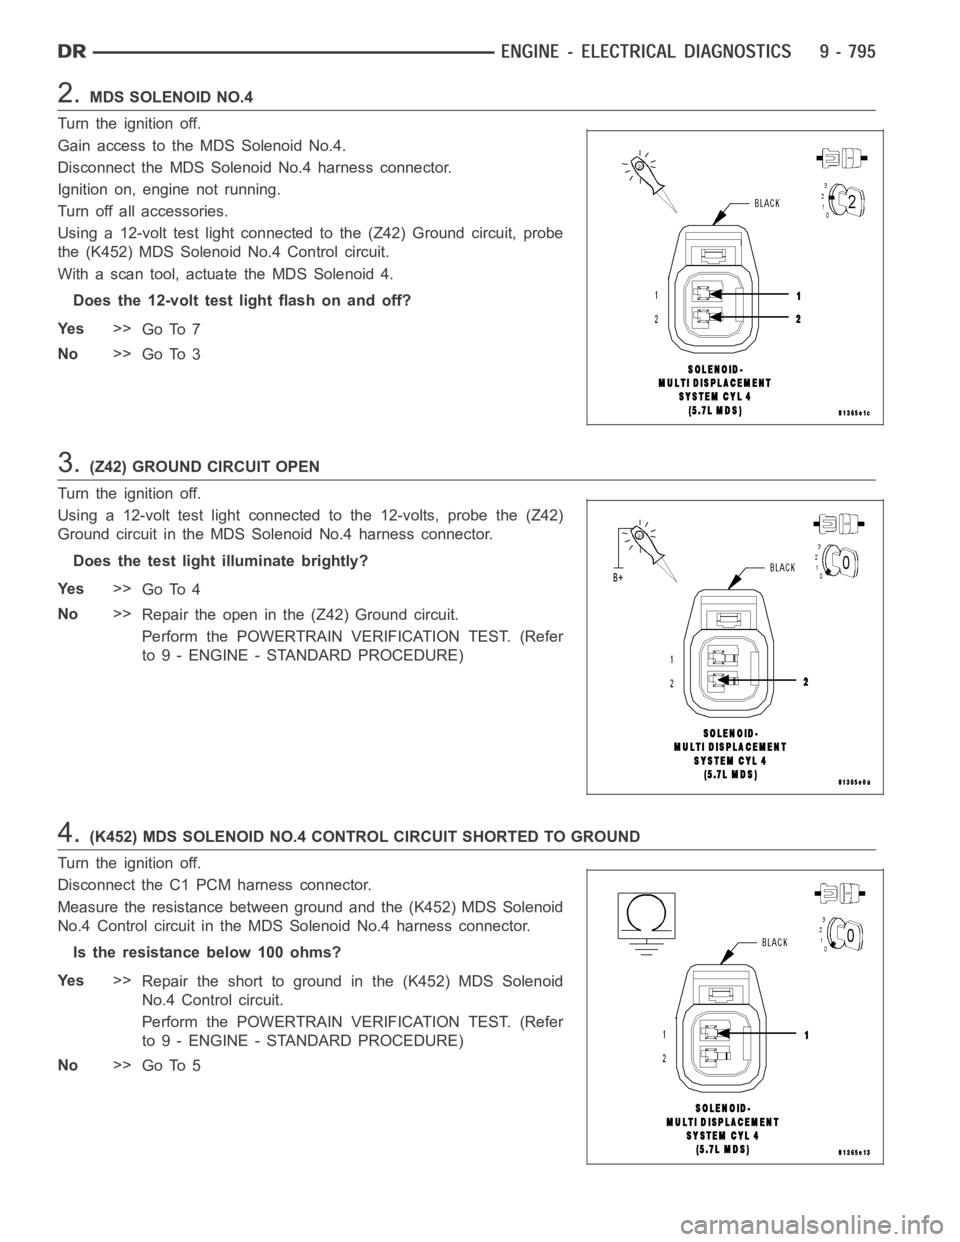
Using a 12-volt test light connected to the (Z42) Ground circuit, probe
the (K452) MDS Solenoid No.4 Control circuit.
With a scan tool, actuate the MDS Solenoid 4.
Does the 12-volt test light flash on and off?
Ye s>>
Go To 7
No>>
Go To 3
3.(Z42) GROUND CIRCUIT OPEN
Turn the ignition off.
Using a 12-volt test light connected to the 12-volts, probe the (Z42)
Ground circuit in the MDS Solenoid No.4 harness connector.
Does the test light illuminate brightly?
Ye s>>
Go To 4
No>>
Repair the open in the (Z42) Ground circuit.
Perform the POWERTRAIN VERIFICATION TEST. (Refer
to 9 - ENGINE - STANDARD PROCEDURE)
4.(K452) MDS SOLENOID NO.4 CONTROL CIRCUIT SHORTED TO GROUND
Turn the ignition off.
Disconnect the C1 PCM harness connector.
Measure the resistance between ground and the (K452) MDS Solenoid
No.4 Control circuit in the MDS Solenoid No.4 harness connector.
Istheresistancebelow100ohms?
Ye s>>
Repair the short to ground in the (K452) MDS Solenoid
No.4 Control circuit.
Perform the POWERTRAIN VERIFICATION TEST. (Refer
to 9 - ENGINE - STANDARD PROCEDURE)
No>>
Go To 5
Page 108 of 5267
For a complete wiring diagramRefer to Section 8W.
Theory of Operation
When all criteria has been met, power is supplied to each MDS Solenoid when the engine is making a transition
from 8 cylinder mode to 4 cylinder mode. By actuating the solenoid, oil pressure is raised to the pair of lifters that
coincide with each particular solenoid. The oil pressure pushes in the locking pins that allows the lifter to collapse,
decoupling the valves and camshaft.
When Monitored:
Transition from 8 to 4 cylinder mode.
Set Condition:
The MDS fails to active and take place for cylinder 6. One trip fault.
Possible Causes
(K453) MDS SOLENOID NO.6 CONTROL SHORT TO GROUND
(K453) MDS SOLENOID NO.6 CONTROL OPEN
(Z42) GROUND CIRCUIT OPEN
INSUFFICIENT OIL PRESSURE ACTING ON THE LIFTER LOCKING PINS
OIL PASSAGES RESTRICTED
LIFTER
MDS SOLENOID NO.6
PCM
Always perform the Pre-Diagnostic Troubleshooting procedure before proceeding. (Refer to 9 - ENGINE -
DIAGNOSIS AND TESTING).
Diagnostic Test
1.ACTIVE DTC
Ignition on, engine not running.
With a scan tool, read DTCs.
Is the DTC active at this time?
Ye s>>
Go To 2
No>>
Refer to the INTERMITTENT CONDITION Diagnostic Procedure.
Perform the POWERTRAIN VERIFICATION TEST. (Refer to 9 - ENGINE - STANDARD PROCEDURE)
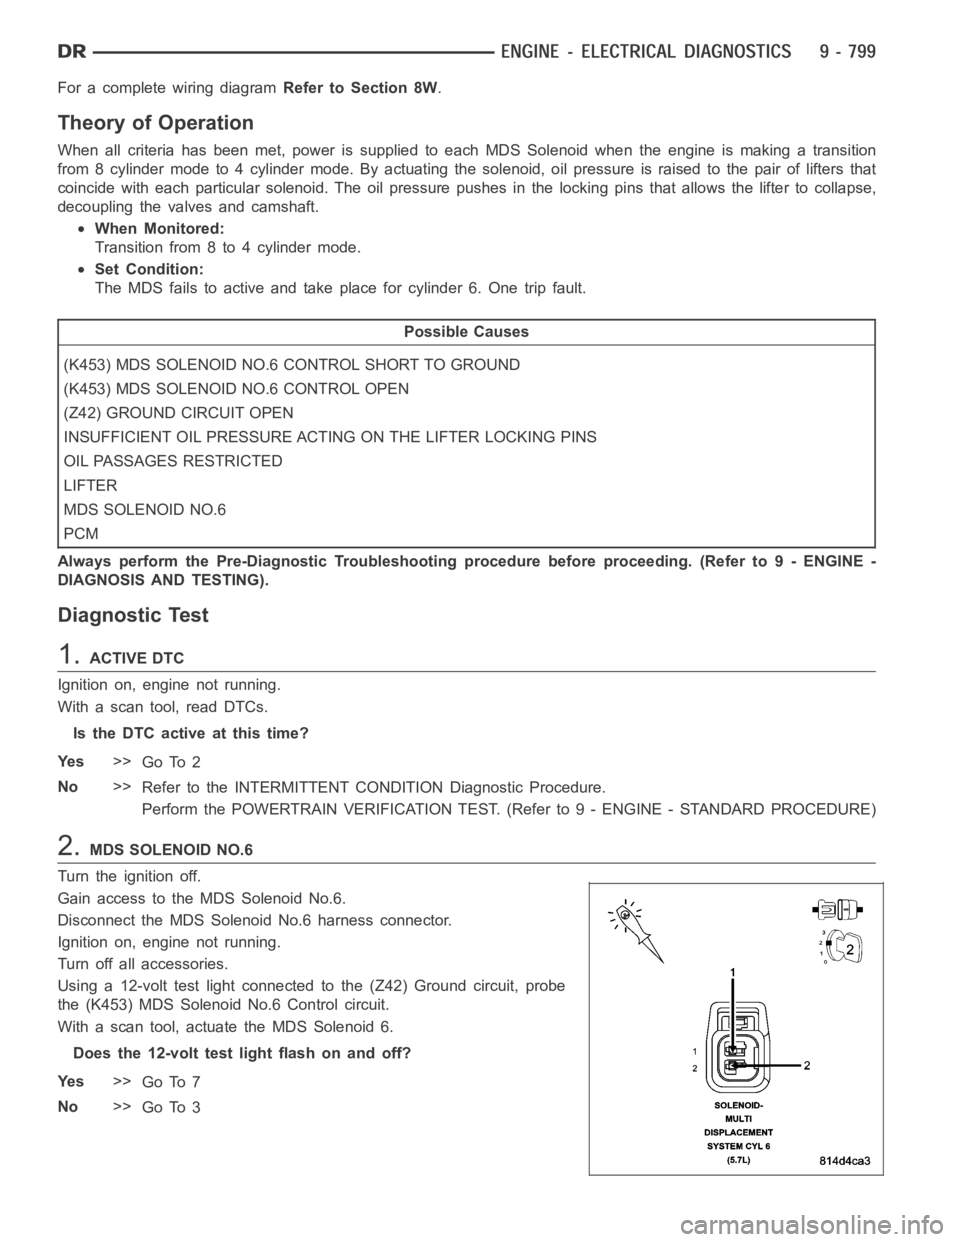
2.MDS SOLENOID NO.6
Turn the ignition off.
Gain access to the MDS Solenoid No.6.
Disconnect the MDS Solenoid No.6 harness connector.
Ignition on, engine not running.
Turn off all accessories.
Using a 12-volt test light connected to the (Z42) Ground circuit, probe
the (K453) MDS Solenoid No.6 Control circuit.
With a scan tool, actuate the MDS Solenoid 6.
Does the 12-volt test light flash on and off?
Ye s>>
Go To 7
No>>
Go To 3
Page 109 of 5267
3.(Z42) GROUND CIRCUIT OPEN
Turn the ignition off.
Using a 12-volt test light connected to the 12-volts, probe the (Z42)
Ground circuit in the MDS Solenoid No.6 harness connector.
Does the test light illuminate brightly?
Ye s>>
Go To 4
No>>
Repair the open in the (Z42) Ground circuit.
Perform the POWERTRAIN VERIFICATION TEST. (Refer
to 9 - ENGINE - STANDARD PROCEDURE)
4.(K453) MDS SOLENOID NO.6 CONTROL CIRCUIT SHORTED TO GROUND
Disconnect the C2 PCM harness connector.
Turn the ignition off.
Measure the resistance between ground and the (K453) MDS Solenoid
No.6 Control circuit in the MDS Solenoid No.6 harness connector.
Istheresistancebelow100ohms?
Ye s>>
Repair the short to ground in the (K453) MDS Solenoid
No.6 Control circuit.
Perform the POWERTRAIN VERIFICATION TEST. (Refer
to 9 - ENGINE - STANDARD PROCEDURE)
No>>
Go To 5
Page 113 of 5267
For a complete wiring diagramRefer to Section 8W.
Theory of Operation
When all criteria has been met, power is supplied to each MDS Solenoid when the engine is making a transition
from 8 cylinder mode to 4 cylinder mode. By actuating the solenoid, oil pressure is raised to the pair of lifters that
coincide with each particular solenoid. The oil pressure pushes in the locking pins that allows the lifter to collapse,
decoupling the valves and camshaft.
When Monitored:
Transition from 8 to 4 cylinder mode.
Set Condition:
The MDS fails to active and take place for cylinder 7. One trip fault.
Possible Causes
(K454) MDS SOLENOID NO.7 CONTROL SHORT TO GROUND
(K454) MDS SOLENOID NO.7 CONTROL OPEN
(Z42) GROUND CIRCUIT OPEN
INSUFFICIENT OIL PRESSURE ACTING ON THE LIFTER LOCKING PINS
OIL PASSAGES RESTRICTED
LIFTER
MDS SOLENOID NO.7
PCM
Always perform the Pre-Diagnostic Troubleshooting procedure before proceeding. (Refer to 9 - ENGINE -
DIAGNOSIS AND TESTING).
Diagnostic Test
1.ACTIVE DTC
Ignition on, engine not running.
With a scan tool, read DTCs.
Is the DTC active at this time?
Ye s>>
Go To 2
No>>
Refer to the INTERMITTENT CONDITION Diagnostic Procedure.
Perform the POWERTRAIN VERIFICATION TEST. (Refer to 9 - ENGINE - STANDARD PROCEDURE)
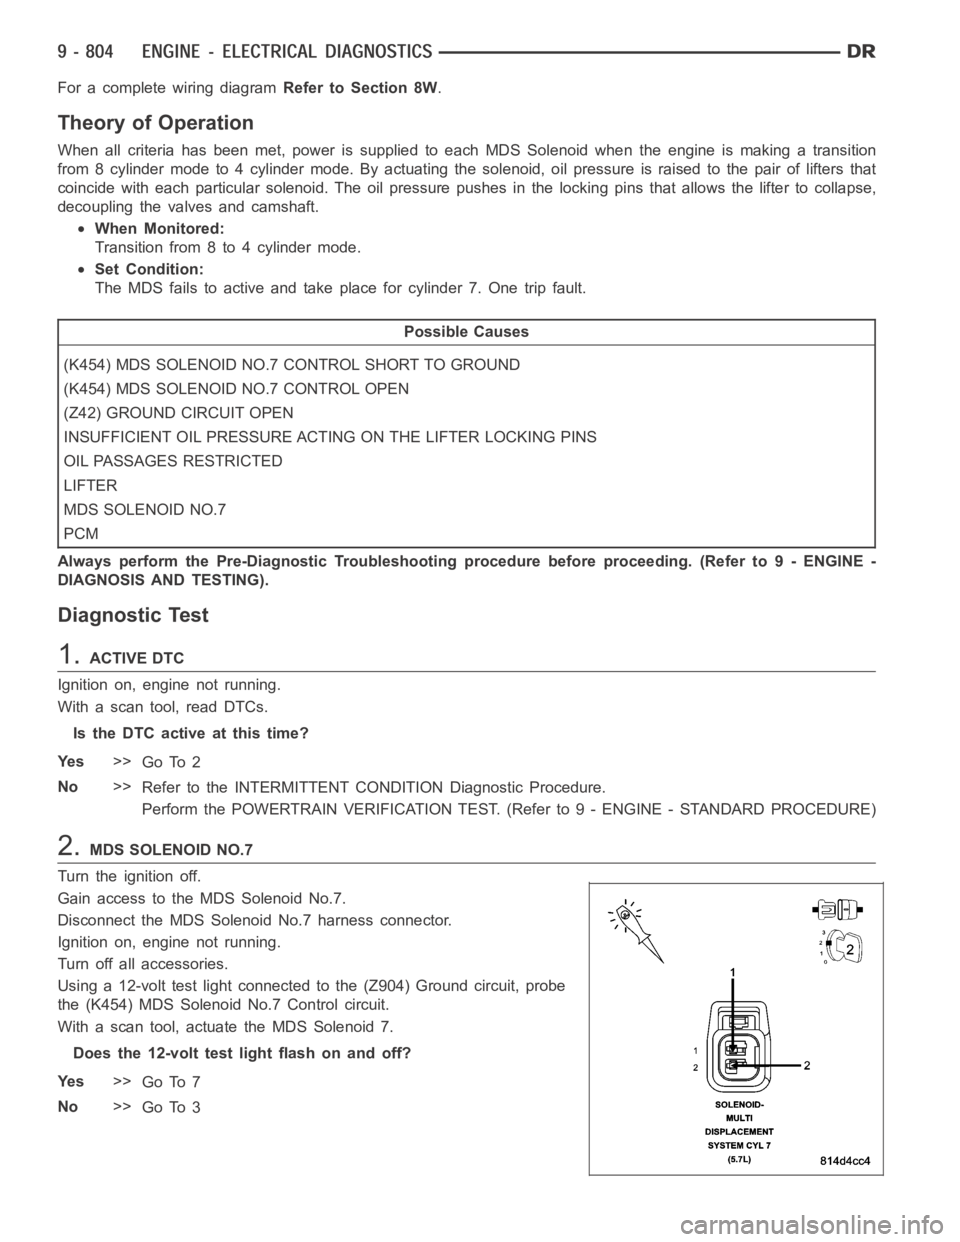
2.MDS SOLENOID NO.7
Turn the ignition off.
Gain access to the MDS Solenoid No.7.
Disconnect the MDS Solenoid No.7 harness connector.
Ignition on, engine not running.
Turn off all accessories.
Using a 12-volt test light connected to the (Z904) Ground circuit, probe
the (K454) MDS Solenoid No.7 Control circuit.
With a scan tool, actuate the MDS Solenoid 7.
Does the 12-volt test light flash on and off?
Ye s>>
Go To 7
No>>
Go To 3