2006 BMW MOTORRAD K 1200 GT Rider's Manual (in English)
-
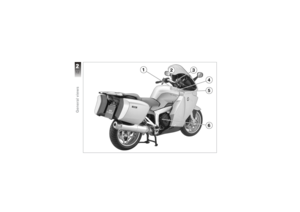
 1
1 -
 2
2 -
 3
3 -
 4
4 -
 5
5 -
 6
6 -
 7
7 -
 8
8 -
 9
9 -
 10
10 -
 11
11 -
 12
12 -
 13
13 -
 14
14 -
 15
15 -
 16
16 -
 17
17 -
 18
18 -
 19
19 -
 20
20 -
 21
21 -
 22
22 -
 23
23 -
 24
24 -
 25
25 -
 26
26 -
 27
27 -
 28
28 -
 29
29 -
 30
30 -
 31
31 -
 32
32 -
 33
33 -
 34
34 -
 35
35 -
 36
36 -
 37
37 -
 38
38 -
 39
39 -
 40
40 -
 41
41 -
 42
42 -
 43
43 -
 44
44 -
 45
45 -
 46
46 -
 47
47 -
 48
48 -
 49
49 -
 50
50 -
 51
51 -
 52
52 -
 53
53 -
 54
54 -
 55
55 -
 56
56 -
 57
57 -
 58
58 -
 59
59 -
 60
60 -
 61
61 -
 62
62 -
 63
63 -
 64
64 -
 65
65 -
 66
66 -
 67
67 -
 68
68 -
 69
69 -
 70
70 -
 71
71 -
 72
72 -
 73
73 -
 74
74 -
 75
75 -
 76
76 -
 77
77 -
 78
78 -
 79
79 -
 80
80 -
 81
81 -
 82
82 -
 83
83 -
 84
84 -
 85
85 -
 86
86 -
 87
87 -
 88
88 -
 89
89 -
 90
90 -
 91
91 -
 92
92 -
 93
93 -
 94
94 -
 95
95 -
 96
96 -
 97
97 -
 98
98 -
 99
99 -
 100
100 -
 101
101 -
 102
102 -
 103
103 -
 104
104 -
 105
105 -
 106
106 -
 107
107 -
 108
108 -
 109
109 -
 110
110 -
 111
111 -
 112
112 -
 113
113 -
 114
114 -
 115
115 -
 116
116 -
 117
117 -
 118
118 -
 119
119 -
 120
120 -
 121
121 -
 122
122 -
 123
123 -
 124
124 -
 125
125 -
 126
126 -
 127
127 -
 128
128 -
 129
129 -
 130
130 -
 131
131 -
 132
132 -
 133
133 -
 134
134 -
 135
135 -
 136
136 -
 137
137 -
 138
138 -
 139
139 -
 140
140 -
 141
141 -
 142
142 -
 143
143 -
 144
144 -
 145
145 -
 146
146 -
 147
147 -
 148
148 -
 149
149 -
 150
150 -
 151
151 -
 152
152 -
 153
153 -
 154
154 -
 155
155 -
 156
156 -
 157
157 -
 158
158 -
 159
159 -
 160
160 -
 161
161 -
 162
162 -
 163
163 -
 164
164 -
 165
165 -
 166
166 -
 167
167 -
 168
168 -
 169
169 -
 170
170 -
 171
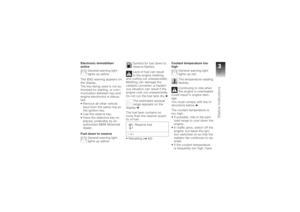
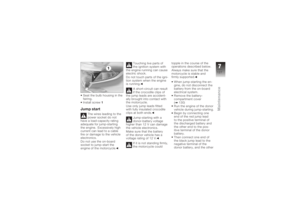
171
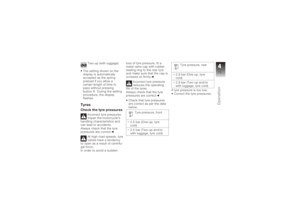
 switched off. In order to en-
sure that the drain on the on-
board power supply system is
minimised, the supply to the
power socket is cut off ap-
proximately 15 minutes after
the ignition is switched")
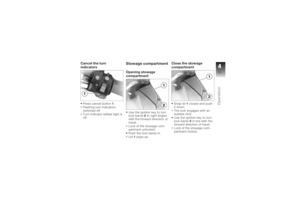
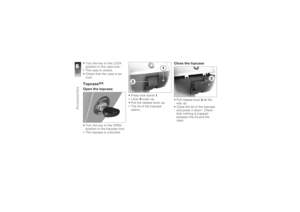
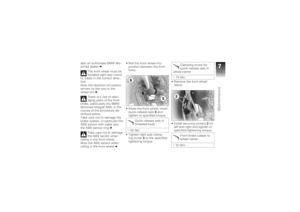
 Press lock barrel1.
Lever 2pops up.
Pull the release lever up.
The lid of the case opens.
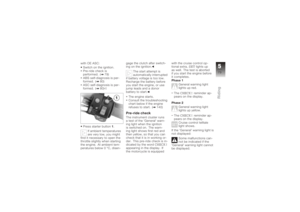
Close the casePull release lever 2all the
way up.
Close the lid of the case
and press it down. Check
that noth")
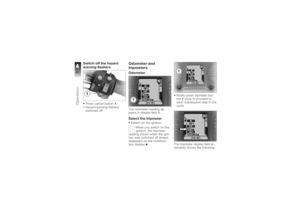
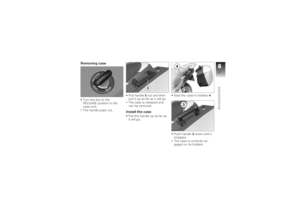
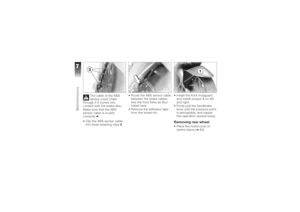
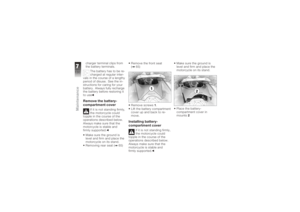
 Removing caseTurn the key to the
RELEASE position in the
case lock.
The handle pops out.Pull handle
3out and then
pull it up as far as it will go.
The case is released and
can be removed.
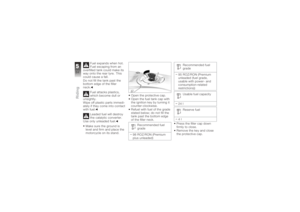
Install the")
 Turn the key to the LOCK
position in the case lock.
The case is closed.
Check that the case is se-
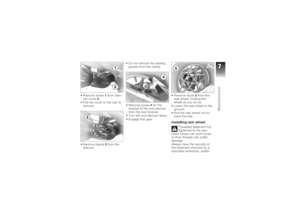
cure.Topcase
OA
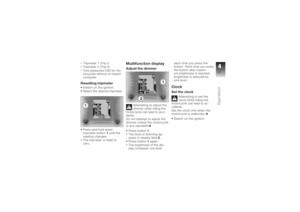
Open the topcaseTurn the key to the OPEN
position in the topcase lock.
The topcase is")
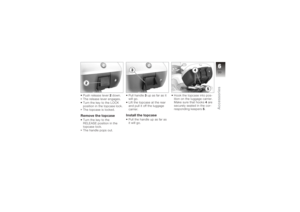
 Push release lever2down.
The release lever engages.
Turn the key to the LOCK
position in the topcase lock.
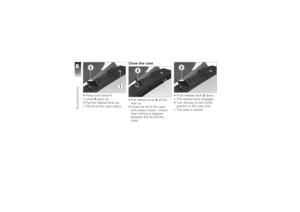
The topcase is locked.Remove the topcaseTurn the key to the
RELEASE position in the
topcase l")
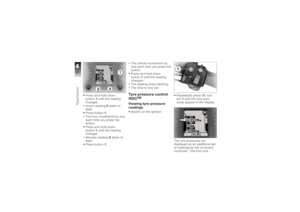
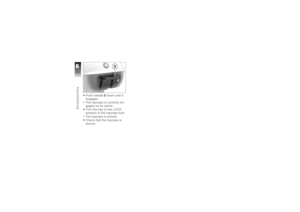
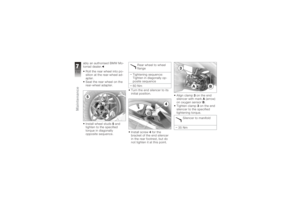
 Push handle3down until it
engages.
The topcase is correctly en-
gaged on its carrier.
Turn the key to the LOCK
position in the topcase lock.
The topcase is locked.
Check that the topcase is
secure.
61")
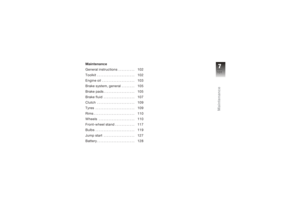
 Maintenance
General instructions . . . . . . . . . . 102
Toolkit . . . . . . . . . . . . . . . . . . . . . . . 102
Engine oil . . . . . . . . . . . . . . . . . . . . 103
Brake system, general . . . .")
 General instructionsThe 'Maintenance' chapter
describes work involving the
replacement of wear parts
that can be performed with
minimum effort.
Special tightening torques are
listed as applica")