Page 81 of 127

The arrow shows the direction of rotation of the tire
Summer and winter tires
When switching between summer and winter tires, mark the tires to indicate where they were mounted on the car,
e.g. LF = left front, RR = right rear
Tires with tread designed to roll in only one direction are marked with an arrow on the sidewall.
Incorrectly mounted tires impair the car's braking properties and ability to force aside rain, snow and slush.
The tires with the most tread should always be at the rear (to reduce the risk of skidding)
Wheels should be stored hanging up or on their sides, never standing.
Contact a Volvo workshop if you are unsure about the tread depth.
pg. 136 Removing a wheel
Removing a wheel
The spare tire, jack, and crank are located under the carpet on the floor of the trunk.
To change a tire:
1. Engage the parking brake.
2. Put the gear selector in (P)ark.
3. Block the wheels that are on the ground with wooden blocks or large stones.
4. Remove the wheel cap (where applicable) using the lug wrench in the tool bag.
ProCarManuals.com
Page 82 of 127

5. With the car still on the ground, use the lug wrench to loosen the wheel nuts 1/2 - 1 turn by exerting downward
pressure. Turn the nuts counterclockwise to loosen.
6. There are two jack attachment points on each side of the car. Position the jack correctly in the attachment (see
illustration above) and crank while simultaneously guiding the base of the jack to the ground. The base of the jack
must be flat on a level, firm, non-slippery surface. Before raising the car, check that the jack is still correctly
positioned in the attachment.
7. Raise the vehicle until the wheel to be changed is lifted off the ground.
8. Unscrew the wheel bolts completely and carefully remove the wheel so as not to damage the threads on the studs.
pg. 137 Removing a wheel
WARNING!
The jack must correctly engage the jack attachment.
Be sure the jack is on a firm, level, non-slippery surface.
Never allow any part of your body to be extended under a car supported by a jack.
Use the jack intended for the car when changing a tire. For any other job, use stands to support the car.
Apply the parking brake and put the gear selector in the (P)ark position.
Block the wheels standing on the ground, use rigid wooden blocks or large stones.
The jack should be kept well-greased.
Installing the wheel
1. Clean the contact surfaces on the wheel and hub.
2. Lift the wheel and place it on the hub.
3. Install the wheel nuts and tighten hand -tight. Using the lug wrench, tighten crosswise until all nuts are snug.
ProCarManuals.com
Page 83 of 127
4. Lower the vehicle to the ground and alternately tighten the bolts crosswise to 62 ft. lbs. (85 Nm).
5. Install the wheel cap (where applicable).
Returning the jack and spare wheel to the storage space
1. Crank the jack (1) down approximately halfway until the mark on the washer (2) aligns with the mark on the jack's
arm (3).
2. Place the jack in the storage space. Fold in the jack's crank (4) and place the lug wrench (5) on the jack.
3. Screw the jack's retaining pin into hole 6 so that it holds the jack securely in place.
4. Place the spare wheel (7) over the jack.
5. Insert the spare wheel's retaining pin through the center hole in the spare wheel so that it aligns with hole 8. Screw
the retaining pin into hole 8 so that it holds the spare wheel securely in place.
pg. 138 This page intentionally left blank
Contents | Top of Page
ProCarManuals.com
Page 84 of 127

2 0 0 5
VOLVO S40
Chapter 9 - Vehicle care
pg. 139 Vehicle care
Washing and cleaning the car140
Paint touch up143
pg. 140 Washing and cleaning the car
Washing and cleaning the car
Washing the car
The following points should be kept in mind when washing and cleaning the car:
The car should be washed at regular intervals since dirt, dust, insects and tar spots adhere to the paint and may cause
damage. To help prevent corrosion, it is particularly important to wash the car frequently in the wintertime.
Avoid washing your car in direct sunlight. Doing so may cause detergents and wax to dry out and become abrasive.
To avoid scratching, use lukewarm water to soften the dirt before you wash with a soft sponge, and plenty of sudsy
water.
Bird droppings : Remove from paint work as soon as possible. Otherwise the finish may be permanently damaged.
A detergent can be used to facilitate the softening of dirt and oil.
A water-soluble grease solvent may be used in cases of sticky dirt. However, use a wash place equipped with a
drainage separator.
Dry the car with a clean chamois and remember to clean the drain holes in the doors and rocker panels.
Tar spots can be removed with kerosene or tar remover after the car has been washed.
A stiff-bristle brush and lukewarm soapy water can be used to clean the wiper blades. Frequent cleaning improves
visibility considerably.
Wash off the dirt from the underside (wheel housings, fenders, etc).
In areas of high industrial fallout, more frequent washing is recommended.
After cleaning the engine, the spark plug wells should be inspected for water and blown dry if necessary.
Bumpers : Wash the bumpers with the same cleaning agent used on the rest of the car. Never clean the bumpers with
gasoline or paint thinner. Difficult spots can be removed with denatured alcohol. To avoid scratches, do not dry the
bumpers with paper.
NOTE: When washing the car, remember to remove dirt from the drain holes in the doors and sills.
CAUTION!
During high pressure washing, the spray mouthpiece must never be closer to the vehicle than 13" (30 cm). Do not
spray into the locks.
When washing or steam cleaning the engine, avoid spraying water or steam directly on the electrical components or
ProCarManuals.com
Page 85 of 127

toward the rear side of the engine. Special moonroof cautions:
Always close the moonroof and sun shade before washing your vehicle.
Never use abrasive cleaning agents on the moonroof.
Never use wax on the rubber seals around the moonroof.
Automatic washing - simple and quick
We do NOT recommend washing your car in an automatic wash during the first six months (because the paint will
not have hardened sufficiently).
An automatic wash is a simple and quick way to clean your car, but it is worth remembering that it may not be as
thorough as when you yourself go over the car with sponge and water. Keeping the underbody clean is most important,
pg. 141 Washing and cleaning the car
especially in the winter. Some automatic washers do not have facilities for washing the underbody.
CAUTION!
Before driving into an automatic carwash, turn off the optional rain sensor to avoid damaging the windshield wipers.
Make sure that side view mirrors, auxiliary lamps, etc, are secure, and that any antenna(s) are retracted or removed.
Otherwise there is risk of the machine dislodging them.
WARNING!
When the car is driven immediately after being washed, apply the brakes several times in order to remove any
moisture from the brake linings.
Engine cleaning agents should not be used when the engine is warm. This constitutes a fire risk.
Polishing and Waxing
Normally, polishing is not required during the first year after delivery, however, waxing may be beneficial.
Before applying polish or wax the vehicle must be washed and dried. Tar spots can be removed with kerosene or tar
remover. Difficult spots may require a fine rubbing compound.
After polishing use liquid or paste wax.
Several commercially available products contain both polish and wax.
Waxing alone does not substitute for polishing a dull surface.
A wide range of polymer-based waxes can be purchased today. These waxes are easy to use and produce a long-
lasting, high-gloss finish that protects the bodywork against oxidation, road dirt and fading.
Do not polish or wax your vehicle in direct sunlight (the surface of the vehicle should not be warmer than 113° F
(45° C).
CAUTION!
Volvo does not recommend the use of long-life or durable paint protection coatings, some of which may claim to
prevent pitting, fading, oxidation, etc. These coatings have not been tested by Volvo for compatibility with your
vehicle's clear coat. Some of them may cause the clear coat to soften, crack, or cloud. Damage caused by application
of paint protection coatings may not be covered under your vehicle's paint warranty.
pg. 142 Upholstery care
Fabric
Clean with soapy water or a detergent. For more difficult spots caused by oil, ice cream, shoe polish, grease, etc.,
use a clothing/fabric stain remover.
ProCarManuals.com
Page 86 of 127

Plastic
The plastic in the upholstery can be cleaned with a soft cloth and mild soap solution.
Alcantera
TM suede-like material
Suede -like upholstery can be cleaned with a soft cloth and mild soap solution.
Leather care
Volvo's leather upholstery is manufactured with a protectant to repel soiling. Over time, sunlight, grease and dirt can
break down the protection. Staining, cracking, scuffing, and fading can result.
Volvo offers an easy-to-use, non-greasy leather care kit formulated to clean and beautify your vehicle's leather, and to
renew the protective qualities of its finish. The cleaner removes dirt and oil buildup. The light cream protectant
restores a barrier against soil and sunlight.
Volvo also offers a special leather softener that should be applied after the cleaner and protectant. It leaves leather soft
and smooth, and reduces friction between leather and other finishes in the vehicle.
Volvo recommends cleaning, protecting and conditioning your vehicle's leather two to four times a year. Ask your
Volvo retailer about Leather Care Kit 951 0251 and Leather Softener 943 7429.
CAUTION!
- Under no circumstances should gasoline, naphtha or similar cleaning agents be used on the plastic or the leather
since these can cause damage.
- Take extra care when removing stains such as ink or lipstick since the coloring can spread.
- Use solvents sparingly. Too much solvent can damage the seat padding.
- Start from the outside of the stain and work toward the center.
-- Sharp objects (e.g. pencils or pens in a pocket) or Velcro fasteners on clothing may damage the textile upholstery.
Cleaning the seat belts
Clean only with lukewarm water and a mild soap solution.
Cleaning floor mats
The floor mats should be vacuumed or brushed clean regularly, especially during winter when they should be taken out
for drying. Spots on textile mats can be removed with a mild detergent. For best protection in winter, Volvo
recommends the use of rubber floor mats. Consult your Volvo retailer.
pg. 143 Paint touch up
Paint touch up
Paint damage requires immediate attention to avoid rusting. Make it a habit to check the finish regularly - when
washing the vehicle for instance. Touch-up if necessary. Paint repairs require special equipment and skill. Contact your
Volvo retailer for any extensive damage. Minor scratches can be repaired by using Volvo touch-up paint.
Color code
When ordering touch-up paint from your Volvo retailer, make sure you have the right color. Use the paint code
indicated on the model plate. The plate is located on the passenger's side center door pillar.
Minor stone chips and scratches
Material:
Primer - can
Paint - touch-up pen
Brush
Masking tape
ProCarManuals.com
Page 87 of 127
NOTE: When touching up the vehicle, it should be clean and dry. The surface temperature should be above 60° F (15°
C).
If the stone chip has not penetrated down to the metal and an undamaged layer of paint remains, the touch-up paint can
be applied as soon as the spot has been cleaned.
Paint color code
Deep scratches
1. Place a strip of masking tape over the damaged surface. Pull the tape off so that any loose flakes of paint adhere to
it.
2. Thoroughly mix the primer and apply it with a small brush. When the primer surface is dry, the paint can be applied
using a brush. Mix the paint thoroughly;
apply several thin paint coats and let dry after each application.
3. If there is a longer scratch, you may want to protect surrounding paint by masking it off.
pg. 144 This page intentionally left blank
Contents | Top of Page
ProCarManuals.com
Page 88 of 127

2 0 0 5
VOLVO S40
Chapter 10 - Maintenance and servicing
pg. 145 Maintenance and servicing
Volvo maintenance146
Maintaining your car147
Hood and engine compartment148
Oils and fluids149
Wiper blades152
Battery153
Bulbs155
Replacing front bulbs156
Replacing tail light bulbs159
Replacing interior bulbs160
Fuses161
pg. 146 Volvo maintenance
Volvo maintenance
Volvo advises you to follow the maintenance program outlined in the Warranty and Service Records Information
booklet. This maintenance program contains inspections and services necessary for the proper function of your vehicle.
The maintenance services contain several checks that require special tools and training, and therefore must be
performed by a qualified technician. To keep your Volvo in top condition, specify time-tested and proven Genuine
Volvo Parts and Accessories.
The Federal Clean Air Act - U.S
The Federal Clean Air Act requires vehicle manufacturers to furnish written instructions to the ultimate purchaser to
assure the proper servicing and function of the components that control emissions. These services, which are listed in
the "Warranty and Service Records Information" booklet, are not covered by the warranty. You will be required to pay
for labor and material used.
Maintenance
Your Volvo passed several major inspections before it was delivered to you, in accordance with Volvo specifications.
The maintenance procedures outlined in the Warranty and Service Records Information booklet, many of which will
ProCarManuals.com
 1
1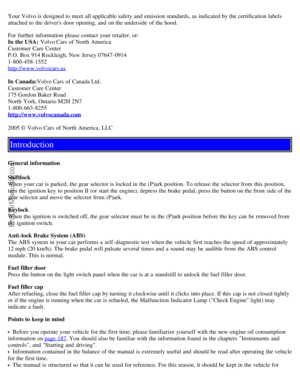 2
2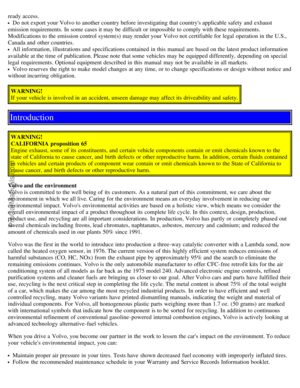 3
3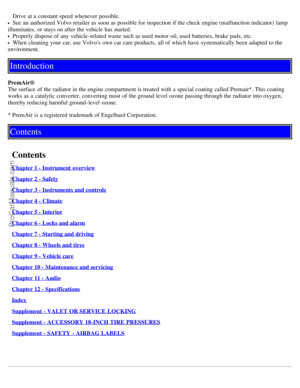 4
4 5
5 6
6 7
7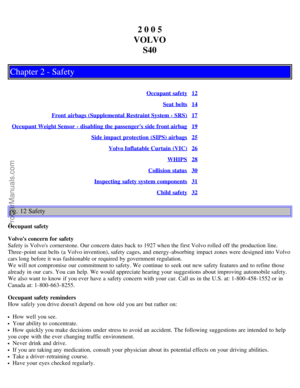 8
8 9
9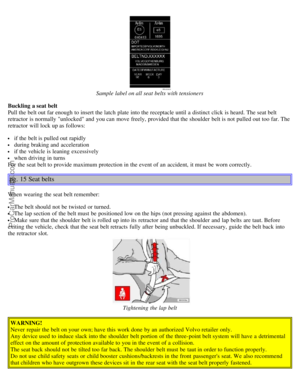 10
10 11
11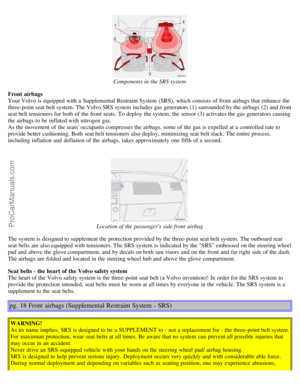 12
12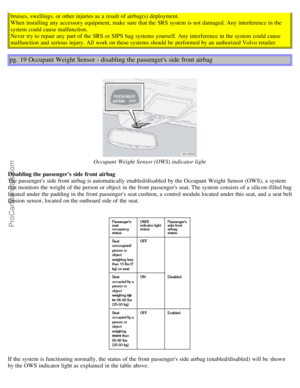 13
13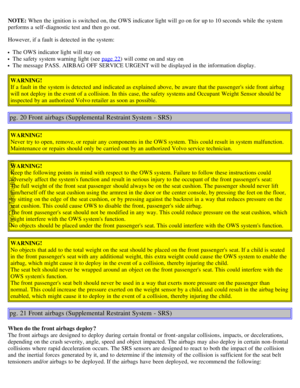 14
14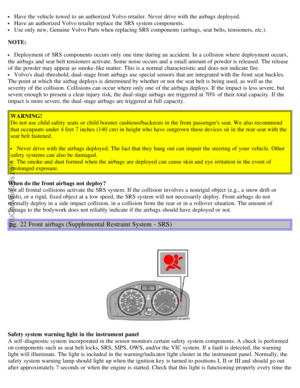 15
15 16
16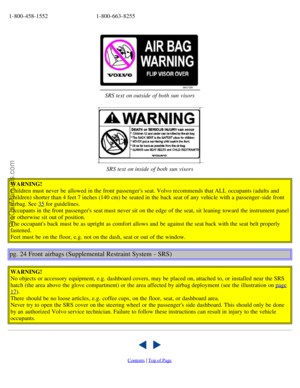 17
17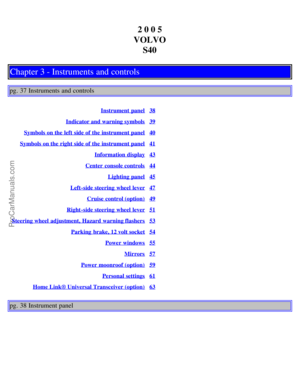 18
18 19
19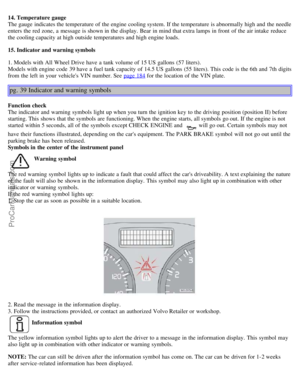 20
20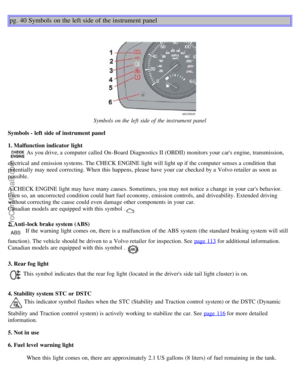 21
21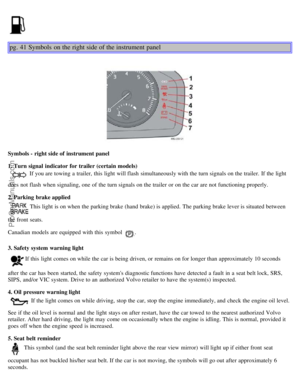 22
22 23
23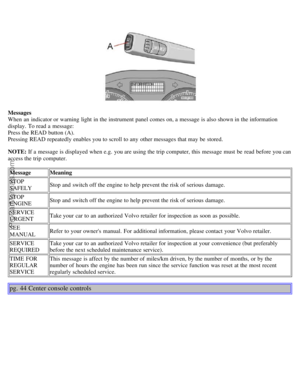 24
24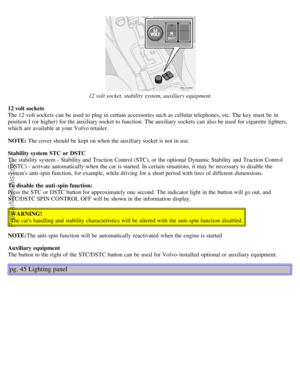 25
25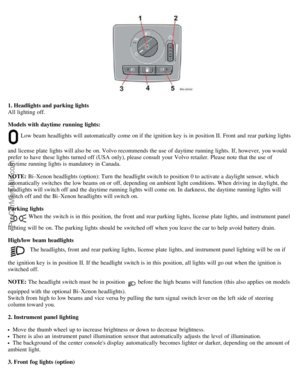 26
26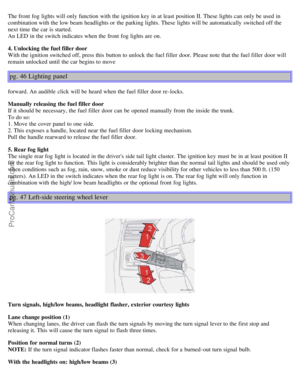 27
27 28
28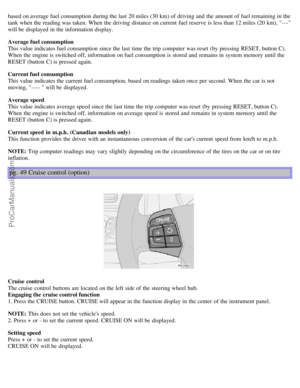 29
29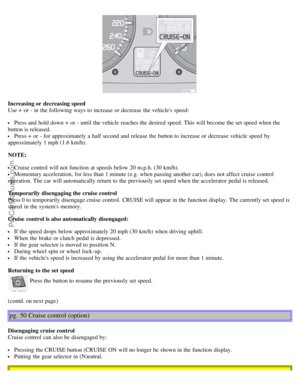 30
30 31
31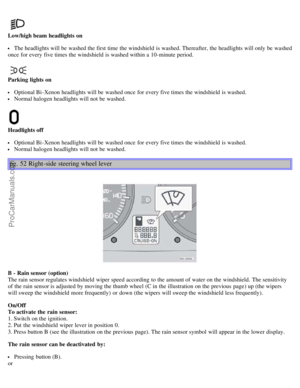 32
32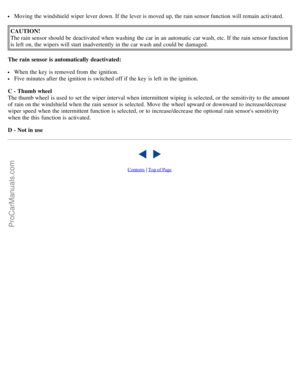 33
33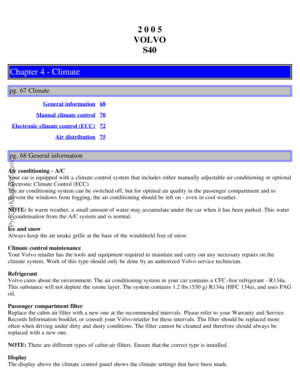 34
34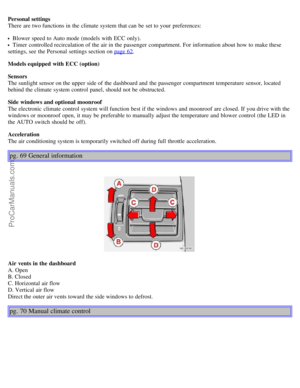 35
35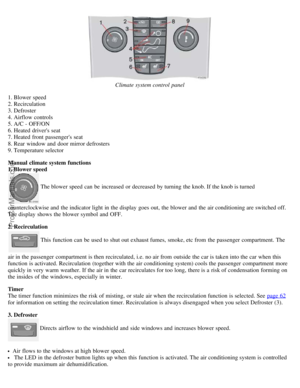 36
36 37
37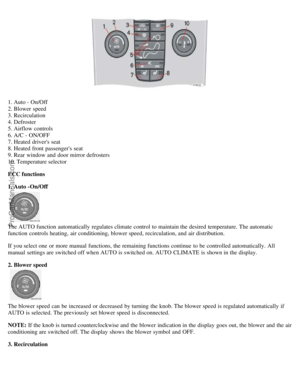 38
38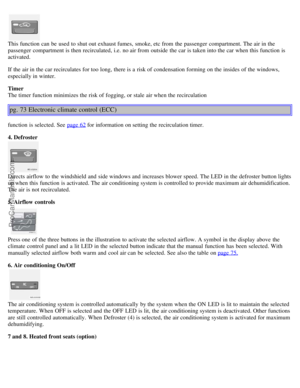 39
39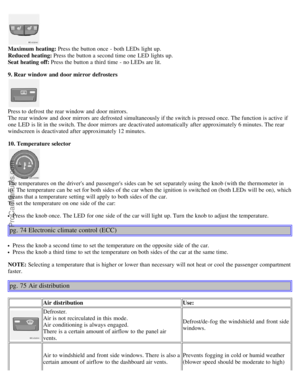 40
40 41
41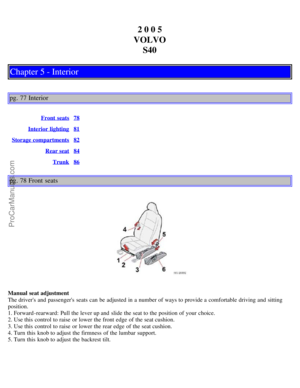 42
42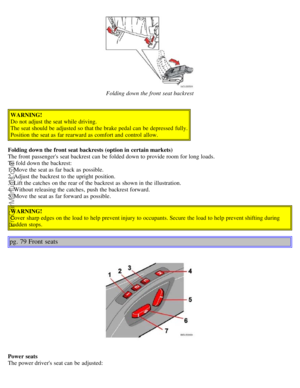 43
43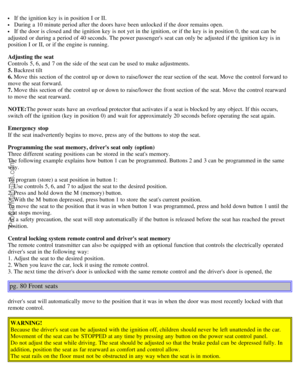 44
44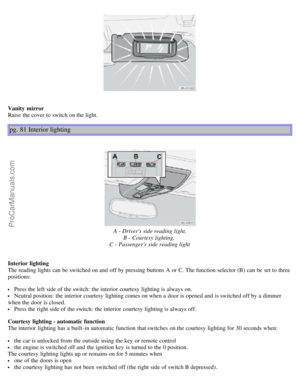 45
45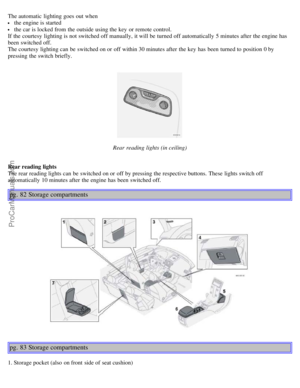 46
46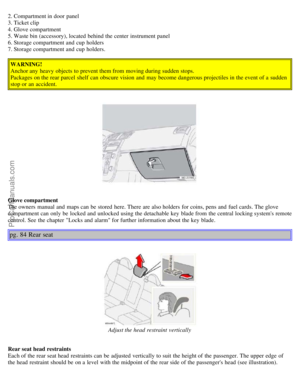 47
47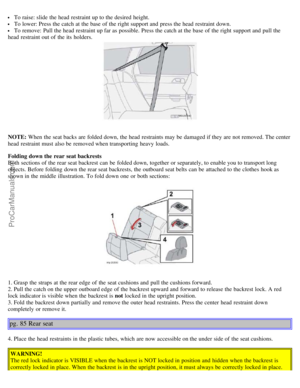 48
48 49
49 50
50 51
51 52
52 53
53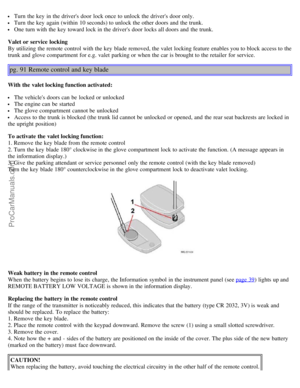 54
54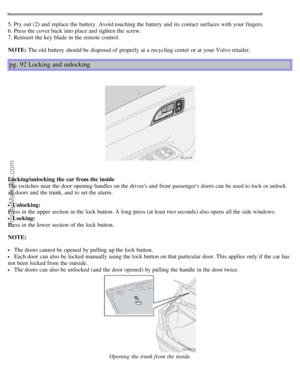 55
55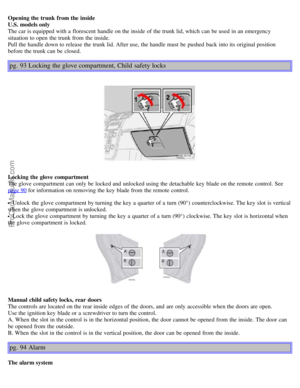 56
56 57
57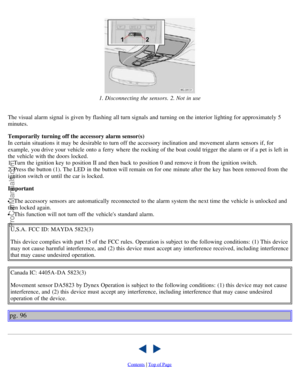 58
58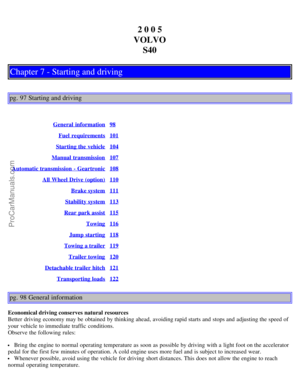 59
59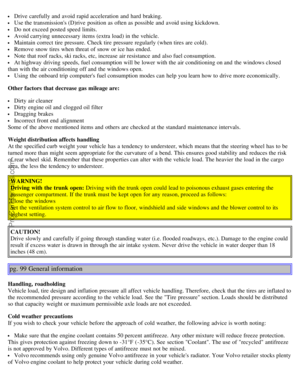 60
60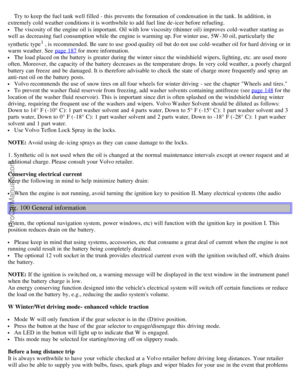 61
61 62
62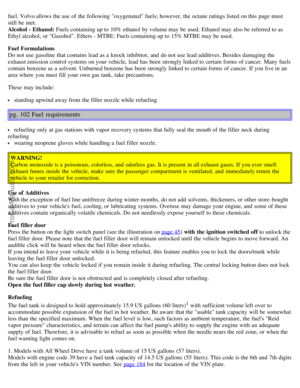 63
63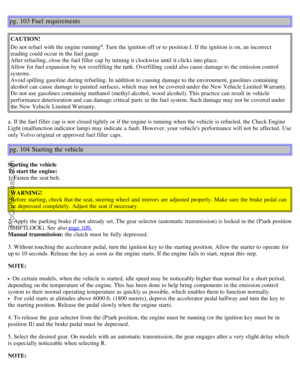 64
64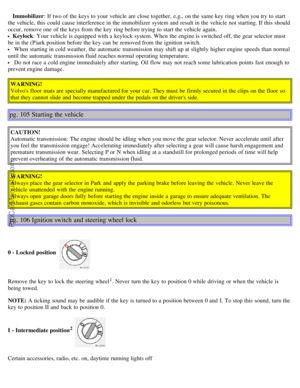 65
65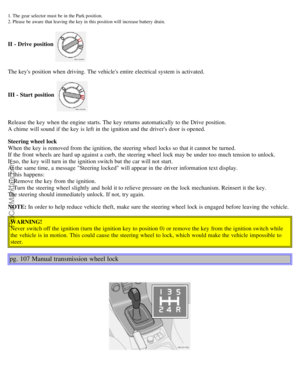 66
66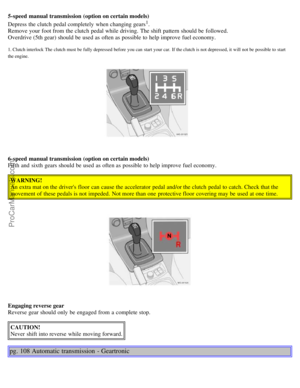 67
67 68
68 69
69 70
70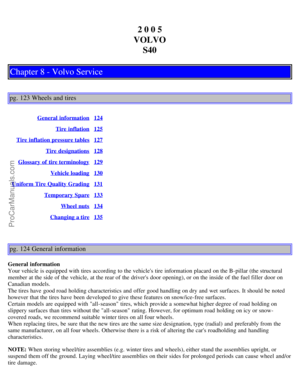 71
71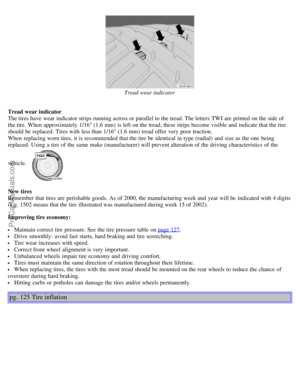 72
72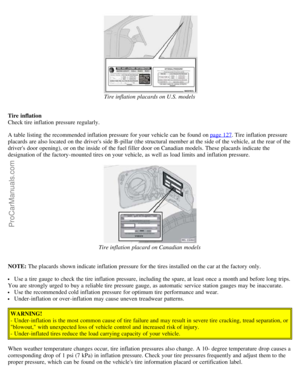 73
73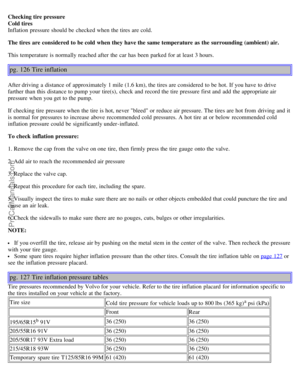 74
74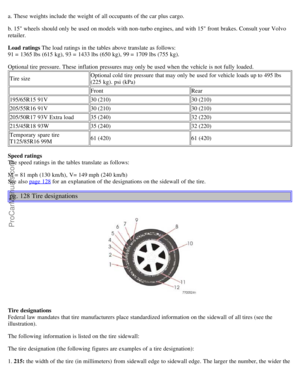 75
75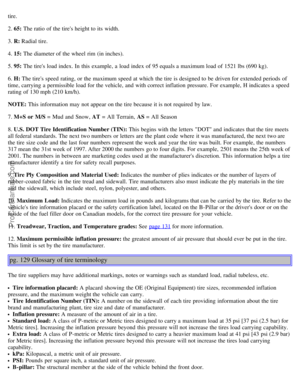 76
76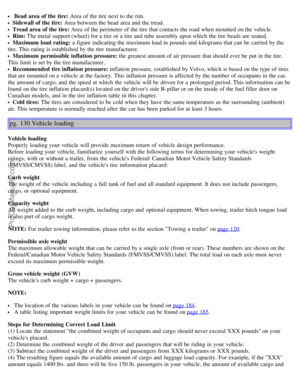 77
77 78
78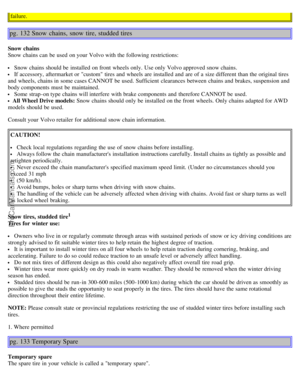 79
79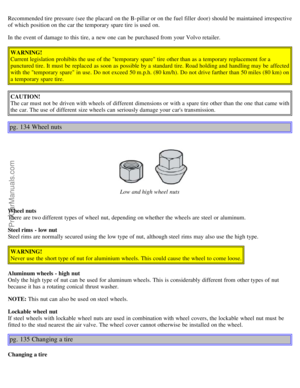 80
80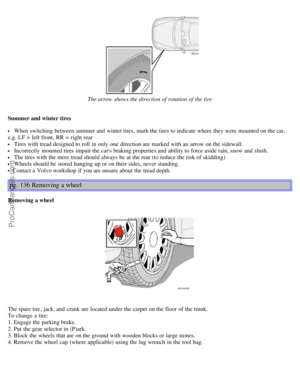 81
81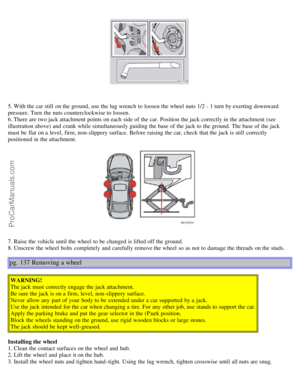 82
82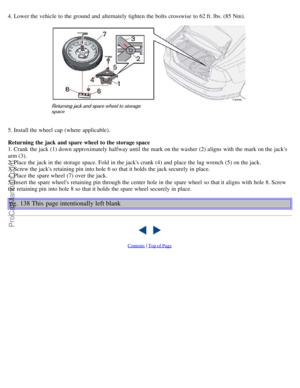 83
83 84
84 85
85 86
86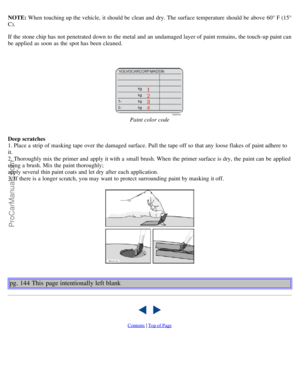 87
87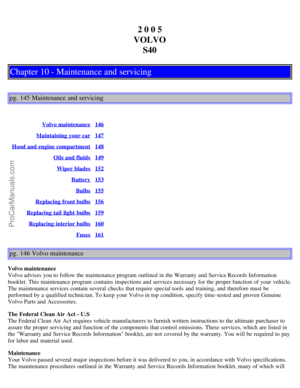 88
88 89
89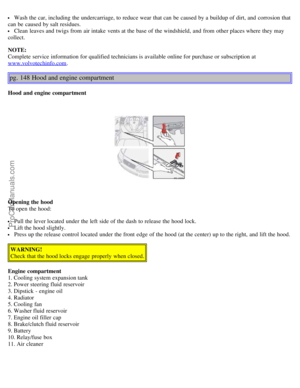 90
90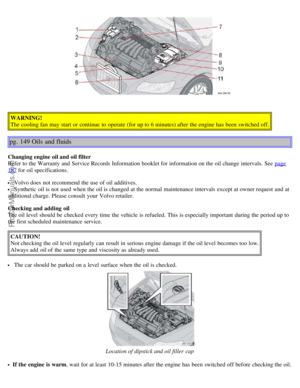 91
91 92
92 93
93 94
94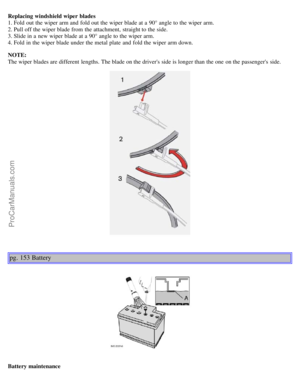 95
95 96
96 97
97 98
98 99
99 100
100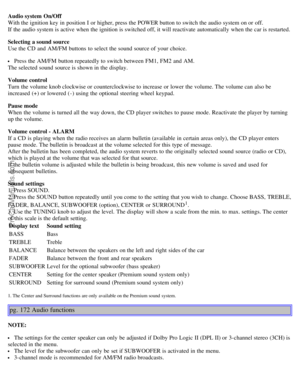 101
101 102
102 103
103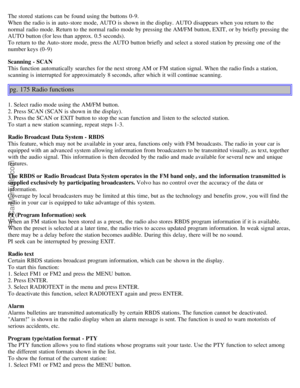 104
104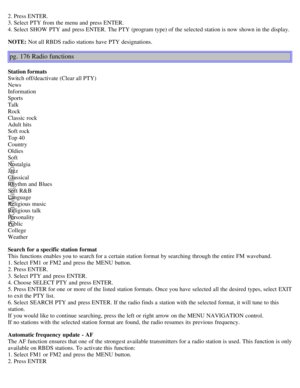 105
105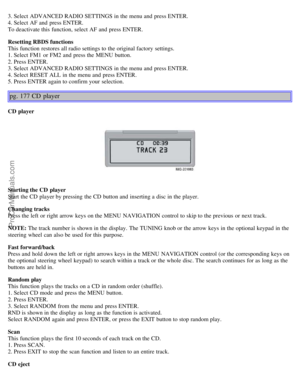 106
106 107
107 108
108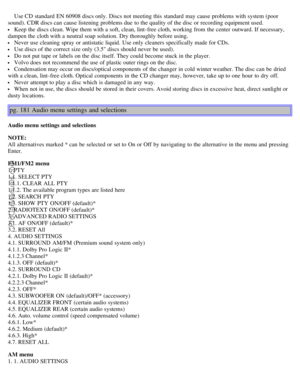 109
109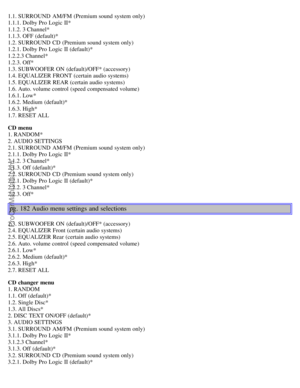 110
110 111
111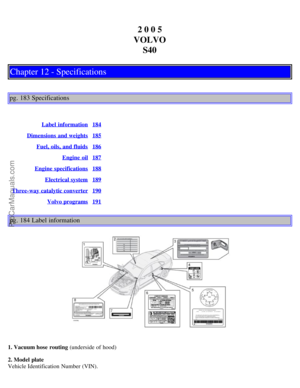 112
112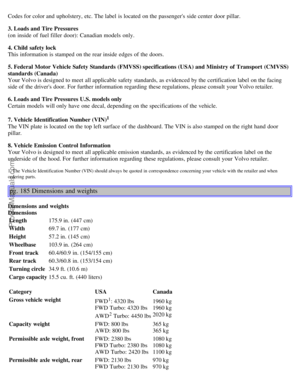 113
113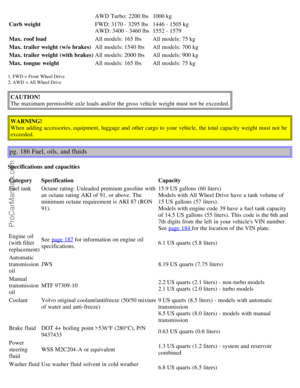 114
114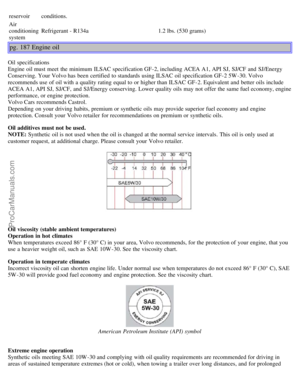 115
115 116
116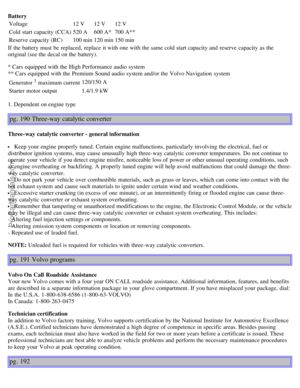 117
117 118
118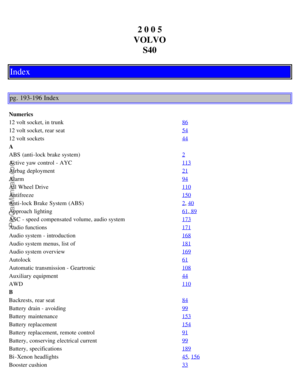 119
119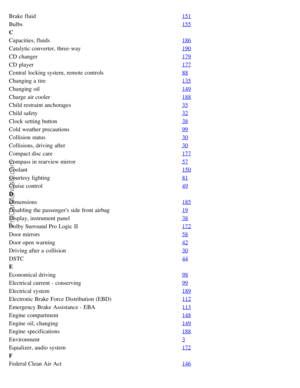 120
120 121
121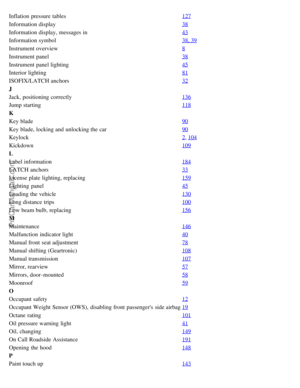 122
122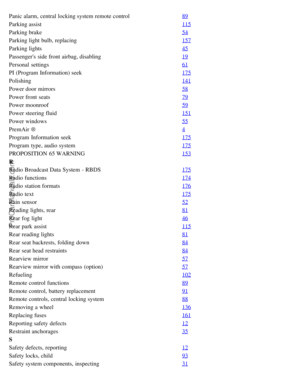 123
123 124
124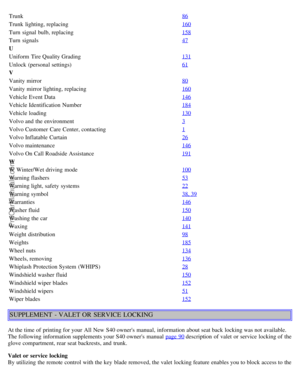 125
125 126
126.
5. Install the wheel cap (where applicable).
Returning the jack and spare wheel to the storag")
.
If the stone chip has not penetrated down to the metal and an undamaged l")