Page 25 of 127

12 volt socket, stability system, auxiliary equipment
12 volt sockets
The 12 volt sockets can be used to plug in certain accessories such as cellular telephones, etc. The key must be in
position I (or higher) for the auxiliary socket to function. The auxiliary sockets can also be used for cigarette lighters,
which are available at your Volvo retailer.
NOTE: The cover should be kept on when the auxiliary socket is not in use.
Stability system STC or DSTC
The stability system - Stability and Traction Control (STC), or the optional Dynamic Stability and Traction Control
(DSTC) - activate automatically when the car is started. In certain situations, it may be necessary to disable the
system's anti-spin function, for example, while driving for a short period with tires of different dimensions.
To disable the anti-spin function:
Press the STC or DSTC button for approximately one second. The indicator light in the button will go out, and
STC/DSTC SPIN CONTROL OFF will be shown in the information display.
WARNING!
The car's handling and stability characteristics will be altered with the anti-spin function disabled.
NOTE: The anti-spin function will be automatically reactivated when the engine is started
Auxiliary equipment
The button to the right of the STC/DSTC button can be used for Volvo-installed optional or auxiliary equipment.
pg. 45 Lighting panel
ProCarManuals.com
Page 26 of 127

1. Headlights and parking lights
All lighting off.
Models with daytime running lights:
Low beam headlights will automatically come on if the ignition key is in position II. Front and rear parking lights
and license plate lights will also be on. Volvo recommends the use of daytime running lights. If, however, you would
prefer to have these lights turned off (USA only), please consult your Volvo retailer. Please note that the use of
daytime running lights is mandatory in Canada.
NOTE: Bi -Xenon headlights (option): Turn the headlight switch to position 0 to activate a daylight sensor, which
automatically switches the low beams on or off, depending on ambient light conditions. When driving in daylight, the
headlights will switch off and the daytime running lights will come on. In darkness, the daytime running lights will
switch off and the Bi -Xenon headlights will switch on.
Parking lights
When the switch is in this position, the front and rear parking lights, license plate lights, and instrument panel
lighting will be on. The parking lights should be switched off when you leave the car to help avoid battery drain.
High/low beam headlights
The headlights, front and rear parking lights, license plate lights, and instrument panel lighting will be on if
the ignition key is in position II. If the headlight switch is in this position, all lights will go out when the ignition is
switched off.
NOTE: The headlight switch must be in position
before the high beams will function (this also applies on models
equipped with the optional Bi -Xenon headlights).
Switch from high to low beams and vice versa by pulling the turn signal switch lever on the left side of steering
column toward you.
2. Instrument panel lighting
Move the thumb wheel up to increase brightness or down to decrease brightness.
There is also an instrument panel illumination sensor that automatically adjusts the level of illumination.
The background of the center console's display automatically becomes lighter or darker, depending on the amount of
ambient light.
3. Front fog lights (option)
ProCarManuals.com
Page 27 of 127

The front fog lights will only function with the ignition key in at least position II. These lights can only be used in
combination with the low beam headlights or the parking lights. These lights will be automatically switched off the
next time the car is started.
An LED in the switch indicates when the front fog lights are on.
4. Unlocking the fuel filler door
With the ignition switched off, press this button to unlock the fuel filler door. Please note that the fuel filler door will
remain unlocked until the car begins to move
pg. 46 Lighting panel
forward. An audible click will be heard when the fuel filler door re-locks.
Manually releasing the fuel filler door
If it should be necessary, the fuel filler door can be opened manually from the inside the trunk.
To do so:
1. Move the cover panel to one side.
2. This exposes a handle, located near the fuel filler door locking mechanism.
Pull the handle rearward to release the fuel filler door.
5. Rear fog light
The single rear fog light is located in the driver's side tail light cluster. The ignition key must be in at least position II
for the rear fog light to function. This light is considerably brighter than the normal tail lights and should be used only
when conditions such as fog, rain, snow, smoke or dust reduce visibility for other vehicles to less than 500 ft. (150
meters). An LED in the switch indicates when the rear fog light is on. The rear fog light will only function in
combination with the high/ low beam headlights or the optional front fog lights.
pg. 47 Left-side steering wheel lever
Turn signals, high/low beams, headlight flasher, exterior courtesy lights
Lane change position (1)
When changing lanes, the driver can flash the turn signals by moving the turn signal lever to the first stop and
releasing it. This will cause the turn signal to flash three times.
Position for normal turns (2)
NOTE: If the turn signal indicator flashes faster than normal, check for a burned-out turn signal bulb.
With the headlights on: high/low beams (3)
ProCarManuals.com
Page 28 of 127

With the headlights switched off (the switch on the lig")
Move the lever toward the steering wheel and release it to switch between high and low beams.
With the headlights off: headlight flasher (3)
With the headlights switched off (the switch on the lighting panel in position 0), move the lever toward the steering
wheel. The high beams will remain on until the lever is released.
Home safe lighting (3)
When you leave your car at night, you can make use of the home safe lighting function to illuminate the area in front
of the car:
1. Remove the key from the ignition switch.
2. Pull the direction indicator lever towards the steering wheel (as when using the headlight flasher function).
3. Exit the car and lock the doors.
The headlights, parking lights, license plate lights will now come on and remain on for 30, 60 or 90 seconds. The time
interval can be changed according to your preferences by using the Personal Settings function, described at the end of
this chapter.
Trip computer (option)
The trip computer stores information gathered from several systems in your car and has four menus (five on Canadian
models) that can be shown in the information display.
Driving distance on current fuel reserve
Average fuel consumption
Current fuel consumption
Average speed
Current speed in m.p.h. (Canadian models only)
pg. 48 Left-side steering wheel lever
NOTE: Warning messages from the car's monitoring systems will override the trip computer function. If a warning
message is shown in the information display while you are using the trip computer, you must acknowledge the
message by pressing the READ button (A). Press button A again to return to the trip computer function.
Controls
The four trip computer functions (five on Canadian models) can be accessed by twisting INFO (B) one step at a time
in either direction. Twisting a fifth time (sixth time on Canadian models) returns you to the original function.
The trip computer can be reset (average fuel consumption and average speed will be erased from system memory) by
pressing RESET (C) for at least five seconds.
Driving distance on current fuel reserve
This function shows the approximate distance that can be driven on the fuel remaining in the tank. This calculation is
ProCarManuals.com
Page 29 of 127
 of driving and the amount of fuel remaining in the
tank when the reading was taken. When the driving distance on current fuel reserv")
based on average fuel consumption during the last 20 miles (30 km) of driving and the amount of fuel remaining in the
tank when the reading was taken. When the driving distance on current fuel reserve is less than 12 miles (20 km), "---"
will be displayed in the information display.
Average fuel consumption
This value indicates fuel consumption since the last time the trip computer was reset (by pressing RESET, button C).
When the engine is switched off, information on fuel consumption is stored and remains in system memory until the
RESET (button C) is pressed again.
Current fuel consumption
This value indicates the current fuel consumption, based on readings taken once per second. When the car is not
moving, "---- " will be displayed.
Average speed
This value indicates average speed since the last time the trip computer was reset (by pressing RESET, button C).
When the engine is switched off, information on average speed is stored and remains in system memory until the
RESET (button C) is pressed again.
Current speed in m.p.h. (Canadian models only)
This function provides the driver with an instantaneous conversion of the car's current speed from km/h to m.p.h.
NOTE: Trip computer readings may vary slightly depending on the circumference of the tires on the car or on tire
inflation.
pg. 49 Cruise control (option)
Cruise control
The cruise control buttons are located on the left side of the steering wheel hub.
Engaging the cruise control function
1. Press the CRUISE button. CRUISE will appear in the function display in the center of the instrument panel.
NOTE: This does not set the vehicle's speed.
2. Press + or - to set the current speed. CRUISE ON will be displayed.
Setting speed
Press + or - to set the current speed.
CRUISE ON will be displayed.
ProCarManuals.com
Page 30 of 127

Increasing or decreasing speed
Use + or - in the following ways to increase or decrease the vehicle's speed:
Press and hold down + or - until the vehicle reaches the desired speed. This will become the set speed when the
button is released.
Press + or - for approximately a half second and release the button to increase or decrease vehicle speed by
approximately 1 mph (1.6 km/h).
NOTE:
Cruise control will not function at speeds below 20 m.p.h. (30 km/h).
Momentary acceleration, for less than 1 minute (e.g. when passing another car), does not affect cruise control
operation. The car will automatically return to the previously set speed when the accelerator pedal is released.
Temporarily disengaging the cruise control
Press 0 to temporarily disengage cruise control. CRUISE will appear in the function display. The currently set speed is
stored in the system's memory.
Cruise control is also automatically disengaged:
If the speed drops below approximately 20 mph (30 km/h) when driving uphill.
When the brake or clutch pedal is depressed.
If the gear selector is moved to position N.
During wheel spin or wheel lock-up.
If the vehicle's speed is increased by using the accelerator pedal for more than 1 minute.
Returning to the set speed
Press the button to resume the previously set speed.
(contd. on next page)
pg. 50 Cruise control (option)
Disengaging cruise control
Cruise control can also be disengaged by:
Pressing the CRUISE button (CRUISE ON will no longer be shown in the function display.
Putting the gear selector in (N)eutral.
ProCarManuals.com
Page 31 of 127

WARNING!
Cruise control should not be used in heavy traffic or when driving on wet or slippery roads. Cruise control may not
maintain set speed on steep downgrades.
pg. 51 Right -side steering wheel lever
Windshield wipers
A. Windshield/headlight washers
B. Rain sensor (option) - on/off
C. Thumb wheel
D. Not in use
Windshield wipers off
The windshield wipers are off when the lever is in position 0
Manual wiper function
From position 0, move the lever upward. The windshield wipers will sweep one stroke at a time for as long as
the lever is held up.
Intermittent wiper function
With the lever in this position, you can set the wiper interval by moving the thumb wheel (C) upward to
increase wiper speed or downward to decrease the speed.
Continuous wiper function
The wipers operate at "normal" speed.
High speed wiper function.
A -Windshield washers
Pull the lever toward the steering wheel and release it. The wipers will make 2-3 sweeps across the windshield after the
lever has been released.
Headlight washers (certain models)
When the lever has been pulled, high pressure jets mounted in the bumper will spray the headlights.
The following applies to conserve washer fluid (see page 45 for information on the light switch positions):
ProCarManuals.com
Page 32 of 127

Low/high beam headlights on
The headlights will be washed the first time the windshield is washed. Thereafter, the headlights will only be washed
once for every five times the windshield is washed within a 10-minute period.
Parking lights on
Optional Bi -Xenon headlights will be washed once for every five times the windshield is washed.
Normal halogen headlights will not be washed.
Headlights off
Optional Bi -Xenon headlights will be washed once for every five times the windshield is washed.
Normal halogen headlights will not be washed.
pg. 52 Right -side steering wheel lever
B - Rain sensor (option)
The rain sensor regulates windshield wiper speed according to the amount of water on the windshield. The sensitivity
of the rain sensor is adjusted by moving the thumb wheel (C in the illustration on the previous page) up (the wipers
will sweep the windshield more frequently) or down (the wipers will sweep the windshield less frequently).
On/Off
To activate the rain sensor:
1. Switch on the ignition.
2. Put the windshield wiper lever in position 0.
3. Press button B (see the illustration on the previous page). The rain sensor symbol will appear in the lower display.
The rain sensor can be deactivated by:
Pressing button (B).
or
ProCarManuals.com
 1
1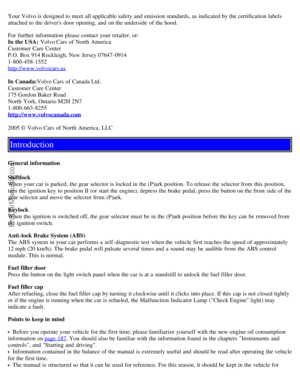 2
2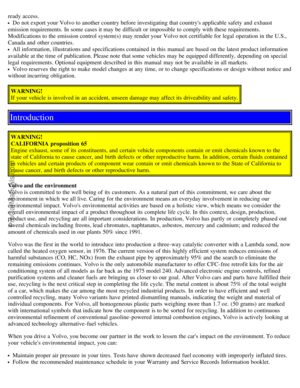 3
3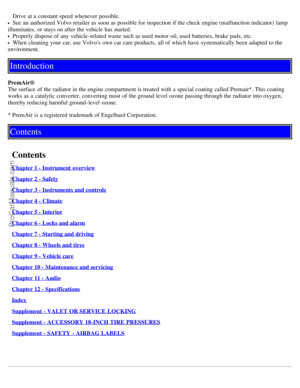 4
4 5
5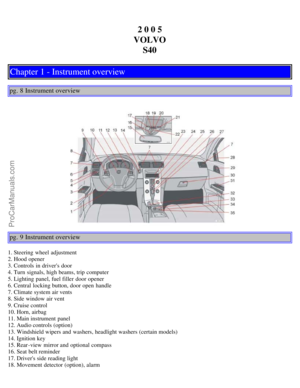 6
6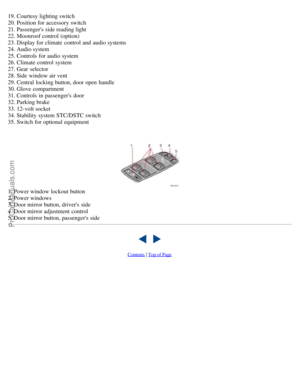 7
7 8
8 9
9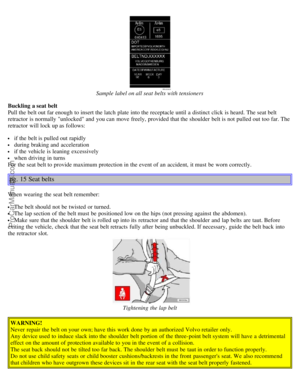 10
10 11
11 12
12 13
13 14
14 15
15 16
16 17
17 18
18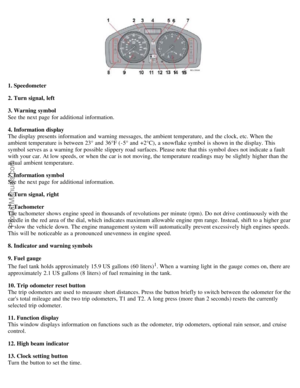 19
19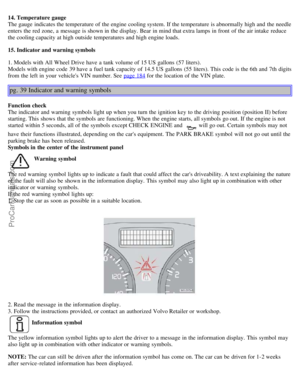 20
20 21
21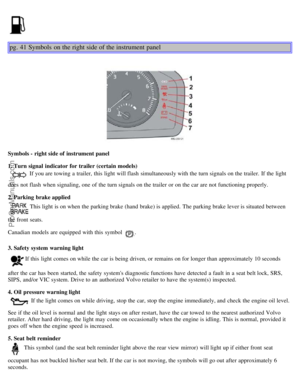 22
22 23
23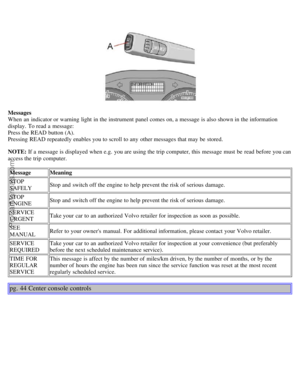 24
24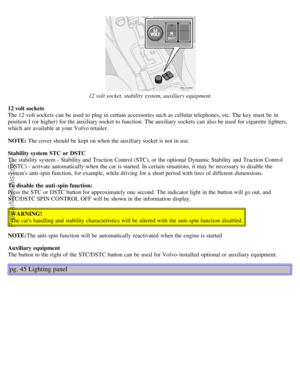 25
25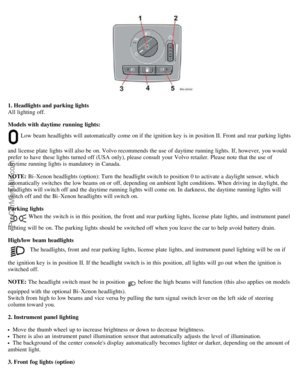 26
26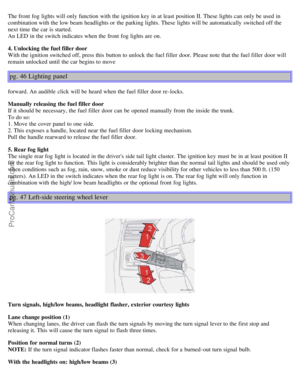 27
27 28
28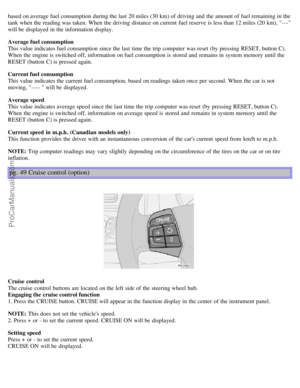 29
29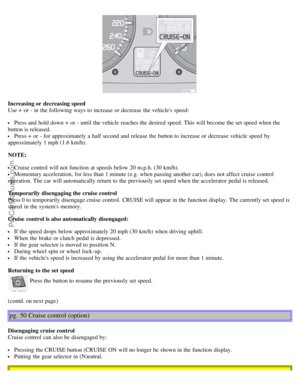 30
30 31
31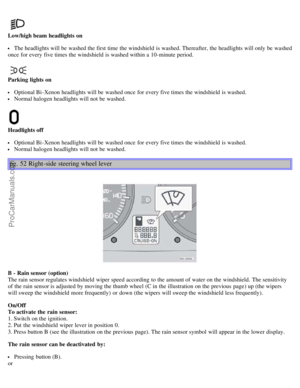 32
32 33
33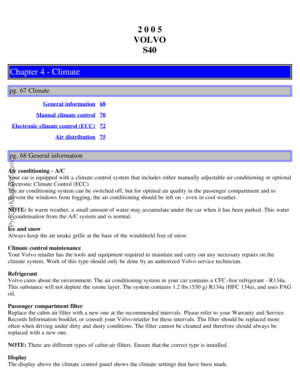 34
34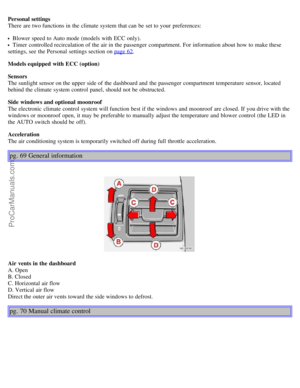 35
35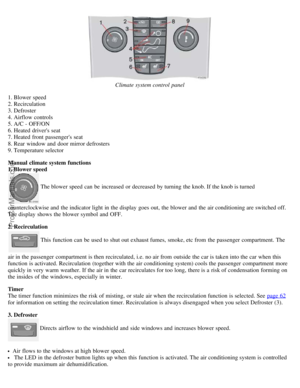 36
36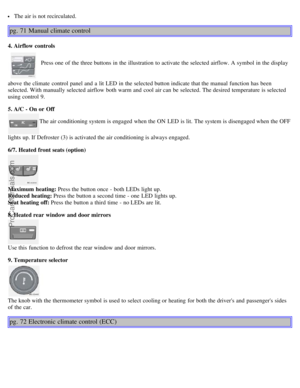 37
37 38
38 39
39 40
40 41
41 42
42 43
43 44
44 45
45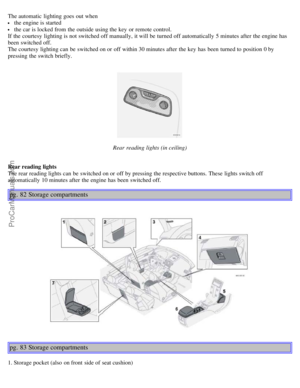 46
46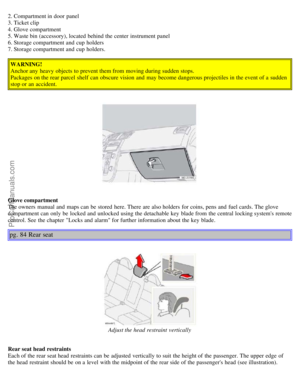 47
47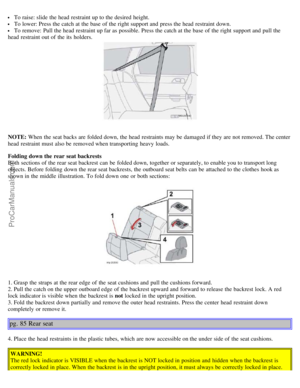 48
48 49
49 50
50 51
51 52
52 53
53 54
54 55
55 56
56 57
57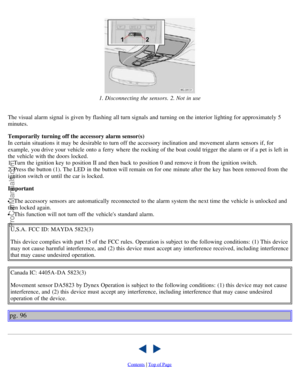 58
58 59
59 60
60 61
61 62
62 63
63 64
64 65
65 66
66 67
67 68
68 69
69 70
70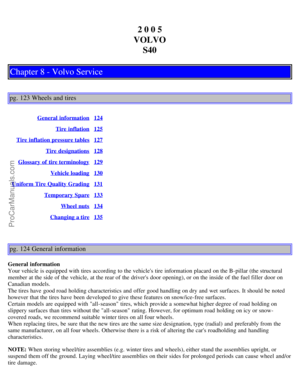 71
71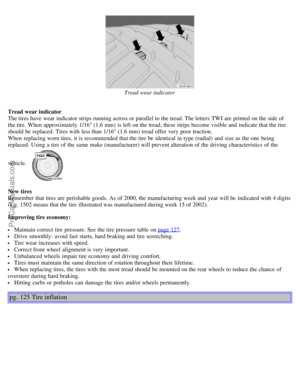 72
72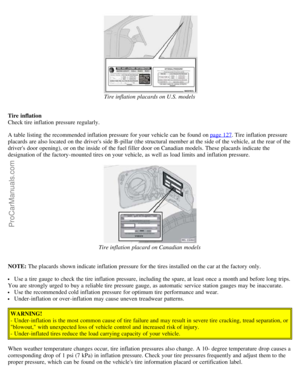 73
73 74
74 75
75 76
76 77
77 78
78 79
79 80
80 81
81 82
82 83
83 84
84 85
85 86
86 87
87 88
88 89
89 90
90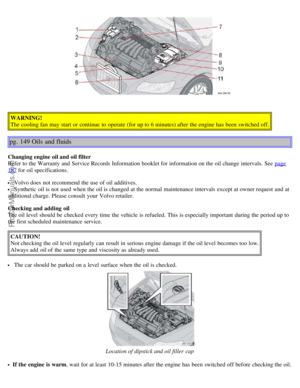 91
91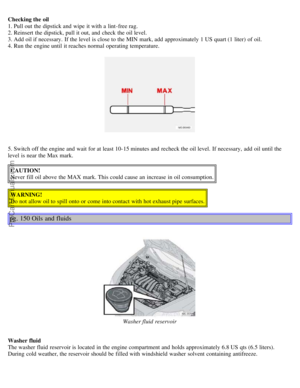 92
92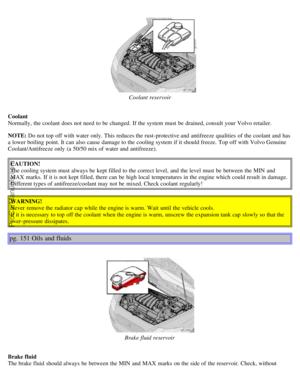 93
93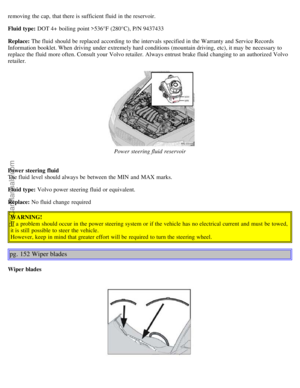 94
94 95
95 96
96 97
97 98
98 99
99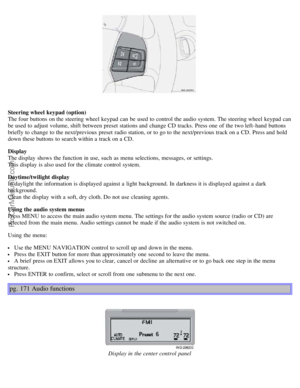 100
100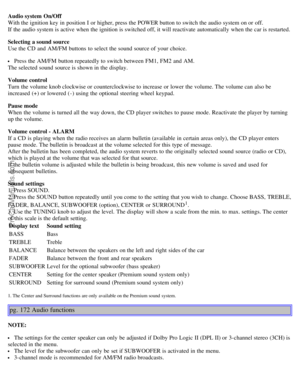 101
101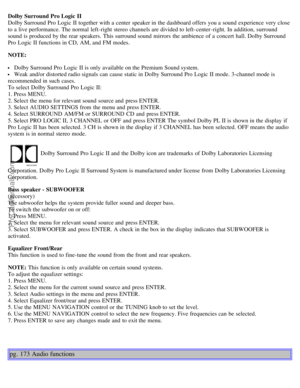 102
102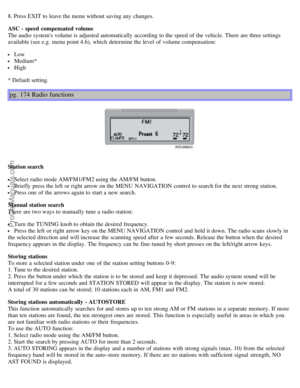 103
103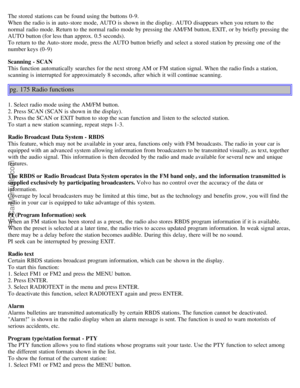 104
104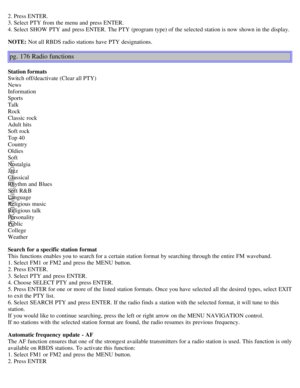 105
105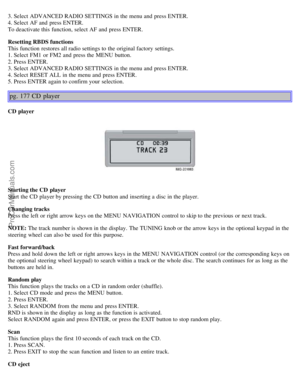 106
106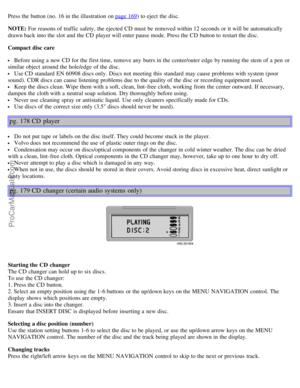 107
107 108
108 109
109 110
110 111
111 112
112 113
113 114
114 115
115 116
116 117
117 118
118 119
119 120
120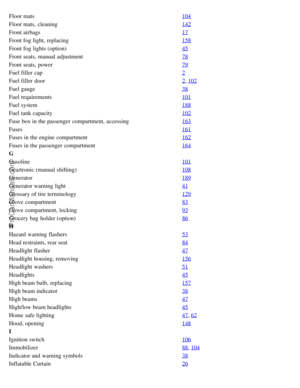 121
121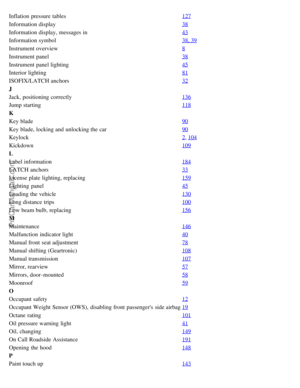 122
122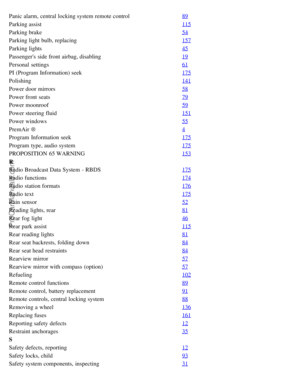 123
123 124
124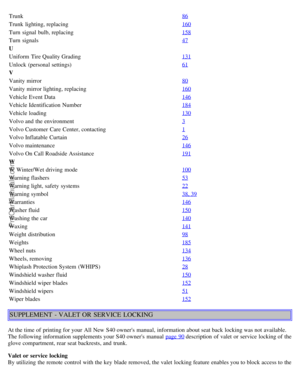 125
125 126
126