2005 VOLVO S40 trunk
[x] Cancel search: trunkPage 23 of 127

6. Generator warning light
If the light comes on while the engine is running, have the charging system checked by an authorized Volvo
workshop.
7. Brake failure warning light
If this light comes on while driving or braking, stop the car as quickly as possible in a safe place, open the
hood, and check the brake fluid level in the reservoir. See page 148
for the location of the reservoir.
Canadian models are equipped with this symbol .
WARNING!
If the fluid level is below the MIN mark in the reservoir or if a "Brake failure - Service urgent" message is displayed
in the information display: DO NOT DRIVE. Have the car towed to an authorized Volvo retailer and have the brake
system inspected.
pg. 42 Symbols on the right side of the instrument panel
If the BRAKE and ABS warning lights come on at the same time, this could indicate a fault in the brake system.
In this case:
1. Stop the car in a suitable place and switch off the engine.
2. Restart the engine.
3. If both warning lights go off, no further action is required and the car can be driven.
4. If both lights remain on after the engine has been restarted, switch off the engine again and check the brake fluid
level. See page 148
for the location of the reservoir.
Door open warning
The driver will be alerted if one of the doors, the hood, or the trunk lid are open or ajar.
At low speeds
If the car is moving at a speed of less than approximately 4 m.p.h. (7 km/h), the Information symbol in the
instrument panel will light up and a message will be shown in the information display indicating which door(s), etc is
not completely closed.
At higher speeds
If the car is moving at a speed above approximately 4 m.p.h. (7 km/h), the Warning symbol in the
instrument panel will light up and a message will be shown in the information display indicating which door(s), etc is
not completely closed.
Hood and trunk
If the hood and/or trunk lid is not completely closed, the Information symbol in the instrument panel will
light up and a message will be displayed, regardless of the vehicle's speed.
pg. 43 Information display
ProCarManuals.com
Page 27 of 127

The front fog lights will only function with the ignition key in at least position II. These lights can only be used in
combination with the low beam headlights or the parking lights. These lights will be automatically switched off the
next time the car is started.
An LED in the switch indicates when the front fog lights are on.
4. Unlocking the fuel filler door
With the ignition switched off, press this button to unlock the fuel filler door. Please note that the fuel filler door will
remain unlocked until the car begins to move
pg. 46 Lighting panel
forward. An audible click will be heard when the fuel filler door re-locks.
Manually releasing the fuel filler door
If it should be necessary, the fuel filler door can be opened manually from the inside the trunk.
To do so:
1. Move the cover panel to one side.
2. This exposes a handle, located near the fuel filler door locking mechanism.
Pull the handle rearward to release the fuel filler door.
5. Rear fog light
The single rear fog light is located in the driver's side tail light cluster. The ignition key must be in at least position II
for the rear fog light to function. This light is considerably brighter than the normal tail lights and should be used only
when conditions such as fog, rain, snow, smoke or dust reduce visibility for other vehicles to less than 500 ft. (150
meters). An LED in the switch indicates when the rear fog light is on. The rear fog light will only function in
combination with the high/ low beam headlights or the optional front fog lights.
pg. 47 Left-side steering wheel lever
Turn signals, high/low beams, headlight flasher, exterior courtesy lights
Lane change position (1)
When changing lanes, the driver can flash the turn signals by moving the turn signal lever to the first stop and
releasing it. This will cause the turn signal to flash three times.
Position for normal turns (2)
NOTE: If the turn signal indicator flashes faster than normal, check for a burned-out turn signal bulb.
With the headlights on: high/low beams (3)
ProCarManuals.com
Page 42 of 127
2 0 0 5
VOLVO S40
Chapter 5 - Interior
pg. 77 Interior
Front seats78
Interior lighting81
Storage compartments82
Rear seat84
Trunk86
pg. 78 Front seats
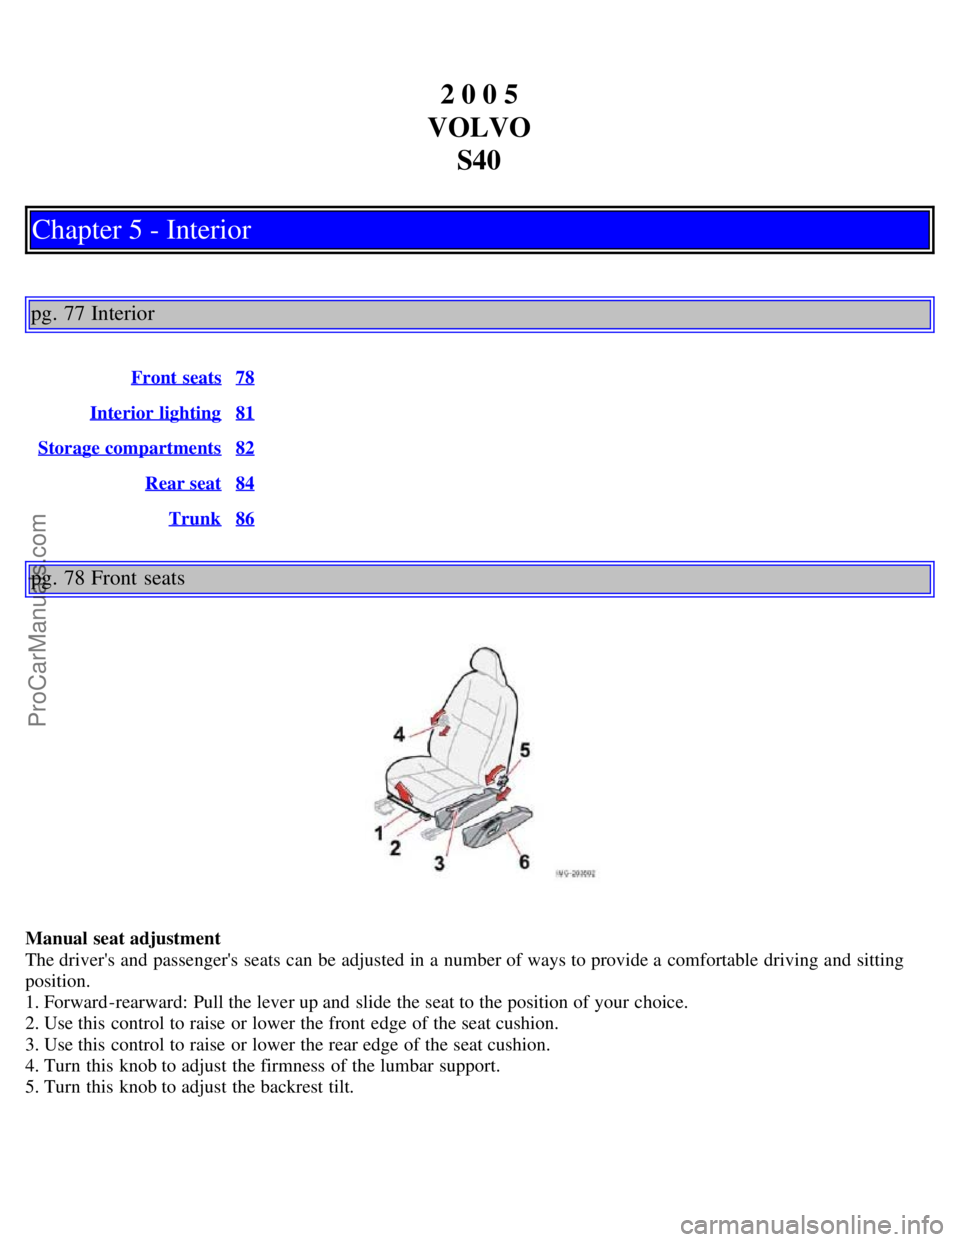
Manual seat adjustment
The driver's and passenger's seats can be adjusted in a number of ways to provide a comfortable driving and sitting
position.
1. Forward-rearward: Pull the lever up and slide the seat to the position of your choice.
2. Use this control to raise or lower the front edge of the seat cushion.
3. Use this control to raise or lower the rear edge of the seat cushion.
4. Turn this knob to adjust the firmness of the lumbar support.
5. Turn this knob to adjust the backrest tilt.
ProCarManuals.com
Page 49 of 127
When the rear seat is folded down, do not place heavy objects against the backs of the front seats. This places a
severe strain on the folded down backrest of the rear seat. Be sure to secure cargo.
Cargo must not be stacked higher than the top of seat backs. This will reduce the possibility of luggage, etc.
becoming projectiles during sudden maneuvers, rapid braking or an accident.
pg. 86 Trunk
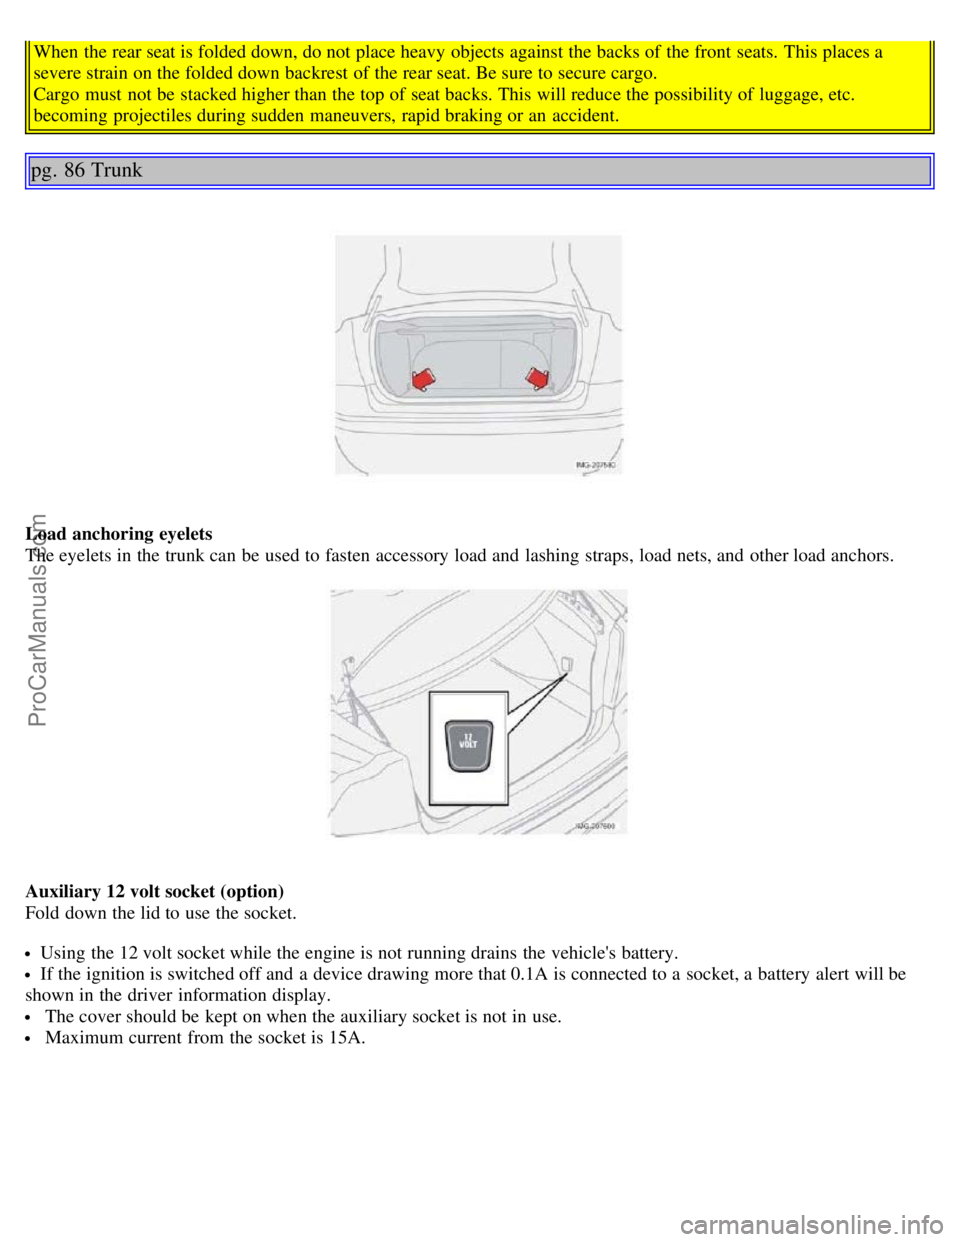
Load anchoring eyelets
The eyelets in the trunk can be used to fasten accessory load and lashing straps, load nets, and other load anchors.
Auxiliary 12 volt socket (option)
Fold down the lid to use the socket.
Using the 12 volt socket while the engine is not running drains the vehicle's battery.
If the ignition is switched off and a device drawing more that 0.1A is connected to a socket, a battery alert will be
shown in the driver information display.
The cover should be kept on when the auxiliary socket is not in use.
Maximum current from the socket is 15A.
ProCarManuals.com
Page 50 of 127
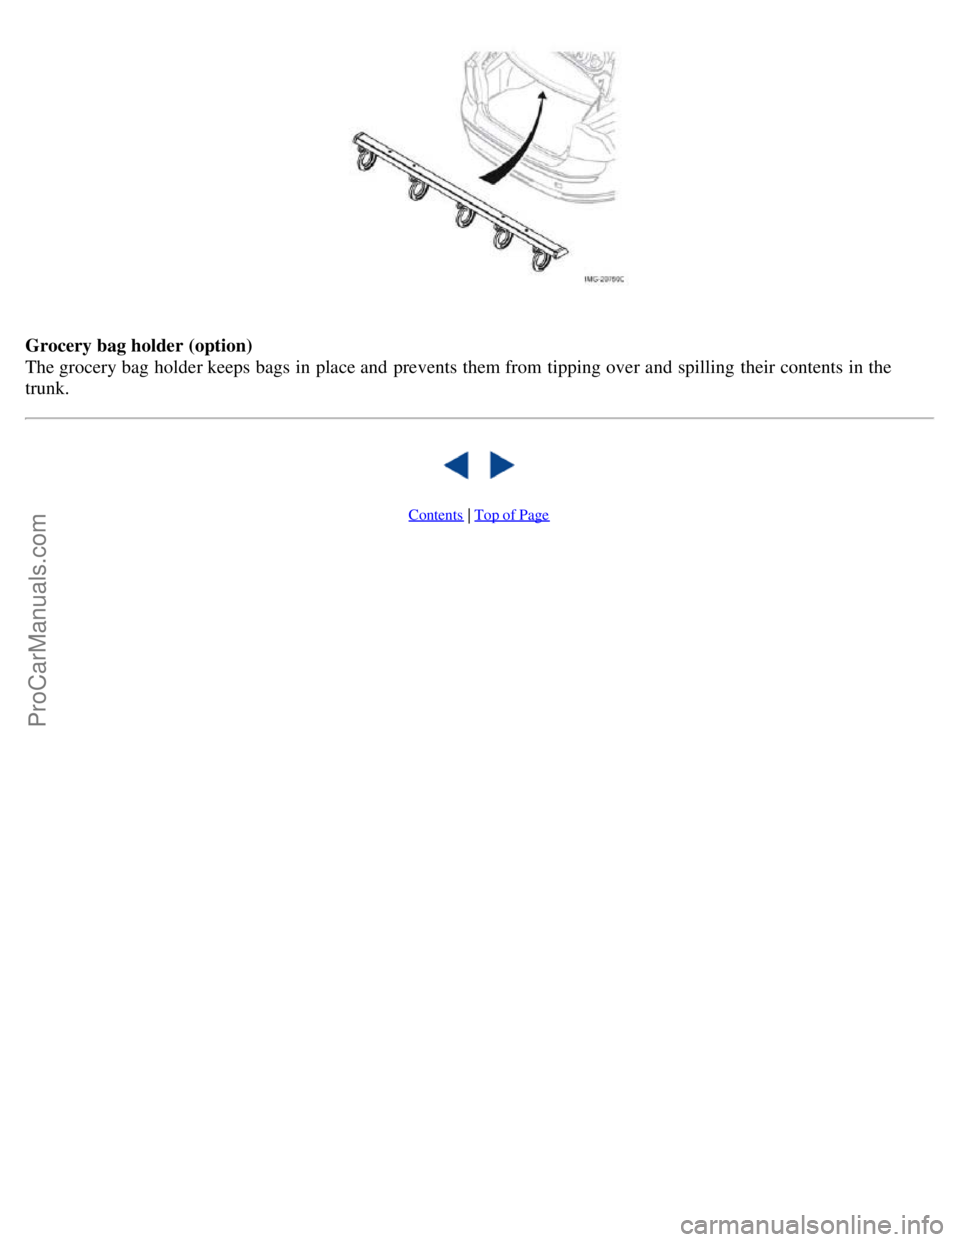
Grocery bag holder (option)
The grocery bag holder keeps bags in place and prevents them from tipping over and spilling their contents in the
trunk.
Contents | Top of Page
ProCarManuals.com
Page 52 of 127
USA - FCC ID: LTQWFS 125VO
This device complies with part 15 of the FCC rules. Operation is subject to the following condition: (1) This device
may not cause harmful interference, and (2) this device must accept any interference received, including interference
that may cause undesired operation.
Canada - IC: 3659A-WFS125VO
Operation is subject to the following conditions: (1) this device may not cause interference, and (2) this device must
accept any interference, including interference that may cause undesired operation of the device.
CAUTION!
Never use force on the narrow section of the remote control - this is where the transponder is located. The car cannot
be started if the transponder is damaged.
pg. 89 Remote control and key blade
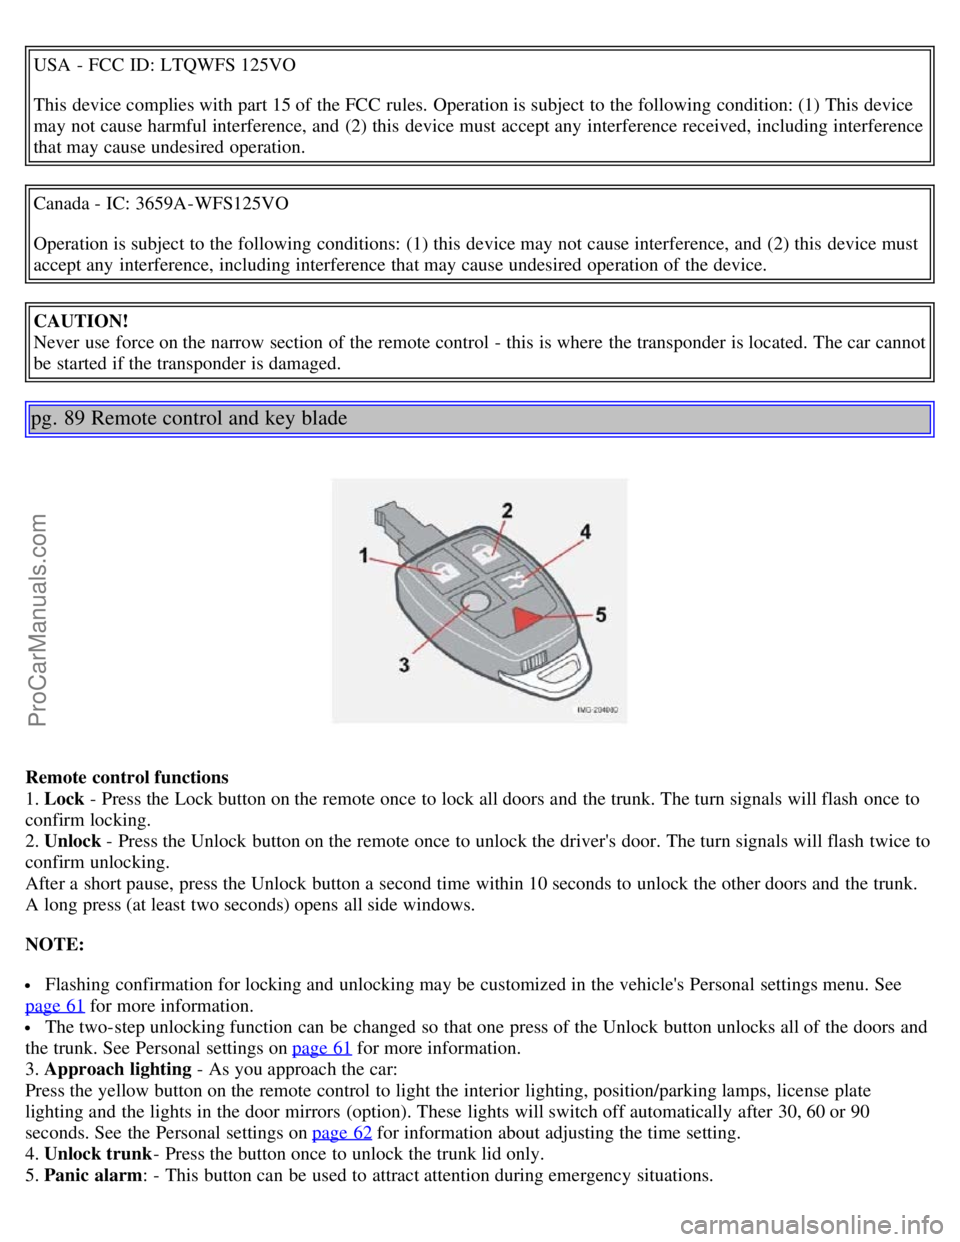
Remote control functions
1. Lock - Press the Lock button on the remote once to lock all doors and the trunk. The turn signals will flash once to
confirm locking.
2. Unlock - Press the Unlock button on the remote once to unlock the driver's door. The turn signals will flash twice to
confirm unlocking.
After a short pause, press the Unlock button a second time within 10 seconds to unlock the other doors and the trunk.
A long press (at least two seconds) opens all side windows.
NOTE:
Flashing confirmation for locking and unlocking may be customized in the vehicle's Personal settings menu. See
page 61
for more information.
The two-step unlocking function can be changed so that one press of the Unlock button unlocks all of the doors and
the trunk. See Personal settings on page 61
for more information.
3. Approach lighting - As you approach the car:
Press the yellow button on the remote control to light the interior lighting, position/parking lamps, license plate
lighting and the lights in the door mirrors (option). These lights will switch off automatically after 30, 60 or 90
seconds. See the Personal settings on page 62
for information about adjusting the time setting.
4. Unlock trunk - Press the button once to unlock the trunk lid only.
5. Panic alarm: - This button can be used to attract attention during emergency situations.
ProCarManuals.com
Page 54 of 127
Turn the key in the driver's door lock once to unlock the driver's door only.
Turn the key again (within 10 seconds) to unlock the other doors and the trunk.
One turn with the key toward lock in the driver's door locks all doors and the trunk.
Valet or service locking
By utilizing the remote control with the key blade removed, the valet locking feature enables you to block access to the
trunk and glove compartment for e.g. valet parking or when the car is brought to the retailer for service.
pg. 91 Remote control and key blade
With the valet locking function activated:
The vehicle's doors can be locked or unlocked
The engine can be started
The glove compartment cannot be unlocked
Access to the trunk is blocked (the trunk lid cannot be unlocked or opened, and the rear seat backrests are locked in
the upright position)
To activate the valet locking function:
1. Remove the key blade from the remote control
2. Turn the key blade 180° clockwise in the glove compartment lock to activate the function. (A message appears in
the information display.)
3. Give the parking attendant or service personnel only the remote control (with the key blade removed)
Turn the key blade 180° counterclockwise in the glove compartment lock to deactivate valet locking.
Weak battery in the remote control
When the battery begins to lose its charge, the Information symbol in the instrument panel (see page 39
) lights up and
REMOTE BATTERY LOW VOLTAGE is shown in the information display.
Replacing the battery in the remote control
If the range of the transmitter is noticeably reduced, this indicates that the battery (type CR 2032, 3V) is weak and
should be replaced. To replace the battery:
1. Remove the key blade.
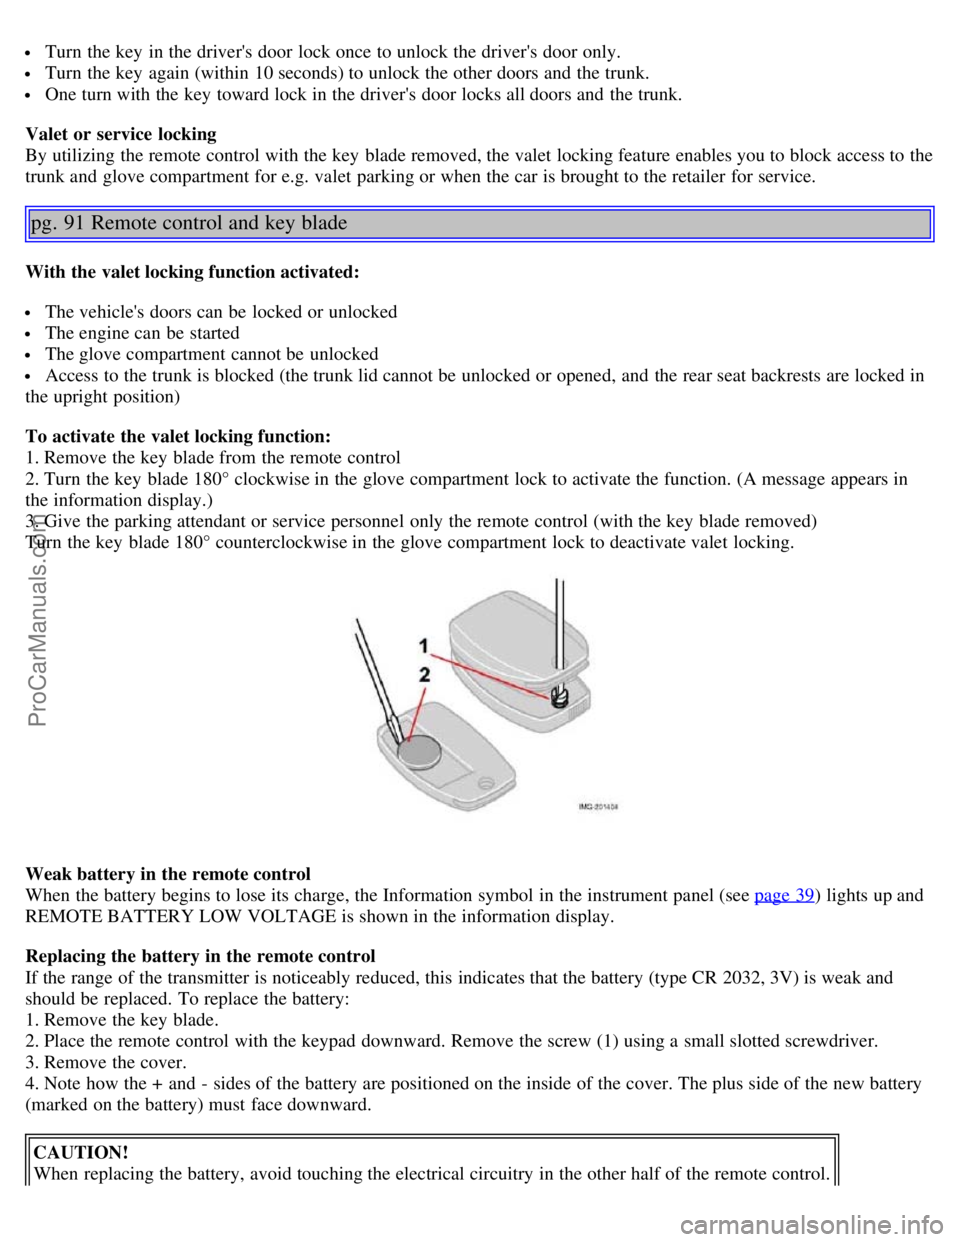
2. Place the remote control with the keypad downward. Remove the screw (1) using a small slotted screwdriver.
3. Remove the cover.
4. Note how the + and - sides of the battery are positioned on the inside of the cover. The plus side of the new battery
(marked on the battery) must face downward.
CAUTION!
When replacing the battery, avoid touching the electrical circuitry in the other half of the remote control.
ProCarManuals.com
Page 55 of 127
5. Pry out (2) and replace the battery. Avoid touching the battery and its contact surfaces with your fingers.
6. Press the cover back into place and tighten the screw.
7. Reinsert the key blade in the remote control.
NOTE: The old battery should be disposed of properly at a recycling center or at your Volvo retailer.
pg. 92 Locking and unlocking
Locking/unlocking the car from the inside
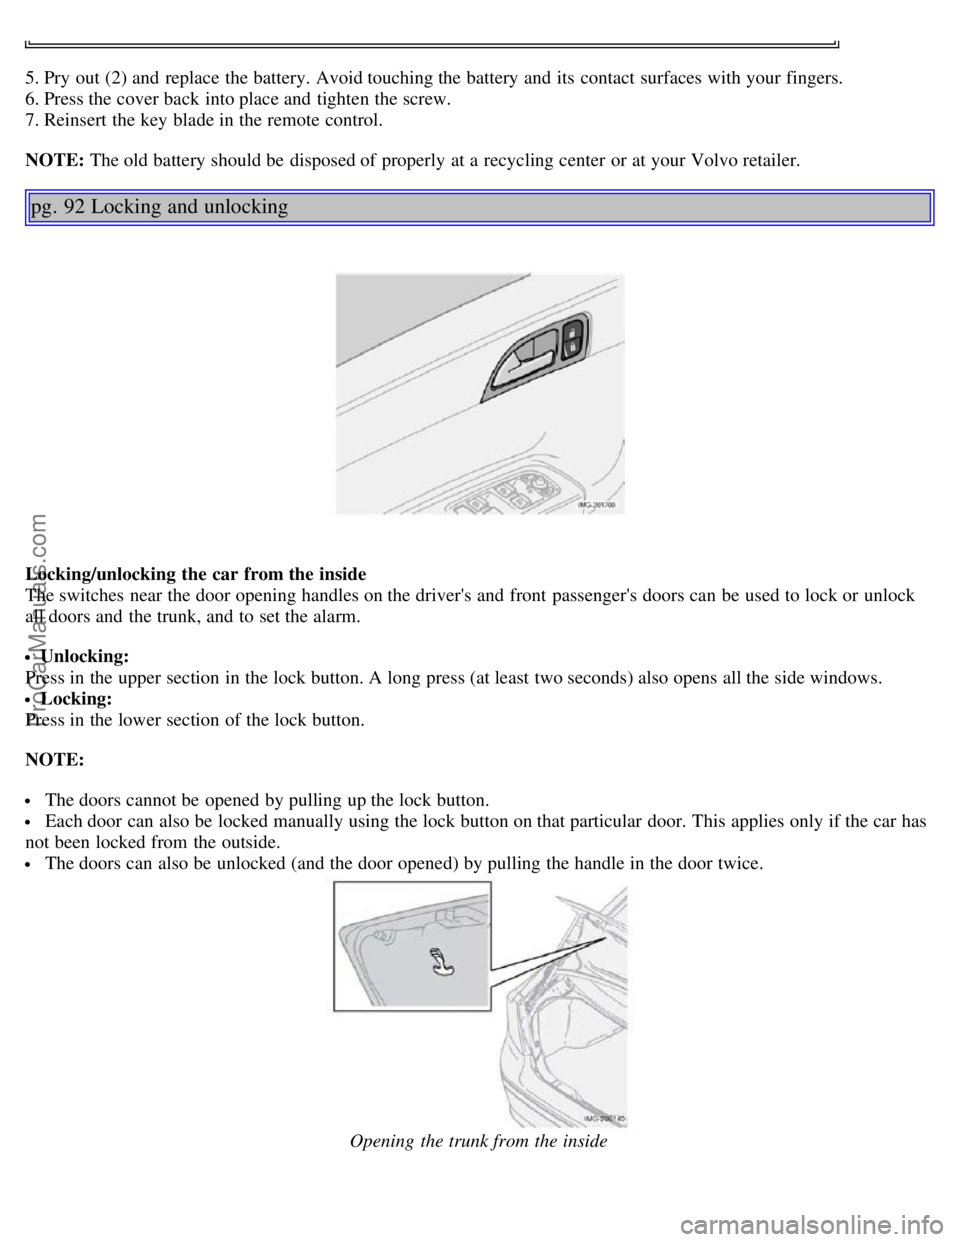
The switches near the door opening handles on the driver's and front passenger's doors can be used to lock or unlock
all doors and the trunk, and to set the alarm.
Unlocking:
Press in the upper section in the lock button. A long press (at least two seconds) also opens all the side windows.
Locking:
Press in the lower section of the lock button.
NOTE:
The doors cannot be opened by pulling up the lock button.
Each door can also be locked manually using the lock button on that particular door. This applies only if the car has
not been locked from the outside.
The doors can also be unlocked (and the door opened) by pulling the handle in the door twice.
Opening the trunk from the inside
ProCarManuals.com