Page 105 of 127
 of the selected station is now shown in the display.
NOTE: Not all RBDS ra")
2. Press ENTER.
3. Select PTY from the menu and press ENTER.
4. Select SHOW PTY and press ENTER. The PTY (program type) of the selected station is now shown in the display.
NOTE: Not all RBDS radio stations have PTY designations.
pg. 176 Radio functions
Station formats
Switch off/deactivate (Clear all PTY)
News
Information
Sports
Talk
Rock
Classic rock
Adult hits
Soft rock
Top 40
Country
Oldies
Soft
Nostalgia
Jazz
Classical
Rhythm and Blues
Soft R&B
Language
Religious music
Religious talk
Personality
Public
College
Weather
Search for a specific station format
This functions enables you to search for a certain station format by searching through the entire FM waveband.
1. Select FM1 or FM2 and press the MENU button.
2. Press ENTER.
3. Select PTY and press ENTER.
4. Choose SELECT PTY and press ENTER.
5. Press ENTER for one or more of the listed station formats. Once you have selected all the desired types, select EXIT
to exit the PTY list.
6. Select SEARCH PTY and press ENTER. If the radio finds a station with the selected format, it will tune to this
station.
If you would like to continue searching, press the left or right arrow on the MENU NAVIGATION control.
If no stations with the selected station format are found, the radio resumes its previous frequency.
Automatic frequency update - AF
The AF function ensures that one of the strongest available transmitters for a radio station is used. This function is only
available on RBDS stations. To activate this function:
1. Select FM1 or FM2 and press the MENU button.
2. Press ENTER
ProCarManuals.com
Page 106 of 127

3. Select ADVANCED RADIO SETTINGS in the menu and press ENTER.
4. Select AF and press ENTER.
To deactivate this function, select AF and press ENTER.
Resetting RBDS functions
This function restores all radio settings to the original factory settings.
1. Select FM1 or FM2 and press the MENU button.
2. Press ENTER.
3. Select ADVANCED RADIO SETTINGS in the menu and press ENTER.
4. Select RESET ALL in the menu and press ENTER.
5. Press ENTER again to confirm your selection.
pg. 177 CD player
CD player
Starting the CD player
Start the CD player by pressing the CD button and inserting a disc in the player.
Changing tracks
Press the left or right arrow keys on the MENU NAVIGATION control to skip to the previous or next track.
NOTE: The track number is shown in the display. The TUNING knob or the arrow keys in the optional keypad in the
steering wheel can also be used for this purpose.
Fast forward/back
Press and hold down the left or right arrows keys in the MENU NAVIGATION control (or the corresponding keys on
the optional steering wheel keypad) to search within a track or the whole disc. The search continues for as long as the
buttons are held in.
Random play
This function plays the tracks on a CD in random order (shuffle).
1. Select CD mode and press the MENU button.
2. Press ENTER.
3. Select RANDOM from the menu and press ENTER.
RND is shown in the display as long as the function is activated.
Select RANDOM again and press ENTER, or press the EXIT button to stop random play.
Scan
This function plays the first 10 seconds of each track on the CD.
1. Press SCAN.
2. Press EXIT to stop the scan function and listen to an entire track.
CD eject
ProCarManuals.com
Page 107 of 127
 to eject the disc.
NOTE: For reasons of traffic safety, the ejected CD must be removed within 12 seconds or it will be automatically
drawn")
Press the button (no. 16 in the illustration on page 169) to eject the disc.
NOTE: For reasons of traffic safety, the ejected CD must be removed within 12 seconds or it will be automatically
drawn back into the slot and the CD player will enter pause mode. Press the CD button to restart the disc.
Compact disc care
Before using a new CD for the first time, remove any burrs in the center/outer edge by running the stem of a pen or
similar object around the hole/edge of the disc.
Use CD standard EN 60908 discs only. Discs not meeting this standard may cause problems with system (poor
sound). CDR discs can cause listening problems due to the quality of the disc or recording equipment used.
Keep the discs clean. Wipe them with a soft, clean, lint-free cloth, working from the center outward. If necessary,
dampen the cloth with a neutral soap solution. Dry thoroughly before using.
Never use cleaning spray or antistatic liquid. Use only cleaners specifically made for CDs.
Use discs of the correct size only (3.5" discs should never be used).
pg. 178 CD player
Do not put tape or labels on the disc itself. They could become stuck in the player.
Volvo does not recommend the use of plastic outer rings on the disc.
Condensation may occur on discs/optical components of the changer in cold winter weather. The disc can be dried
with a clean, lint-free cloth. Optical components in the CD changer may, however, take up to one hour to dry off.
Never attempt to play a disc which is damaged in any way.
When not in use, the discs should be stored in their covers. Avoid storing discs in excessive heat, direct sunlight or
dusty locations.
pg. 179 CD changer (certain audio systems only)
Starting the CD changer
The CD changer can hold up to six discs.
To use the CD changer:
1. Press the CD button.
2. Select an empty position using the 1-6 buttons or the up/down keys on the MENU NAVIGATION control. The
display shows which positions are empty.
3. Insert a disc into the changer.
Ensure that INSERT DISC is displayed before inserting a new disc.
Selecting a disc position (number)
Use the station setting buttons 1-6 to select the disc to be played, or use the up/down arrow keys on the MENU
NAVIGATION control. The number of the disc and the track being played are shown in the display.
Changing tracks
Press the right/left arrow keys on the MENU NAVIGATION control to skip to the next or previous track.
ProCarManuals.com
Page 108 of 127
 or
the optional keypad in the steering wheel can also be used for this purpose.
Fast")
NOTE: The TUNING knob (turn clockwise to go to the next track, or counterclockwise to go to the previous track) or
the optional keypad in the steering wheel can also be used for this purpose.
Fast forward/back
Press and hold down the left or right arrows keys in the MENU NAVIGATION control (or the corresponding keys on
the optional steering wheel keypad) to search within a track or the whole disc. The search continues for as long as the
buttons are held in.
Random play
This function makes it possible to play the tracks on a single disc or on all of the discs in the CD changer in random
order (shuffle).
1. Select CD mode and press the MENU button.
2. Press ENTER.
3. Select RANDOM from the menu and press ENTER.
4. Select SINGLE DISC or ALL DISCS for the player to randomly choose from one or all discs in the CD changer.
RND or RND ALL is shown in the display while the function is active. Press EXIT to deactivate this function. Press
the right arrow key on the MENU NAVIGATION control to select the next random track.
NOTE: You can only select the next random track on the current disc.
Scan
This function plays the first ten seconds of each track on the CD.
1. Press SCAN.
2. Press EXIT to stop the scan function and listen to an entire track.
Scan only works on the selected disc.
Disc text
Certain CDs contain information about the disc, such as the titles of the tracks, etc. This information can be shown in
the display by activating the DISCTEXT function.
1. Press MENU. Select the menu for relevant sound source and press ENTER.
2. Select DISCTEXT in the menu and press ENTER.
3. If information is stored on the disc, it will now appear in the display.
pg. 180 CD changer (certain audio systems only)
To deactivate this function, select DISCTEXT in the menu and press ENTER.
CD eject
This function makes it possible to eject a single disc, or to eject all of the discs in the changer.
Press the button (no. 16 in the illustration on page 169) briefly to eject the disc that is currently playing.
A longer press (more than two seconds) starts the process of ejecting all of the discs in the changer.
NOTE:
The EJECT ALL function can only be used while the vehicle is at a standstill and will be cancelled if the vehicle
begins to move.
For reasons of traffic safety, you have 12 seconds in which to remove the ejected disc. After that, the disc
automatically reinserts into the player.
Compact disc care
Before using a new CD for the first time, remove any burrs in the center/outer edge by running the stem of a pen or
similar object around the hole/edge of the disc.
ProCarManuals.com
Page 109 of 127
. CDR discs can cause listening problems due to the quality of the disc or recording")
Use CD standard EN 60908 discs only. Discs not meeting this standard may cause problems with system (poor
sound). CDR discs can cause listening problems due to the quality of the disc or recording equipment used.
Keep the discs clean. Wipe them with a soft, clean, lint-free cloth, working from the center outward. If necessary,
dampen the cloth with a neutral soap solution. Dry thoroughly before using.
Never use cleaning spray or antistatic liquid. Use only cleaners specifically made for CDs.
Use discs of the correct size only (3.5" discs should never be used).
Do not put tape or labels on the disc itself. They could become stuck in the player.
Volvo does not recommend the use of plastic outer rings on the disc.
Condensation may occur on discs/optical components of the changer in cold winter weather. The disc can be dried
with a clean, lint-free cloth. Optical components in the CD changer may, however, take up to one hour to dry off.
Never attempt to play a disc which is damaged in any way.
When not in use, the discs should be stored in their covers. Avoid storing discs in excessive heat, direct sunlight or
dusty locations.
pg. 181 Audio menu settings and selections
Audio menu settings and selections
NOTE:
All alternatives marked * can be selected or set to On or Off by navigating to the alternative in the menu and pressing
Enter.
FM1/FM2 menu
1. PTY
1.1. SELECT PTY
1.1.1. CLEAR ALL PTY
1.1.2. The available program types are listed here
1.2. SEARCH PTY
1.3. SHOW PTY ON/OFF (default)*
2. RADIOTEXT ON/OFF (default)*
3. ADVANCED RADIO SETTINGS
3.1. AF ON/OFF (default)*
3.2. RESET All
4. AUDIO SETTINGS
4.1. SURROUND AM/FM (Premium sound system only)
4.1.1. Dolby Pro Logic II*
4.1.2.3 Channel*
4.1.3. OFF (default)*
4.2. SURROUND CD
4.2.1. Dolby Pro Logic II (default)*
4.2.2.3 Channel*
4.2.3. OFF*
4.3. SUBWOOFER ON (default)/OFF* (accessory)
4.4. EQUALIZER FRONT (certain audio systems)
4.5. EQUALIZER REAR (certain audio systems)
4.6. Auto. volume control (speed compensated volume)
4.6.1. Low*
4.6.2. Medium (default)*
4.6.3. High*
4.7. RESET ALL
AM menu
1. 1. AUDIO SETTINGS
ProCarManuals.com
Page 110 of 127

1.1.1. Dolby Pro Logic II*
1.1.2. 3 Channel*
1.1.3. OFF (default)*
1.2. SURROUND CD (Premium sound system only)
1.2.1. Dolby Pro Logic II (default)*
1")
1.1. SURROUND AM/FM (Premium sound system only)
1.1.1. Dolby Pro Logic II*
1.1.2. 3 Channel*
1.1.3. OFF (default)*
1.2. SURROUND CD (Premium sound system only)
1.2.1. Dolby Pro Logic II (default)*
1.2.2.3 Channel*
1.2.3. Off*
1.3. SUBWOOFER ON (default)/OFF* (accessory)
1.4. EQUALIZER FRONT (certain audio systems)
1.5. EQUALIZER REAR (certain audio systems)
1.6. Auto. volume control (speed compensated volume)
1.6.1. Low*
1.6.2. Medium (default)*
1.6.3. High*
1.7. RESET ALL
CD menu
1. RANDOM*
2. AUDIO SETTINGS
2.1. SURROUND AM/FM (Premium sound system only)
2.1.1. Dolby Pro Logic II*
2.1.2. 3 Channel*
2.1.3. Off (default)*
2.2. SURROUND CD (Premium sound system only)
2.2.1. Dolby Pro Logic II (default)*
2.2.2. 3 Channel*
2.2.3. Off*
pg. 182 Audio menu settings and selections
2.3. SUBWOOFER ON (default)/OFF* (accessory)
2.4. EQUALIZER Front (certain audio systems)
2.5. EQUALIZER Rear (certain audio systems)
2.6. Auto. volume control (speed compensated volume)
2.6.1. Low*
2.6.2. Medium (default)*
2.6.3. High*
2.7. RESET ALL
CD changer menu
1. RANDOM
1.1. Off (default)*
1.2. Single Disc*
1.3. All Discs*
2. DISC TEXT ON/OFF (default)*
3. AUDIO SETTINGS
3.1. SURROUND AM/FM (Premium sound system only)
3.1.1. Dolby Pro Logic II*
3.1.2.3 Channel*
3.1.3. Off (default)*
3.2. SURROUND CD (Premium sound system only)
3.2.1. Dolby Pro Logic II (default)*
ProCarManuals.com
Page 111 of 127
3.2.2. 3 Channel*
3.2.3. Off*
3.3. SUBWOOFER ON (default)/OFF* (accessory)
3.4. EQUALIZER Front (certain audio systems)
3.5. EQUALIZER Rear (certain audio systems)
3.6. Auto. volume control (speed compensated sound)
3.6.1. Low*
3.6.2. Medium (default)*
3.6.3. High*
3.7. RESET ALL
Contents | Top of Page
ProCarManuals.com
Page 112 of 127
2 0 0 5
VOLVO S40
Chapter 12 - Specifications
pg. 183 Specifications
Label information184
Dimensions and weights185
Fuel, oils, and fluids186
Engine oil187
Engine specifications188
Electrical system189
Three-way catalytic converter190
Volvo programs191
pg. 184 Label information
1. Vacuum hose routing (underside of hood)
2. Model plate
Vehicle Identification Number (VIN).
ProCarManuals.com
 1
1 2
2 3
3 4
4 5
5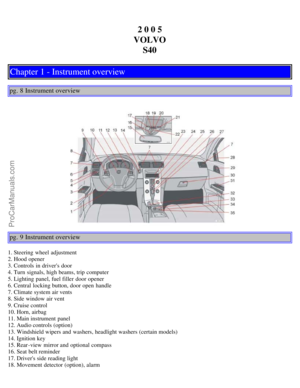 6
6 7
7 8
8 9
9 10
10 11
11 12
12 13
13 14
14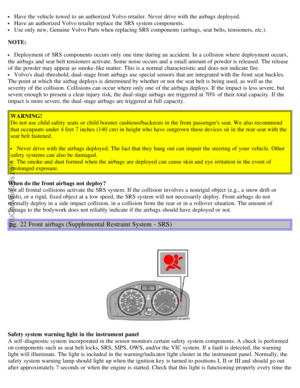 15
15 16
16 17
17 18
18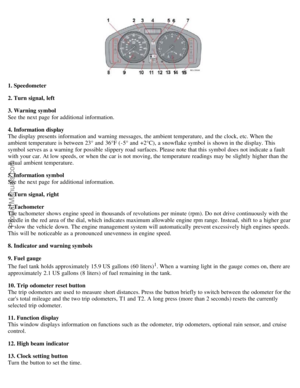 19
19 20
20 21
21 22
22 23
23 24
24 25
25 26
26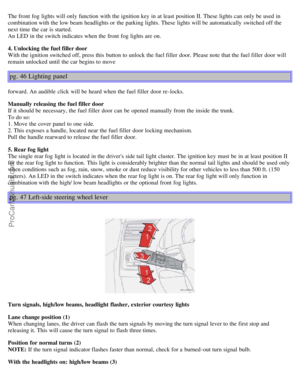 27
27 28
28 29
29 30
30 31
31 32
32 33
33 34
34 35
35 36
36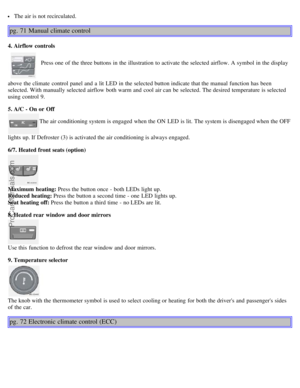 37
37 38
38 39
39 40
40 41
41 42
42 43
43 44
44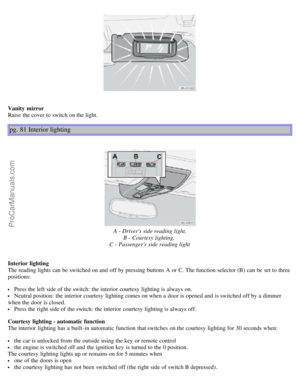 45
45 46
46 47
47 48
48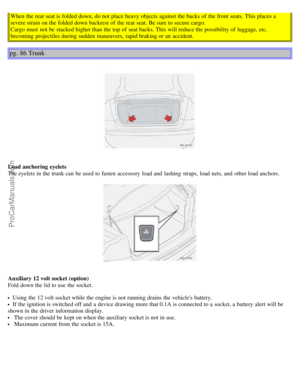 49
49 50
50 51
51 52
52 53
53 54
54 55
55 56
56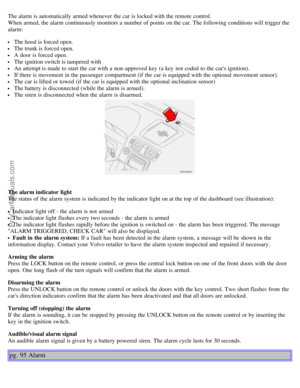 57
57 58
58 59
59 60
60 61
61 62
62 63
63 64
64 65
65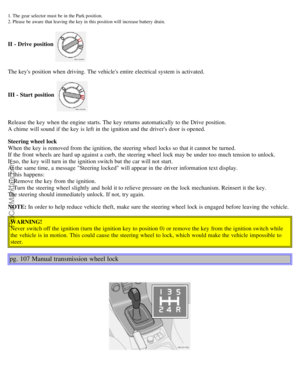 66
66 67
67 68
68 69
69 70
70 71
71 72
72 73
73 74
74 75
75 76
76 77
77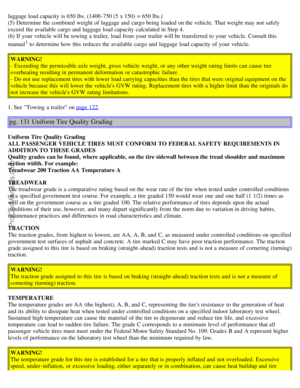 78
78 79
79 80
80 81
81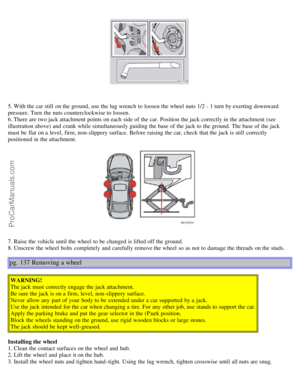 82
82 83
83 84
84 85
85 86
86 87
87 88
88 89
89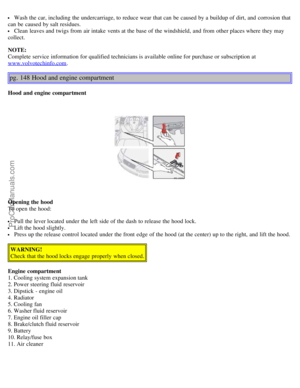 90
90 91
91 92
92 93
93 94
94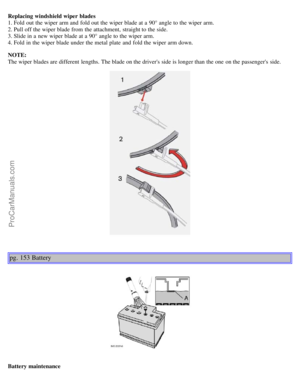 95
95 96
96 97
97 98
98 99
99 100
100 101
101 102
102 103
103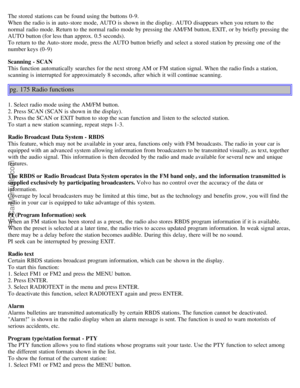 104
104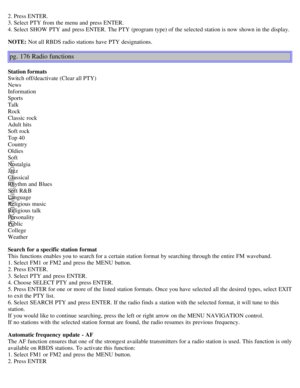 105
105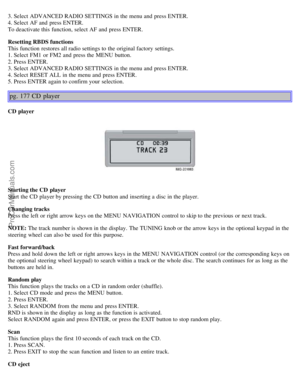 106
106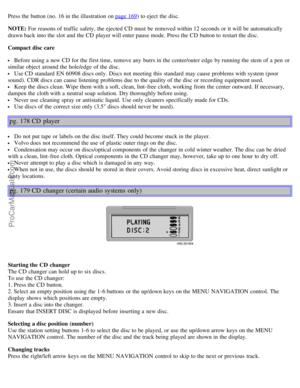 107
107 108
108 109
109 110
110 111
111 112
112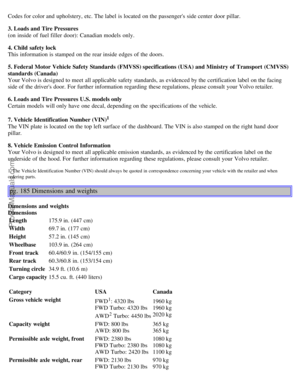 113
113 114
114 115
115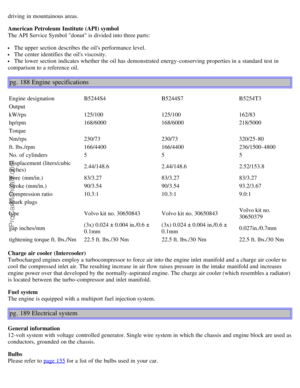 116
116 117
117 118
118 119
119 120
120 121
121 122
122 123
123 124
124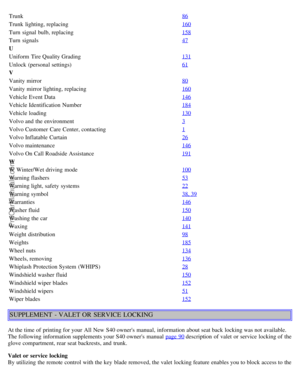 125
125 126
126/OFF* (accessory)
3.4. EQUALIZER Front (certain audio systems)
3.5. EQUALIZER Rear (certain audio systems)
3.6. Auto. volume control (speed co")
