Page 3653 of 5135
D03909
D03589
D08056
D08057
D04083
± AUTOMATIC TRANSMISSION / TRANSAUTOMATIC TRANSAXLE ASSY (U241E)
40±31
U241E A/T REPAIR MANUAL (RM840U)
(b) Remove the 1±way clutch inner race from the 1±way
clutch assy.
59. REMOVE 1WAY CLUTCH SLEEVE OUTER
(a) Remove the 1±way clutch sleeve outer.
60. REMOVE 2ND BRAKE CLUTCH DISC
(a) Using a screwdriver, remove the 2ND brake hole snap
ring from the transaxle case.
(b) Remove the flange, 3 discs and 3 plates from the trans-
axle case.
61. INSPECT 2ND BRAKE CLUTCH DISC
(a) Check to see if the sliding surface of the disc, plate and
flange are worn or burnt.
If necessary, replace them.
NOTICE:
�If the lining of the disc is peeling off or discolored, or
even if a part of the printed number is defaced, re-
place all discs.
Page 3654 of 5135
D08058
D08059
D08060
D09189
40±32
± AUTOMATIC TRANSMISSION / TRANSAUTOMATIC TRANSAXLE ASSY (U241E)
U241E A/T REPAIR MANUAL (RM840U)
�Before assembling new discs, soak them in ATF for
at least 15 minutes.
62. REMOVE SECOND BRAKE PISTON ASSY
(a) Using a screwdriver, remove the 2ND brake cylinder hole
snap ring from the transaxle case.
(b) Remove the 2ND brake cylinder from the transaxle case.
63. REMOVE 1ST & REVERSE BRAKE CLUTCH DISC
(a) Remove the flange, 5 discs and 5 plates from the trans-
axle case.
64. INSPECT 1ST & REVERSE BRAKE CLUTCH DISC
(a) Check to see if the sliding surface of the disc, plate, and
flange are worn or burnt.
If necessary, replace them.
NOTICE:
�If the lining of the disc is peeling off or discolored, or
even if a part of the groove is defaced, replace all
discs.
�Before assembling new discs, soak them in ATF for
at least 15 minutes.
Page 3667 of 5135
D09190
D03618
A
D03815
D03619
± AUTOMATIC TRANSMISSION / TRANSAUTOMATIC TRANSAXLE ASSY (U241E)
40±45
U241E A/T REPAIR MANUAL (RM840U)
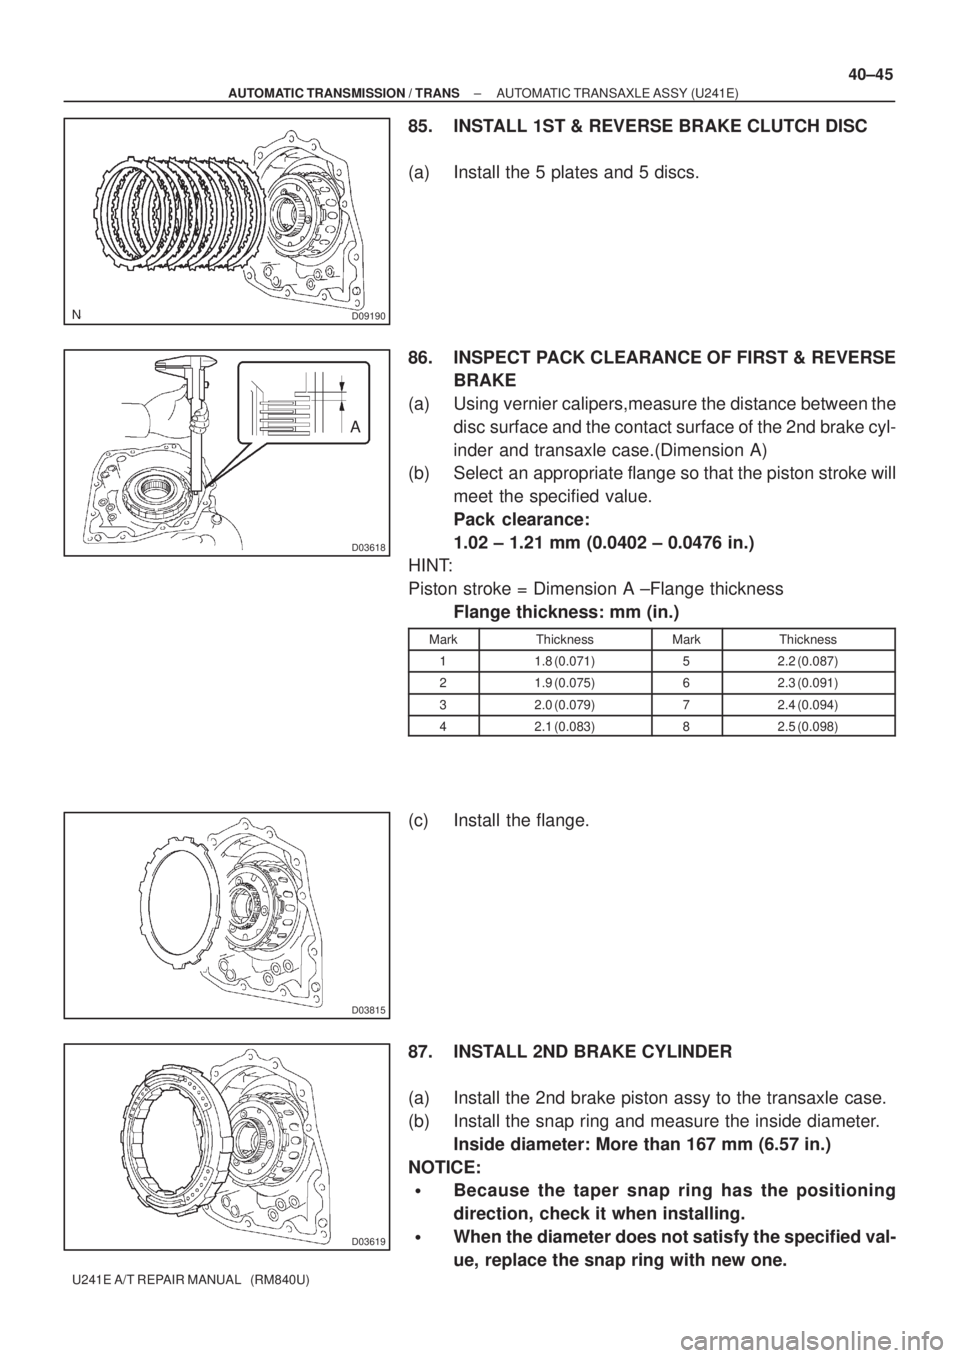
85. INSTALL 1ST & REVERSE BRAKE CLUTCH DISC
(a) Install the 5 plates and 5 discs.
86. INSPECT PACK CLEARANCE OF FIRST & REVERSE
BRAKE
(a) Using vernier calipers,measure the distance between the
disc surface and the contact surface of the 2nd brake cyl-
inder and transaxle case.(Dimension A)
(b) Select an appropriate flange so that the piston stroke will
meet the specified value.
Pack clearance:
1.02 ± 1.21 mm (0.0402 ± 0.0476 in.)
HINT:
Piston stroke = Dimension A ±Flange thickness
Flange thickness: mm (in.)
MarkThicknessMarkThickness
11.8 (0.071)52.2 (0.087)
21.9 (0.075)62.3 (0.091)
32.0 (0.079)72.4 (0.094)
42.1 (0.083)82.5 (0.098)
(c) Install the flange.
87. INSTALL 2ND BRAKE CYLINDER
(a) Install the 2nd brake piston assy to the transaxle case.
(b) Install the snap ring and measure the inside diameter.
Inside diameter: More than 167 mm (6.57 in.)
NOTICE:
�Because the taper snap ring has the positioning
direction, check it when installing.
�When the diameter does not satisfy the specified val-
ue, replace the snap ring with new one.
Page 3668 of 5135
D08078
D03909
D09638
Groove
Free
D03588
D03908
40±46
± AUTOMATIC TRANSMISSION / TRANSAUTOMATIC TRANSAXLE ASSY (U241E)
U241E A/T REPAIR MANUAL (RM840U)
88. INSTALL 1WAY CLUTCH SLEEVE OUTER
(a) Install the 1±way clutch outer sleeve to the 2nd brake cyl-
inder assy.
NOTICE:
Check the positioning direction of the outer sleeve.
89. INSTALL 1 WAY CLUTCH ASSY
(a) Install the inner race to the 1±way clutch.
NOTICE:
Check the direction of the inner race.
(b) Check the rotating direction of 1±way clutch for the lock
or free operation, as shown in illustration.
(c) Install the 1±way clutch and bearing to the 1±way clutch
outer race sleeve.
Bearing diameter: mm (in.)
InsideOutside
Bearing53.6 (2.110)69.6 (2.740)
NOTICE:
Install the thrust bearing properly so that no±colored race
will be visible.
90. INSTALL REAR PLANETARY SUN GEAR ASSY
(a) Coat the planetary carrier thrust washer No. 1 with petro-
leum jelly, install it onto the rear planetary sun gear.
Page 3669 of 5135
D03791
D03587
D09162
D09163
± AUTOMATIC TRANSMISSION / TRANSAUTOMATIC TRANSAXLE ASSY (U241E)
40±47
U241E A/T REPAIR MANUAL (RM840U)
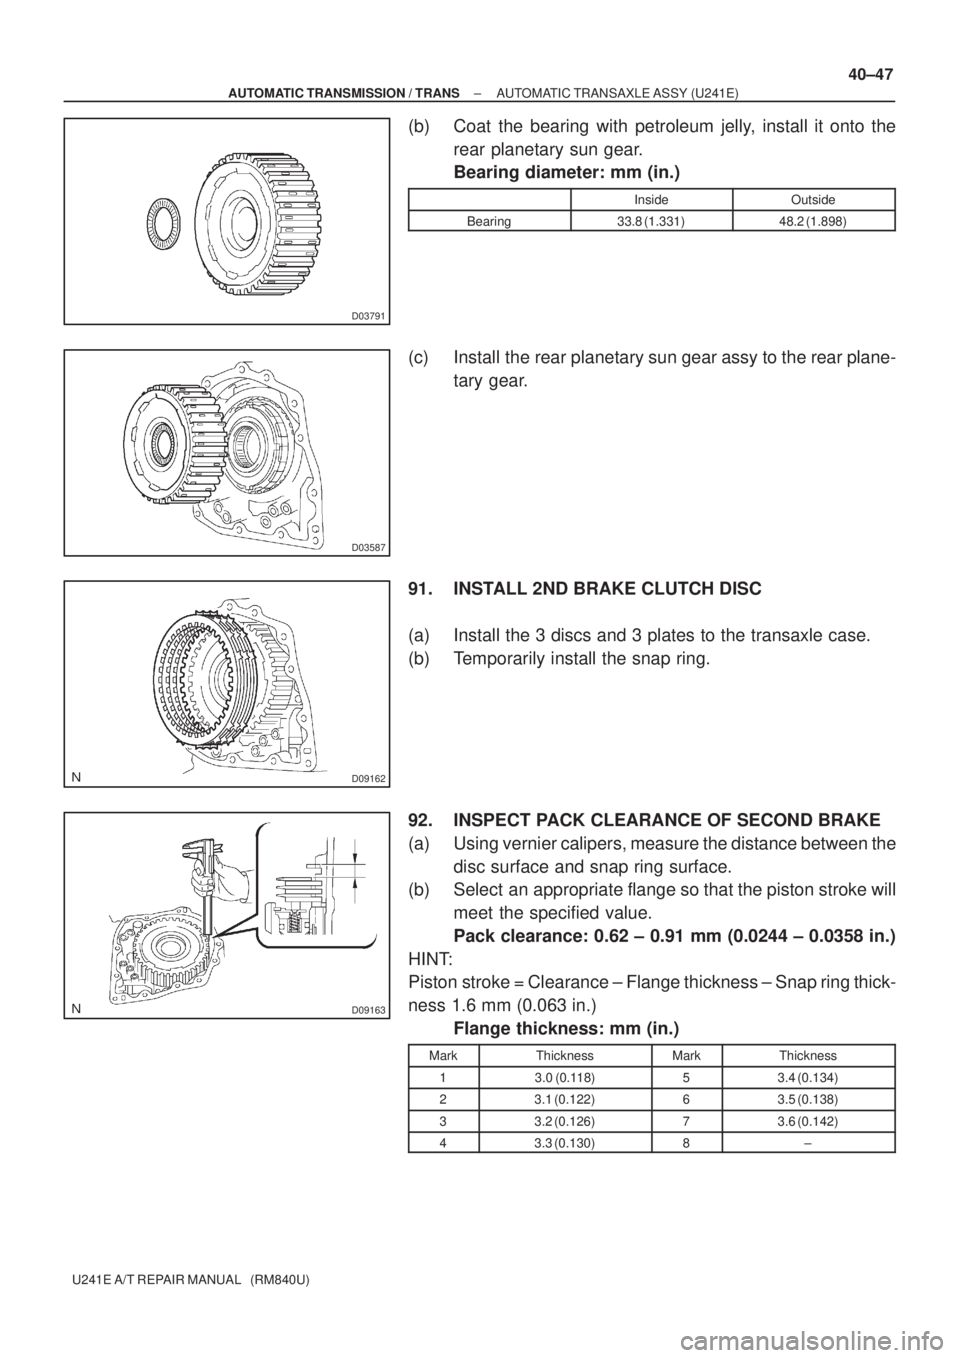
(b) Coat the bearing with petroleum jelly, install it onto the
rear planetary sun gear.
Bearing diameter: mm (in.)
InsideOutside
Bearing33.8 (1.331)48.2 (1.898)
(c) Install the rear planetary sun gear assy to the rear plane-
tary gear.
91. INSTALL 2ND BRAKE CLUTCH DISC
(a) Install the 3 discs and 3 plates to the transaxle case.
(b) Temporarily install the snap ring.
92. INSPECT PACK CLEARANCE OF SECOND BRAKE
(a) Using vernier calipers, measure the distance between the
disc surface and snap ring surface.
(b) Select an appropriate flange so that the piston stroke will
meet the specified value.
Pack clearance: 0.62 ± 0.91 mm (0.0244 ± 0.0358 in.)
HINT:
Piston stroke = Clearance ± Flange thickness ± Snap ring thick-
ness 1.6 mm (0.063 in.)
Flange thickness: mm (in.)
MarkThicknessMarkThickness
13.0 (0.118)53.4 (0.134)
23.1 (0.122)63.5 (0.138)
33.2 (0.126)73.6 (0.142)
43.3 (0.130)8±
Page 3670 of 5135
D03623
D03802
D03586
D03624
B
D03922
Dimension (1) Dimension (2) 40±48
± AUTOMATIC TRANSMISSION / TRANSAUTOMATIC TRANSAXLE ASSY (U241E)
U241E A/T REPAIR MANUAL (RM840U)
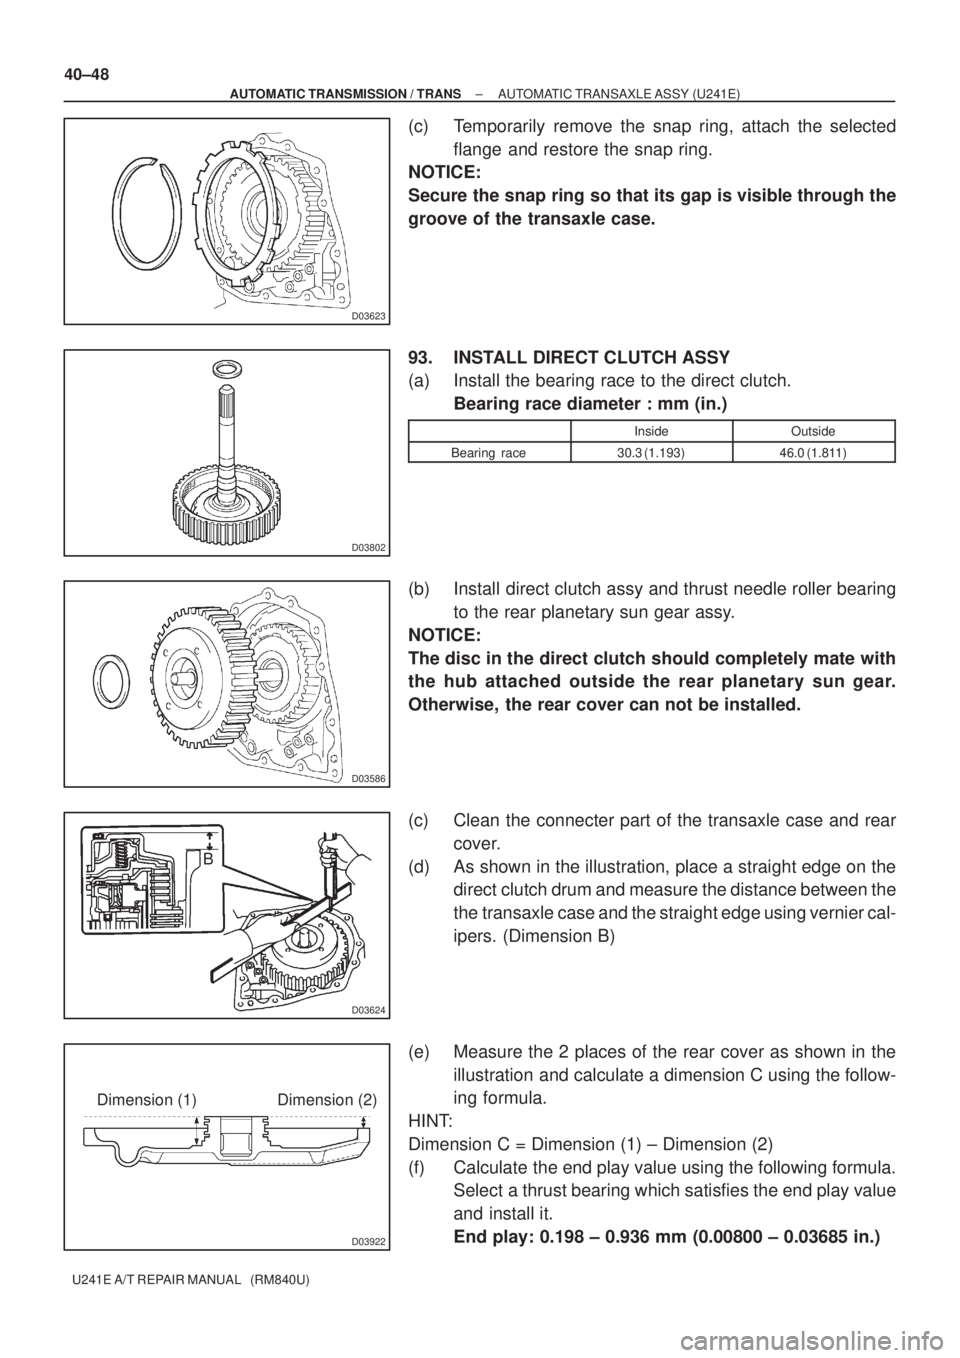
(c) Temporarily remove the snap ring, attach the selected
flange and restore the snap ring.
NOTICE:
Secure the snap ring so that its gap is visible through the
groove of the transaxle case.
93. INSTALL DIRECT CLUTCH ASSY
(a) Install the bearing race to the direct clutch.
Bearing race diameter : mm (in.)
InsideOutside
Bearing race30.3 (1.193)46.0 (1.811)
(b) Install direct clutch assy and thrust needle roller bearing
to the rear planetary sun gear assy.
NOTICE:
The disc in the direct clutch should completely mate with
the hub attached outside the rear planetary sun gear.
Otherwise, the rear cover can not be installed.
(c) Clean the connecter part of the transaxle case and rear
cover.
(d) As shown in the illustration, place a straight edge on the
direct clutch drum and measure the distance between the
the transaxle case and the straight edge using vernier cal-
ipers. (Dimension B)
(e) Measure the 2 places of the rear cover as shown in the
illustration and calculate a dimension C using the follow-
ing formula.
HINT:
Dimension C = Dimension (1) ± Dimension (2)
(f) Calculate the end play value using the following formula.
Select a thrust bearing which satisfies the end play value
and install it.
End play: 0.198 ± 0.936 mm (0.00800 ± 0.03685 in.)
Page 3671 of 5135
D03591
D03923
D03923
D25510
± AUTOMATIC TRANSMISSION / TRANSAUTOMATIC TRANSAXLE ASSY (U241E)
40±49
U241E A/T REPAIR MANUAL (RM840U)
NOTICE:
Make sure that the colored race side is facing the direct
clutch assy.
HINT:
End play = Dimension C ± Dimension B
Bearing thickness and diameter : mm (in.)
ThicknessInsideOutside
3.55 (0.1397)53.6 (2.110)69.6 (2.740)
3.85 (0.1515)53.6 (2.110)70.18 (2.763)
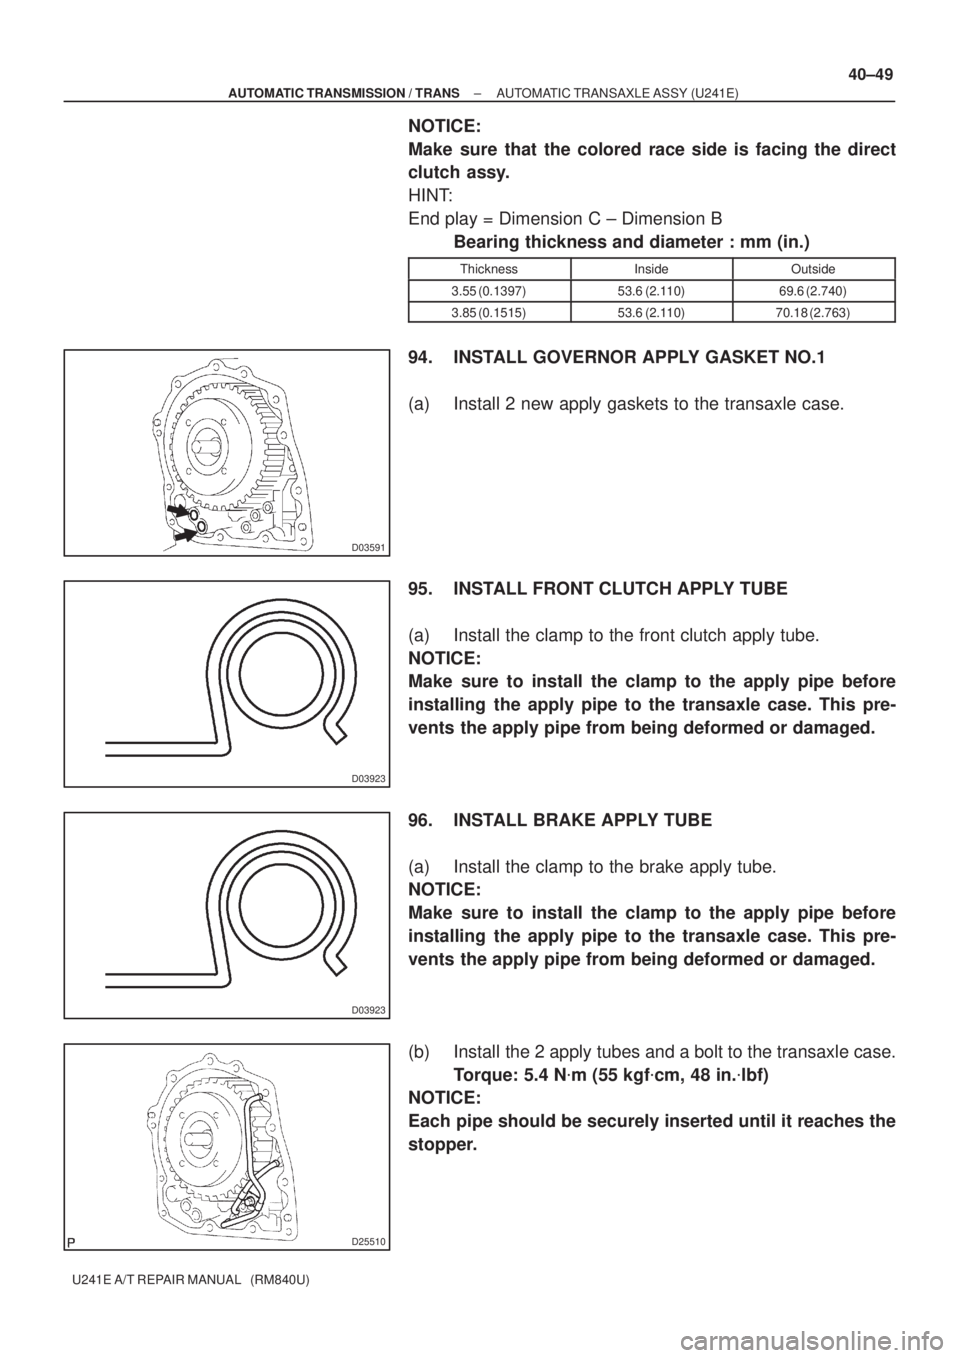
94. INSTALL GOVERNOR APPLY GASKET NO.1
(a) Install 2 new apply gaskets to the transaxle case.
95. INSTALL FRONT CLUTCH APPLY TUBE
(a) Install the clamp to the front clutch apply tube.
NOTICE:
Make sure to install the clamp to the apply pipe before
installing the apply pipe to the transaxle case. This pre-
vents the apply pipe from being deformed or damaged.
96. INSTALL BRAKE APPLY TUBE
(a) Install the clamp to the brake apply tube.
NOTICE:
Make sure to install the clamp to the apply pipe before
installing the apply pipe to the transaxle case. This pre-
vents the apply pipe from being deformed or damaged.
(b) Install the 2 apply tubes and a bolt to the transaxle case.
Torque: 5.4 N�m (55 kgf�cm, 48 in.�lbf)
NOTICE:
Each pipe should be securely inserted until it reaches the
stopper.
Page 3673 of 5135
D09946
FIPG
D09943A
D03914
D03809
Vinyl Tape
SST
D03810
SST
± AUTOMATIC TRANSMISSION / TRANSAUTOMATIC TRANSAXLE ASSY (U241E)
40±51
U241E A/T REPAIR MANUAL (RM840U)
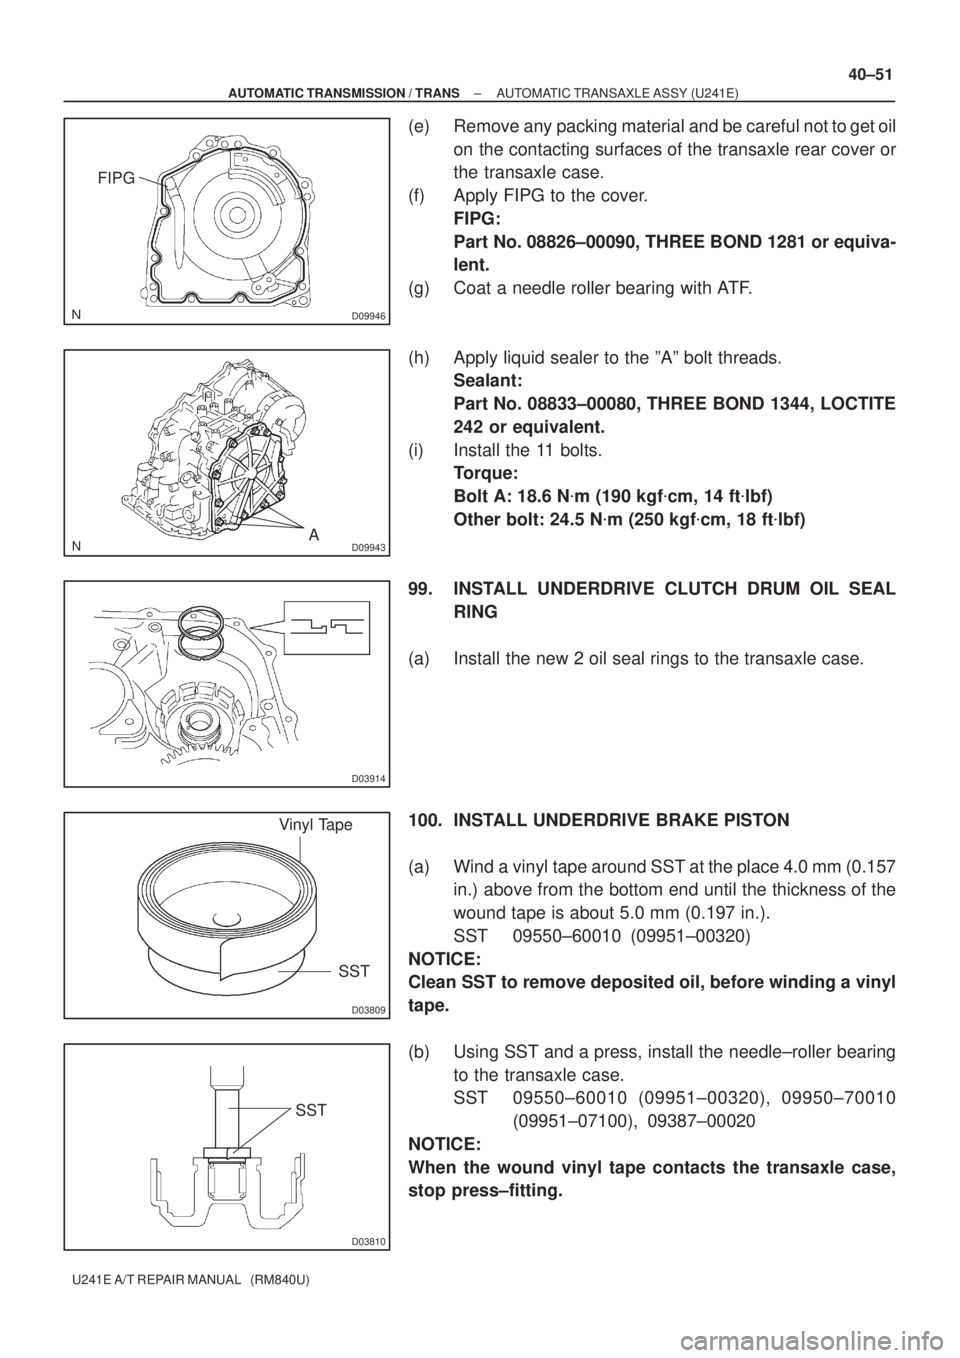
(e) Remove any packing material and be careful not to get oil
on the contacting surfaces of the transaxle rear cover or
the transaxle case.
(f) Apply FIPG to the cover.
FIPG:
Part No. 08826±00090, THREE BOND 1281 or equiva-
lent.
(g) Coat a needle roller bearing with ATF.
(h) Apply liquid sealer to the ºAº bolt threads.
Sealant:
Part No. 08833±00080, THREE BOND 1344, LOCTITE
242 or equivalent.
(i) Install the 11 bolts.
Torque:
Bolt A: 18.6 N�m (190 kgf�cm, 14 ft�lbf)
Other bolt: 24.5 N�m (250 kgf�cm, 18 ft�lbf)
99. INSTALL UNDERDRIVE CLUTCH DRUM OIL SEAL
RING
(a) Install the new 2 oil seal rings to the transaxle case.
100. INSTALL UNDERDRIVE BRAKE PISTON
(a) Wind a vinyl tape around SST at the place 4.0 mm (0.157
in.) above from the bottom end until the thickness of the
wound tape is about 5.0 mm (0.197 in.).
SST 09550±60010 (09951±00320)
NOTICE:
Clean SST to remove deposited oil, before winding a vinyl
tape.
(b) Using SST and a press, install the needle±roller bearing
to the transaxle case.
SST 09550±60010 (09951±00320), 09950±70010
(09951±07100), 09387±00020
NOTICE:
When the wound vinyl tape contacts the transaxle case,
stop press±fitting.