2004 MITSUBISHI ENDEAVOR air condition
[x] Cancel search: air conditionPage 440 of 3870
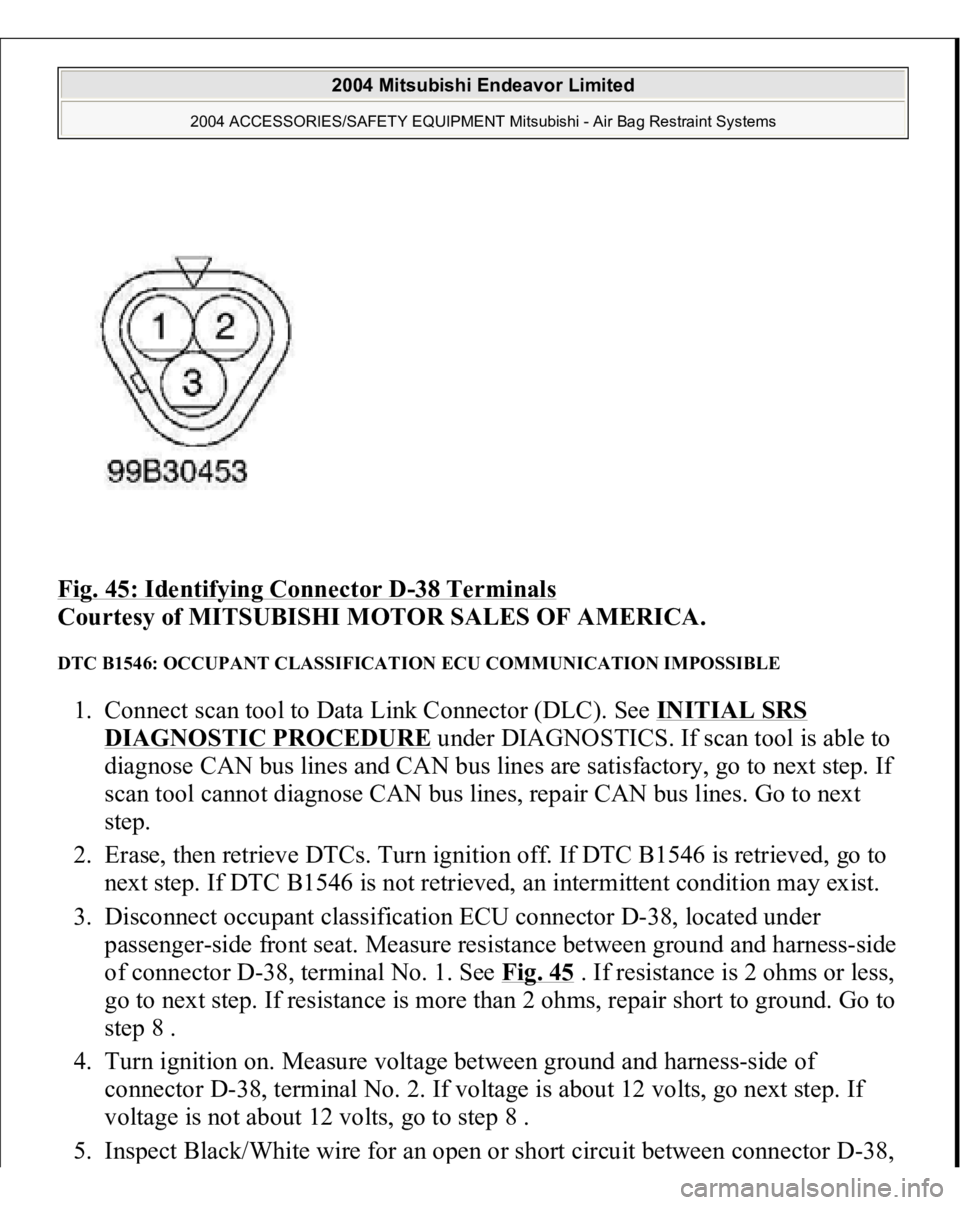
Fig. 45: Identifying Connector D
-38 Terminals
Courtesy of MITSUBISHI MOTOR SALES OF AMERICA.
DTC B1546: OCCUPANT CLASSIFICATION ECU COMMUNICATION IMPOSSIBLE 1. Connect scan tool to Data Link Connector (DLC). See INITIAL SRS
DIAGNOSTIC PROCEDURE
under DIAGNOSTICS. If scan tool is able to
diagnose CAN bus lines and CAN bus lines are satisfactory, go to next step. If
scan tool cannot diagnose CAN bus lines, repair CAN bus lines. Go to next
step.
2. Erase, then retrieve DTCs. Turn ignition off. If DTC B1546 is retrieved, go to
next step. If DTC B1546 is not retrieved, an intermittent condition may exist.
3. Disconnect occupant classification ECU connector D-38, located under
passenger-side front seat. Measure resistance between ground and harness-side
of connector D-38, terminal No. 1. See Fig. 45
. If resistance is 2 ohms or less,
go to next step. If resistance is more than 2 ohms, repair short to ground. Go to
step 8 .
4. Turn ignition on. Measure voltage between ground and harness-side of
connector D-38, terminal No. 2. If voltage is about 12 volts, go next step. If
voltage is not about 12 volts, go to step 8 .
5. Ins
pect Black/White wire for an o
pen or short circuit between connector D-38,
2004 Mitsubishi Endeavor Limited
2004 ACCESSORIES/SAFETY EQUIPMENT Mitsubishi - Air Bag Restraint Systems
Page 441 of 3870
terminal No. 2 and ignition switch connector C-308, terminal No. 2. If wire is
okay, go to step 8 . If wire is not okay, replace wire harness between occupant
classification ECU and ignition switch connector C-308. Go to step 8 .
6. Disconnect SRS ECU connector C-25. See SRS ELECTRONIC CONTROL UNIT (SRS ECU)
under REMOVAL & INSTALLATION. See Fig. 30
.
Inspect Sky Blue wire for an open or short circuit between connector D-38,
terminal No. 3 and SRS ECU connector C-25, terminal No. 66. See Fig. 33
. If
wire is okay, reconnect SRS components. Erase, then retrieve DTCs. If DTC
B1545 is retrieved, replace front seat slide adjuster. Go to next step. If wire
harness is not okay, replace wire harness. Go to step 8 .
7. Erase DTCs. Turn ignition on. If DTC B1546 is retrieved, replace SRS ECU.
Go to next step. If DTC B1546 is not retrieved, diagnosis is complete.
8. Erase, then retrieve DTCs. If DTC B1546 is retrieved, go to step 1 . If DTC
B1546 is not retrieved, system is normal at this time.
DTC B1547: CUT OFF FOR PASSENGER-SIDE AIR BAG MODULE 1. Connect scan tool to Data Link Connector (DLC). See INITIAL SRS
DIAGNOSTIC PROCEDURE
under DIAGNOSTICS. If scan tool is able to
diagnose CAN bus lines and CAN bus lines are satisfactory, go to next step. If
scan tool cannot diagnose CAN bus lines, repair CAN bus lines. Go to next
step.
2. Erase, then retrieve DTCs. Turn ignition off. If DTC B1547 is retrieved, go to
next step. If DTC B1547 is not retrieved, an intermittent condition may exist.
3. If DTCs other than DTC B1457 are retrieved, diagnose indicated DTC. See
DIAGNOSTIC TROUBLE CODES (DTCS) IDENTIFICATION WITH
SINGLE
-STAGE AIR BAG SYSTEM
table. If only DTC B1547 is
retrieved, go to next step.
4. Using scan tool, erase, then retrieve DTCs. If DTC B1547 is retrieved, replace
SRS ECU. See SRS ELECTRONIC CONTROL UNIT (SRS ECU)
under
REMOVAL & INSTALLATION. If DTC B1547 is not retrieved, diagnosis is
complete.
DTC B1552: CHANGING CIRCUIT SHORT 1. Connect scan tool to Data Link Connector
(DLC
). SeeINITIAL SRS
2004 Mitsubishi Endeavor Limited
2004 ACCESSORIES/SAFETY EQUIPMENT Mitsubishi - Air Bag Restraint Systems
Page 442 of 3870
DIAGNOSTIC PROCEDURE
under DIAGNOSTICS. If scan tool is able to
diagnose CAN bus lines and CAN bus lines are satisfactory, go to next step. If
scan tool cannot diagnose CAN bus lines, repair CAN bus lines. Go to next
step.
2. Erase, then retrieve DTCs. If DTC B1552 is retrieved, replace SRS ECU. See
SRS ELECTRONIC CONTROL UNIT (SRS ECU)
under REMOVAL &
INSTALLATION. If DTC B1552 is not retrieved, an intermittent condition
may exist.
DTC B1553: CHANGING CIRCUIT OPEN 1. Connect scan tool to Data Link Connector (DLC). See INITIAL SRS
DIAGNOSTIC PROCEDURE
under DIAGNOSTICS. If scan tool is able to
diagnose CAN bus lines and CAN bus lines are satisfactory, go to next step. If
scan tool cannot diagnose CAN bus lines, repair CAN bus lines. Go to next
step.
2. Erase, then retrieve DTCs. If DTC B1553 is retrieved, replace SRS ECU. See
SRS ELECTRONIC CONTROL UNIT (SRS ECU)
under REMOVAL &
INSTALLATION. If DTC B1553 is not retrieved, an intermittent condition
may exist.
DTCB1554: SG BY-PASS CIRCUIT MALFUNCTION 1. Connect scan tool to Data Link Connector (DLC). See INITIAL SRS
DIAGNOSTIC PROCEDURE
under DIAGNOSTICS. If scan tool is able to
diagnose CAN bus lines and CAN bus lines are satisfactory, go to next step. If
scan tool cannot diagnose CAN bus lines, repair CAN bus lines. Go to next
step.
2. Erase, then retrieve DTCs. If DTC B1554 is retrieved, replace SRS ECU. See
SRS ELECTRONIC CONTROL UNIT (SRS ECU)
under REMOVAL &
INSTALLATION. If DTC B1554 is not retrieved, an intermittent condition
may exist.
DTC B1555: SG BY-PASS CIRCUIT (FET) OPEN 1. Connect scan tool to Data Link Connector (DLC). See INITIAL SRS
DIAGNOSTIC PROCEDURE
under DIAGNOSTICS. If scan tool is able to
2004 Mitsubishi Endeavor Limited
2004 ACCESSORIES/SAFETY EQUIPMENT Mitsubishi - Air Bag Restraint Systems
Page 443 of 3870
diagnose CAN bus lines and CAN bus lines are satisfactory, go to next step. If
scan tool cannot diagnose CAN bus lines, repair CAN bus lines. Go to next
step.
2. Erase, then retrieve DTCs. If DTC B1555 is retrieved, replace SRS ECU. See
SRS ELECTRONIC CONTROL UNIT (SRS ECU)
under REMOVAL &
INSTALLATION. If DTC B1555 is not retrieved, an intermittent condition
may exist.
DTC B1556: SEAT SLIDE SENSOR MALFUNCTION 1. Connect scan tool to Data Link Connector (DLC). See INITIAL SRS
DIAGNOSTIC PROCEDURE
under DIAGNOSTICS. If scan tool is able to
diagnose CAN bus lines and CAN bus lines are satisfactory, go to next step. If
scan tool cannot diagnose CAN bus lines, repair CAN bus lines. Go to next
step.
2. Erase, then retrieve DTCs. Turn ignition off. If DTC B1556 is retrieved, go to
next step. If DTC B1556 is not retrieved, an intermittent condition may exist.
3. Replace seat slide sensor. See SEAT SLIDE SENSOR
under REMOVAL &
INSTALLATION. Check for DTCs. If DTC B1556 is retrieved, replace SRS
ECU. See SRS ELECTRONIC CONTROL UNIT (SRS ECU)
under
REMOVAL & INSTALLATION. If DTC B1556 is not retrieved, procedure is
complete.
DTCB1557: SRS ECU ASIC 1. Connect scan tool to Data Link Connector (DLC). See INITIAL SRS
DIAGNOSTIC PROCEDURE
under DIAGNOSTICS. If scan tool is able to
diagnose CAN bus lines and CAN bus lines are satisfactory, go to next step. If
scan tool cannot diagnose CAN bus lines, repair CAN bus lines. Go to next
step.
2. Erase, then retrieve DTCs. If DTC B1557 is retrieved, replace SRS ECU. See
SRS ELECTRONIC CONTROL UNIT (SRS ECU)
under REMOVAL &
INSTALLATION. If DTC B1557 is not retrieved, an intermittent condition
may exist.
DTCB1558: OCCUPANT CLASSIFICATION ECU ID CORD MALFUNCTION
2004 Mitsubishi Endeavor Limited
2004 ACCESSORIES/SAFETY EQUIPMENT Mitsubishi - Air Bag Restraint Systems
Page 444 of 3870
1. Connect scan tool to Data Link Connector (DLC). See INITIAL SRS
DIAGNOSTIC PROCEDURE
under DIAGNOSTICS. If scan tool is able to
diagnose CAN bus lines and CAN bus lines are satisfactory, go to next step. If
scan tool cannot diagnose CAN bus lines, repair CAN bus lines. Go to next
step.
2. Erase, then retrieve DTCs. If DTC B1558 is retrieved, replace seat slide sensor.
See SEAT SLIDE SENSOR
under REMOVAL & INSTALLATION. If DTC
B1558 is not retrieved, an intermittent condition may exist.
DTC U1073: BUS OFF 1. Connect scan tool to Data Link Connector (DLC). See INITIAL SRS
DIAGNOSTIC PROCEDURE
under DIAGNOSTICS. If scan tool is able to
diagnose CAN bus lines and CAN bus lines are satisfactory, go to next step. If
scan tool cannot diagnose CAN bus lines, repair CAN bus lines. Go to next
step.
2. Erase, then retrieve DTCs. If scan tool retrieves DTC U1073, replace A/C
ECU. If scan tool does not retrieve DTC U1073, an intermittent condition may
exist.
COMPONENT TESTING OCCUPANT CLASSIFICATION SENSOR CALIBRATION (DUAL-STAGE AIR BAG SYSTEM) 1. Connect scan tool to Data Link Connector (DLC). See INITIAL SRS
DIAGNOSTIC PROCEDURE
under DIAGNOSTICS. Go to next step.
2. Open and close passenger-side front door 5 times hard to remove friction. If
door does not open and close smoothly after the impact, hit front and rear sides
of seat back about 8 times each to remove friction. Go to next step.
3. Select INTERACTIVE DIAGNOSIS, then SPECIAL FUNCTION then SEAT
WEIGHT SENSOR ACCURACY CHECK on screen. Slide passenger-side
front seat to full forward position. Place a 66 pound weight (30 kg) in center of
passenger-side seat cushion. Repeat step2 . Touch OK button to perform
accuracy check.
4. If variance between sensor output and input levels is within 11 pounds (5 kg),
ACCURACY CHECK COMPLETION will be dis
played on screen. Go to ste
p
2004 Mitsubishi Endeavor Limited
2004 ACCESSORIES/SAFETY EQUIPMENT Mitsubishi - Air Bag Restraint Systems
Page 445 of 3870
6 . If ACCURACY CHECK COMPLETION is not displayed, go to next step.
5. If ABNORMAL CONDITION is displayed, press OK and go to calibration
screen. Remove weight from seat. Verify seat is installed correctly. If seat is
installed correctly, go to step 1 .
6. Remove weight from seat cushion. Move seat to rear most position. Repeat
step2 . Go to next step.
7. Select INTERACTIVE DIAGNOSIS, then SPECIAL FUNCTION then SEAT
WEIGHT SENSOR ACCURACY CHECK on screen. Place a 66 pound weight
(30 kg) in center of passenger-side seat cushion. Repeat step2 . Touch OK
button to perform accuracy check. Go to next step.
8. If variance between sensor output and input levels is within 11 pounds (5 kg),
ACCURACY CHECK COMPLETION will be displayed on screen.
Calibration is complete. If ACCURACY CHECK COMPLETION is not
displayed, go to next step.
9. Verify seat is installed correctly. Repeat step2 . Touch OK button. When
EXECUTION prompt is displayed, touch OK button. When calibration is
completed, screen will display ZERO CALIBRATION COMPLETED. If
calibration cannot be completed, an intermittent condition may exist.
FRONT IMPACT SENSOR (DUAL-STAGE AIR BAG SYSTEM) 1. Remove appropriate front impact sensor. See FRONT IMPACT SENSOR
under REMOVAL & INSTALLATION. Visually inspect front impact sensor
case, connectors and brackets for damage. If no damage is found, go to next
step. If damage is found, discard front impact sensor.
2. Measure resistance between terminals of front impact sensor. Resistance
should be 738-902 ohms. Measure resistance between front impact sensor
terminals and front impact sensor case. Resistance should be infinite. If
resistance is not as specified, replace front impact sensor.
WIRING DIAGRAMS
2004 Mitsubishi Endeavor Limited
2004 ACCESSORIES/SAFETY EQUIPMENT Mitsubishi - Air Bag Restraint Systems
Page 713 of 3870
STEP 9. Recheck symptom.
Q: Is the symptom eliminated?
YES: The procedure is complete.
NO: Start over at Step 1 . If a new symptom surfaces, refer to the
SYMPTOM CHART
.
INSPECTION PROCEDURE 5: SCRAPING OR GRINDING NOISE WHEN BRAKES ARE APPLIED DIAGNOSIS
STEP 1. Check the front brakes, then rear brakes, for metal-to-metal
condition.
Q: Is the metal-to-metal contact evident?
YES: Repair or replace the components. Then go to Step 6 .
NO: Go to Step 2.
STEP 2. Check for interference between the caliper and wheel.
Q: Is there a interference?
YES: Repair or replace the part. Then go to Step 6 .
NO: Go to Step 3.
STEP 3. Check for interference between the dust cover and brake disc.
2004 Mitsubishi Endeavor LS
2004 BRAKES Basic Brake System - Endeavor
Page 847 of 3870
Fig. 22: Identifying Connectors: C
-302, C
-303, C
-306
Courtesy of MITSUBISHI MOTOR SALES OF AMERICA.
Q: Are the connectors and terminals in good condition?
YES : Go to Step 6.
NO : Repair or replace the faulty connector and install the air bag module
(driver's side). (Refer to DRIVER
-SIDE AIR BAG MODULE &
CLOCKSPRING
). Then go to Step 18 .
STEP 6. Check the harness wire between PCM connector B-18 terminal
12 and auto-cruise control switch connector C-302 terminal 2 for damage.
2004 Mitsubishi Endeavor LS
2004 BODY & ACCESSORIES Auto, Cruise Control System - Endeavor