2004 BMW 525I SEDAN key
[x] Cancel search: keyPage 76 of 220

Everything under control
74
Measurement units
You can change the measurement units for
consumption, distances, temperature and
pressure for each specific key.
1.Open the menu
2.Select "Display settings" and press the
controller
3.Select "Units" and press the controller
4.Select the menu item to be adjusted
and press the controller
5.Select the desired measurement unit
and press the controller.
Language
The language on the Control Center can be
set for each specific key.
Control Center, for principle details, refer to
page 16:
1.Open the menu
2.Select "Display settings" and press the
controller
3.Select "Languages" and press the con-
troller
4.Select "Text language" and press the
controller. You can select a different
language for the text displays5.Select the desired language and press
the controller.
Setting the time
Control Center, for principle details, refer to
page 16:
1.Open the menu
2.Select "Display settings" and press the
controller
3.Select "Time" and press the controller
4.Select "Set time" and press the control-
ler. The first time setting is highlighted
5.Turn the controller to make the adjust-
ment
6.Press the controller to apply the setting.
The next adjustment is highlighted
7.Make the remaining adjustments. After
the last adjustment, the time is stored.
Changing the display format
The display mode of the clock can be set
for each specific key.
1.Select "Time format" and press the
controller
2.Select the desired format and press the
controller.
Page 77 of 220
Controls
75Reference
At a glance
Driving tips
Communications
Navigation
Entertainment
Mobility
Switching on the reminder function*
Select "Hour memo" and press the control-
ler.
is displayed with the reminder function
switched on.
You will hear three tones just before each
full hour.
Setting the date
Control Center, for principle details, refer to
page 16:
1.Open the menu
2.Select "Display settings" and press the
controller
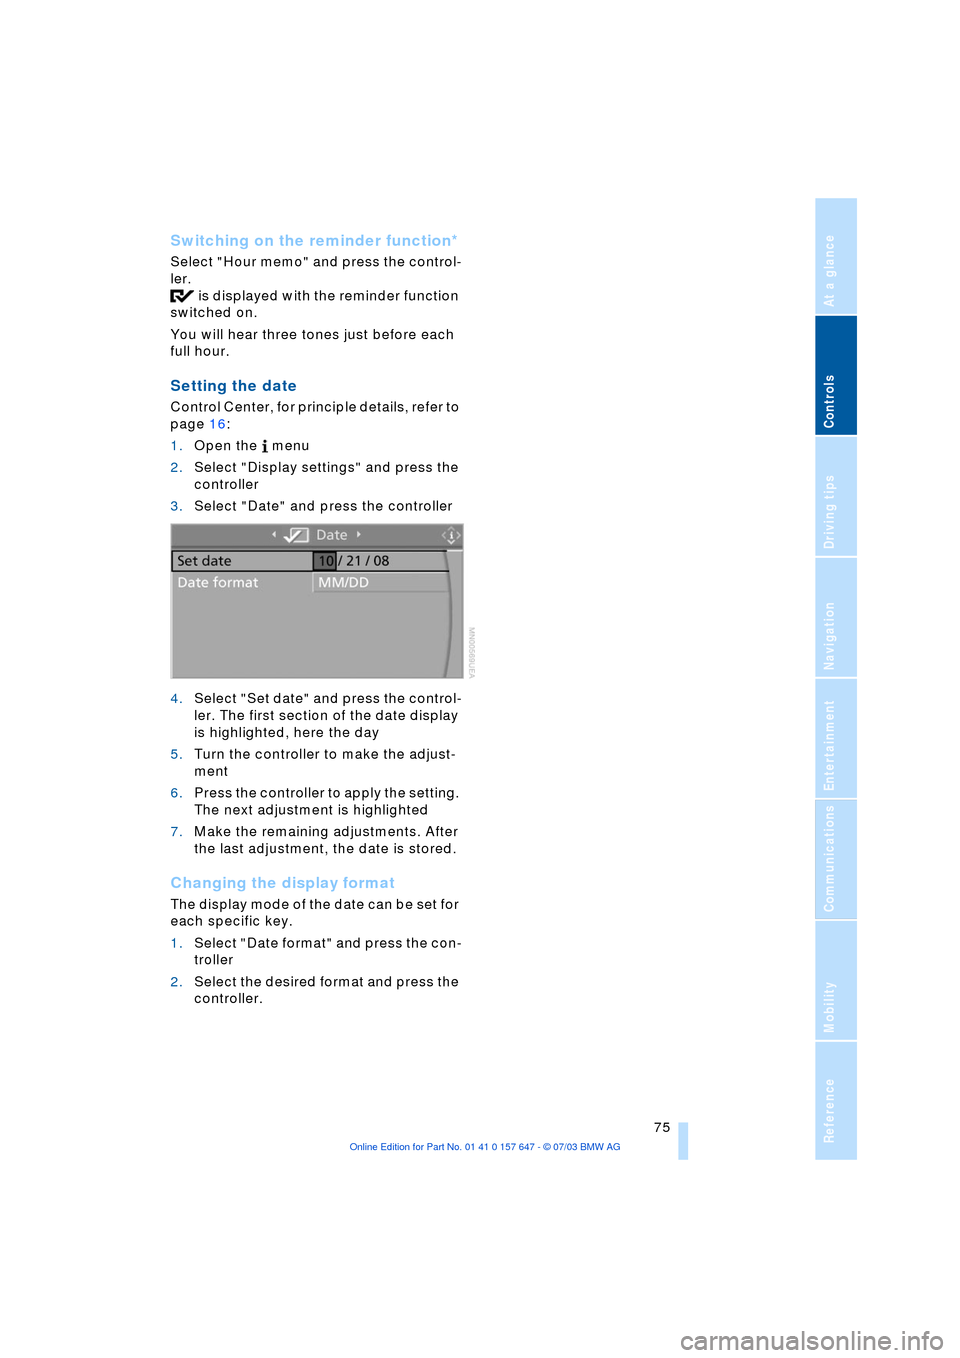
3.Select "Date" and press the controller
4.Select "Set date" and press the control-
ler. The first section of the date display
is highlighted, here the day
5.Turn the controller to make the adjust-
ment
6.Press the controller to apply the setting.
The next adjustment is highlighted
7.Make the remaining adjustments. After
the last adjustment, the date is stored.
Changing the display format
The display mode of the date can be set for
each specific key.
1.Select "Date format" and press the con-
troller
2.Select the desired format and press the
controller.
Page 78 of 220
Technology for comfort, convenience and safety
76
Technology for comfort, convenience
and safety
PDC Park Distance Control*
The concept
The PDC assists you when you are parking.
Signal tones indicate the current distance
to an object behind or in front of your vehi-
cle. Four ultrasonic sensors in both the
bumpers monitor the distance to the near-
est object. The sensors at the front and at
the two rear corners have a range of
approx. 1.64 ft/50 cm; the rear middle sen-
sors have approx. 5 ft/1.50 m.
PDC is a parking aid that can indicate
objects when they are approached
slowly, as is usually the case when parking.
Avoid approaching an object at high speed,
as otherwise the physical circumstances
would mean that the system warning was
too late.<
Automatic function
In ignition key position 2, the system auto-
matically assumes operational status after
a few seconds each time you engage
reverse gear or selector-lever position R.
Wait this short period before revers-
ing.<
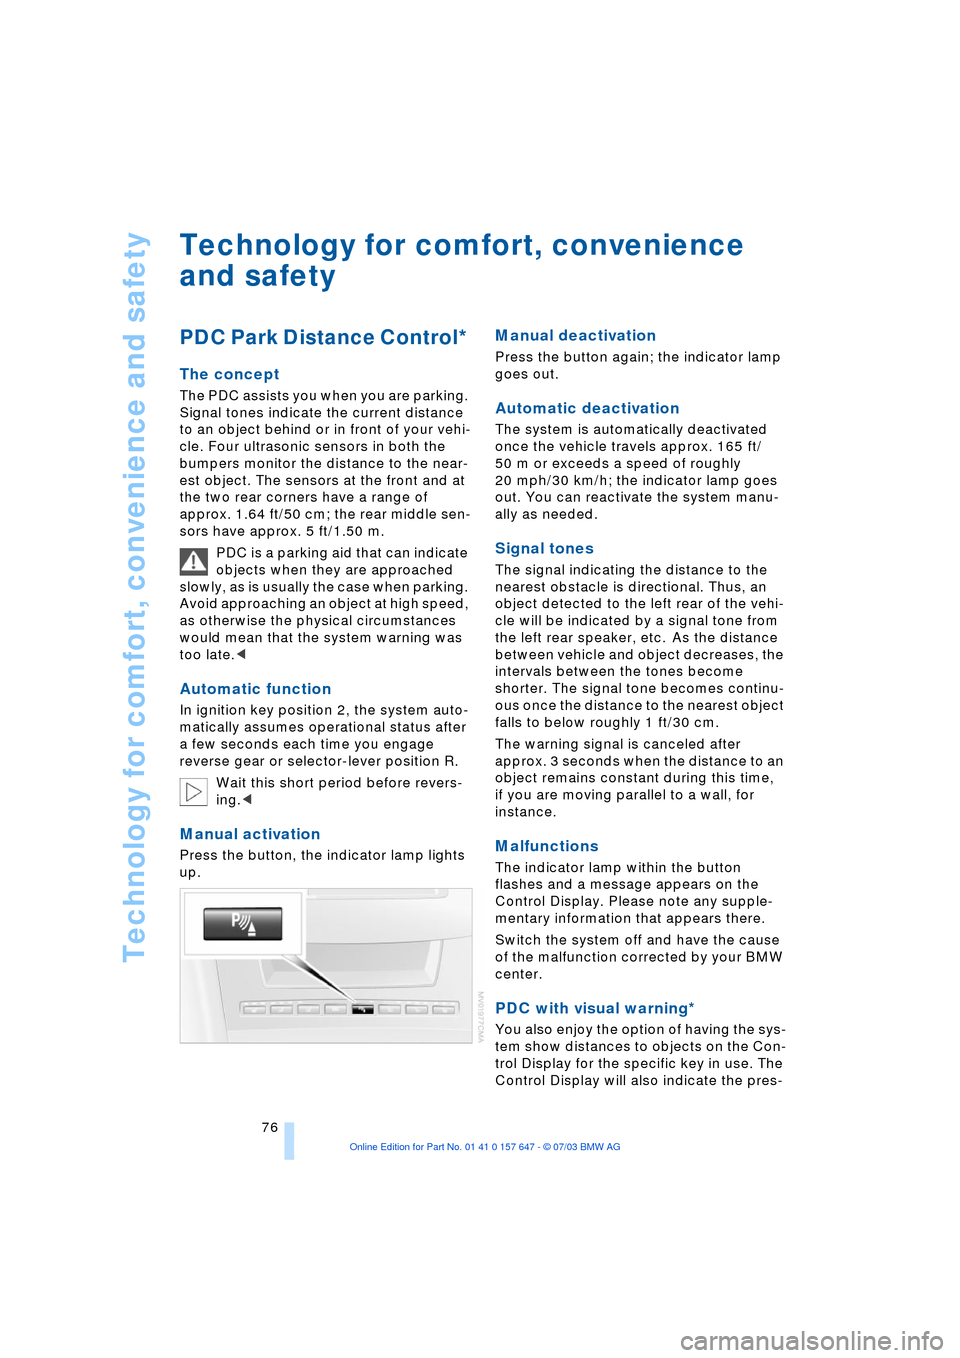
Manual activation
Press the button, the indicator lamp lights
up.
Manual deactivation
Press the button again; the indicator lamp
goes out.
Automatic deactivation
The system is automatically deactivated
once the vehicle travels approx. 165 ft/
50 m or exceeds a speed of roughly
20 mph/30 km/h; the indicator lamp goes
out. You can reactivate the system manu-
ally as needed.
Signal tones
The signal indicating the distance to the
nearest obstacle is directional. Thus, an
object detected to the left rear of the vehi-
cle will be indicated by a signal tone from
the left rear speaker, etc. As the distance
between vehicle and object decreases, the
intervals between the tones become
shorter. The signal tone becomes continu-
ous once the distance to the nearest object
falls to below roughly 1 ft/30 cm.
The warning signal is canceled after
approx. 3 seconds when the distance to an
object remains constant during this time,
if you are moving parallel to a wall, for
instance.
Malfunctions
The indicator lamp within the button
flashes and a message appears on the
Control Display. Please note any supple-
mentary information that appears there.
Switch the system off and have the cause
of the malfunction corrected by your BMW
center.
PDC with visual warning*
You also enjoy the option of having the sys-
tem show distances to objects on the Con-
trol Display for the specific key in use. The
Control Display will also indicate the pres-
Page 86 of 220
Technology for comfort, convenience and safety
84 >When a child is seated in the child-
restraint system or with an empty seat,
the front and side airbags are automat-
ically deactivated on the passenger's
side
>When an adult is traveling in the front
seat, the front and side airbags remain
active on the passenger side.
Although not desired, it can occur in
the case of heavier children that the
front passenger airbags remain active or in
the case of very light adults or young per-
sons that the front passenger airbags are
deactivated.
The state of the front passenger airbags is
shown with the telltale lamp, refer to Indi-
cator lamps in the following. In this case
transport the corresponding persons on
the rear seat.
Except when persons to be transported, do
not increase the load on the front passen-
ger seat with additional items. Do not fit
seat covers, seat cushion padding, ball
mats or other items to the front passenger
seat unless they are specifically recom-
mended by BMW. Do not place any items
under the seat. Otherwise, the function of
the seat occupation detection could be
impaired.<
Indicator lamps
Operational readiness of airbag
system
The airbag indicator lamp in the instrument
cluster indicates the operational readiness
of the entire airbag system and the safety
belt tensioners as of ignition key position 1.
The indicator lamp goes out after a few
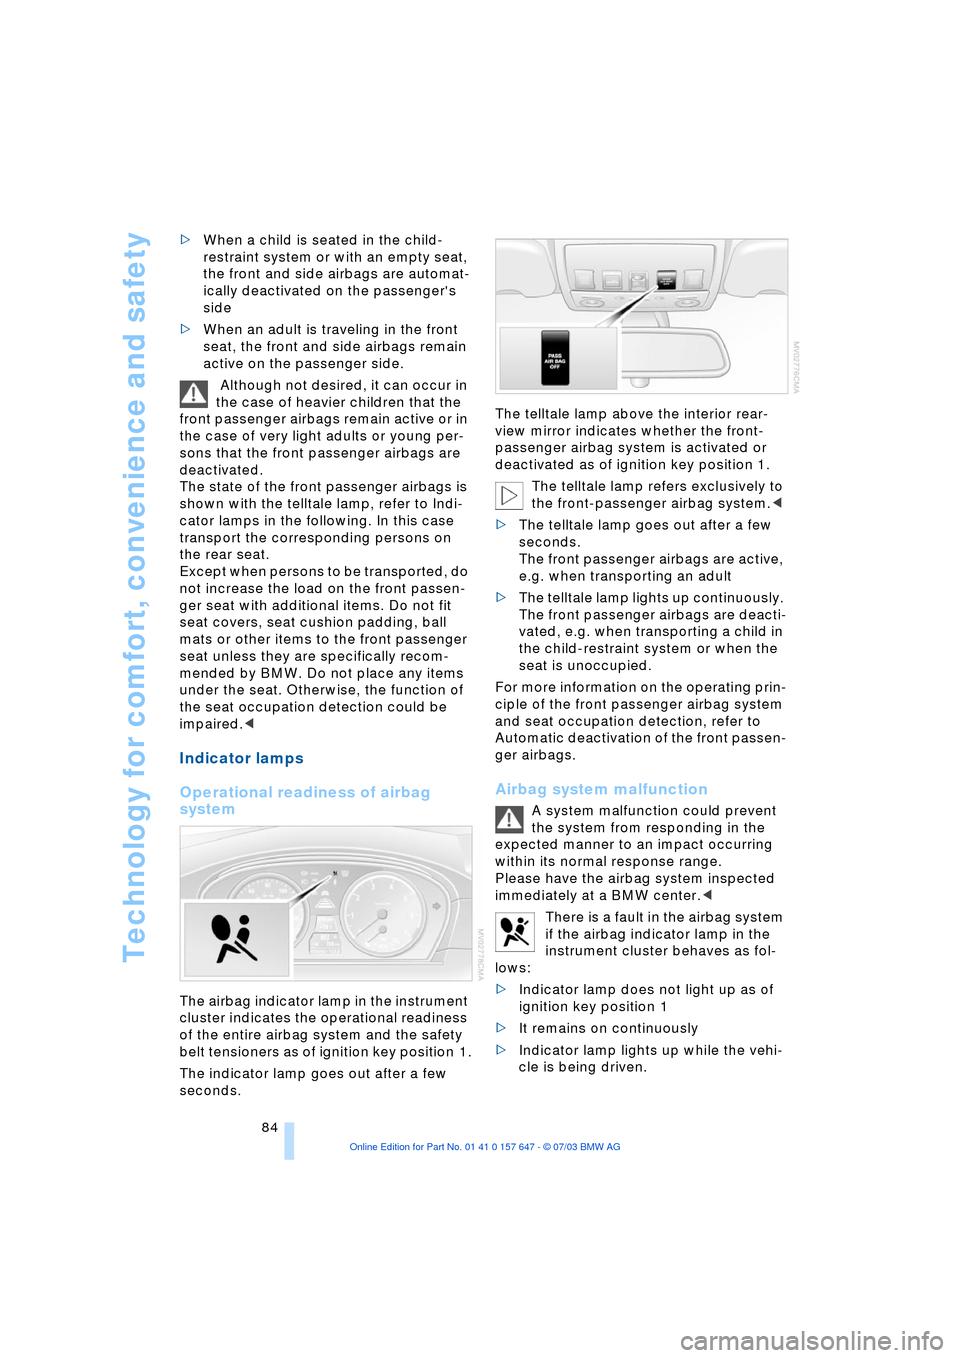
seconds.The telltale lamp above the interior rear-
view mirror indicates whether the front-
passenger airbag system is activated or
deactivated as of ignition key position 1.
The telltale lamp refers exclusively to
the front-passenger airbag system.<
>The telltale lamp goes out after a few
seconds.
The front passenger airbags are active,
e.g. when transporting an adult
>The telltale lamp lights up continuously.
The front passenger airbags are deacti-
vated, e.g. when transporting a child in
the child-restraint system or when the
seat is unoccupied.
For more information on the operating prin-
ciple of the front passenger airbag system
and seat occupation detection, refer to
Automatic deactivation of the front passen-
ger airbags.
Airbag system malfunction
A system malfunction could prevent
the system from responding in the
expected manner to an impact occurring
within its normal response range.
Please have the airbag system inspected
immediately at a BMW center.<
There is a fault in the airbag system
if the airbag indicator lamp in the
instrument cluster behaves as fol-
lows:
>Indicator lamp does not light up as of
ignition key position 1
>It remains on continuously
>Indicator lamp lights up while the vehi-
cle is being driven.
Page 87 of 220
Controls
85Reference
At a glance
Driving tips
Communications
Navigation
Entertainment
Mobility
Head-Up Display*
The concept
The Head-Up Display can be used to
project important information into the field
of vision of the driver, e.g. instructions of
the navigation system. You can assimilate
this information without taking your eyes off
the road.
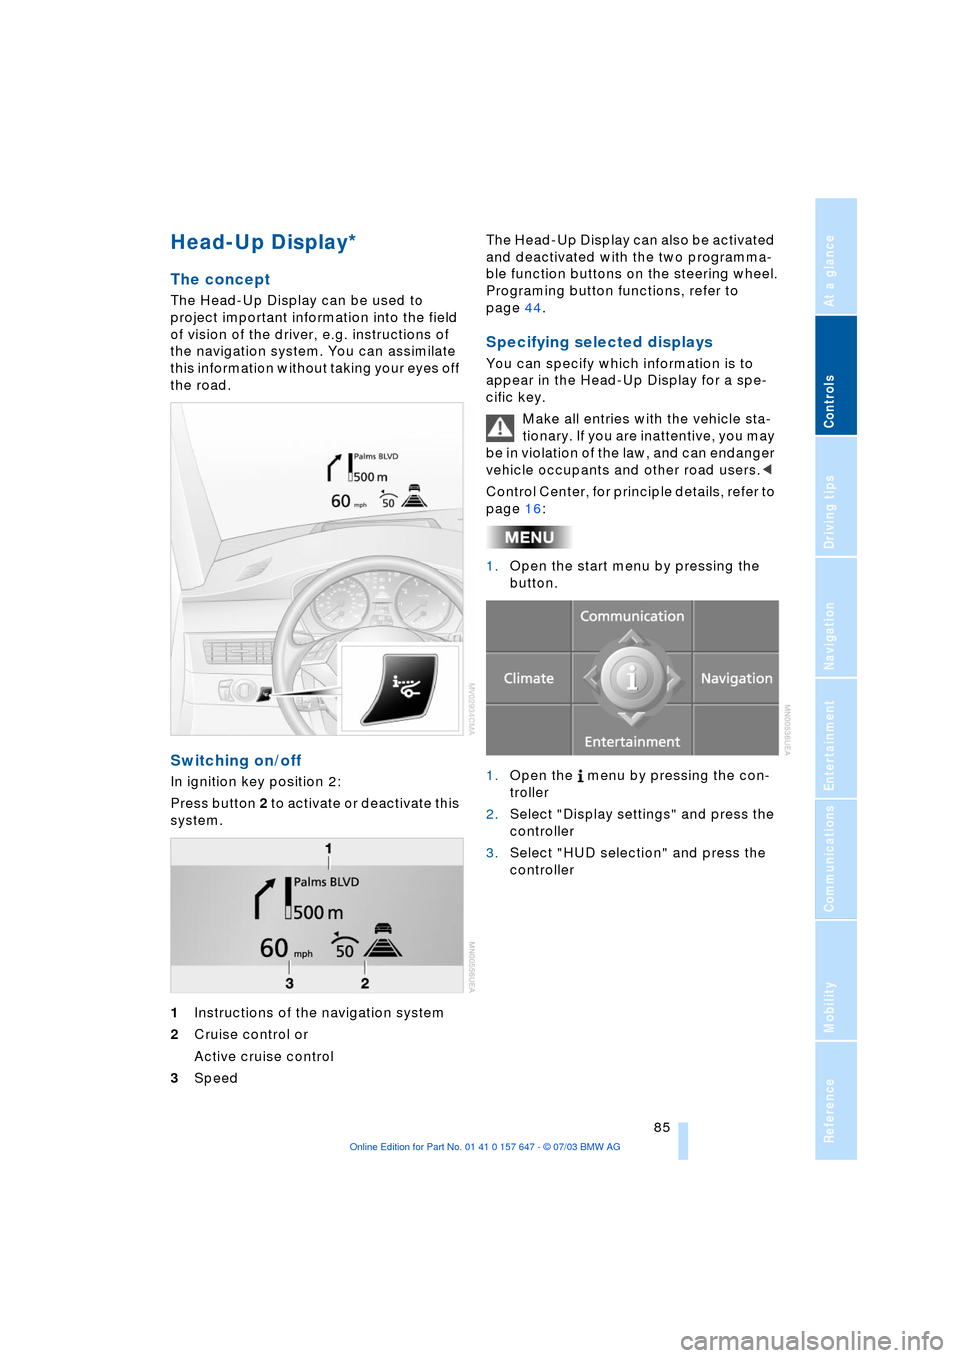
Switching on/off
In ignition key position 2:
Press button 2 to activate or deactivate this
system.
1Instructions of the navigation system
2Cruise control or
Active cruise control
3Speed The Head-Up Display can also be activated
and deactivated with the two programma-
ble function buttons on the steering wheel.
Programing button functions, refer to
page 44.
Specifying selected displays
You can specify which information is to
appear in the Head-Up Display for a spe-
cific key.
Make all entries with the vehicle sta-
tionary. If you are inattentive, you may
be in violation of the law, and can endanger
vehicle occupants and other road users.<
Control Center, for principle details, refer to
page 16:
1.Open the start menu by pressing the
button.
1.Open the menu by pressing the con-
troller
2.Select "Display settings" and press the
controller
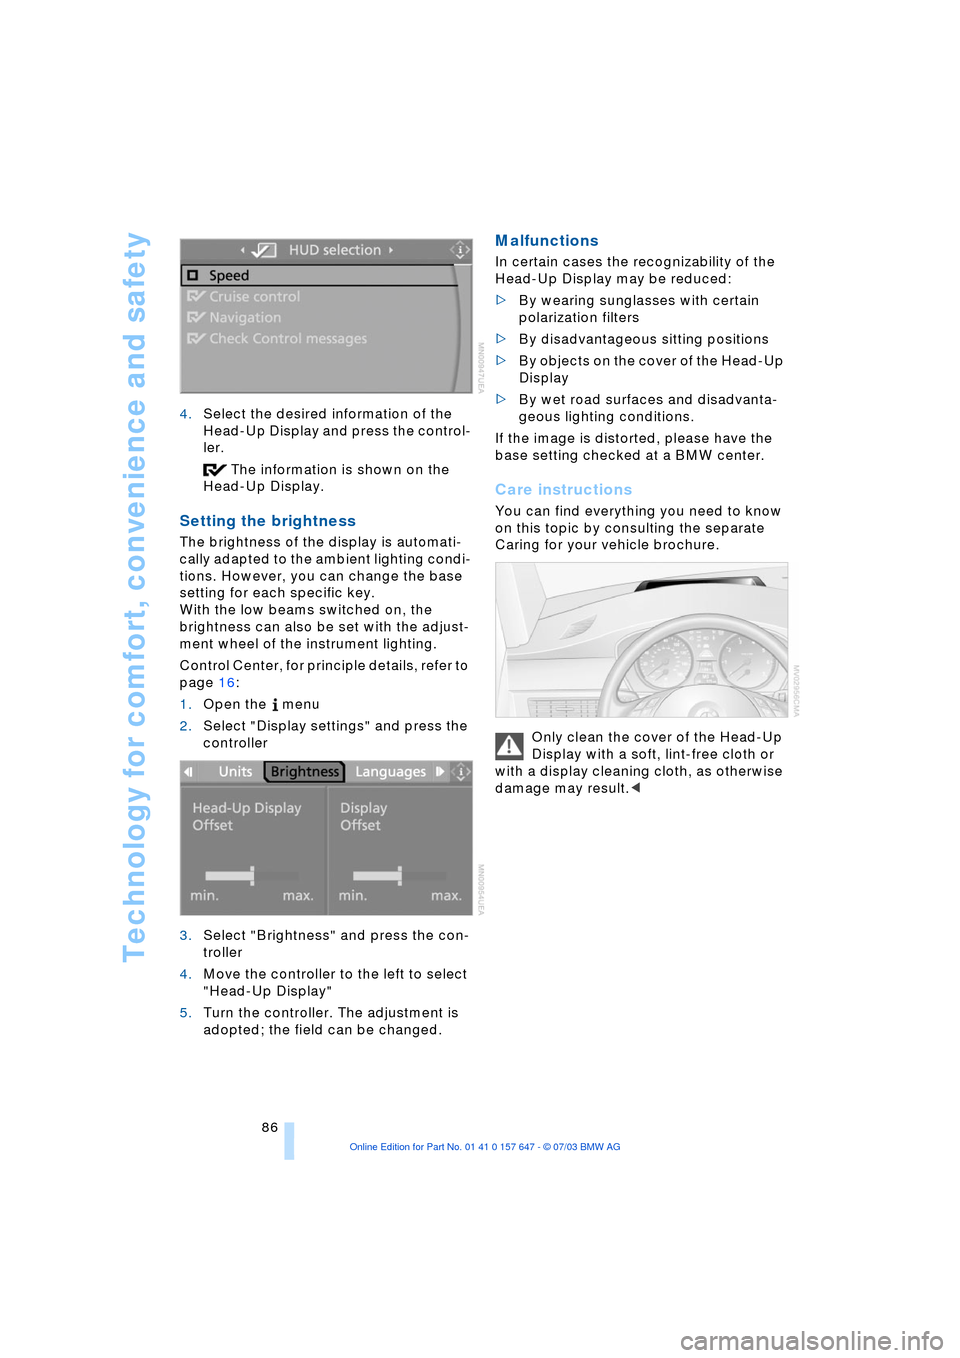
3.Select "HUD selection" and press the
controller
Page 88 of 220
Technology for comfort, convenience and safety
86 4.Select the desired information of the
Head-Up Display and press the control-
ler.
The information is shown on the
Head-Up Display.
Setting the brightness
The brightness of the display is automati-
cally adapted to the ambient lighting condi-
tions. However, you can change the base
setting for each specific key.
With the low beams switched on, the
brightness can also be set with the adjust-
ment wheel of the instrument lighting.
Control Center, for principle details, refer to
page 16:
1.Open the menu
2.Select "Display settings" and press the
controller
3.Select "Brightness" and press the con-
troller
4.Move the controller to the left to select
"Head-Up Display"
5.Turn the controller. The adjustment is
adopted; the field can be changed.
Malfunctions
In certain cases the recognizability of the
Head-Up Display may be reduced:
>By wearing sunglasses with certain
polarization filters
>By disadvantageous sitting positions
>By objects on the cover of the Head-Up
Display
>By wet road surfaces and disadvanta-
geous lighting conditions.
If the image is distorted, please have the
base setting checked at a BMW center.
Care instructions
You can find everything you need to know
on this topic by consulting the separate
Caring for your vehicle brochure.
Only clean the cover of the Head-Up
Display with a soft, lint-free cloth or
with a display cleaning cloth, as otherwise
damage may result.<
Page 89 of 220
Controls
87Reference
At a glance
Driving tips
Communications
Navigation
Entertainment
Mobility
Lamps
Parking lamps/low beams
Parking lamps
With the switch in this position, the
front, rear and side vehicle lighting
is switched on. You can use the side
marker lamps for parking. For lighting on
one side for parking as an additional fea-
ture, refer to page 88.
Low beams
When you switch off the ignition
with the headlamps on, the head-
lamps go out, and only the parking
lamps remain on.
Pathway lighting
After parking the vehicle and switching off
the headlamps, operating the headlamp
flasher activates the low beams. You can
set the duration using the Control Center or
deactivate the function.
Control Center, for principle details, refer to
page 16:
1.Open the menu
2.Select "Vehicle settings" and press the
controller
3.Select "Lighting" and press the control-
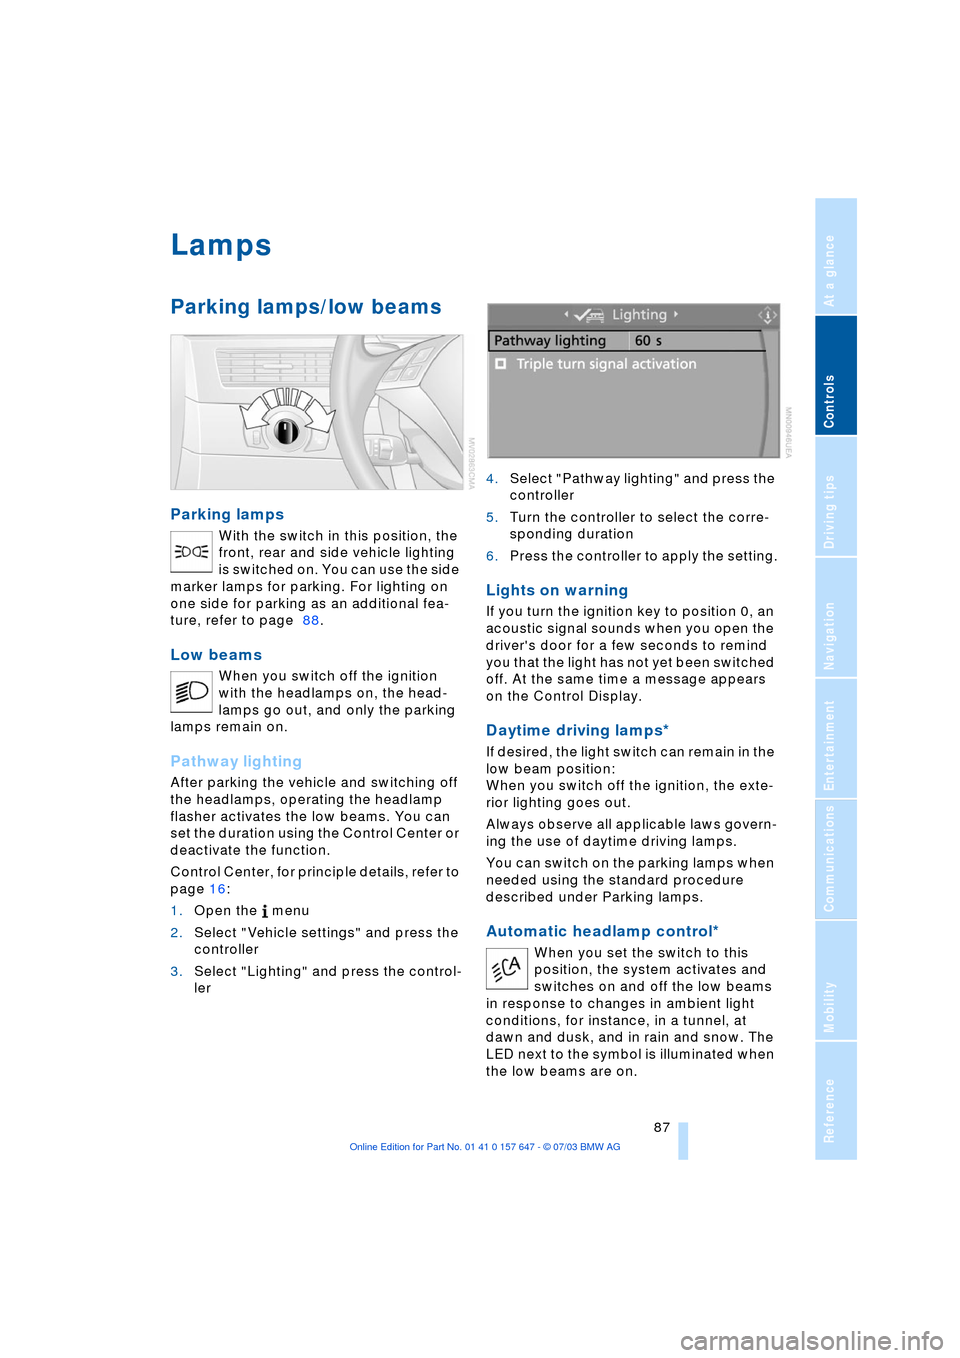
ler 4.Select "Pathway lighting" and press the
controller
5.Turn the controller to select the corre-
sponding duration
6.Press the controller to apply the setting.
Lights on warning
If you turn the ignition key to position 0, an
acoustic signal sounds when you open the
driver's door for a few seconds to remind
you that the light has not yet been switched
off. At the same time a message appears
on the Control Display.
Daytime driving lamps*
If desired, the light switch can remain in the
low beam position:
When you switch off the ignition, the exte-
rior lighting goes out.
Always observe all applicable laws govern-
ing the use of daytime driving lamps.
You can switch on the parking lamps when
needed using the standard procedure
described under Parking lamps.
Automatic headlamp control*
When you set the switch to this
position, the system activates and
switches on and off the low beams
in response to changes in ambient light
conditions, for instance, in a tunnel, at
dawn and dusk, and in rain and snow. The
LED next to the symbol is illuminated when
the low beams are on.
Page 90 of 220
Lamps
88 Following automatic activation, the
vehicle's external lighting remains on
when you switch on the fog lamps.<
The automatic headlamp control can-
not serve as a substitute for your per-
sonal judgment in determining when the
lamps should be switched on in response
to ambient lighting conditions. For exam-
ple, the system cannot detect fog. To avoid
safety risks, you should always switch on
the lamps manually under these condi-
tions.<
Adaptive Head Light*
The concept
Adaptive Head Light is a variable headlamp
control system that enables dynamic illumi-
nation of the road surface. Depending on
the steering angle and other assumptions,
the light from the headlamp follows the
course of the road.
Activating Adaptive Head Light
In ignition key position 2, turn the
light switch to the position 'Auto-
matic headlamp control', refer to
page 87.
When reversing, the Adaptive Head
Light is inactive; when the vehicle is
stationary, it is only active in one direc-
tion.<
In case of malfunction
The LED above the symbol for automatic
headlamp control flashes. Please have the
system inspected at your BMW center.
Instrument lighting
Turn the serrated dial to adjust the illumina-
tion intensity.
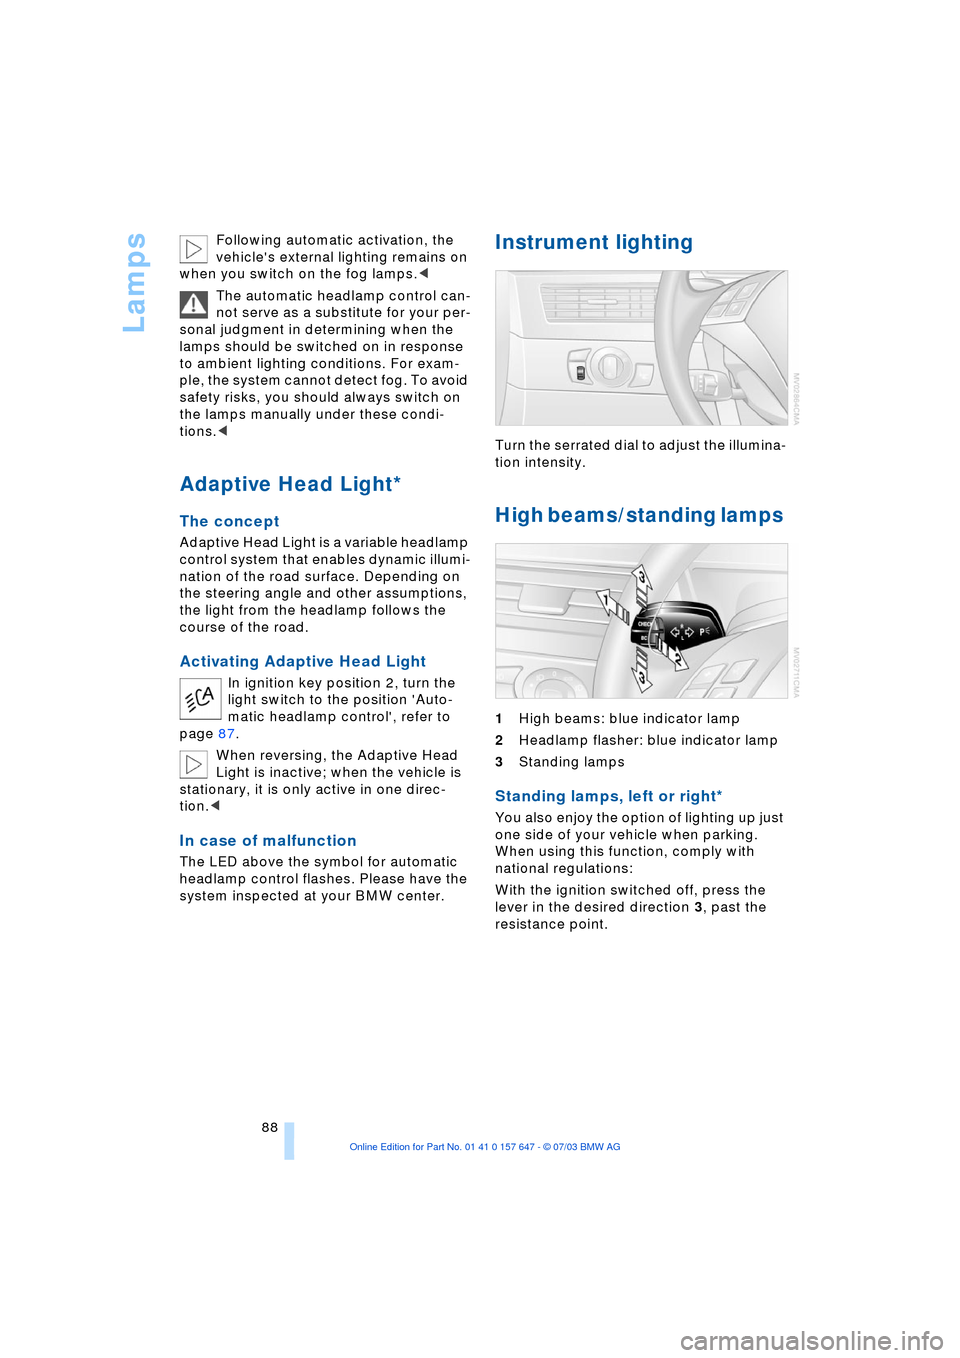
High beams/standing lamps
1High beams: blue indicator lamp
2Headlamp flasher: blue indicator lamp
3Standing lamps
Standing lamps, left or right*
You also enjoy the option of lighting up just
one side of your vehicle when parking.
When using this function, comply with
national regulations:
With the ignition switched off, press the
lever in the desired direction 3, past the
resistance point.