2004 BMW 525I SEDAN change time
[x] Cancel search: change timePage 24 of 220
Voice command system
22
Notes
Do not use the voice command sys-
tem in emergency situations. In stress
situations, voice and pitch can change.
Instead, use the emergency call button
near the interior rearview mirror.<
At the time of going to press, the
voice command system was available
in English. Other languages are currently
not available.
The telephone can also be operated using
voice control, refer to page 157.<
Important for voice commands
Issue the commands fluently and at normal
volume, avoiding excessing emphasis and
pauses.
The voice command system uses a special
hands-free microphone located in the front
of your vehicle's headliner. On vehicles
with telephone, two vehicle microphones
are fitted. Although the system is designed
to filter out ambient noise, you can help
ensure that your commands will be under-
stood by observing the following instruc-
tions:
>Keep the doors, windows and glass
roof closed to prevent interference from
ambient noise
>Avoid other sources of noise in the
vehicle while speaking, and ask other
vehicle occupants to refrain from talk-
ing while you are using the system
>Without a telephone, the vehicle micro-
phone is directed at the driver. This
means that the system might not be
able to register the voices of other vehi-
cle occupants properly.
Page 28 of 220
Opening and closing
26
Opening and closing
The key set
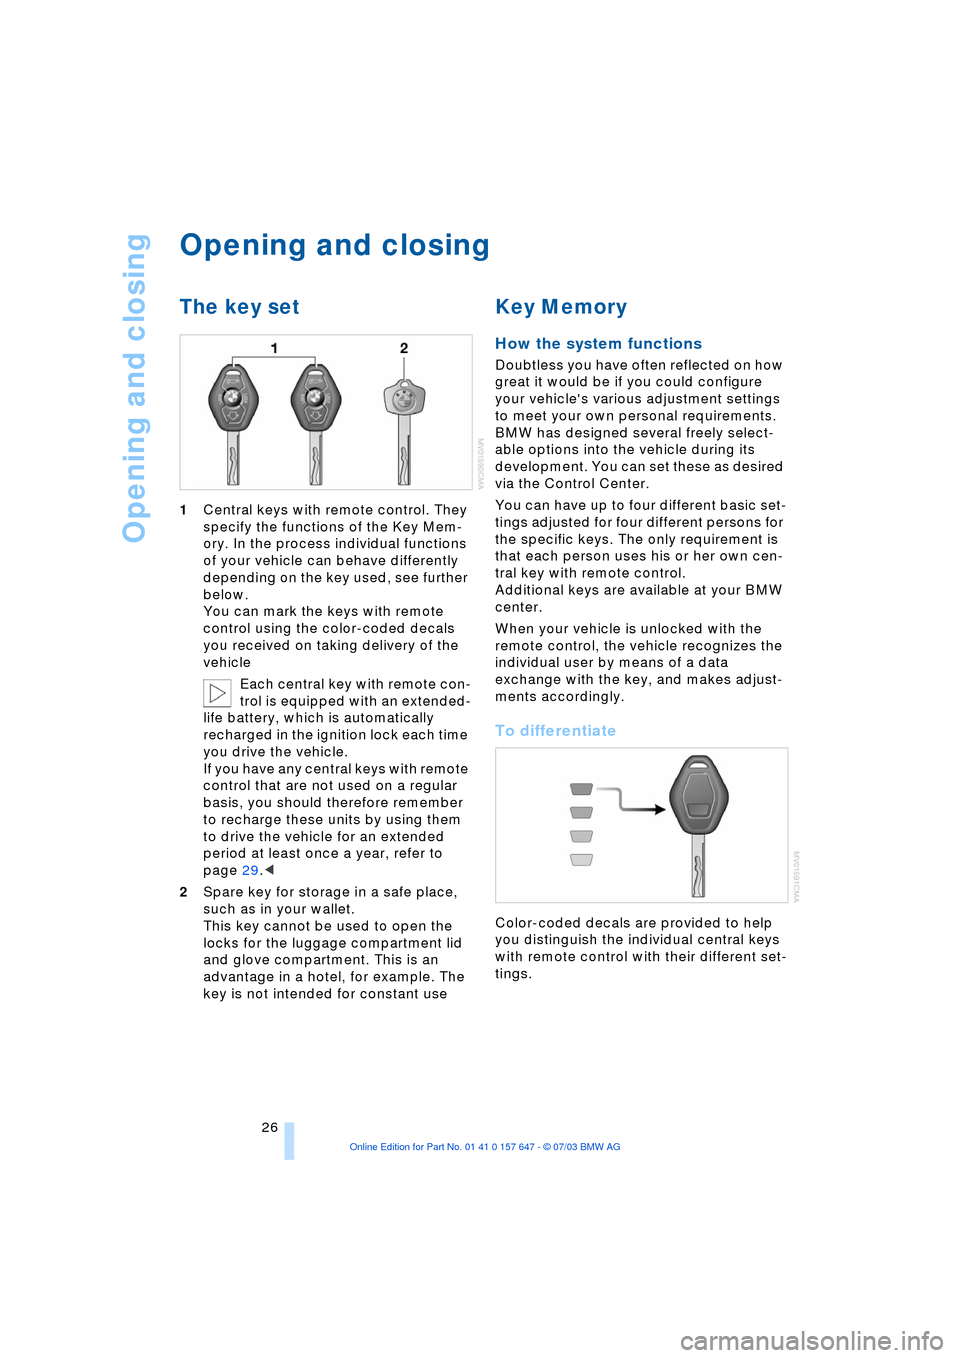
1Central keys with remote control. They
specify the functions of the Key Mem-
ory. In the process individual functions
of your vehicle can behave differently
depending on the key used, see further
below.
You can mark the keys with remote
control using the color-coded decals
you received on taking delivery of the
vehicle
Each central key with remote con-
trol is equipped with an extended-
life battery, which is automatically
recharged in the ignition lock each time
you drive the vehicle.
If you have any central keys with remote
control that are not used on a regular
basis, you should therefore remember
to recharge these units by using them
to drive the vehicle for an extended
period at least once a year, refer to
page 29.<
2Spare key for storage in a safe place,
such as in your wallet.
This key cannot be used to open the
locks for the luggage compartment lid
and glove compartment. This is an
advantage in a hotel, for example. The
key is not intended for constant use
Key Memory
How the system functions
Doubtless you have often reflected on how
great it would be if you could configure
your vehicle's various adjustment settings
to meet your own personal requirements.
BMW has designed several freely select-
able options into the vehicle during its
development. You can set these as desired
via the Control Center.
You can have up to four different basic set-
tings adjusted for four different persons for
the specific keys. The only requirement is
that each person uses his or her own cen-
tral key with remote control.
Additional keys are available at your BMW
center.
When your vehicle is unlocked with the
remote control, the vehicle recognizes the
individual user by means of a data
exchange with the key, and makes adjust-
ments accordingly.
To differentiate
Color-coded decals are provided to help
you distinguish the individual central keys
with remote control with their different set-
tings.
Page 31 of 220
Controls
29Reference
At a glance
Driving tips
Communications
Navigation
Entertainment
Mobility
Malfunctions
External systems or devices may cause
local interference in the functions of the
remote control.
Should the remote control fail to operate
owing to interference of this kind, you can
respond by using the central key to unlock
your vehicle at one of the doors.
In the event of a system malfunction,
please contact your BMW center, which is
also your source for replacement keys.
When it is no longer possible to lock the
vehicle via the remote control, the battery is
discharged. Use this remote control during
an extended drive; this will recharge the
battery, refer to page 26.
For US owners only
The transmitter and receiver units comply
with part 15 of the FCC/Federal Communi-
cation Commission regulations. Operation
is governed by the following:
FCC ID: LX8766S
LX8766E
LX8CAS
Compliance statement:
This device complies with part 15 of the
FCC Rules. Operation is subject to the fol-
lowing two conditions:
>This device may not cause harmful
interference, and
>this device must accept any interfer-
ence received, including interference
that may cause undesired operation.
Any unauthorized modifications or
changes to these devices could void
the user's authority to operate this equip-
ment.<
Using the door lock
Do not lock the vehicle when persons
are inside, as the vehicle cannot be
unlocked from inside.<
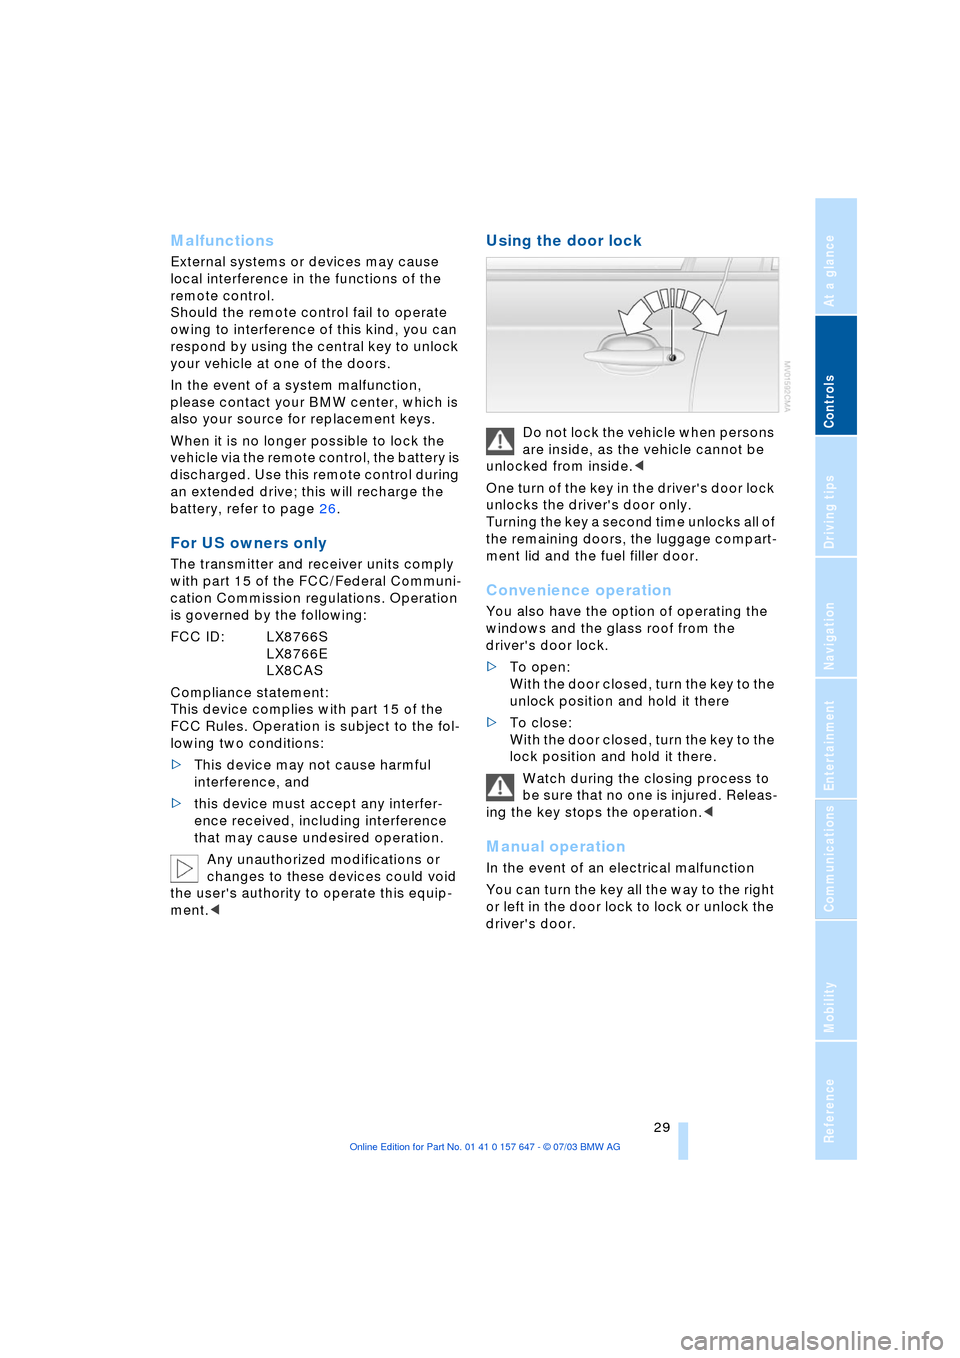
One turn of the key in the driver's door lock
unlocks the driver's door only.
Turning the key a second time unlocks all of
the remaining doors, the luggage compart-
ment lid and the fuel filler door.
Convenience operation
You also have the option of operating the
windows and the glass roof from the
driver's door lock.
>To open:
With the door closed, turn the key to the
unlock position and hold it there
>To close:
With the door closed, turn the key to the
lock position and hold it there.
Watch during the closing process to
be sure that no one is injured. Releas-
ing the key stops the operation.<
Manual operation
In the event of an electrical malfunction
You can turn the key all the way to the right
or left in the door lock to lock or unlock the
driver's door.
Page 44 of 220
Adjustments
42 3.Move the controller to the left or right to
select "Driver" or "Passenger"
4.Turn the controller. The adjustment is
adopted; the field can be changed.
Active seat ventilation*
The system progresses one step through
the control sequence each time you press
the button.
To switch off:
Maintain pressure on the button for several
seconds.
Use level 3 to cool the passenger
compartment rapidly, for instance,
when heat accumulates in the vehicle. After
a short time, there is an automatic return to
level 2 to prevent undercooling of the occu-
pant's back.<
Active seat*
The seat cushion is actively varied by alter-
nately raising and lowering the right and left
half of the seat cushion. This reduces mus-
cular tension and fatigue to help prevent
lower back pain.
Center console:
To activate, press the button; the indicator
lamp lights up.
If you switch off the active seat, it can take
up to 1 minute before the two halves of the
seat cushion have returned to their initial
position.
Mirrors
Adjusting exterior mirrors
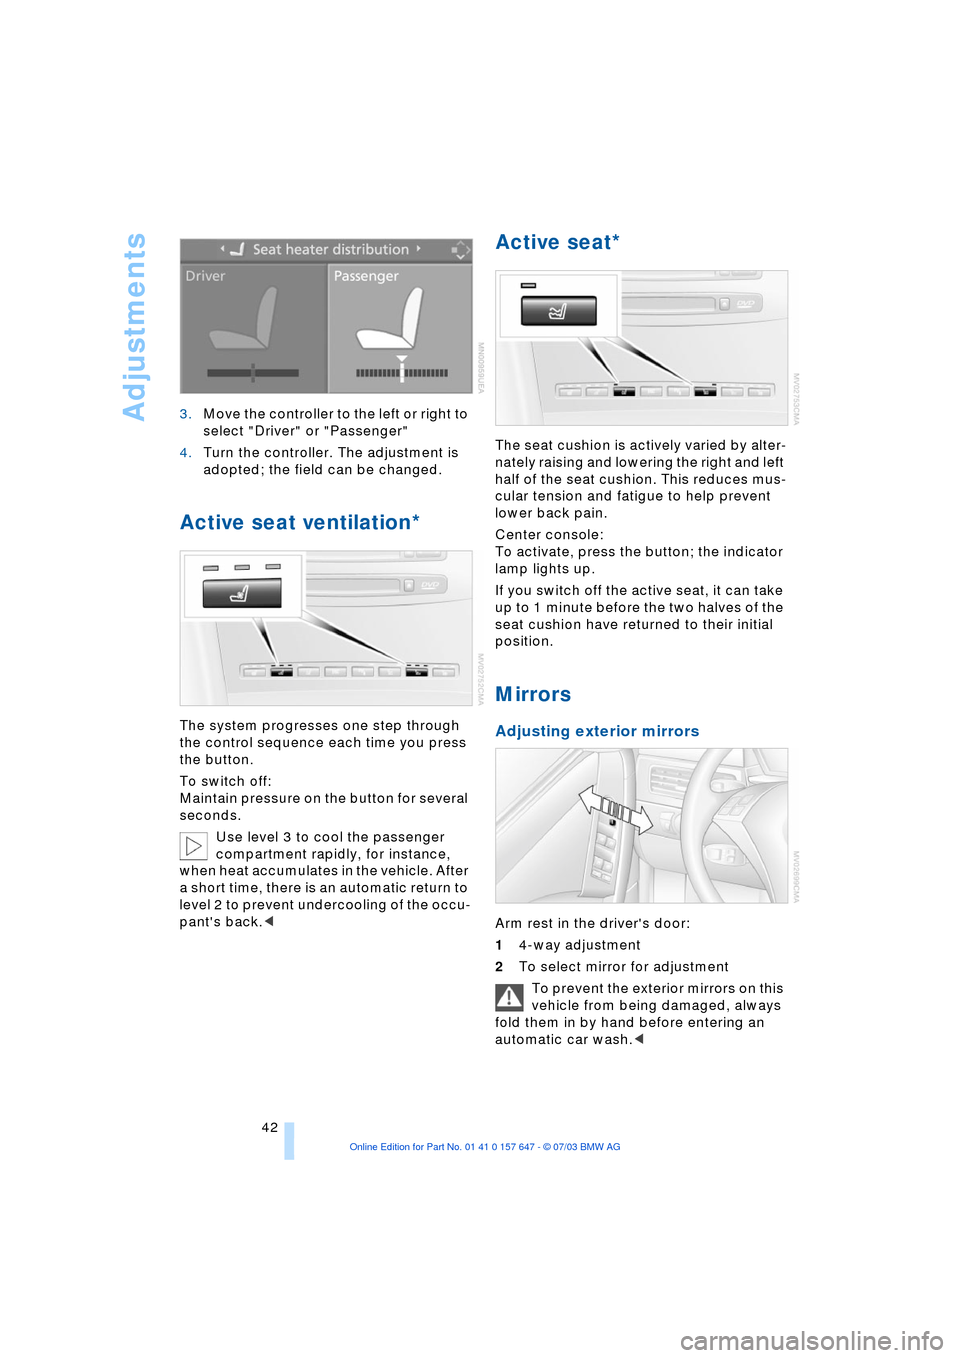
Arm rest in the driver's door:
14-way adjustment
2To select mirror for adjustment
To prevent the exterior mirrors on this
vehicle from being damaged, always
fold them in by hand before entering an
automatic car wash.<
Page 64 of 220
Driving
62
5 Select distance
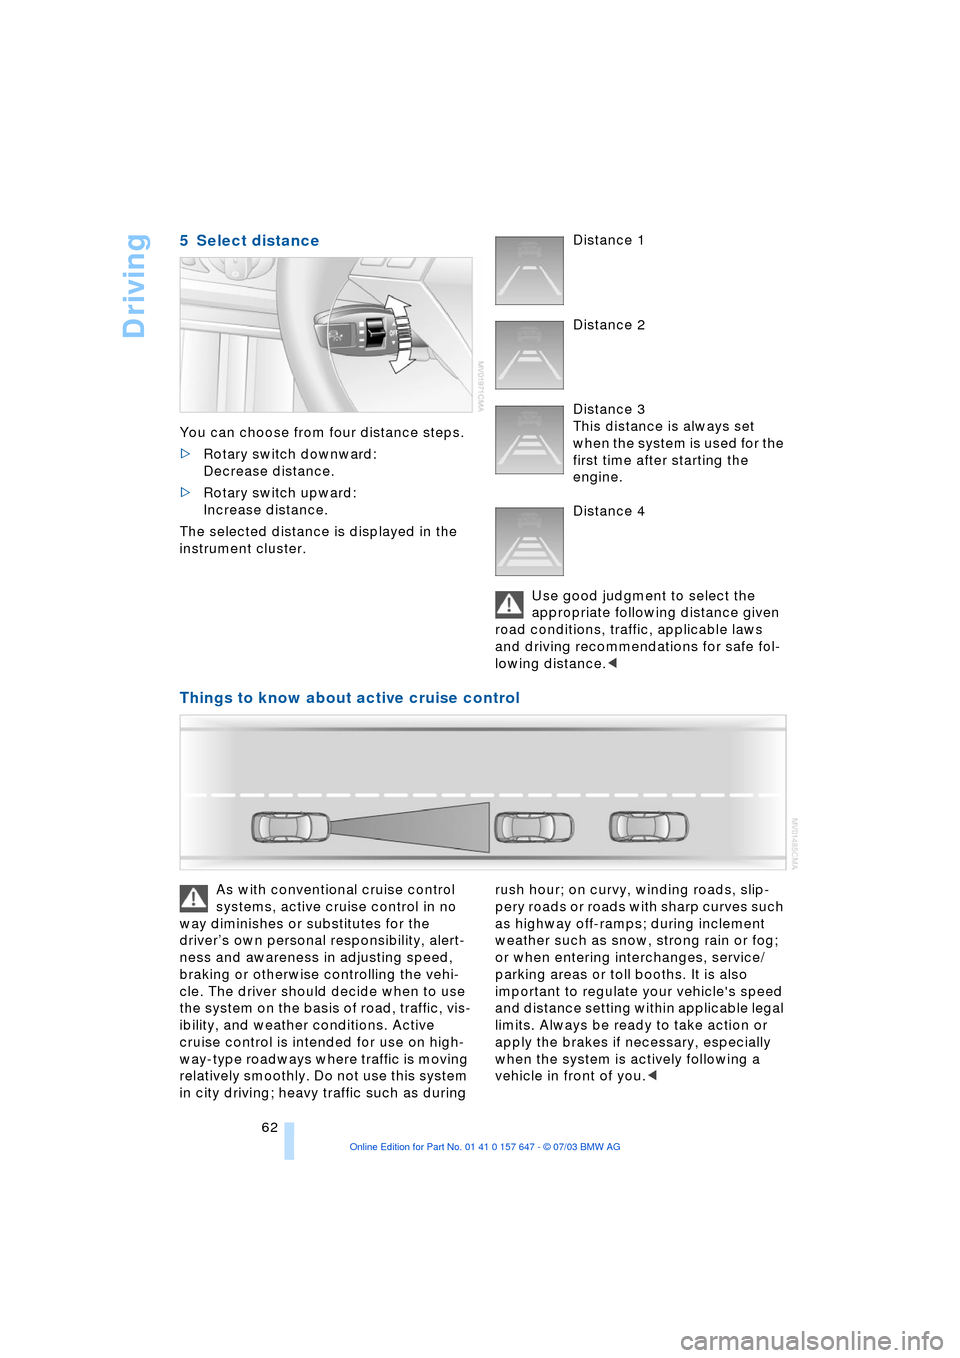
You can choose from four distance steps.
>Rotary switch downward:
Decrease distance.
>Rotary switch upward:
Increase distance.
The selected distance is displayed in the
instrument cluster. Distance 1
Distance 2
Distance 3
This distance is always set
when the system is used for the
first time after starting the
engine.
Distance 4
Use good judgment to select the
appropriate following distance given
road conditions, traffic, applicable laws
and driving recommendations for safe fol-
lowing distance.<
Things to know about active cruise control
As with conventional cruise control
systems, active cruise control in no
way diminishes or substitutes for the
driverÕs own personal responsibility, alert-
ness and awareness in adjusting speed,
braking or otherwise controlling the vehi-
cle. The driver should decide when to use
the system on the basis of road, traffic, vis-
ibility, and weather conditions. Active
cruise control is intended for use on high-
way-type roadways where traffic is moving
relatively smoothly. Do not use this system
in city driving; heavy traffic such as during rush hour; on curvy, winding roads, slip-
pery roads or roads with sharp curves such
as highway off-ramps; during inclement
weather such as snow, strong rain or fog;
or when entering interchanges, service/
parking areas or toll booths. It is also
important to regulate your vehicle's speed
and distance setting within applicable legal
limits. Always be ready to take action or
apply the brakes if necessary, especially
when the system is actively following a
vehicle in front of you.<
Page 67 of 220
Controls
65Reference
At a glance
Driving tips
Communications
Navigation
Entertainment
Mobility
Everything under control
Odometer, outside
temperature display, clock
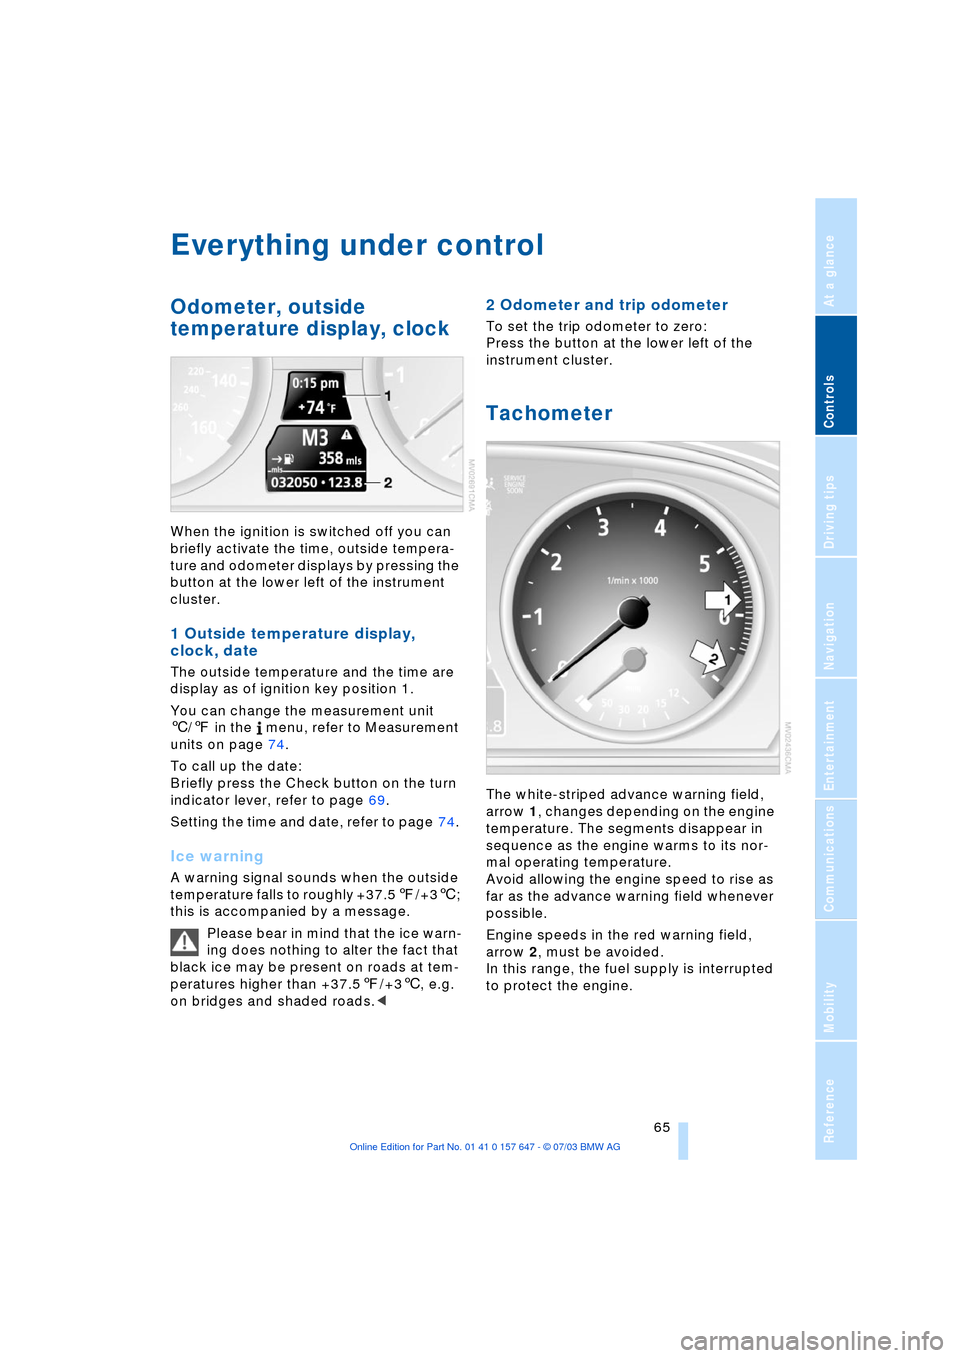
When the ignition is switched off you can
briefly activate the time, outside tempera-
ture and odometer displays by pressing the
button at the lower left of the instrument
cluster.
1 Outside temperature display,
clock, date
The outside temperature and the time are
display as of ignition key position 1.
You can change the measurement unit
6/7 in the menu, refer to Measurement
units on page 74.
To call up the date:
Briefly press the Check button on the turn
indicator lever, refer to page 69.
Setting the time and date, refer to page 74.
Ice warning
A warning signal sounds when the outside
temperature falls to roughly +37.57/+36;
this is accompanied by a message.
Please bear in mind that the ice warn-
ing does nothing to alter the fact that
black ice may be present on roads at tem-
peratures higher than +37.57/+36, e.g.
on bridges and shaded roads.<
2 Odometer and trip odometer
To set the trip odometer to zero:
Press the button at the lower left of the
instrument cluster.
Tachometer
The white-striped advance warning field,
arrow 1, changes depending on the engine
temperature. The segments disappear in
sequence as the engine warms to its nor-
mal operating temperature.
Avoid allowing the engine speed to rise as
far as the advance warning field whenever
possible.
Engine speeds in the red warning field,
arrow 2, must be avoided.
In this range, the fuel supply is interrupted
to protect the engine.
Page 75 of 220
Controls
73Reference
At a glance
Driving tips
Communications
Navigation
Entertainment
Mobility
3.Select "Limit" and press the controller
4.Select "Select current speed" and
press the controller. The system adopts
your current speed as the limit.
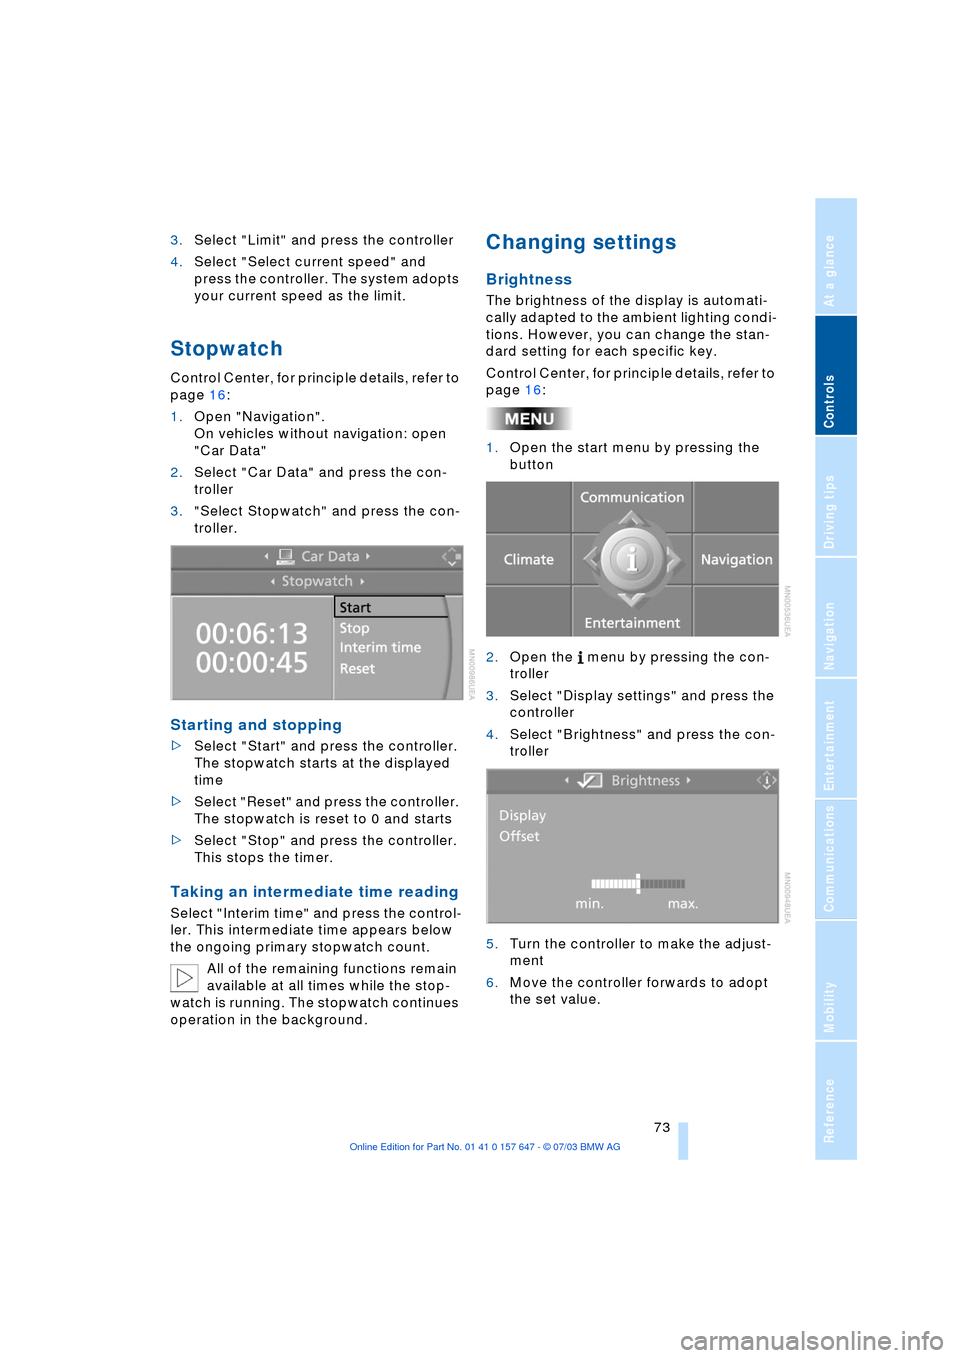
Stopwatch
Control Center, for principle details, refer to
page 16:
1.Open "Navigation".
On vehicles without navigation: open
"Car Data"
2.Select "Car Data" and press the con-
troller
3."Select Stopwatch" and press the con-
troller.
Starting and stopping
>Select "Start" and press the controller.
The stopwatch starts at the displayed
time
>Select "Reset" and press the controller.
The stopwatch is reset to 0 and starts
>Select "Stop" and press the controller.
This stops the timer.
Taking an intermediate time reading
Select "Interim time" and press the control-
ler. This intermediate time appears below
the ongoing primary stopwatch count.
All of the remaining functions remain
available at all times while the stop-
watch is running. The stopwatch continues
operation in the background.
Changing settings
Brightness
The brightness of the display is automati-
cally adapted to the ambient lighting condi-
tions. However, you can change the stan-
dard setting for each specific key.
Control Center, for principle details, refer to
page 16:
1.Open the start menu by pressing the
button
2.Open the menu by pressing the con-
troller
3.Select "Display settings" and press the
controller
4.Select "Brightness" and press the con-
troller
5.Turn the controller to make the adjust-
ment
6.Move the controller forwards to adopt
the set value.
Page 76 of 220

Everything under control
74
Measurement units
You can change the measurement units for
consumption, distances, temperature and
pressure for each specific key.
1.Open the menu
2.Select "Display settings" and press the
controller
3.Select "Units" and press the controller
4.Select the menu item to be adjusted
and press the controller
5.Select the desired measurement unit
and press the controller.
Language
The language on the Control Center can be
set for each specific key.
Control Center, for principle details, refer to
page 16:
1.Open the menu
2.Select "Display settings" and press the
controller
3.Select "Languages" and press the con-
troller
4.Select "Text language" and press the
controller. You can select a different
language for the text displays5.Select the desired language and press
the controller.
Setting the time
Control Center, for principle details, refer to
page 16:
1.Open the menu
2.Select "Display settings" and press the
controller
3.Select "Time" and press the controller
4.Select "Set time" and press the control-
ler. The first time setting is highlighted
5.Turn the controller to make the adjust-
ment
6.Press the controller to apply the setting.
The next adjustment is highlighted
7.Make the remaining adjustments. After
the last adjustment, the time is stored.
Changing the display format
The display mode of the clock can be set
for each specific key.
1.Select "Time format" and press the
controller
2.Select the desired format and press the
controller.