2004 BMW 525I SEDAN inflation pressure
[x] Cancel search: inflation pressurePage 38 of 220

Adjustments
36
Adjustments
Sitting safely
The ideal sitting position can make a vital
contribution to relaxed, fatigue-free driv-
ing.The sitting position of the occupants
plays an important role together with the
safety belts and airbags in an accident. To
ensure that the safety systems operate with
optimal efficiency, we strongly urge you to
observe the instructions contained in the
following section.
For additional information on transporting
children safely, refer to page 45.
Sitting safely with airbags
Always maintain an adequate dis-
tance between yourself and the air-
bags. Always hold the steering wheel by
its rim with hands at the 9 o'clock and
3 o'clock positions, to minimize the risk of
injuries to your hands and arms in the event
of airbag deployment.
No one and nothing is to come between the
airbags and the seat occupant.
Do not use the cover of the front airbag on
the front passenger side as a storage area.
Make sure that the front passenger is cor-
rectly seated and does not rest feet or legs
on the instrument panel, otherwise leg inju-
ries can occur if the knee and front airbag
are triggered.
Never let an occupant's head rest near or
on a side airbag because the inflating air-
bag could cause a serious or fatal injury.<
Even if you adhere to all the instructions
injuries resulting from contact with airbags
cannot be fully excluded, depending on the
circumstances. The ignition and inflation
noise may provoke a mild hearing loss in
extremely sensitive individuals. This effect
is usually only temporary.
For airbag locations and additional infor-
mation on airbags, refer to page 83.
Sitting safely with safety belts
Fasten your safety belt before starting any
trip. Airbags complement the safety belt as
an additional safety device, but they do not
represent a substitute.
Your vehicle has five seats that are all
equipped with a safety belt.
At all times, occupants should sit
upright and be properly restrained Ð
infants and small children in appropriate
child-restraint systems; larger children and
adults using the safety belts.
Expectant mothers should always wear
their safety belts, taking care to position
the lap belt against the lower hips, where it
will not exert pressure against the abdomi-
nal area.
Never allow more than one person to wear
a single safety belt. Never allow infants or
small children to ride in a passenger's lap.
Do not route the belt across your neck, or
run it across sharp edges. Be sure that the
belt does not become caught or jammed.
Avoid twisting the belt while routing it firmly
across the hips and shoulder. Do not allow
the belt to rest against hard or fragile
objects. Otherwise, in the event of a frontal
impact, a loose lap belt could slide over
your hips, leading to abdominal injury.
Avoid wearing clothing that prevents the
belt from fitting properly and pull the lap
belt periodically to readjust the tension
across your shoulder in order to avoid a
reduction in the retention effect of the
safety belt.<
For instructions on operating safety belts,
refer to page 40.
Seats
Note before adjusting
Never attempt to adjust your seat
while the vehicle is moving. The seat
could respond with unexpected move-
Page 82 of 220

Technology for comfort, convenience and safety
80 tance during panic stops. This system
exploits all of the benefits provided by ABS.
Do not reduce the pressure on the brake
pedal for the duration of the brake applica-
tion. When the brake pedal is released,
DBC is deactivated.
In the event of a malfunction, the
warning lamp in the instrument
cluster lights up yellow.
Have the system checked and repaired at
your BMW center as soon as possible.
Please note any information that appears
on the Control Display.
Warning lamp for Canadian models.
Active roll stabilization*
The concept
Active roll stabilization minimizes body roll
and optimizes vehicle stability during cor-
nering and evasive maneuvers.
Dynamic stabilizers at the front and rear
axles form the basis for active roll stabiliza-
tion. Suspension compliance adapts to suit
driving conditions, varying from perfor-
mance-oriented during cornering to
smooth and comfort-oriented when the
vehicle is proceeding in a straight line.
The system assumes operational status
each time you start the engine.
Driving with active roll stabilization
During vehicle operation, the system con-
tinuously runs through closed-loop control
cycles lasting only fractions of a second.
In case of malfunction
The symbol in the instrument clus-
ter lights up and a message
appears on the Control Display.
Please note any supplementary information
that appears there.
You can find more information on the
Check Control starting on page 68. If the active roll stabilization system is
deactivated in response to malfunc-
tion, please remember to adapt your speed
accordingly, especially in curves.
The suspension will be noticeably softer
and the vehicle will display a greater ten-
dency to tilt during cornering and in cross-
winds.
If a message stating that you should stop
appears on the Control Display in addition
to the red symbol, stop immediately and
switch off the engine. In this case the oil
level in the reservoir may have dropped
below the minimum, possibly owing to a
leak in the hydraulic system.
Please note any supplementary information
that appears on the Control Display.<
Flat Tire Monitor
The concept
The Flat Tire Monitor keeps track of the
inflation pressures in the four fitted tires as
you drive. The system provides an alert
whenever the inflation pressure drops sig-
nificantly in relation to the pressure in
another tire.
The check of the tire inflation pressure is
based on monitoring the relative speeds of
the wheels. A flat tire is detected and
reported on the basis of a deviation in cer-
tain speed ratios.
Functional requirement
So that the Flat Tire Monitor can learn the
correct inflation pressure, please perform
the following:
1.Check the inflation pressures in all tires
2.Compare with the inflation pressure
table on page 170 and correct if neces-
sary
3.Initialize the system.
Limits of the system
The Flat Tire Monitor cannot indicate
sudden severe tire damage caused
by outside factors and does not detect a
Page 83 of 220

Controls
81Reference
At a glance
Driving tips
Communications
Navigation
Entertainment
Mobility
natural, even pressure drop in all four
tires.<
In the following situations, on the other
hand, there can be delays in detecting tire
pressure losses, and even system failure:
>When you are driving on snow-covered
or slippery road surfaces
>If you are using a sports driving style:
slip on the drive wheels, high lateral
acceleration
>False alarms and undetected loss of
pressure may occur when you are driv-
ing with snow chains fitted
>When you are driving with the compact
wheel, the Flat Tire Monitor is unable to
function.
Initializing the system
Perform the initialization immediately
after correcting the inflation pressure,
after changing a tire or changing a wheel or
all wheels. A drive is necessary for this pur-
pose.<
Control Center, for principle details, refer to
page 16:
1.Before beginning driving, start the
engine, but do not drive off
2.Open the menu
3.Select "Vehicle settings" and press the
controller
4.Select "FTM" and press the controller
5.Select "Set tire pressure" and press the
controller
6.Select "Yes" and press the controller
7.Drive off.
The message "Initializing" is displayed.It takes a few minutes before the Flat Tire
Monitor can detect and report a flat tire.
After the initialization is completed, the
message "Active" is displayed.
If a flat tire is detected during initialization,
a message appears on the Control Display.
When driving with snow chains or
with the compact wheel, do not initial-
ize the system.<
Flat tire
Indicator lamp
The symbol in the instrument clus-
ter lights up in red and a simulta-
neous message appears on the
Control Display. In addition, an acoustic
signal sounds.
Please note any supplementary information
that appears on the Control Display. You
can find more information on the Check
Control starting on page 68.
1.Reduce speed and stop the vehicle
carefully. Avoid sudden braking and
steering maneuvers
2.Identify damaged tire
If identification is not possible,
contact your BMW center.<
3.Replace the damaged wheel, refer to
Changing a tire on page 187.
Vehicles with run-flat tires:
1.Cautiously reduce the vehicle speed to
below 50 mph/80 km/h. Avoid sudden
braking and steering maneuvers. Do
not exceed a vehicle speed of 50 mph/
80 km/h
Due to the reinforcement on the
edges of the run-flat tires, inflation
pressure loss can not usually be recog-
nized from the outside, refer to Run-flat
tires on page 175.<
2.To continue driving, comply with the
instructions for driving with damaged
tires on page 175.
Page 172 of 220

Wheels and tires
170
Wheels and tires
Tire inflation pressure
Information for your safety
It is not merely the tire's service life, but
also driving comfort and Ð to a great extent
Ð driving safety that depend on the condi-
tion of the tires and the maintenance of the
specified tire pressure.
Check and if necessary adjust tire
inflation pressures regularly, also on
the compact wheel, at least every two
weeks and before beginning a longer trip. If
you fail to observe this precaution you may
be driving on tires with incorrect tire pres-
sures, a condition that cannot only com-
promise your vehicle's driving stability, but
also lead to tire damage and the risk of an
accident.
Do not drive with deflated, i.e. flat tires,
except run-flat tires. A flat tire will seriously
impair your vehicle's handling and braking
response. Attempts to drive on a flat tire
can lead to loss of control over the vehi-
cle.<
Checking the pressure
Only check tire inflation pressure when the
tires are cold. This means after a maximum
of 1.25 miles/2 km driving or when the
vehicle has been parked for at least
2 hours. When tires are warm, the tire infla-
tion pressure increases.
After correcting the inflation pressure(s),
always reinitialize the Flat Tire Monitor,
refer to page 81.
Inflation pressure for original tires
The inflation pressures for your standard
tires are visible on the door post when you
open the driver's door.
Inflation pressure for other tire sizes
The tables on the next pages provide all the
correct inflation pressures for the specified
tire sizes at ambient temperature.
For correct identification of the right
tire inflation pressure for your tires,
observe the specifications for the corre-
sponding tire size.<
Page 177 of 220

Mobility
175Reference
At a glance
Controls
Driving tips
Communications
Navigation
Entertainment
approves them. You can find out about
these at specialized dealers or at your
BMW center. Observe any country-specific
regulations, e.g. on making a correspond-
ing entry in the vehicle documents.
The factory-mounted tires have been spe-
cially selected to provide optimized perfor-
mance when installed on your vehicle; if
properly cared for, they will provide a com-
bination of safety and excellent ride com-
fort.
Run-flat tires
If your BMW is equipped with run-flat tires,
refer to Run-flat tires, only use these tires,
as in the event of a breakdown there is no
spare wheel available.
Special characteristics of winter
tires
BMW recommends winter tires for use in
cold winter driving conditions. Although all-
season M+S tires provide better winter
traction than summer tires, they generally
fail to provide the same levels of cold-
weather performance as winter tires.
When switching to winter tires, observe the
descriptions at Tire condition and Replac-
ing wheels/tires, refer to pages 173
and 174.
Run-flat tires
If your BMW is equipped with run-flat tires,
refer to Run-flat tires. Your BMW center will
advise you if you wish to replace the tires of
your BMW or wish to switch from summer
to winter tires or vice versa.
If you switch from summer to winter tires,
or vice versa, use run-flat tires, as in the
event of a flat there is no spare wheel avail-
able.
Observing speed ratings
Never exceed the maximum speed for
which the winter tires are rated.
Unprofessional attempts by laymen to ser-
vice tires can lead to damage and acci-
dents. Have this work performed by skilled
professionals only. The technicians at your BMW center will be glad to assist you with
the required professional knowledge and
specialized equipment.<
Storage
Always store wheels and tires in a cool, dry
place with as little exposure to light as pos-
sible. Always protect tires against all con-
tact with oil, grease and fuels. Do not
exceed the maximum tire inflation pressure
indicated on the side wall of the tire.
Run-flat tires*
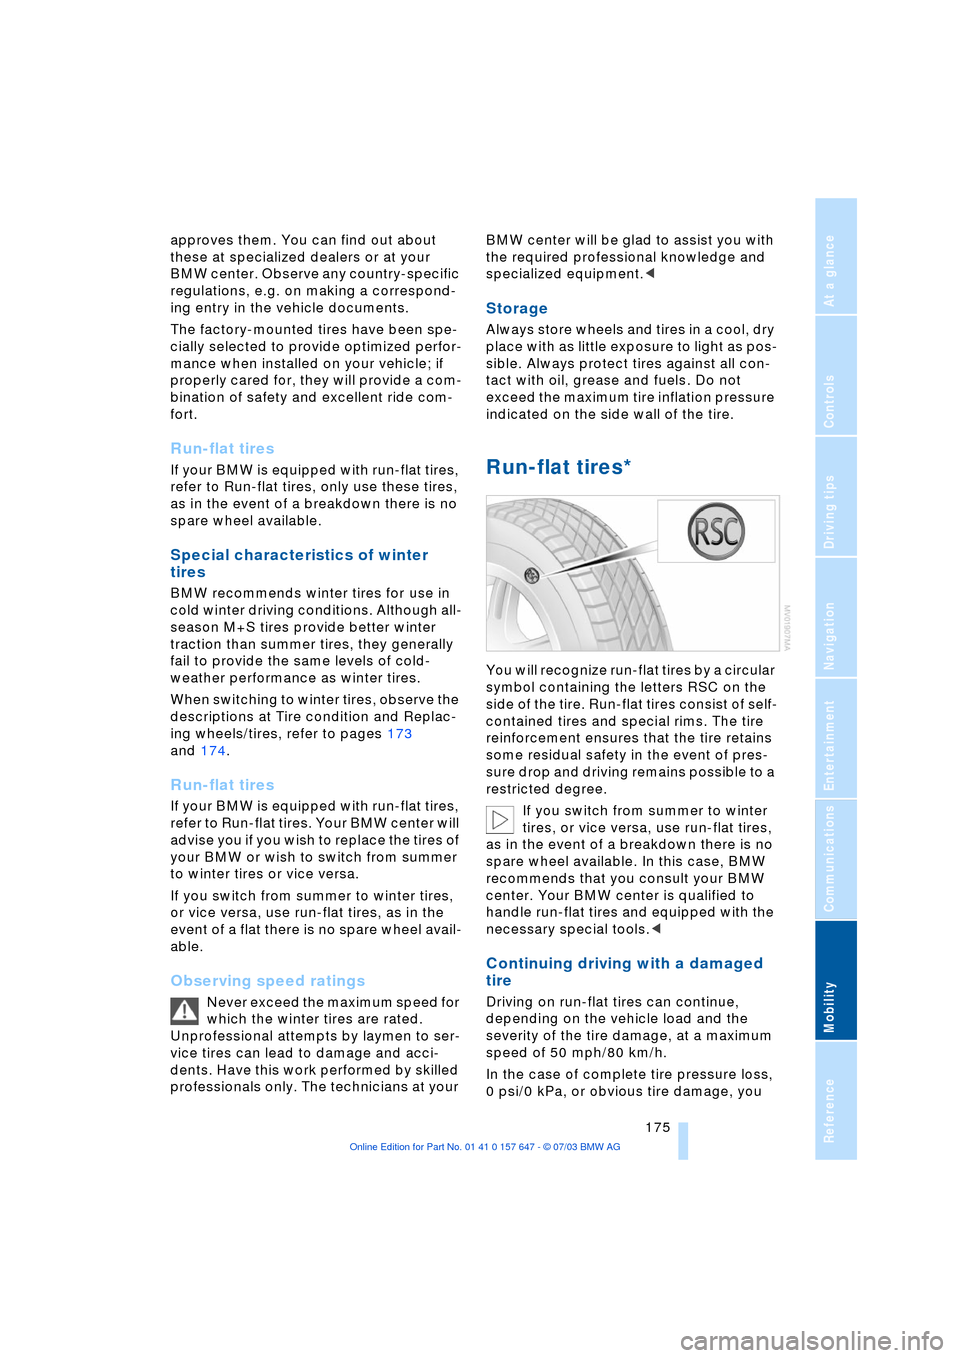
You will recognize run-flat tires by a circular
symbol containing the letters RSC on the
side of the tire. Run-flat tires consist of self-
contained tires and special rims. The tire
reinforcement ensures that the tire retains
some residual safety in the event of pres-
sure drop and driving remains possible to a
restricted degree.
If you switch from summer to winter
tires, or vice versa, use run-flat tires,
as in the event of a breakdown there is no
spare wheel available. In this case, BMW
recommends that you consult your BMW
center. Your BMW center is qualified to
handle run-flat tires and equipped with the
necessary special tools.<
Continuing driving with a damaged
tire
Driving on run-flat tires can continue,
depending on the vehicle load and the
severity of the tire damage, at a maximum
speed of 50 mph/80 km/h.
In the case of complete tire pressure loss,
0 psi/0 kPa, or obvious tire damage, you
Page 190 of 220

Replacing components
188 3.Loosen the lug bolts 1/2 a turn
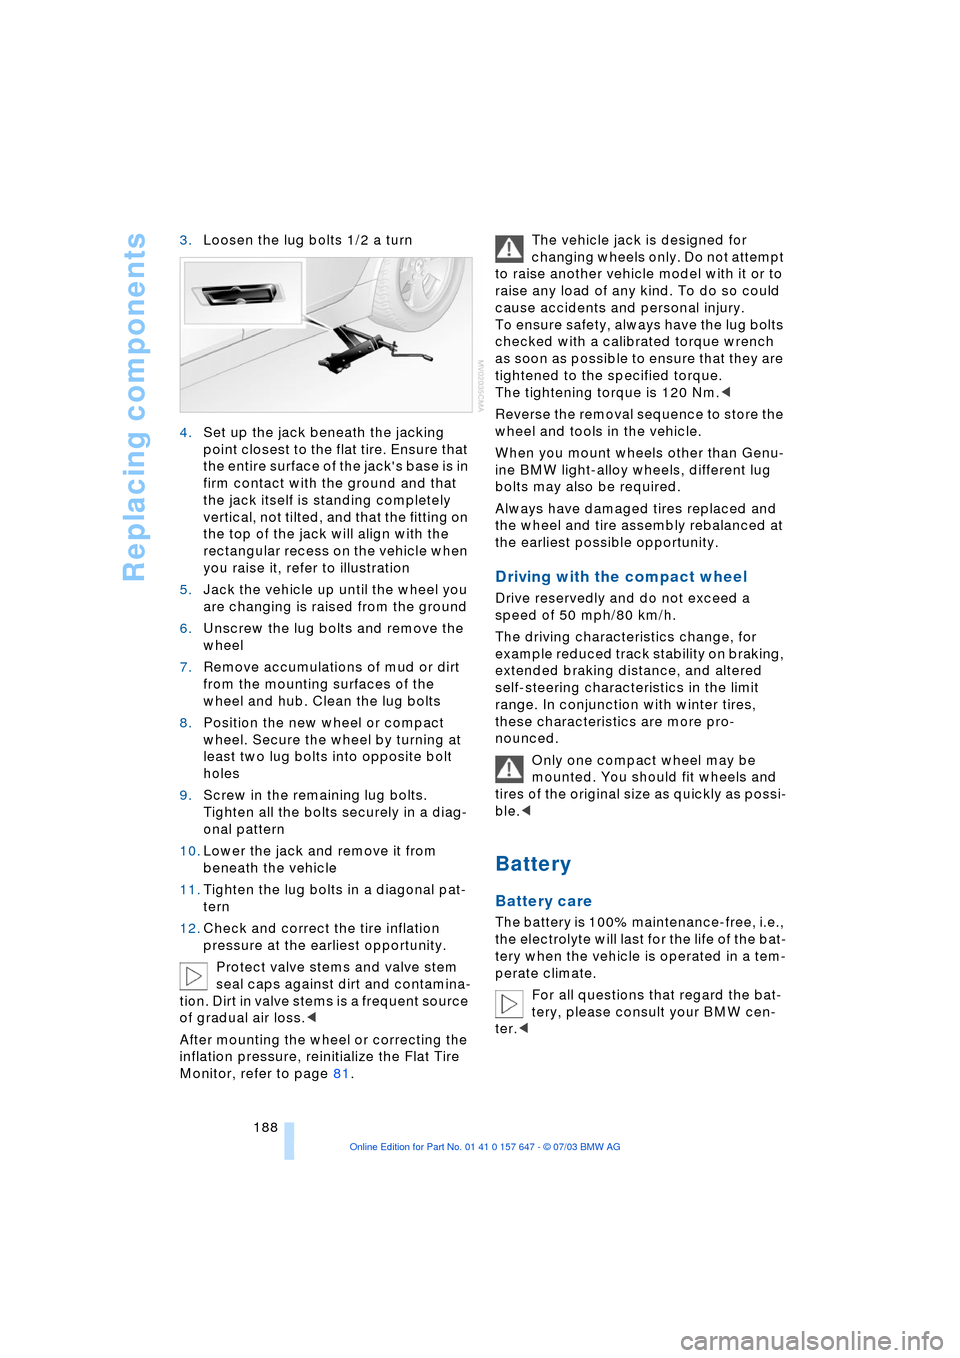
4.Set up the jack beneath the jacking
point closest to the flat tire. Ensure that
the entire surface of the jack's base is in
firm contact with the ground and that
the jack itself is standing completely
vertical, not tilted, and that the fitting on
the top of the jack will align with the
rectangular recess on the vehicle when
you raise it, refer to illustration
5.Jack the vehicle up until the wheel you
are changing is raised from the ground
6.Unscrew the lug bolts and remove the
wheel
7.Remove accumulations of mud or dirt
from the mounting surfaces of the
wheel and hub. Clean the lug bolts
8.Position the new wheel or compact
wheel. Secure the wheel by turning at
least two lug bolts into opposite bolt
holes
9.Screw in the remaining lug bolts.
Tighten all the bolts securely in a diag-
onal pattern
10.Lower the jack and remove it from
beneath the vehicle
11.Tighten the lug bolts in a diagonal pat-
tern
12.Check and correct the tire inflation
pressure at the earliest opportunity.
Protect valve stems and valve stem
seal caps against dirt and contamina-
tion. Dirt in valve stems is a frequent source
of gradual air loss.<
After mounting the wheel or correcting the
inflation pressure, reinitialize the Flat Tire
Monitor, refer to page 81.The vehicle jack is designed for
changing wheels only. Do not attempt
to raise another vehicle model with it or to
raise any load of any kind. To do so could
cause accidents and personal injury.
To ensure safety, always have the lug bolts
checked with a calibrated torque wrench
as soon as possible to ensure that they are
tightened to the specified torque.
The tightening torque is 120 Nm.<
Reverse the removal sequence to store the
wheel and tools in the vehicle.
When you mount wheels other than Genu-
ine BMW light-alloy wheels, different lug
bolts may also be required.
Always have damaged tires replaced and
the wheel and tire assembly rebalanced at
the earliest possible opportunity.
Driving with the compact wheel
Drive reservedly and do not exceed a
speed of 50 mph/80 km/h.
The driving characteristics change, for
example reduced track stability on braking,
extended braking distance, and altered
self-steering characteristics in the limit
range. In conjunction with winter tires,
these characteristics are more pro-
nounced.
Only one compact wheel may be
mounted. You should fit wheels and
tires of the original size as quickly as possi-
ble.<
Battery
Battery care
The battery is 100% maintenance-free, i.e.,
the electrolyte will last for the life of the bat-
tery when the vehicle is operated in a tem-
perate climate.
For all questions that regard the bat-
tery, please consult your BMW cen-
ter.<
Page 206 of 220

Everything from A to Z
204 Cargo, securing 109
Cargo area
Ð locking separately 31
Caring for artificial leather,
refer to Caring for your
vehicle brochure
Caring for leather, refer to
Caring for your vehicle
brochure
Caring for light-alloy
wheels, refer to Caring for
your vehicle brochure
Caring for plastic, refer to
Caring for your vehicle
brochure
Caring for the carpet, refer
to Caring for your vehicle
brochure
Caring for the vehicle finish,
refer to Caring for your
vehicle brochure
Car jack
Ð jacking points 188
Car keys, refer to Central
keys with remote
control 26
Car phone 151
Ð installation location, refer
to Center armrest 98
Ð refer to Portable
phone 150
Ð refer to separate Owner's
Manual
Car radio, refer to
Radio 134
Car wash 106
Ð refer also to Caring for
your vehicle brochure
Catalytic converter, refer to
High temperatures 106
"Categories" 138
CBC Cornering Brake
Control 78
CBS Condition Based
Service 181
"CD" 130CD changer 144
Ð adjusting the tone 131
Ð controls 130
Ð fast forward/reverse 146
Ð installation location 144
Ð listening to a CD 144
Ð playing a track 145
Ð random order 146
Ð repeating a track 145
Ð selecting track 145
Ð switching on/off 130
Ð volume 131
CD for navigation 114
CD player 141
Ð adjusting the tone 131
Ð controls 130
Ð fast forward/reverse 142
Ð playing a track 142
Ð random order 142
Ð repeating a track 142
Ð selecting tracks 141
Ð switching on/off 130
Ð volume 131
Center armrest 98
Center console, refer to
Comfort area 14
Central keys with remote
control 26
"Central locking" 38
Central locking system 27
Ð from inside vehicle 30
Ð from outside vehicle 27
Changes, technical, refer to
Parts and accessories 6
Changing a wheel 187
Changing selector-lever
positions 55
Changing the direction
display for navigation 124
Changing the language on
the Control Display 74
Changing the
measurement units on the
Control Display 74
Changing wheels 174
CHECK button 69
Check Control 68
"Check Control
messages" 69
Check Gas Cap 168Checking the air pressure,
refer to Tire inflation
pressure 170
Child's seat 45
Child-restraint fixing
LATCH 47
Child restraints 45
Child-restraint system 45
Child-safety lock 48
Chock 187
Chrome parts, care, refer to
Caring for your vehicle
brochure
Cigarette lighter 100
Circulation of air, refer to
Recirculated-air mode 91
"City" for destination
entry 117
Cleaning, refer to Caring for
your vehicle brochure
Cleaning headlamps
Ð washer fluid 57
Cleaning windshield 57
"Climate" 41
Clock 65
Ð 12/24 hour mode 74
Ð setting the time and
date 74
Closing
Ð from inside 30
Ð from outside 27
Cockpit 10
Comfort area 14
Comfort seat 37
"Communication" 152
"Communication
interface" 161
Compact Disc
Ð refer to CD changer 144
Ð refer to CD player 141
Compact wheel
Ð inflation pressure 171
Ð wheel change 187
Compression ratio, refer to
Engine data 198
Computer 70
Ð clock, 12/24 hour
mode 74
Ð displays on the Control
Display 70
Page 210 of 220

Everything from A to Z
208 Heating 90
Ð mirrors 43
Ð steering wheel 44
Heating while stopped 92
Heavy cargo, refer to
Stowing cargo 109
Height, refer to
Dimensions 199
Height adjustment
Ð head restraints 39
Ð seats 37
Ð steering wheel 43
High beams 88
Ð headlight flasher 88
Ð indicator lamp 13
Ð replacing the bulbs 185
Hills 107
Holder for beverages 99
"Horn" 44
Horn 10
"Hour memo" 75
"House number" for
destination entry 117
Hydraulic brake assistant,
refer to DBC 79
Hydroplaning 106, 174
I
Ice warning 65
iDrive, refer to Control
Center 16
Ignition key 26
Ignition key positions, refer
to Ignition lock 49
Ignition lock 49
Independent ventilation
Ð switching on and off
directly 94
Independent ventilation/
heating
Ð entering switch-on
times 95
Ð preselecting switch-on
times 95Indicator/warning lamp
Ð active steering 82
Ð airbags 84
Ð Flat Tire Monitor 81
Ð front fog lamps 11
Ð overview 13
Ð safety belt warning 40
Individual air distribution 93
Individual button
assignment options on
steering wheel 44
Individual settings, refer to
Key Memory 26
Inflation pressure, refer to
Tire inflation
pressure 170
"Information" for
navigation 118
Information for navigation
Ð on a different city 118
Ð on city of destination 118
Ð on current position 118
"Information on
destination" 119
"Input map" 118
Installation location
Ð CD changer 144
Ð navigation computer 114
Ð portable phone 151
Instructions for navigation
system, refer to Voice
instructions 124
Instrument cluster 12
Instrument combination,
refer to Instrument
cluster 12
Instrument lighting 88
Instrument panel, refer to
Instrument cluster 10
Integrated universal remote
control 96
Interesting destination 118
"Interim time" 73
Interior lamps 89
Ð remote control 28
Interior mirror, refer to
Interior rearview mirror 43
Interior motion sensor 33
Ð switching off 28Interior rearview mirror 43
Ð automatic dimming
feature 43
Interlock, refer to Steering
locked 49
Intermittent mode of the
wipers 57
J
Jacking points 188
Joystick, refer to Control
Center 16
Jump-starting 192
K
Key Memory 26
"Keypad" 156
Keys 26
Key set, refer Central keys
with remote control 26
Kickdown 55
Knock control 169
L
Lamps and bulbs 184
"Languages" 74
"Languages" for
navigation 124
Lashing eyes, refer to
Securing the load 109
"Last seat position" 38
LATCH child-restraint
fixing 47
LEDs light-emitting
diodes 89
Length, refer to
Dimensions 199
Letter symbol on portable
phone 156
License plate light
Ð replacing the bulbs 186
Light-emitting diodes
LEDs 89
Lighter 100
Ð socket 100
"Lighting" 56, 87