Page 1235 of 1767

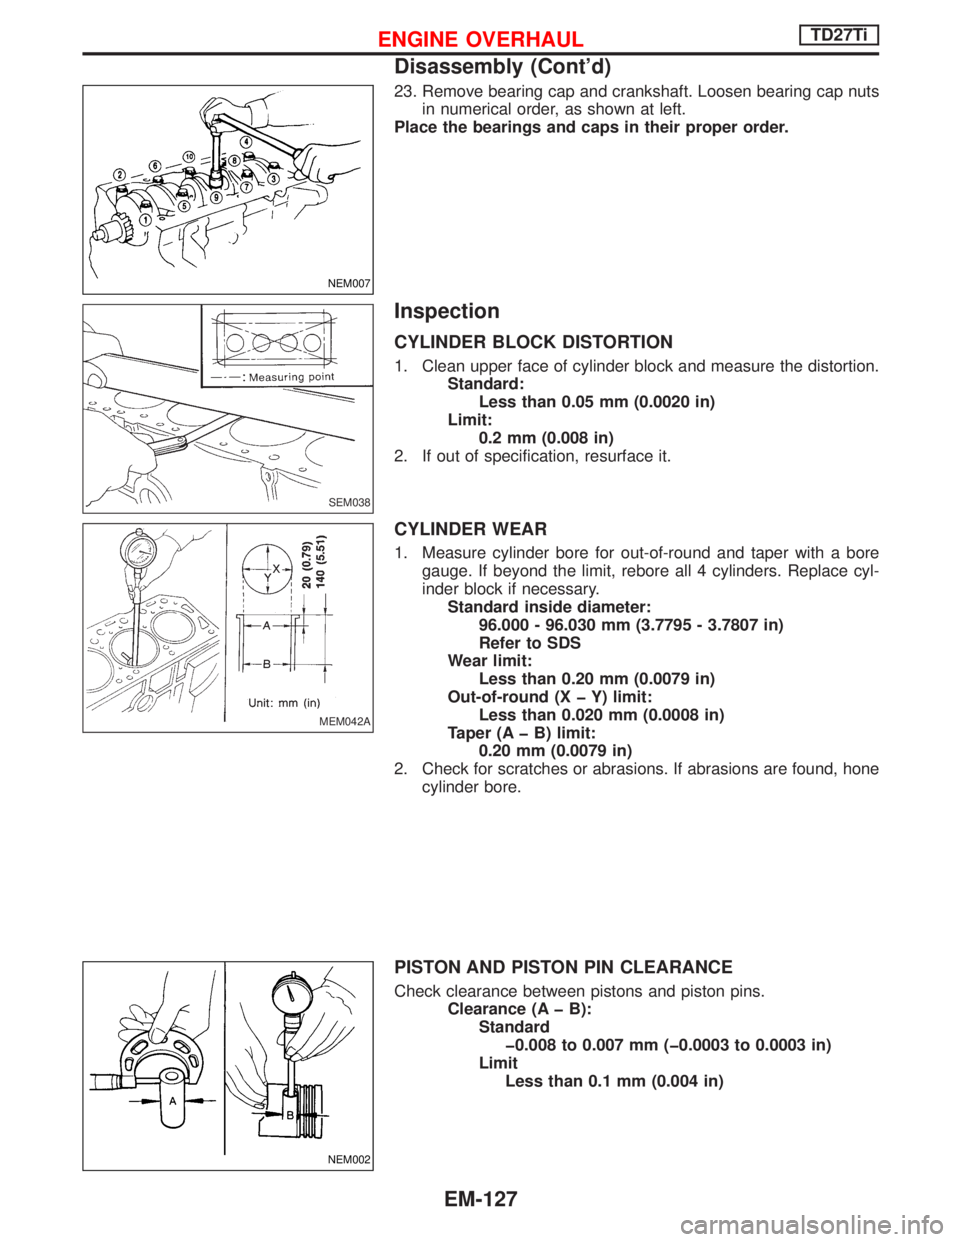
23. Remove bearing cap and crankshaft. Loosen bearing cap nuts
in numerical order, as shown at left.
Place the bearings and caps in their proper order.
Inspection
CYLINDER BLOCK DISTORTION
1. Clean upper face of cylinder block and measure the distortion.
Standard:
Less than 0.05 mm (0.0020 in)
Limit:
0.2 mm (0.008 in)
2. If out of specification, resurface it.
CYLINDER WEAR
1. Measure cylinder bore for out-of-round and taper with a bore
gauge. If beyond the limit, rebore all 4 cylinders. Replace cyl-
inder block if necessary.
Standard inside diameter:
96.000 - 96.030 mm (3.7795 - 3.7807 in)
Refer to SDS
Wear limit:
Less than 0.20 mm (0.0079 in)
Out-of-round (X þ Y) limit:
Less than 0.020 mm (0.0008 in)
Taper (A þ B) limit:
0.20 mm (0.0079 in)
2. Check for scratches or abrasions. If abrasions are found, hone
cylinder bore.
PISTON AND PISTON PIN CLEARANCE
Check clearance between pistons and piston pins.
Clearance (A þ B):
Standard
þ0.008 to 0.007 mm (þ0.0003 to 0.0003 in)
Limit
Less than 0.1 mm (0.004 in)
NEM007
SEM038
MEM042A
NEM002
ENGINE OVERHAULTD27Ti
Disassembly (Cont'd)
EM-127
Page 1238 of 1767

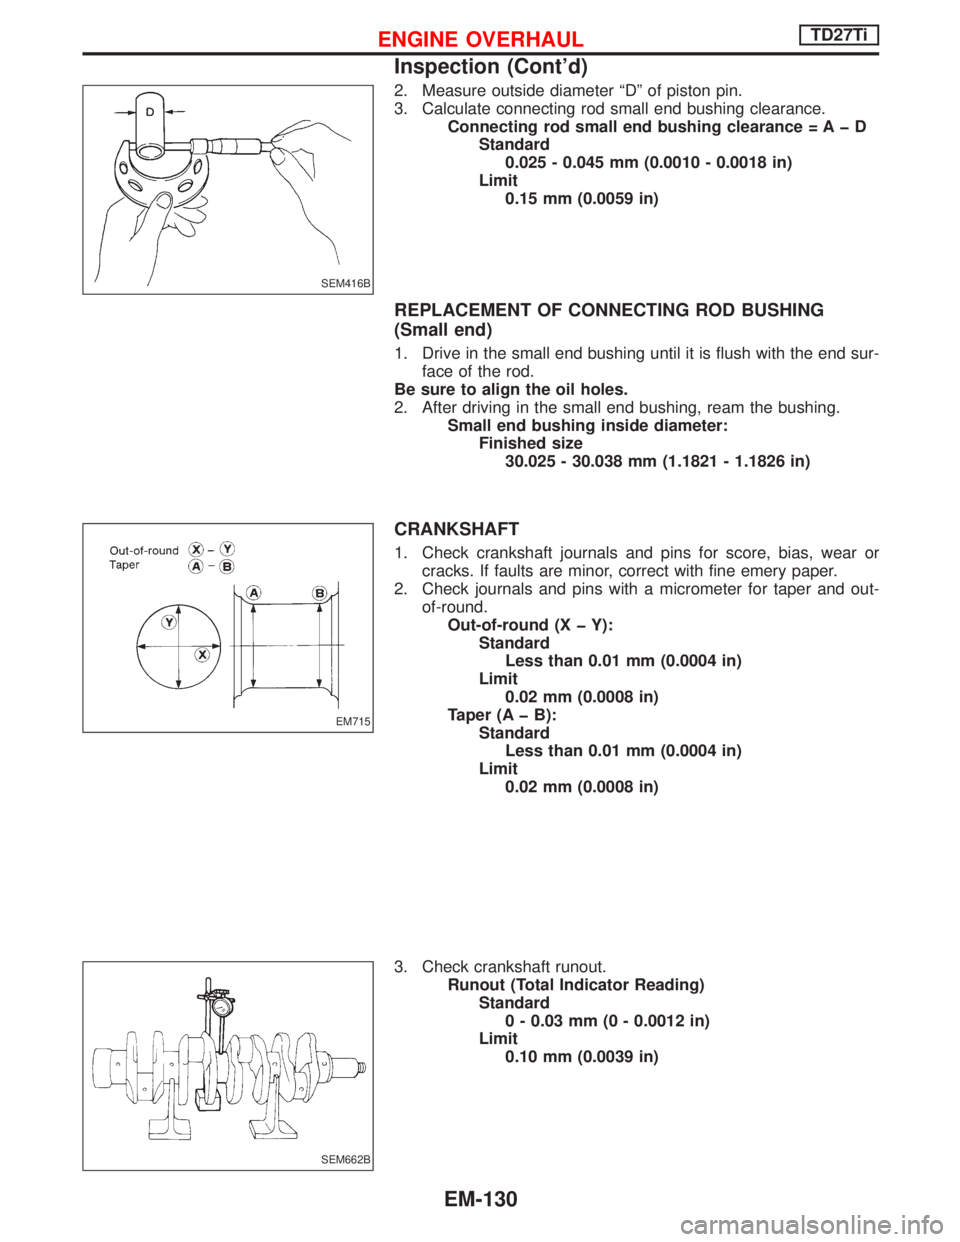
2. Measure outside diameter ªDº of piston pin.
3. Calculate connecting rod small end bushing clearance.
Connecting rod small end bushing clearance = A þ D
Standard
0.025 - 0.045 mm (0.0010 - 0.0018 in)
Limit
0.15 mm (0.0059 in)
REPLACEMENT OF CONNECTING ROD BUSHING
(Small end)
1. Drive in the small end bushing until it is flush with the end sur-
face of the rod.
Be sure to align the oil holes.
2. After driving in the small end bushing, ream the bushing.
Small end bushing inside diameter:
Finished size
30.025 - 30.038 mm (1.1821 - 1.1826 in)
CRANKSHAFT
1. Check crankshaft journals and pins for score, bias, wear or
cracks. If faults are minor, correct with fine emery paper.
2. Check journals and pins with a micrometer for taper and out-
of-round.
Out-of-round (X þ Y):
Standard
Less than 0.01 mm (0.0004 in)
Limit
0.02 mm (0.0008 in)
Taper (A þ B):
Standard
Less than 0.01 mm (0.0004 in)
Limit
0.02 mm (0.0008 in)
3. Check crankshaft runout.
Runout (Total Indicator Reading)
Standard
0 - 0.03 mm (0 - 0.0012 in)
Limit
0.10 mm (0.0039 in)
SEM416B
EM715
SEM662B
ENGINE OVERHAULTD27Ti
Inspection (Cont'd)
EM-130
Page 1239 of 1767
RESURFACING OF CRANKSHAFT JOURNAL AND
CRANK PIN
When using undersize main bearings and connecting rod bearings,
the crankshaft journals or crank pins must be finished to match the
bearings.
R: Crank journal 3.0 mm (0.118 in)
Crank pin 3.5 mm (0.138 in)
CAUTION:
IAt the same time make sure that the surface width does not
increase.
IDo not attempt to cut counterweight of crankshaft.
PILOT BUSHING REPLACEMENT
1. Pull out bushing with Tool.
2. Insert pilot bushing until distance between flange end and
bushing is specified value.
Distance:
Approx. 5.6 - 6.0 mm (0.220 - 0.236 in)
FLYWHEEL RUNOUT
Runout (Total Indicator Reading):
Less than 0.15 mm (0.0059 in)
FRONT PLATE
Check front plate for warpage. If not within the limit, make flat or
replace front plate.
Warpage limit:
0.2 mm (0.008 in)
SEF692A
SEM413
NEM181
SEM059A
SEM668B
ENGINE OVERHAULTD27Ti
Inspection (Cont'd)
EM-131
Page 1240 of 1767
GEAR TRAIN
Camshaft drive gear, injection pump drive gear, oil pump gear,
idler gear, crankshaft gear and vacuum pump gear.
1. If gear tooth and key have scratches or are excessively worn,
replace gear and key.
2. Check gear train backlash before disassembling and after
assembling.
Method A (Using dial gauge)
Method B (Using fuse wire)
If beyond the limit, replace gear.
Backlash:
Standard
0.07 - 0.11 mm (0.0028 - 0.0043 in)
Limit
0.20 mm (0.0079 in)
IDLER GEAR BUSHING CLEARANCE
1. Measure idler gear shaft outer diameter.
2. Measure idler gear bushing inner diameter.
3. Calculate idler gear bushing clearance.
Bushing oil clearance:
Standard
0.025 - 0.061 mm (0.0010 - 0.0024 in)
Limit
0.20 mm (0.0079 in)
IDLER GEAR END PLAY
Measure idler gear end play between gear plate and gear.
Idler gear end play:
Standard
0.03 - 0.14 mm (0.0012 - 0.0055 in)
Limit
Less than 0.3 mm (0.012 in)
NEM186
NEM187
SEM666B
SEM705
ENGINE OVERHAULTD27Ti
Inspection (Cont'd)
EM-132
Page 1242 of 1767
(3) Rear camshaft bushing.
Align the cutout of rear bushing with knock pin of replacer bar
before installation.
Insert rear bushing with replacer bar into the cylinder block.
Install guide plate with bolt holes (on the ªTDº mark side) fac-
ing upper side of cylinder block. Tighten bolts.
Drive replacer bar until the alignment mark on replacer bar is
aligned with the end of replacer guide.
Remove replacer set.
After installation, check that oil hole in camshaft bushing are
aligned with oil hole in cylinder block.
SEM995B
SEM110C
NEM172
ENGINE OVERHAULTD27Ti
Inspection (Cont'd)
EM-134
Page 1244 of 1767
3. Check camshaft bushing clearance.
4. Install new welch plug with a drift.
Apply liquid sealer.
When setting 4th through 2nd bushings on replacer bar, tape
the bar to prevent movement.
CAMSHAFT ALIGNMENT
1. Check camshaft journal and cam surface for cracks, wear or
damage.
If fault is beyond limit, replace.
2. Check camshaft runout at center journal.
If runout is greater than specified limit, repair or replace cam-
shaft.
Camshaft runout
(Total indicator reading):
Standard
Less than 0.02 mm (0.0008 in)
Limit
Less than 0.06 mm (0.0024 in)
SEM987B
SEM034
SEM999B
SEM670B
ENGINE OVERHAULTD27Ti
Inspection (Cont'd)
EM-136
Page 1260 of 1767
(1) When installing each rubber part, final tightening must be car-
ried out under unladen condition * with tires on ground.
* Fuel, radiator coolant and engine oil full. Spare tire, jack,
hand tools and mats in designated positions.
(2) When removing each suspension part, check wheel alignment
and adjust if necessary.
(3) Use Tool when removing or installing brake tubes.
SBR820B
PRECAUTIONS
FA-2
Page 1300 of 1767

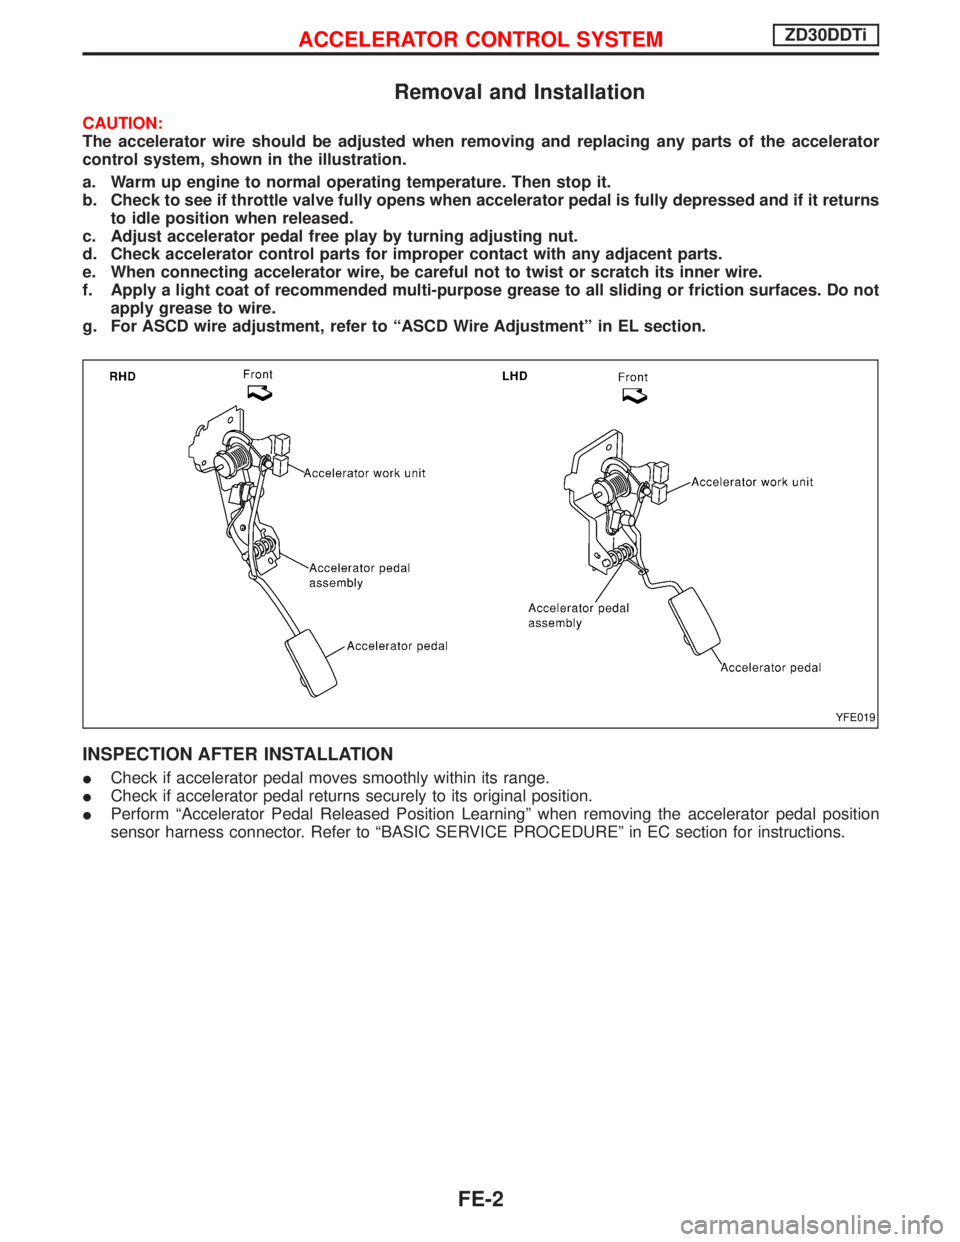
Removal and Installation
CAUTION:
The accelerator wire should be adjusted when removing and replacing any parts of the accelerator
control system, shown in the illustration.
a. Warm up engine to normal operating temperature. Then stop it.
b. Check to see if throttle valve fully opens when accelerator pedal is fully depressed and if it returns
to idle position when released.
c. Adjust accelerator pedal free play by turning adjusting nut.
d. Check accelerator control parts for improper contact with any adjacent parts.
e. When connecting accelerator wire, be careful not to twist or scratch its inner wire.
f. Apply a light coat of recommended multi-purpose grease to all sliding or friction surfaces. Do not
apply grease to wire.
g. For ASCD wire adjustment, refer to ªASCD Wire Adjustmentº in EL section.
INSPECTION AFTER INSTALLATION
ICheck if accelerator pedal moves smoothly within its range.
ICheck if accelerator pedal returns securely to its original position.
IPerform ªAccelerator Pedal Released Position Learningº when removing the accelerator pedal position
sensor harness connector. Refer to ªBASIC SERVICE PROCEDUREº in EC section for instructions.
YFE019
ACCELERATOR CONTROL SYSTEMZD30DDTi
FE-2