2002 BMW 745LI SEDAN rear entertainment
[x] Cancel search: rear entertainmentPage 70 of 208
At a glanceControlsDriving tipsCommunicationsNavigationEntertainmentMobilityReference
69
To deactivate the L mode >Press the L/D button or
>press the selector lever into position D
once again. Automatic transmission
with Steptronic Canadian models only While you can drive as with any conven-
tional automatic transmission, you also
enjoy the option of shifting manually at the
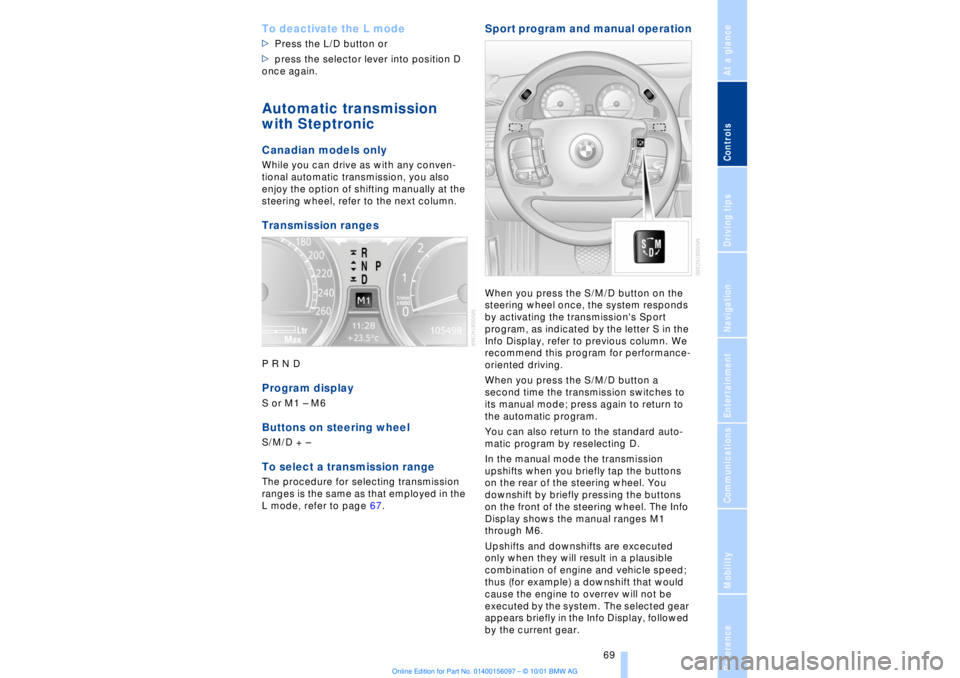
steering wheel, refer to the next column. Transmission rangesP R N D Program displayS or M1 Ð M6Buttons on steering wheel S/M/D + Ð To select a transmission range The procedure for selecting transmission
ranges is the same as that employed in the
L mode, refer to page 67.
Sport program and manual operationWhen you press the S/M/D button on the
steering wheel once, the system responds
by activating the transmission's Sport
program, as indicated by the letter S in the
Info Display, refer to previous column. We
recommend this program for performance-
oriented driving.
When you press the S/M/D button a
second time the transmission switches to
its manual mode; press again to return to
the automatic program.
You can also return to the standard auto-
matic program by reselecting D.
In the manual mode the transmission
upshifts when you briefly tap the buttons
on the rear of the steering wheel. You
downshift by briefly pressing the buttons
on the front of the steering wheel. The Info
Display shows the manual ranges M1
through M6.
Upshifts and downshifts are excecuted
only when they will result in a plausible
combination of engine and vehicle speed;
thus (for example) a downshift that would
cause the engine to overrev will not be
executed by the system. The selected gear
appears briefly in the Info Display, followed
by the current gear.
Page 92 of 208
At a glanceControlsDriving tipsCommunicationsNavigationEntertainmentMobilityReference
91
limited system response up to a speed of
approx. 45 mph (70 km/h). Intervention for
stability-enhancement is reduced. Do not
make any modiÞcations to the DSC system.
Never allow anyone other than authorized
professional technicians to carry out
service or repairs on the DSC system.< Dynamic Brake Control DBC
When you apply the brakes rapidly, this
system automatically produces the
maximum braking force boost and thus
helps to achieve the shortest possible
braking distance during "panic stops." This
system exploits all of the benefits provided
by ABS.
Do not reduce the pressure on the brake
pedal for the duration of the brake applica-
tion. When the brake pedal is released, the
DBC is deactivated.
In the event of a malfunction, the
warning lamp comes on with a
yellow lamp. Have the system
checked and repaired at your BMW center
as soon as possible.
Check Control messages, refer to page 80.
Please note the supplementary information
provided in the Control Display.
Warning lamp on Canadian models.Driving stability control/
ABS Antilock Brake System The concept ABS enhances active safety by preventing
the wheels from locking under braking.
ABS incorporates CBC and EBV. In case of malfunction
If the indicator lamp lights up in
yellow, this indicates that ABS has
been deactivated in response to a
system malfunction. Conventional braking
efficiency remains available without limita-
tions. Please have the system inspected at
your BMW center.
Cornering Brake Control CBC CBC is a technical advance based on ABS.
It provides further enhancements in vehicle
stability and steering response during lane
changes and cornering at high rates of
lateral acceleration. EBV Electronic brake-force
distribution EBV controls the brake system's applica-
tion pressure at the rear wheels to ensure
stable deceleration. In case of malfunction
If the brake system warning lamp
lights up in red, appearing together
with the yellow lamps for ABS and
DSC: the stability control is no
longer operational.
If all three lamps light up in yellow:
malfunction in the stability control
systems.
While you may continue, you should
remember to proceed cautiously and drive
defensively while avoiding full brake appli-
cations.
Please have the system checked at the
nearest BMW center.
Check Control status messages, refer to
page 80. Please note the supplementary
information provided in the Control Display.
Indicator and warning lamps on
Canadian models.
Dynamic Drive The concept Dynamic Drive minimizes body roll and
optimizes vehicle stability during cornering
and evasive maneuvers.
Page 96 of 208
At a glanceControlsDriving tipsCommunicationsNavigationEntertainmentMobilityReference
95
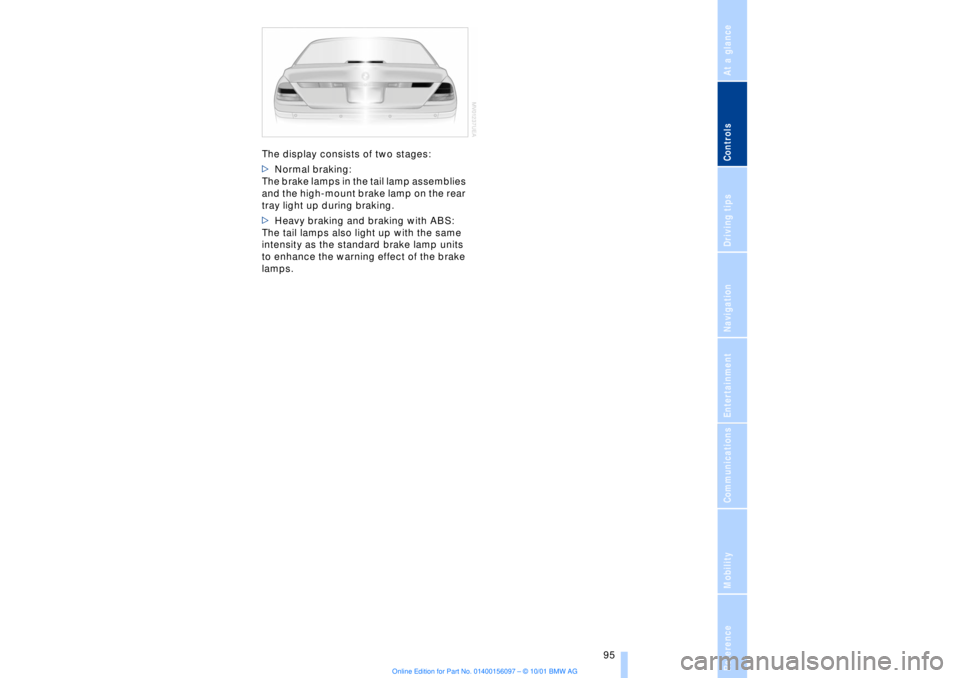
The display consists of two stages:
>Normal braking:
The brake lamps in the tail lamp assemblies
and the high-mount brake lamp on the rear
tray light up during braking.
>Heavy braking and braking with ABS:
The tail lamps also light up with the same
intensity as the standard brake lamp units
to enhance the warning effect of the brake
lamps.
Page 104 of 208
At a glanceControlsDriving tipsCommunicationsNavigationEntertainmentMobilityReference
103
Switching off the automatic climate
control*
The air supply, the heater and
the air conditioner are all
switched off. You can restart
the automatic climate control
by pressing any of its buttons
except the REST button.
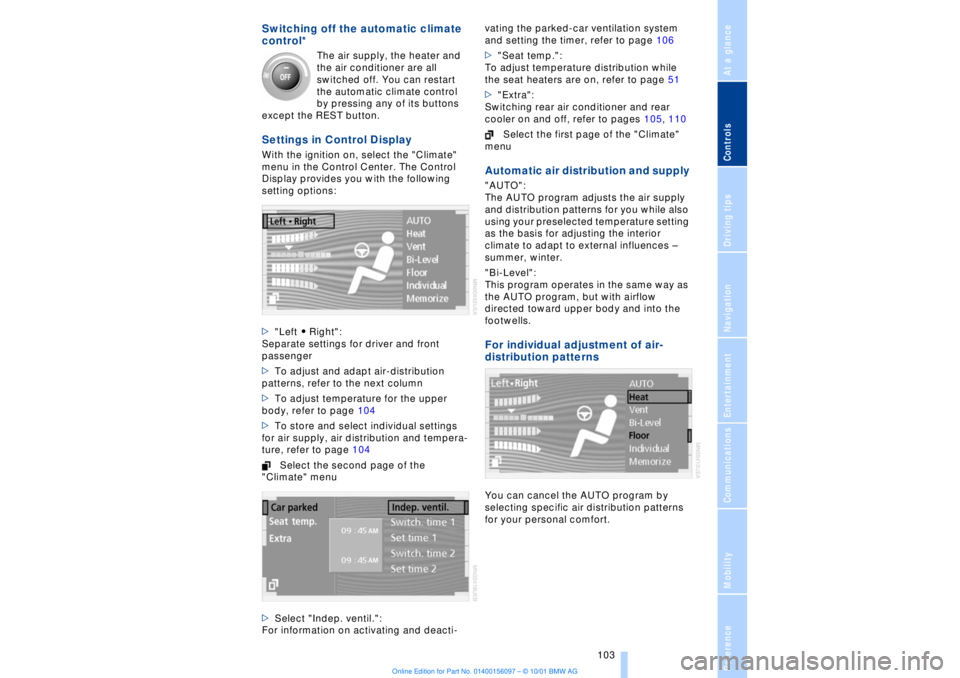
Settings in Control Display With the ignition on, select the "Climate"
menu in the Control Center. The Control
Display provides you with the following
setting options:
>"Left A Right":
Separate settings for driver and front
passenger
>To adjust and adapt air-distribution
patterns, refer to the next column
>To adjust temperature for the upper
body, refer to page 104
>To store and select individual settings
for air supply, air distribution and tempera-
ture, refer to page 104
Select the second page of the
"Climate" menu
>Select "Indep. ventil.":
For information on activating and deacti-vating the parked-car ventilation system
and setting the timer, refer to page 106
>"Seat temp.":
To adjust temperature distribution while
the seat heaters are on, refer to page 51
>"Extra":
Switching rear air conditioner and rear
cooler on and off, refer to pages 105, 110
Select the first page of the "Climate"
menu
Automatic air distribution and supply "AUTO":
The AUTO program adjusts the air supply
and distribution patterns for you while also
using your preselected temperature setting
as the basis for adjusting the interior
climate to adapt to external influences Ð
summer, winter.
"Bi-Level":
This program operates in the same way as
the AUTO program, but with airflow
directed toward upper body and into the
footwells. For individual adjustment of air-
distribution patternsYou can cancel the AUTO program by
selecting specific air distribution patterns
for your personal comfort.
Page 106 of 208
At a glanceControlsDriving tipsCommunicationsNavigationEntertainmentMobilityReference
105
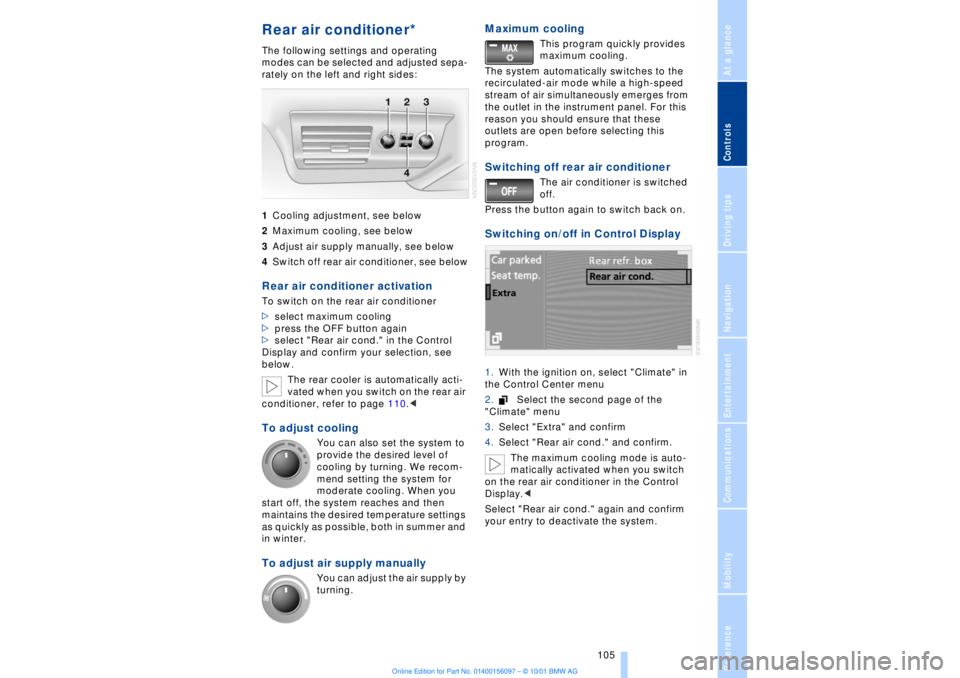
Rear air conditioner* The following settings and operating
modes can be selected and adjusted sepa-
rately on the left and right sides:
1Cooling adjustment, see below
2Maximum cooling, see below
3Adjust air supply manually, see below
4Switch off rear air conditioner, see belowRear air conditioner activation To switch on the rear air conditioner
>select maximum cooling
>press the OFF button again
>select "Rear air cond." in the Control
Display and confirm your selection, see
below.
The rear cooler is automatically acti-
vated when you switch on the rear air
conditioner, refer to page 110.< To adjust cooling
You can also set the system to
provide the desired level of
cooling by turning. We recom-
mend setting the system for
moderate cooling. When you
start off, the system reaches and then
maintains the desired temperature settings
as quickly as possible, both in summer and
in winter.
To adjust air supply manually
You can adjust the air supply by
turning.
Maximum cooling
This program quickly provides
maximum cooling.
The system automatically switches to the
recirculated-air mode while a high-speed
stream of air simultaneously emerges from
the outlet in the instrument panel. For this
reason you should ensure that these
outlets are open before selecting this
program.
Switching off rear air conditioner
The air conditioner is switched
off.
Press the button again to switch back on.
Switching on/off in Control Display 1.With the ignition on, select "Climate" in
the Control Center menu
2.Select the second page of the
"Climate" menu
3.Select "Extra" and confirm
4.Select "Rear air cond." and confirm.
The maximum cooling mode is auto-
matically activated when you switch
on the rear air conditioner in the Control
Display.<
Select "Rear air cond." again and confirm
your entry to deactivate the system.
Page 110 of 208
At a glanceControlsDriving tipsCommunicationsNavigationEntertainmentMobilityReference
109
4.Simultaneously press the transmit key
on the original hand-held transmitter,
arrow 3 and the selected channel key 1
on the Universal Garage Door Opener.
Release both keys as soon as the indicator
lamp flashes rapidly
5.To program other original hand-held
transmitters, repeat steps 3 and 4.
The corresponding channel key is now
programmed with the signal of the original
hand-held transmitter. Programming alternating-code
transmitters
Observe all of the safety precautions
described on the previous page.<
Consult the unit's operating instructions
when programming the Universal Garage
Door Opener.
When programming hand-held transmitters
that employ an alternating code, please
observe the following supplementary
instructions:
Programming will be easier with the
aid of a second person.<
1.Program the Universal Garage Door
Opener by following the instructions given
above under Programming.
2.Maintain pressure on the alternating-
code transmitter for roughly two seconds,
continuing until the program lamp lights up.
3.Press the selected channel key on the
Universal Garage Door Opener three times.
If you have any additional questions,
please contact your BMW center.<
To clear channel keys
Observe all of the safety precautions
described on the previous page.<
The memory of individual channel keys
cannot be deleted. However, the three
channel keys can be cleared together as
follows:
>Press both outside keys on the Universal
Garage Door Opener; maintain pressure
until the indicator lamp starts to flash, then
release the key.
Sun blinds*
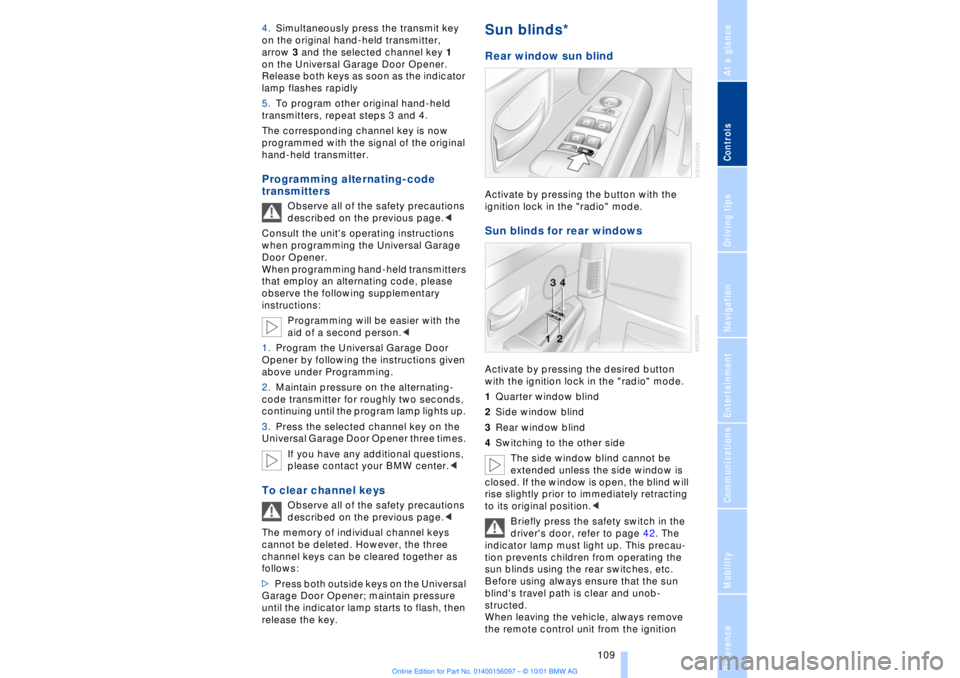
Rear window sun blind Activate by pressing the button with the
ignition lock in the "radio" mode. Sun blinds for rear windows Activate by pressing the desired button
with the ignition lock in the "radio" mode.
1Quarter window blind
2Side window blind
3Rear window blind
4Switching to the other side
The side window blind cannot be
extended unless the side window is
closed. If the window is open, the blind will
rise slightly prior to immediately retracting
to its original position.<
Briefly press the safety switch in the
driver's door, refer to page 42. The
indicator lamp must light up. This precau-
tion prevents children from operating the
sun blinds using the rear switches, etc.
Before using always ensure that the sun
blind's travel path is clear and unob-
structed.
When leaving the vehicle, always remove
the remote control unit from the ignition
Page 114 of 208
At a glanceControlsDriving tipsCommunicationsNavigationEntertainmentMobilityReference
113
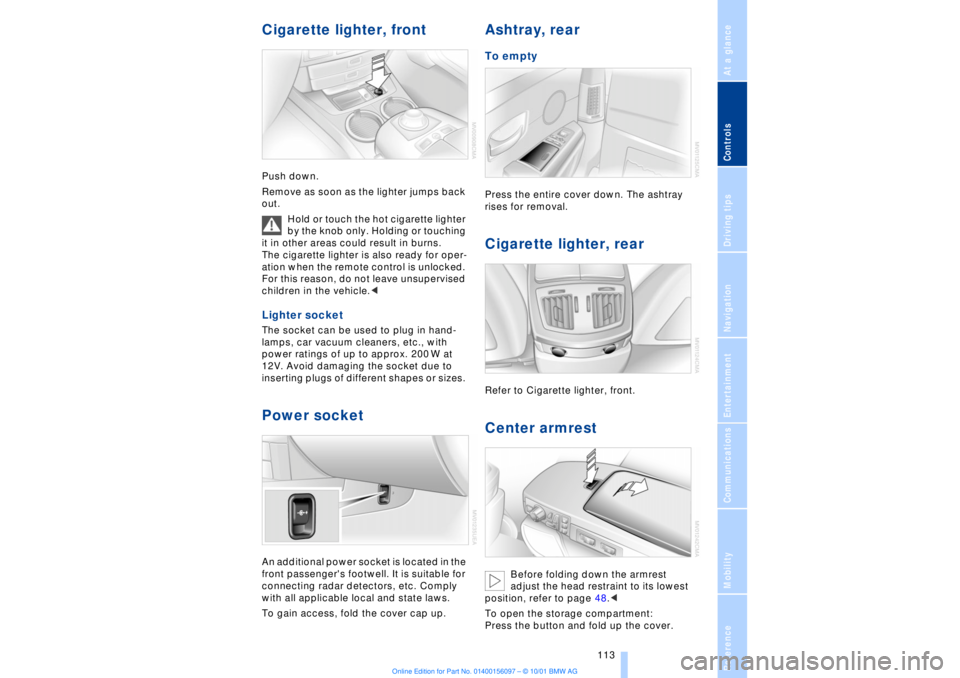
Cigarette lighter, frontPush down.
Remove as soon as the lighter jumps back
out.
Hold or touch the hot cigarette lighter
by the knob only. Holding or touching
it in other areas could result in burns.
The cigarette lighter is also ready for oper-
ation when the remote control is unlocked.
For this reason, do not leave unsupervised
children in the vehicle.< Lighter socket The socket can be used to plug in hand-
lamps, car vacuum cleaners, etc., with
power ratings of up to approx. 200 W at
12V. Avoid damaging the socket due to
inserting plugs of different shapes or sizes. Power socket An additional power socket is located in the
front passenger's footwell. It is suitable for
connecting radar detectors, etc. Comply
with all applicable local and state laws.
To gain access, fold the cover cap up.
Ashtray, rear To empty Press the entire cover down. The ashtray
rises for removal. Cigarette lighter, rear Refer to Cigarette lighter, front. Center armrest
Before folding down the armrest
adjust the head restraint to its lowest
position, refer to page 48.<
To open the storage compartment:
Press the button and fold up the cover.
Page 142 of 208
At a glanceControlsDriving tipsCommunicationsNavigationEntertainmentMobilityReference
141
It is not possible to operate the
system using the control buttons in
the steering wheel when the ignition is off.
To avoid discharging the battery you
should always switch off the sound system
when leaving the vehicle.<
Volume adjustmentAdjusting volumeTurn adjust the desired volume level.
The sound system automatically
reverts to its mute mode whenever
you use your mobile phone.
>Treble:
To amplify or reduce high frequencies
>Bass:
To amplify or reduce low frequencies
>Balance:
Left-to-right balance
>Fader:
Front-to-rear adjustment, high/low volume
>Reset:
This feature resets the tone settings to their
standard, default settings
>Speed vol.:
Speed-sensitive volume adjustment. Tone settings can be made separately
for each sound system, i. e., radio,
CD, MD and cassette. When you then
select a new sound system the system
automatically adopts the stored settings.<
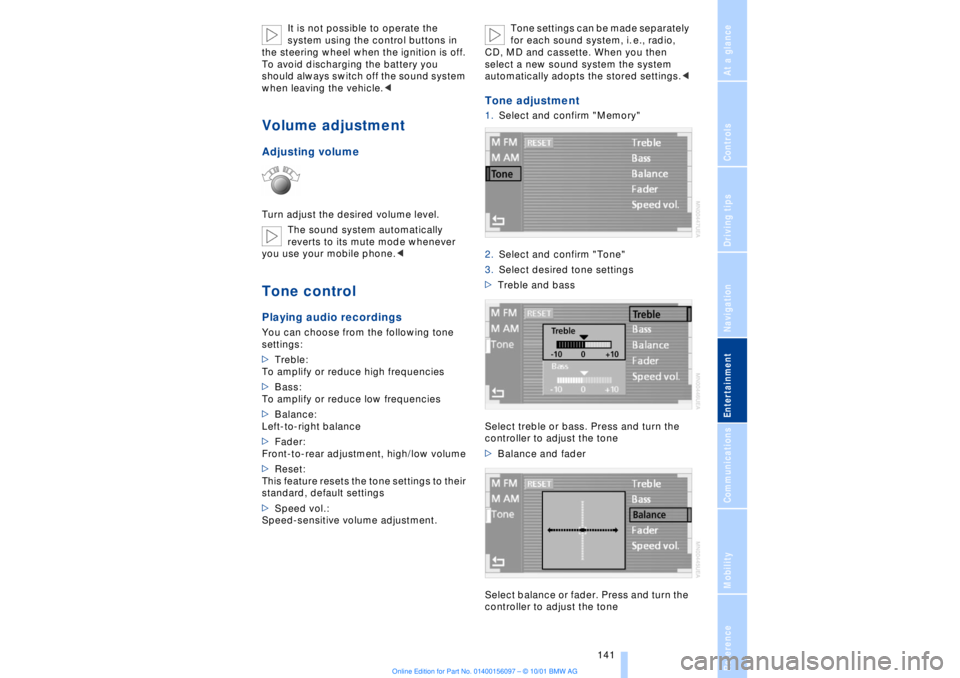
Tone adjustment1.Select and confirm "Memory"
2.Select and confirm "Tone"
3.Select desired tone settings
>Treble and bass
Select treble or bass. Press and turn the
controller to adjust the tone
>Balance and fader
Select balance or fader. Press and turn the
controller to adjust the tone