2002 BMW 745LI SEDAN CD player
[x] Cancel search: CD playerPage 141 of 208
Sound system
140
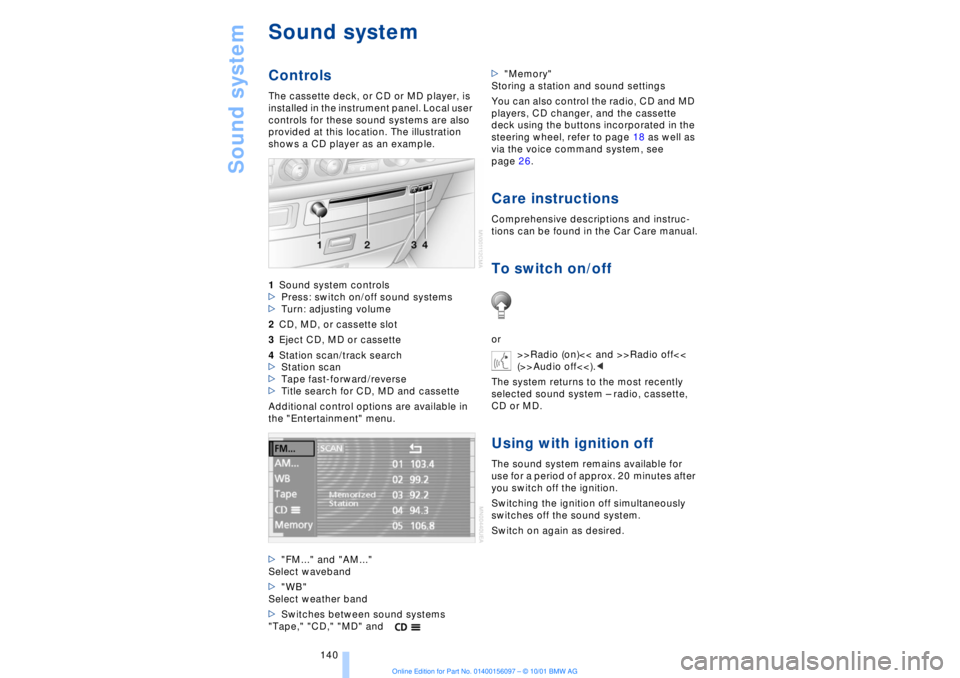
Sound systemControlsThe cassette deck, or CD or MD player, is
installed in the instrument panel. Local user
controls for these sound systems are also
provided at this location. The illustration
shows a CD player as an example.
1Sound system controls
>Press: switch on/off sound systems
>Turn: adjusting volume
2CD, MD, or cassette slot
3Eject CD, MD or cassette
4Station scan/track search
>Station scan
>Tape fast-forward/reverse
>Title search for CD, MD and cassette
Additional control options are available in
the "Entertainment" menu.
>"FM..." and "AM..."
Select waveband
>"WB"
Select weather band
>Switches between sound systems
"Tape," "CD," "MD" and>"Memory"
Storing a station and sound settings
You can also control the radio, CD and MD
players, CD changer, and the cassette
deck using the buttons incorporated in the
steering wheel, refer to page 18 as well as
via the voice command system, see
page 26.
Care instructionsComprehensive descriptions and instruc-
tions can be found in the Car Care manual.To switch on/offor
>>Radio (on)<< and >>Radio off<<
(>>Audio off<<).<
The system returns to the most recently
selected sound system Ð radio, cassette,
CD or MD.Using with ignition offThe sound system remains available for
use for a period of approx. 20 minutes after
you switch off the ignition.
Switching the ignition off simultaneously
switches off the sound system.
Switch on again as desired.
Page 147 of 208
CD Compact Disc
146
CD Compact Disc
You may experience playback prob-
lems, such as skips, when using CDs
that you have copied at home.<
StartingInsert the CD in the slot.
If a CD is already inserted in the CD-player:
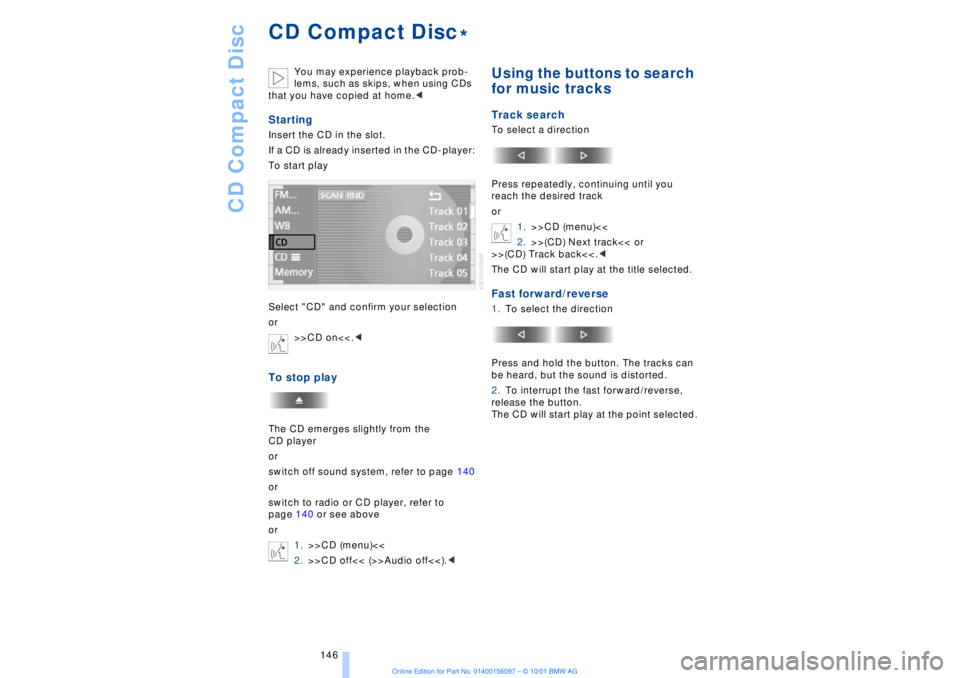
To start play
Select "CD" and confirm your selection
or
>>CD on<<.
or
switch off sound system, refer to page 140
or
switch to radio or CD player, refer to
page 140 or see above
or
1.>>CD (menu)<<
2.>>CD off<< (>>Audio off<<).<
Using the buttons to search
for music tracksTrack searchTo select a direction
Press repeatedly, continuing until you
reach the desired track
or
1.>>CD (menu)<<
2.>>(CD) Next track<< or
>>(CD) Track back<<.<
The CD will start play at the title selected.Fast forward/reverse1.To select the direction
Press and hold the button. The tracks can
be heard, but the sound is distorted.
2.To interrupt the fast forward/reverse,
release the button.
The CD will start play at the point selected.
*
Page 149 of 208
CD changer
148
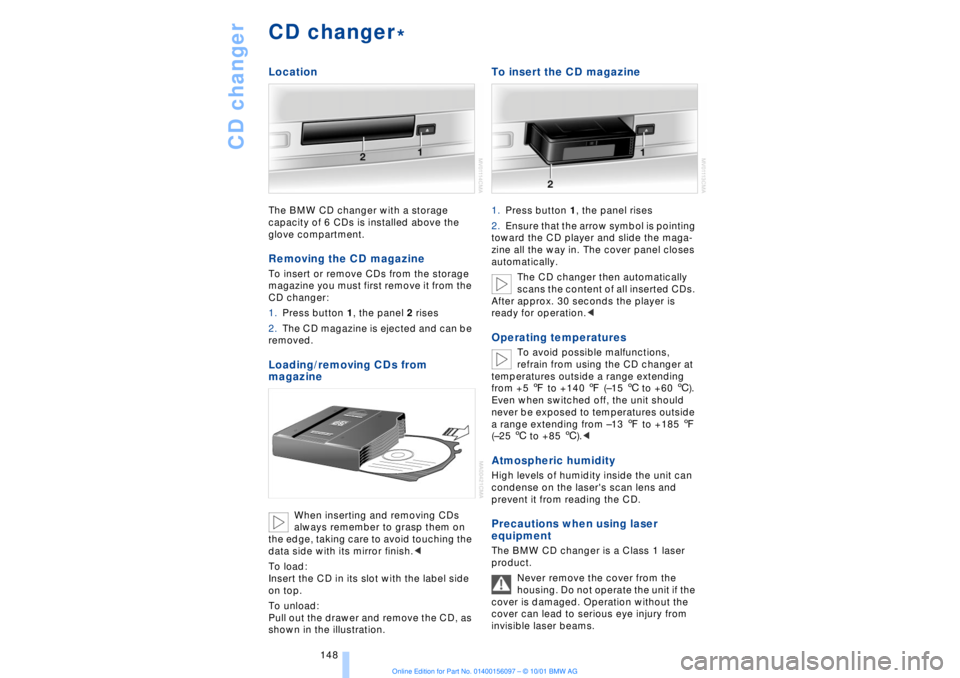
CD changerLocationThe BMW CD changer with a storage
capacity of 6 CDs is installed above the
glove compartment.Removing the CD magazineTo insert or remove CDs from the storage
magazine you must first remove it from the
CD changer:
1.Press button 1, the panel 2 rises
2.The CD magazine is ejected and can be
removed.Loading/removing CDs from
magazine
When inserting and removing CDs
always remember to grasp them on
the edge, taking care to avoid touching the
data side with its mirror finish.<
To load:
Insert the CD in its slot with the label side
on top.
To unload:
Pull out the drawer and remove the CD, as
shown in the illustration.
To insert the CD magazine1.Press button 1, the panel rises
2.Ensure that the arrow symbol is pointing
toward the CD player and slide the maga-
zine all the way in. The cover panel closes
automatically.
The CD changer then automatically
scans the content of all inserted CDs.
After approx. 30 seconds the player is
ready for operation.
refrain from using the CD changer at
temperatures outside a range extending
from +5 7 to +140 7 (Ð15 6 to +60 6).
Even when switched off, the unit should
never be exposed to temperatures outside
a range extending from Ð13 7 to +185 7
(Ð25 6 to +85 6).<
Atmospheric humidityHigh levels of humidity inside the unit can
condense on the laser's scan lens and
prevent it from reading the CD.Precautions when using laser
equipmentThe BMW CD changer is a Class 1 laser
product.
Never remove the cover from the
housing. Do not operate the unit if the
cover is damaged. Operation without the
cover can lead to serious eye injury from
invisible laser beams.
*
Page 150 of 208
At a glanceControlsDriving tipsCommunicationsNavigationEntertainmentMobilityReference
149
Always refer all repair and maintenance
operations to qualified technicians.
You may experience playback prob-
lems, such as skips, when using CDs
that you have copied at home.<
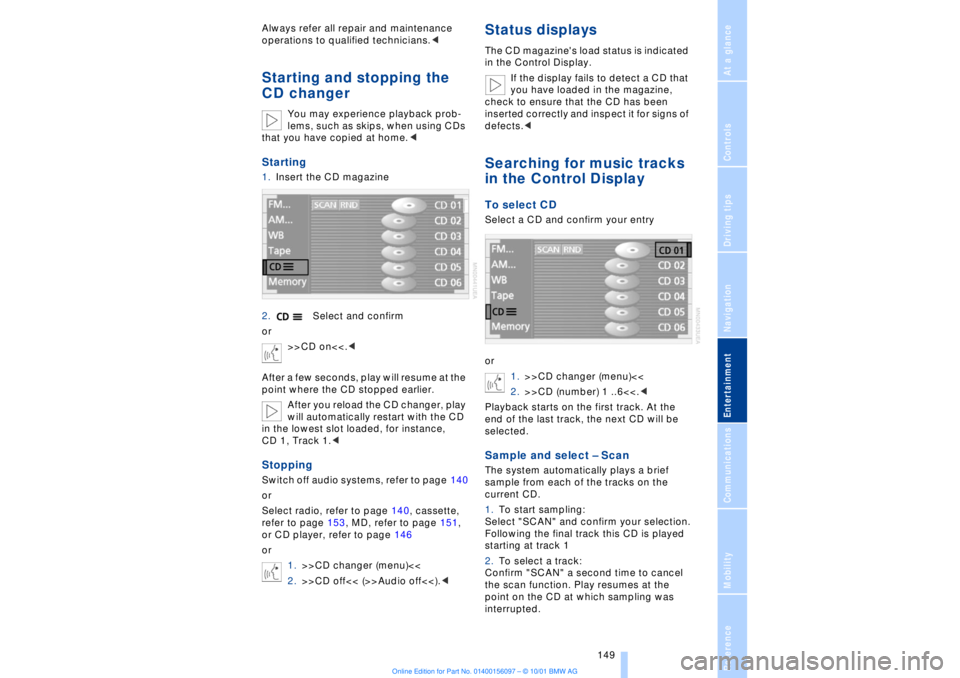
Starting1.Insert the CD magazine
2.Select and confirm
or
>>CD on<<.<
After a few seconds, play will resume at the
point where the CD stopped earlier.
After you reload the CD changer, play
will automatically restart with the CD
in the lowest slot loaded, for instance,
CD 1, Track 1.
Select radio, refer to page 140, cassette,
refer to page 153, MD, refer to page 151,
or CD player, refer to page 146
or
1.>>CD changer (menu)<<
2.>>CD off<< (>>Audio off<<).<
Status displaysThe CD magazine's load status is indicated
in the Control Display.
If the display fails to detect a CD that
you have loaded in the magazine,
check to ensure that the CD has been
inserted correctly and inspect it for signs of
defects.
or
1.>>CD changer (menu)<<
2.>>CD (number) 1 ..6<<.<
Playback starts on the first track. At the
end of the last track, the next CD will be
selected.Sample and select Ð ScanThe system automatically plays a brief
sample from each of the tracks on the
current CD.
1.To start sampling:
Select "SCAN" and confirm your selection.
Following the final track this CD is played
starting at track 1
2.To select a track:
Confirm "SCAN" a second time to cancel
the scan function. Play resumes at the
point on the CD at which sampling was
interrupted.
Page 152 of 208
At a glanceControlsDriving tipsCommunicationsNavigationEntertainmentMobilityReference
151
MiniDisc MDStartingInsert the MiniDisc.
If a MiniDisc is already in the MD player:
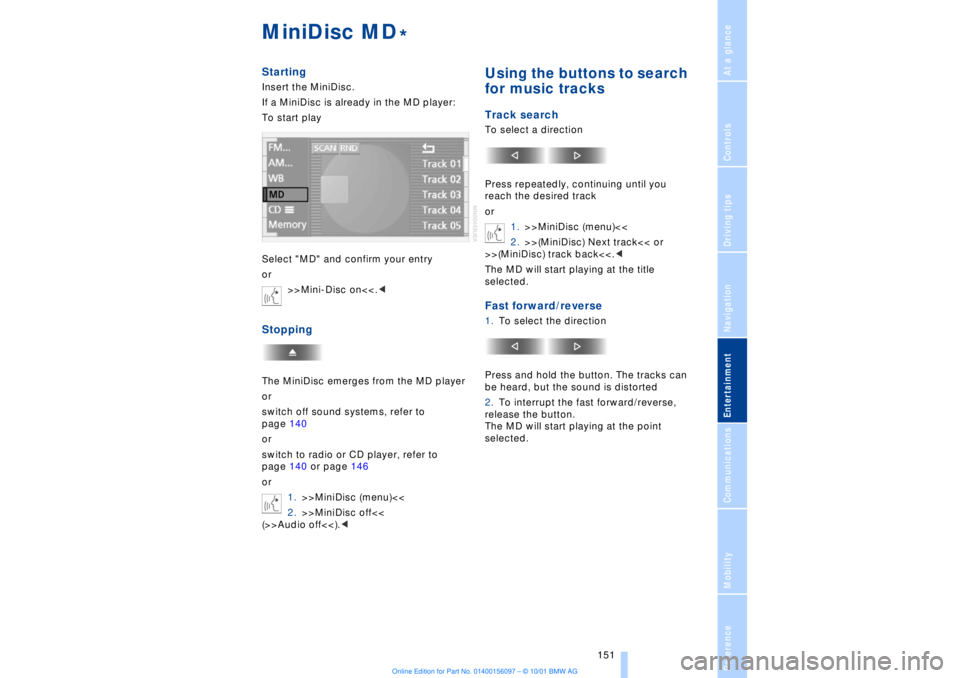
To start play
Select "MD" and confirm your entry
or
>>Mini-Disc on<<.
switch off sound systems, refer to
page 140
or
switch to radio or CD player, refer to
page 140 or page 146
or
1.>>MiniDisc (menu)<<
2.>>MiniDisc off<<
(>>Audio off<<).<
Using the buttons to search
for music tracksTrack searchTo select a direction
Press repeatedly, continuing until you
reach the desired track
or
1.>>MiniDisc (menu)<<
2.>>(MiniDisc) Next track<< or
>>(MiniDisc) track back<<.<
The MD will start playing at the title
selected.Fast forward/reverse1.To select the direction
Press and hold the button. The tracks can
be heard, but the sound is distorted
2.To interrupt the fast forward/reverse,
release the button.
The MD will start playing at the point
selected.
*
Page 154 of 208
At a glanceControlsDriving tipsCommunicationsNavigationEntertainmentMobilityReference
153
CassetteStartingSlide the cassette all the way into the slot,
ensuring that the side with the exposed
tape is on the right.
If a cassette is already in the slot:
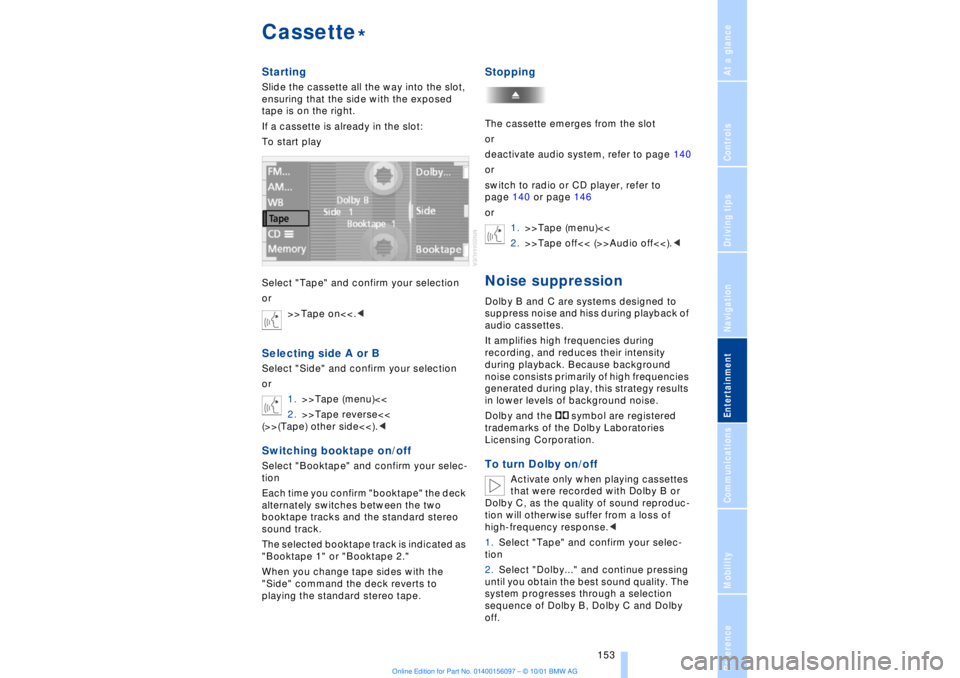
To start play
Select "Tape" and confirm your selection
or
>>Tape on<<.
1.>>Tape (menu)<<
2.>>Tape reverse<<
(>>(Tape) other side<<).
Each time you confirm "booktape" the deck
alternately switches between the two
booktape tracks and the standard stereo
sound track.
The selected booktape track is indicated as
"Booktape 1" or "Booktape 2."
When you change tape sides with the
"Side" command the deck reverts to
playing the standard stereo tape.
StoppingThe cassette emerges from the slot
or
deactivate audio system, refer to page 140
or
switch to radio or CD player, refer to
page 140 or page 146
or
1.>>Tape (menu)<<
2.>>Tape off<< (>>Audio off<<).
audio cassettes.
It amplifies high frequencies during
recording, and reduces their intensity
during playback. Because background
noise consists primarily of high frequencies
generated during play, this strategy results
in lower levels of background noise.
Dolby and the symbol are registered
trademarks of the Dolby Laboratories
Licensing Corporation.To turn Dolby on/off
Activate only when playing cassettes
that were recorded with Dolby B or
Dolby C, as the quality of sound reproduc-
tion will otherwise suffer from a loss of
high-frequency response.<
1.Select "Tape" and confirm your selec-
tion
2.Select "Dolby..." and continue pressing
until you obtain the best sound quality. The
system progresses through a selection
sequence of Dolby B, Dolby C and Dolby
off.
*
Page 155 of 208
Cassette
154 The selected noise-suppression mode is
indicated as "Dolby B" or "Dolby C."
Music track searchFast forward/reverseTo select the direction
Press twice briefly or once for a longer
period
or
1.>>Tape (menu)<<
2.>>(Tape) next<< or
>>(Tape) back<<.<
When it reaches the end of the tape, the
player automatically switches to the other
side.
To cancel the music track search
Music search
For the music search feature to
operate, pauses of at least 4 seconds
must be present between the individual
music selections.<
To use music search
The tape is wound forward or back to the
next music selection, and switches to the
other track when it reaches the end of the
current side.
To cancel the music search
Page 197 of 208

Everything from A to Z
196 Backup lamp, bulb
replacement 183
Bass 141
Battery 185
Ð discharged 187
Battery switch 185, 186
"BC," refer to Computer 83
Belts 50
Beverage holders 112
Blinds 109
Blower 101
BMW active seat 52
"BMW ASSIST" 19, 22
BMW comfort seat 46
"Booktape" 153
Brake, malfunctions 178
Brake lamp, adaptive 94
Brake lamps, bulb
replacement 183
"Brake pads" 179
Brake pads 119
Brakes 119
Brake system
Ð brake fluid 178
Break-in procedures 118
Brief commands for voice
command system 29
"Brief info" 23
Bulb changes 181
Buttons in steering
wheel 18
CCalifornia Proposition
65 Warning 180
Call
Ð terminating 162
Calling 162
Ð from telephone
directory 163
Ð from the redial list 164
Ð from the Top 8 list 163
Ð redialing 164
Can holders, refer to Bever-
age holders 112
Capacities 194
Car care, refer to Car care
manual
Cargo, securing 120Cargo area
Ð capacity 194
Ð opening from the
inside 39
Car Memory 59
"Car parked" 103, 106
Car radio, see Radio 140
Car wash, refer to separate
Car care manual
Cassette 153
Cassette deck 153
Ð booktape 153
Ð fast-forward mode 154
Ð music search 154
Ð reverse 154
Ð selecting tape side 153
Ð skipping pauses 154
Ð switching on 153
CBC (Cornering Brake
Control) 91
CBS (Condition Based
Service) 179
"CD" 140, 146
CD changer 148
Ð fast forward 150
Ð humidity 148
Ð operating
temperatures 148
Ð random play 150
Ð reverse 150
Ð safety 148
Ð scan function 149
Ð skipping tracks 150
Ð switching on 149
Ð temperature range 148
CD player 146
Ð activation 146
Ð fast forward 146
Ð random selection 147
Ð reverse 146
Ð sampling 147
Ð scan 147
Ð skip track 146
Cell phone, refer to sepa-
rate Mobile phone
manual 158
Center (high-mount) brake
lamp 183
Center armrest 113
Center console, refer to
Comfort features 16Central locking
system 35, 38
"CHANGE" for
navigation 130
Changing bulbs 181
Changing bulbs, refer to
Lamps and bulbs 181
Changing language 86
Changing settings in Con-
trol Display 86
Changing units of measure
in Control Display 86
Check Control 80
Ð "Check" 81
Checking engine oil
level 176, 176
Checking tire
pressures 170
Child-restraint systems 57
Ð refer also to LATCH child-
restraint system 58
Child-safety locks 59
Child seats 57
Cigarette lighter 113
Cleaning, refer to Car care
manual
"Climate" 19, 22
"Clock" 86
Clock 77
Ð setting time and date 86
Closing
Ð from the inside 37
Closing assist
Ð doors 38
Ð luggage compartment
lid 39
Cockpit 12, 16
Coin box, see
Compartments 111
Cold start 62
Combination switch 71
"Comfort"
Ð "EDC" 92
Comfort features 16
Comfort seat 46
Ð in rear 47
"Communication" 19, 22
Compact Disc, see CD 146
Compartments 111