2002 BMW 745LI SEDAN rear view mirror
[x] Cancel search: rear view mirrorPage 28 of 208
At a glanceControlsDriving tipsCommunicationsNavigationEntertainmentMobilityReference
27
Notices
Do not use the voice command
system to make emergency SOS
calls. Your voice and habitual tone could be
affected by stressful situations, as a result
of which the process of establishing the
telephone connection could be unneces-
sarily delayed. Instead, you should use the
emergency SOS button located adjacent to
the rearview mirror, refer to page 161.<
Environmental conditionsThe voice command system uses a special
microphone located on the front headliner
of your vehicle. Although the system is
designed to filter out ambient noise, you
can help ensure that your commands will
be understood by observing the following
instructions:
>Speak smoothly and clearly, at a normal
volume. Do not place any unusual stress on
individual syllables, and avoid pauses
>Do not speak while the voice command
system is talking
>Keep the doors, windows and sunroof
closed to prevent interference from
ambient noise
>Avoid other sources of noise in the
vehicle while speaking, and ask other
vehicle occupants to refrain from talking
while you are using the system.
>The hands-free microphone is aimed
toward the driver. This means that the
system may be unable to register the
voices of other vehicle occupants properly;
passengers should use the mobile phone
instead.
The notebookRecording a note
>>Record note<<<
You can store approx. ten minutes of
spoken text Ð either as a single entry or as
multiple entries of any desired length.
To terminate recording:
Apply extended pressure to
the button.
The voice command system does not
respond to the commands
>>Cancel<< and >>Exit<< while you are
recording a note. The standard utility that
scans for system commands is deactivated
in the note mode to allow you to record any
text desired, without artificial restrictions.
This feature saves you from having to
concentrate on avoiding these words while
recording.<
To listen to a notebook entryListening to recorded notebook entries:
1.>>Read out (note)<<
or >>Listen to (note)<<
The system plays back roughly the first
3 seconds of the first memorandum.
2.Respond to the query >Note and then<
by selecting the desired function
>To listen to the entire note:
>>Read (note)<<
(>>Listen to (note)<<)
>To hear the next notebook entry:
>>Next note<< (>>(Note) next<<)
>To hear the entry again:
>>(Note) back<<
or
>>Once again<< (>>Repeat<<, >>Read
out<<).<
Page 42 of 208

At a glanceControlsDriving tipsCommunicationsNavigationEntertainmentMobilityReference
41
>The hazard warning flashers for approx.
five minutes
>The high beams, which flash on and off
in the same rhythm.To arm and disarm the alarm system When you lock (or unlock) the vehicle,
either with the remote control unit or at the
door lock, the alarm system is armed (or
disarmed) at the same time.
The system indicates that is has been
correctly armed by switching on the hazard
warning flashers for a single cycle and by
emitting an acoustic signal.
You can have different acknowledg-
ment signals set to confirm arming
and disarming.<
Even with the alarm system armed, you can
open the luggage compartment lid using
the button 3on the remote control
unit, refer to page 36. The alarm system will
start to monitor the luggage compartment
lid again as soon as it is reclosed. Indicator lamp displays>The indicator lamp below the interior
rearview mirror flashes continuously: the
system is armed
>The indicator lamp flashes when the
system is armed: door(s), the hood or
luggage compartment lid are not
completely closed. Even if you do not close
the alerted area, the system begins to
monitor the remaining areas, and the indi-
cator lamp flashes continuously after
10 seconds. However, the interior motion
sensor is not activated >If the indicator lamp goes out when the
system is disarmed: no manipulation or
attempted intrusions have been detected in
the period since the system was armed
>If the indicator lamp flashes for roughly
5 minutes when you disarm the system, or
until the remote control unit is inserted in
the ignition lock: an attempted entry has
been detected in the period since the
system was armed.
Following triggering of an alarm, the indi-
cator lamp will flash continuously.
Avoiding unintentional alarms The tilt alarm sensor and interior motion
sensor may be switched off at the same
time. You can do this to prevent a false
alarm from being triggered (in garages with
elevator ramps, for instance), or when the
vehicle is transported by trailer or train:
Lock the vehicle, i. e., arm the alarm system
twice in a row by pressing button 2 on the
remote control unit twice in succession,
refer to page 36, or lock the vehicle twice
using the key, refer to page 37.
The indicator lamp flashes briefly and then
flashes continuously. The tilt alarm sensor
and the interior motion sensor are switched
off long as the system is armed.
If you desire, the
>tilt alarm sensor, and
>interior motion sensor
can be switched off permanently. Please
contact your BMW center for assistance.< Interior motion sensor In order for the interior motion sensor to
function properly, the windows and sliding/
tilt sunroof must be completely closed.
Be sure to deactivate the interior motion
sensor, see section on Avoiding uninten-
tional alarms, when you wish to leave the
windows or sliding/tilt sunroof open.
Page 53 of 208
Adjustments
52
Active seat* "Active" adjustment of the seat cushion's
contours reduces muscular tension and
fatigue to help prevent lower back pain.
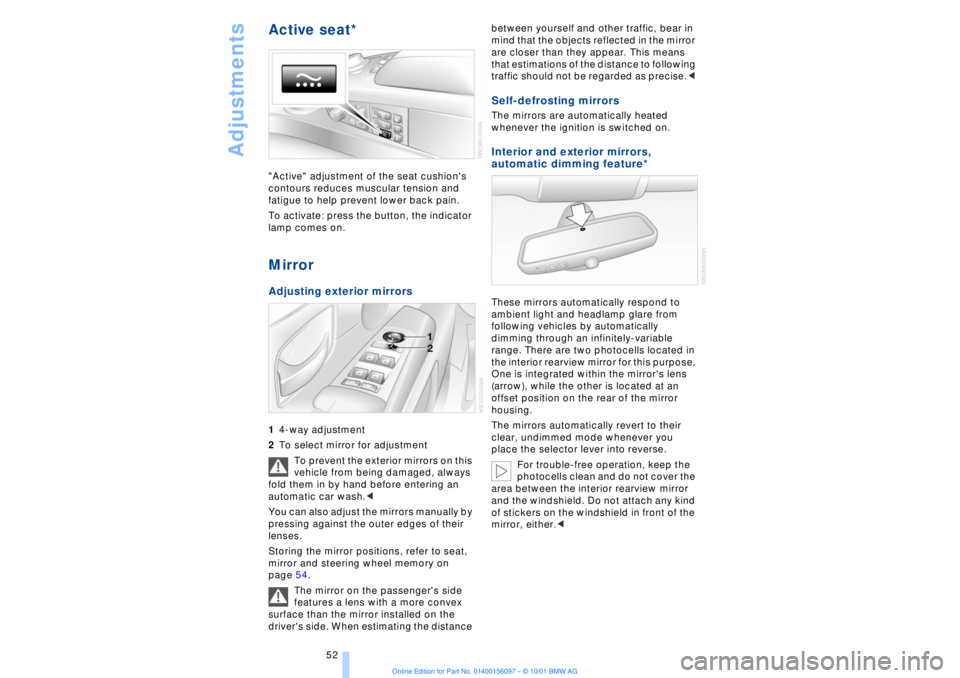
To activate: press the button, the indicator
lamp comes on. MirrorAdjusting exterior mirrors 14-way adjustment
2To select mirror for adjustment
To prevent the exterior mirrors on this
vehicle from being damaged, always
fold them in by hand before entering an
automatic car wash.<
You can also adjust the mirrors manually by
pressing against the outer edges of their
lenses.
Storing the mirror positions, refer to seat,
mirror and steering wheel memory on
page 54.
The mirror on the passenger's side
features a lens with a more convex
surface than the mirror installed on the
driver's side. When estimating the distance between yourself and other traffic, bear in
mind that the objects reflected in the mirror
are closer than they appear. This means
that estimations of the distance to following
traffic should not be regarded as precise.<
Self-defrosting mirrors The mirrors are automatically heated
whenever the ignition is switched on. Interior and exterior mirrors,
automatic dimming feature*
These mirrors automatically respond to
ambient light and headlamp glare from
following vehicles by automatically
dimming through an infinitely-variable
range. There are two photocells located in
the interior rearview mirror for this purpose.
One is integrated within the mirror's lens
(arrow), while the other is located at an
offset position on the rear of the mirror
housing.
The mirrors automatically revert to their
clear, undimmed mode whenever you
place the selector lever into reverse.
For trouble-free operation, keep the
photocells clean and do not cover the
area between the interior rearview mirror
and the windshield. Do not attach any kind
of stickers on the windshield in front of the
mirror, either.<
Page 73 of 208
Driving
72
1 Standard wiper speed The system automatically reverts to opera-
tion in the intermittent mode whenever the
vehicle stops. Fast wiper speed You can also select this position by
pressing the lever upward past the detent.
The system automatically reverts to opera-
tion in the standard wipe mode whenever
the vehicle stops. 4 Clean windshield The system sprays washer fluid against the
windshield and activates the wipers for a
brief period. Cleaning headlamps >Each fifth time you press into position 4
to wash the windshield while the head-
lamps are on.
Do not use the washers if there is any
danger that the fluid will freeze on the
windshield. If you do so, your vision could
be obscured. To avoid freezing, use a
washer fluid antifreeze, refer to page 73.
Avoid activating the washer when the
reservoir is empty, as damage to the pump
could result.< Windshield washer nozzles The windshield washer nozzles and the
windshield itself in the area around the
wipers are heated automatically when the
ignition is switched on. Rain sensor
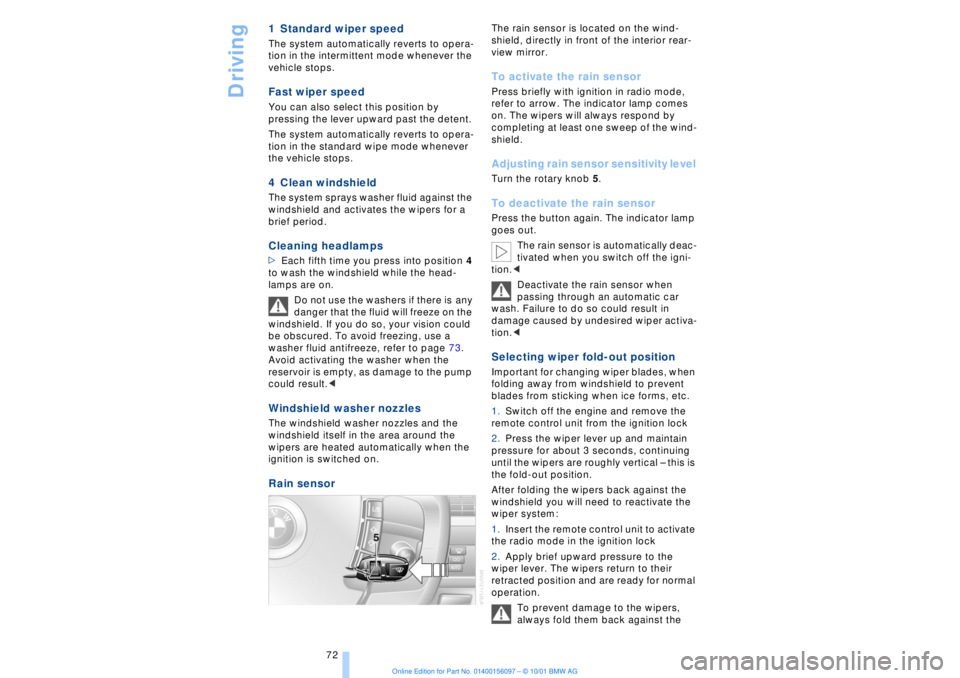
The rain sensor is located on the wind-
shield, directly in front of the interior rear-
view mirror. To activate the rain sensor Press briefly with ignition in radio mode,
refer to arrow. The indicator lamp comes
on. The wipers will always respond by
completing at least one sweep of the wind-
shield. Adjusting rain sensor sensitivity level Turn the rotary knob 5. To deactivate the rain sensor Press the button again. The indicator lamp
goes out.
The rain sensor is automatically deac-
tivated when you switch off the igni-
tion.<
Deactivate the rain sensor when
passing through an automatic car
wash. Failure to do so could result in
damage caused by undesired wiper activa-
tion.< Selecting wiper fold-out position Important for changing wiper blades, when
folding away from windshield to prevent
blades from sticking when ice forms, etc.
1.Switch off the engine and remove the
remote control unit from the ignition lock
2.Press the wiper lever up and maintain
pressure for about 3 seconds, continuing
until the wipers are roughly vertical Ð this is
the fold-out position.
After folding the wipers back against the
windshield you will need to reactivate the
wiper system:
1.Insert the remote control unit to activate
the radio mode in the ignition lock
2.Apply brief upward pressure to the
wiper lever. The wipers return to their
retracted position and are ready for normal
operation.
To prevent damage to the wipers,
always fold them back against the
Page 200 of 208
199
At a glanceControlsDriving tipsCommunicationsNavigationEntertainmentMobilityReference
HHandbrake, refer to Parking
brake 62
Hand lamp 111
Hands-free
microphone 161
Hands-free system 161
Hazard warning flashers 16
Headlamp control 96
Headlamp flasher 71
Headlamps, low beam 96
Headlamp washers 72, 73
Head restraints 48
Ð front head restraints,
active 48
Heated steering wheel 53
Heating and ventilation 99
Heating while stopped 101
Height 193
Height adjustment
Ð seats 46
Ð steering column 53
"Help" 19, 22
Help texts in Control
Display 23
High beams 97
Ð bulb replacement 182
High-mount brake
lamp 183
Home address 135
Hood release 175
Horn 13
Hydraulic Brake Assistant,
refer to DBC 91IIce warning 77
Ignition key 34
Ignition lock 61
"Indep. ventil." 106
Indicator lamps 15
"Individual" 104
Individual button assign-
ments on steering
wheel 53
Inflation pressure 170
Inflation pressure control,
tires 92
Info Display 14"Information" for
navigation 129
Instrument cluster, refer to
Info Display 14
Instrument lighting 97
Instrument panel 12, 16
Instrument panel switch 71
Interior lamps 97
Ð remote control 36
Interior motion sensor 41
Interior protection
Ð deactivating 36, 41
Interior rearview mirror 52
Ð automatic dimming 52
Intermittent wipe 71
JJack 184
Jump-starting 187KKey Memory 59
Key Pad control
buttons 160
Key Pad digit buttons 160
Key Pad with mobile
phone 160
Keys 34
Ð adapter for spare key 34
Kickdown 68L"Last" 164
"Last destin." 130
LATCH, refer to LATCH
child-restraint system 58
"Left"
Ð for heated seats 51
Ð with automatic climate
control 103
Length 193
Level control system 94
License plate lamp, bulb
replacement 183
Lighter 113
Lights on warning 96
Light switch 96
"Limit" 84Limit selection,
adjustment 84
Litter container 111
L mode on automatic
transmission 66
Loading 120
Loading the vehicle 120
"LOCATION" 135
"Location" 129, 135
Lock Code 162
Locking
Ð from the outside 35
Louvers 99
Low beams
Ð automatic 96
Lower back support, refer
to lumbar support 46
Lug bolts 185
Luggage compartment
capacity 194
Luggage compartment lid
Ð emergency release 40
Ð locking separately 39
Ð opening from the
inside 39
Ð opening from the
outside 38
Ð operating via remote
control 36
Luggage compartment lid
operation,
automatic 36, 39
Luggage compartment
net 40
Luggage rack, refer to
Roof-mounted luggage
rack 120
Lug wrench 184
Lumbar support 46
MM+S tires 173
Maintenance 179
Make-up mirror 53
Malfunction displays 80
"M AM" 144, 145
Manually controlled recir-
culated air 101
Page 202 of 208
201
At a glanceControlsDriving tipsCommunicationsNavigationEntertainmentMobilityReference
Parking brake 62
Ð Automatic Hold 63
Ð manual operation 65
Parking brake lockout, refer
to Transmission
lockout 67, 70
Parking lamps 96
Ð bulb replacement 182
Parking with
Automatic Hold 64
Passenger-side mirror tilt
function 54
PDC (Park Distance
Control) 88
"PDC pic." 88
Phone directory 162
Ð deleting all entries 163
Ð dialing numbers using
voice command
system 163
Ð entering numbers in voice
command directory 163
Ð entry deletion 163
Ð viewing entries 163
Phone number, see Mobile
phone 162
Please fasten safety belts
warning lamp 50
Pollen 104
Power electric seat 47
Power rating 192
Power socket 113
Pressure, tires 170
Pressure control, tires 92
Programmable cruise
control 73
Programming settings,
refer to Car Memory, Key
Memory 59
Publishers 2
RRadio
Ð autostore 144
Ð memory locations 144
Ð search 144
Ð station search 144
Ð station selection 145
Ð switching on and off 140
Ð waveband selection 143
Ð Weather Band 145
Radio "Autostore"
feature 144
Radio mode 61
Radio "SCAN"
feature 143, 144
Rain sensor 72
"RDC" 93
RDC (Tire Pressure
Monitor) 92
Reading lamps 98
Rear air conditioner 105
Ð activation and deactiva-
tion in Control
Display 105
Ð air supply 105
Ð cooling adjustment 105
Ð deactivating 105
Rear armrest, see Center
armrest 113
Rear cooler 110
Rear seat heaters 51
Rear seats
Ð adjusting passenger seat
from the rear 47
Ð comfort seat
adjustments 47
Ð head restraint
adjustment 48
Rearview mirror 52
Rear window blind, see Sun
blind 109
Rear window defroster 16
Rear window safety
switch 13
"Recirc. air" 53
Reclining seat 45
Redialing with mobile
phone 164
Redial list 164Refrigerator box, refer to
Rear cooler 110
Refueling 168
Releasing the hood 175
Remaining distance 83
Remote control 34, 35
Remote-control unit 34
Removing condensation
from windows 101
Replacement fuses 186
Replacement keys 35
Replacing tires 172
Reserve warning 82
Reservoir, washer
system 73
Reset 141
Residual heat 101
"Right"
Ð for heated seats 51
Ð with automatic climate
control 103
"RND" with CD
changer 150
"RND" with CD player 147
"RND" with MD player 152
Roadside assistance calls
Ð manual activation 161
Roof-mounted luggage
rack 120
Route
Ð display 132
Ð list 132
Ð map cancelation 132
Ð map display 132
Ð selection 130
"Route guide" 131, 134
"Route select" 131
SSafety belts 50
Safety belt tensioners, see
Safety belts 50
Safety lock buttons 38
Safety precautions to
observe when using your
phone 158
Safety switch for rear
windows 42