2002 BMW 745LI SEDAN hood open
[x] Cancel search: hood openPage 14 of 208

At a glanceControlsDriving tipsCommunicationsNavigationEntertainmentMobilityReference
13
1
Rear window sun blind109
2
Rear window safety switch42
3
Electric power windows42
4
Exterior mirrors52
5
Parking brake62
6
Parking lamps and low beams96
7
Instrument lighting97
8
Turn signal indicators71
High beams, headlamp flasher97
Computer81,
Check Control80
Computer81
Standing lamps97
9
Steering wheel18
10
Info Display14
11
Automatic transmission lever66
12
Ignition lock61
13
Switching ignition on and off,
starting the engine62
14
Windshield wipers71
Rain sensor71
15
Park Distance Control (PDC)88
16
Horn: the entire surface
17
Steering wheel heating53
Steering wheel adjustment53
18
Unlocking the luggage
compartment39
19
Programmable cruise control73
20
Front fog lamps97
Front fog lamps
21
Opening the hood175
Page 41 of 208
Opening and closing
40 >press the button on the outside of the
luggage compartment lid, refer to page 38
>press the button 3on the remote
control unit, refer to page 36.
During opening the luggage compart-
ment lid pivots upward and to the
rear. Ensure that adequate clearance is
available before opening.<
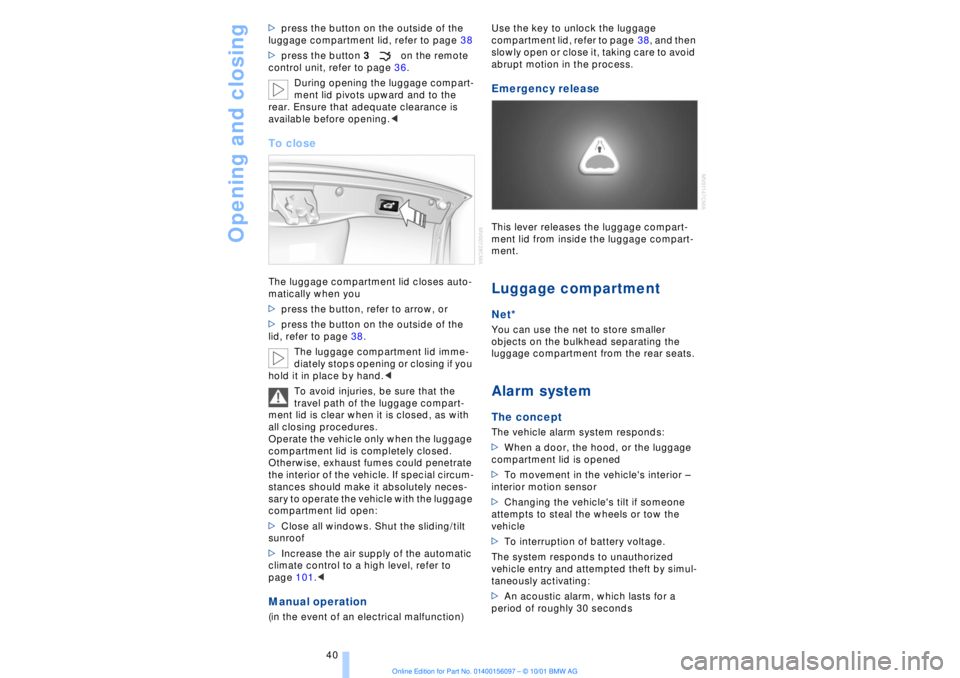
To closeThe luggage compartment lid closes auto-
matically when you
>press the button, refer to arrow, or
>press the button on the outside of the
lid, refer to page 38.
The luggage compartment lid imme-
diately stops opening or closing if you
hold it in place by hand.<
To avoid injuries, be sure that the
travel path of the luggage compart-
ment lid is clear when it is closed, as with
all closing procedures.
Operate the vehicle only when the luggage
compartment lid is completely closed.
Otherwise, exhaust fumes could penetrate
the interior of the vehicle. If special circum-
stances should make it absolutely neces-
sary to operate the vehicle with the luggage
compartment lid open:
>Close all windows. Shut the sliding/tilt
sunroof
>Increase the air supply of the automatic
climate control to a high level, refer to
page 101.< Manual operation(in the event of an electrical malfunction) Use the key to unlock the luggage
compartment lid, refer to page 38, and then
slowly open or close it, taking care to avoid
abrupt motion in the process.
Emergency release This lever releases the luggage compart-
ment lid from inside the luggage compart-
ment. Luggage compartmentNet*You can use the net to store smaller
objects on the bulkhead separating the
luggage compartment from the rear seats. Alarm system The conceptThe vehicle alarm system responds:
>When a door, the hood, or the luggage
compartment lid is opened
>To movement in the vehicle's interior Ð
interior motion sensor
>Changing the vehicle's tilt if someone
attempts to steal the wheels or tow the
vehicle
>To interruption of battery voltage.
The system responds to unauthorized
vehicle entry and attempted theft by simul-
taneously activating:
>An acoustic alarm, which lasts for a
period of roughly 30 seconds
Page 42 of 208

At a glanceControlsDriving tipsCommunicationsNavigationEntertainmentMobilityReference
41
>The hazard warning flashers for approx.
five minutes
>The high beams, which flash on and off
in the same rhythm.To arm and disarm the alarm system When you lock (or unlock) the vehicle,
either with the remote control unit or at the
door lock, the alarm system is armed (or
disarmed) at the same time.
The system indicates that is has been
correctly armed by switching on the hazard
warning flashers for a single cycle and by
emitting an acoustic signal.
You can have different acknowledg-
ment signals set to confirm arming
and disarming.<
Even with the alarm system armed, you can
open the luggage compartment lid using
the button 3on the remote control
unit, refer to page 36. The alarm system will
start to monitor the luggage compartment
lid again as soon as it is reclosed. Indicator lamp displays>The indicator lamp below the interior
rearview mirror flashes continuously: the
system is armed
>The indicator lamp flashes when the
system is armed: door(s), the hood or
luggage compartment lid are not
completely closed. Even if you do not close
the alerted area, the system begins to
monitor the remaining areas, and the indi-
cator lamp flashes continuously after
10 seconds. However, the interior motion
sensor is not activated >If the indicator lamp goes out when the
system is disarmed: no manipulation or
attempted intrusions have been detected in
the period since the system was armed
>If the indicator lamp flashes for roughly
5 minutes when you disarm the system, or
until the remote control unit is inserted in
the ignition lock: an attempted entry has
been detected in the period since the
system was armed.
Following triggering of an alarm, the indi-
cator lamp will flash continuously.
Avoiding unintentional alarms The tilt alarm sensor and interior motion
sensor may be switched off at the same
time. You can do this to prevent a false
alarm from being triggered (in garages with
elevator ramps, for instance), or when the
vehicle is transported by trailer or train:
Lock the vehicle, i. e., arm the alarm system
twice in a row by pressing button 2 on the
remote control unit twice in succession,
refer to page 36, or lock the vehicle twice
using the key, refer to page 37.
The indicator lamp flashes briefly and then
flashes continuously. The tilt alarm sensor
and the interior motion sensor are switched
off long as the system is armed.
If you desire, the
>tilt alarm sensor, and
>interior motion sensor
can be switched off permanently. Please
contact your BMW center for assistance.< Interior motion sensor In order for the interior motion sensor to
function properly, the windows and sliding/
tilt sunroof must be completely closed.
Be sure to deactivate the interior motion
sensor, see section on Avoiding uninten-
tional alarms, when you wish to leave the
windows or sliding/tilt sunroof open.
Page 66 of 208
At a glanceControlsDriving tipsCommunicationsNavigationEntertainmentMobilityReference
65
>the hood is opened while the engine is
running
>the luggage compartment is opened
with the transmission in reverse while the
engine is running, and
>when the parking brake is used to bring
the vehicle to a stop.
The indicator lamp shifts from green
to red, and the "Auto P" message disap-
pears from the Info Display.
Before starting off again, briefly press the
button to disengage the parking brake
manually, refer to page 63, or reactivate
Automatic Hold, refer to page 64.
Before leaving the vehicle with the
engine running, always move the
automatic transmission's selector lever to
position P and ensure that the parking
brake is engaged. The vehicle could start to
roll if you fail to observe these precautions.
Never leave an unattended vehicle with the
engine running, as such a vehicle repre-
sents a potential safety hazard.<
Automatic Hold is automatically
deactivated whenever the system
detects any tendency for the wheels to spin
in response to slippery road surfaces. Note
the status displays in the Check Control
panel. You can find more detailed informa-
tion on Check Control on page 80.< Malfunctions In the event of malfunction, the indicator
lamp in the Info Display will light up
yellow, and a status report will appear in
the Check Control panel. Please remember
to observe the supplementary information
provided in the Control Display. To disengage the parking brake
manually You can respond to any interruptions in the
supply of electrical power, for instance, if
the battery is discharged or disconnected,
by releasing the parking brake manually.
Before proceeding to release the
parking brake manually, and each
time you park the vehicle without engaging the parking brake, always ensure that the
automatic transmission's selector lever is
in position P, refer to page 66. Note the
range indicated in the Info Display.
If it is not possible to avoid parking on an
extremely steep slope, use some supple-
mentary means, such as a wheel chock, to
make certain that the vehicle will not roll,
refer to page 184. Otherwise the danger
exists that the vehicle could roll when
parked on a very steep hill.<
Should it be necessary to release the auto-
matic transmission's lockout manually, for
instance, if the battery is discharged,
always adhere to the following sequence:
1.If necessary, start by manually releasing
the parking brake
2.Then release the automatic transmis-
sion's lockout manually, refer to page 70.
Towing and jump-starting, refer to
pages 187 and 188.
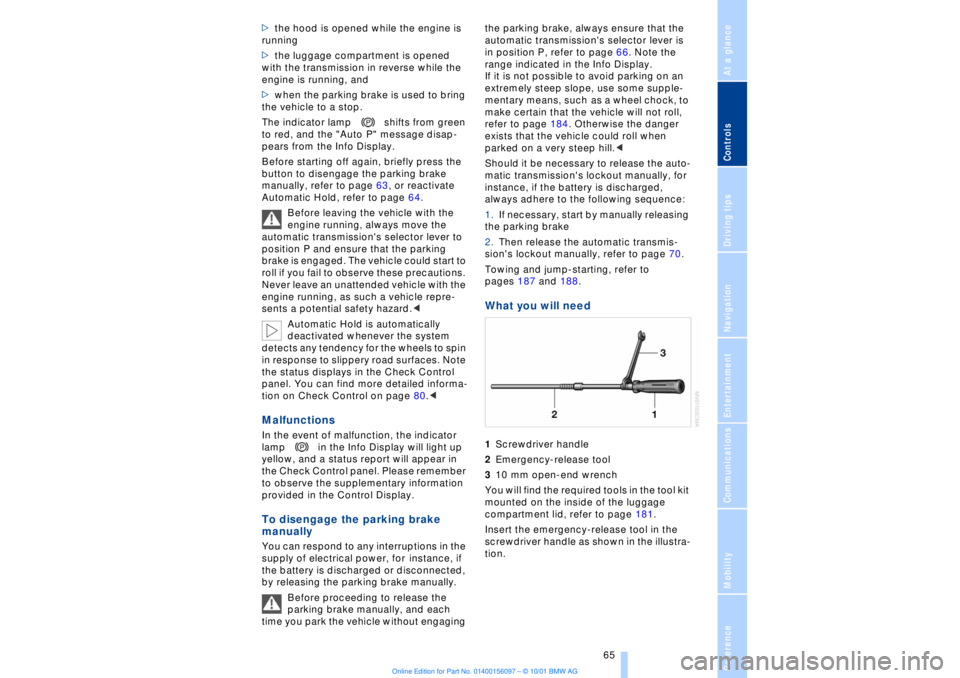
What you will need 1Screwdriver handle
2Emergency-release tool
310 mm open-end wrench
You will find the required tools in the tool kit
mounted on the inside of the luggage
compartment lid, refer to page 181.
Insert the emergency-release tool in the
screwdriver handle as shown in the illustra-
tion.
Page 159 of 208
Using your mobile phone
158
Using your mobile phone Safety noticeFor your own safety Your in-car phone makes life more conve-
nient in many ways, and can even save
lives in an emergency. While you should
consult your mobile phone's separate
manual for a detailed description of safety
precautions and information, we request
that you direct your particular attention to
the following:Adjustments
To avoid posing a danger to yourself
and other road users, never adjust the
system settings unless your vehicle is
completely stationary.<
Using the phone in your vehicle
Using a hand-held mobile phone to
make and receive calls while driving is
now illegal in virtually every country in the
world. Always use your hands-free system,
or stop your vehicle in an area where you
will not pose a safety hazard to other road
users.<
Vehicles and mobile phones
Do not use your phone from within a
garage, or near an open hood. The air
in these areas could contain fuel vapors,
and the mobile phone might generate
sparks that could result in burns.
This same precaution applies to open
luggage compartment lids on vehicles
equipped for operation using natural gas or
hydrogen, and to all vehicles with luggage
compartment-mounted batteries.<
Antenna
When using the phone, ensure that all
persons in the area are at least 20 in
(50 cm) from the antenna. Never use your
BMW mobile phone if the antenna is
damaged. Contact between your skin and a damaged antenna can result in minor
burns.
If the antenna is damaged, have it replaced
immediately.<
Special environmental conditions
Always switch off your BMW mobile
phone in areas where blasting work is
being conducted with explosives. The
phone signals could potentially act as a
high-frequency transmitter and set off
explosions.
Always switch off your BMW mobile phone
in areas where an increased explosion
danger is present. This category includes
filling stations along with fuel and chemical
storage depots, etc., and all areas in which
the air can contain fuel, chemicals or metal
particles . Under these conditions, your
BMW mobile phone could conceivably
generate sparks that could lead to a fire or
explosion. Always observe all legal regula-
tions governing the use of cell phones in
the vicinity of filling stations, chemical
factories and other areas where an explo-
sion potential exists.
Never use the BMW mobile phone in
aircraft; do not use this mobile phone in
hospitals, care centers or at other locations
where medical equipment may be in oper-
ation, such as accident sites, etc.
Your service provider can furnish you with
more detailed information on legal regula-
tions governing the use of your phone.<
Medical equipment
Mobile phones can generate interfer-
ence capable of preventing hearing
aids and cardiac pacemakers from oper-
ating correctly. If you or any occupant of
the vehicle will be using such equipment,
consult a physician or the manufacturer of
the equipment to determine whether it is
adequately shielded against high-
frequency energy.<
*
Page 176 of 208
At a glanceControlsDriving tipsCommunicationsNavigationEntertainmentMobilityReference
175
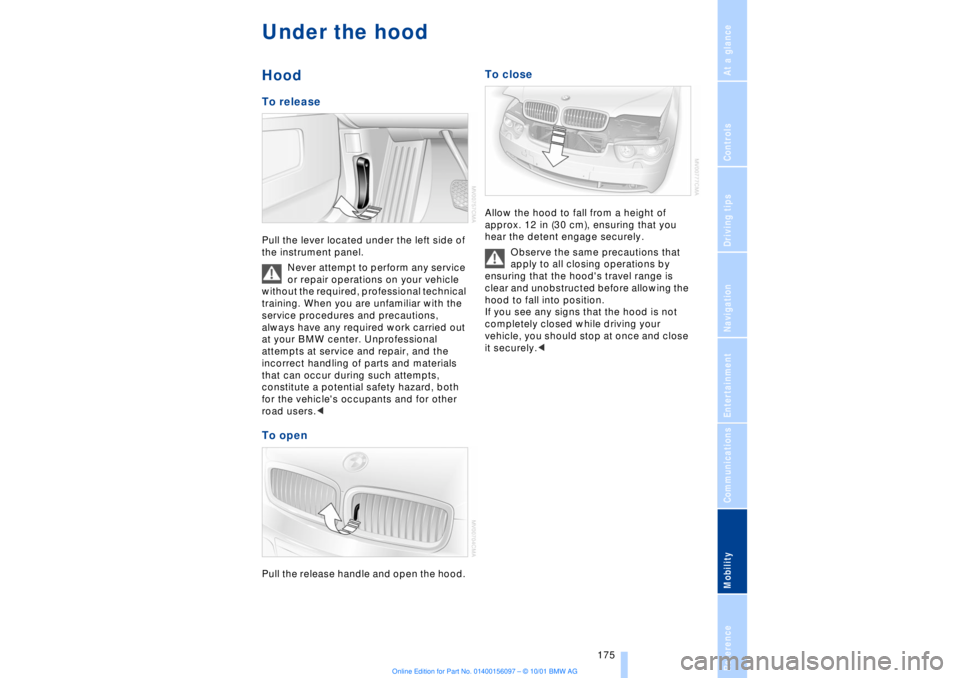
Under the hood Hood To release Pull the lever located under the left side of
the instrument panel.
Never attempt to perform any service
or repair operations on your vehicle
without the required, professional technical
training. When you are unfamiliar with the
service procedures and precautions,
always have any required work carried out
at your BMW center. Unprofessional
attempts at service and repair, and the
incorrect handling of parts and materials
that can occur during such attempts,
constitute a potential safety hazard, both
for the vehicle's occupants and for other
road users.< To open Pull the release handle and open the hood.
To close Allow the hood to fall from a height of
approx. 12 in (30 cm), ensuring that you
hear the detent engage securely.
Observe the same precautions that
apply to all closing operations by
ensuring that the hood's travel range is
clear and unobstructed before allowing the
hood to fall into position.
If you see any signs that the hood is not
completely closed while driving your
vehicle, you should stop at once and close
it securely.<
Page 179 of 208
Under the hood
178
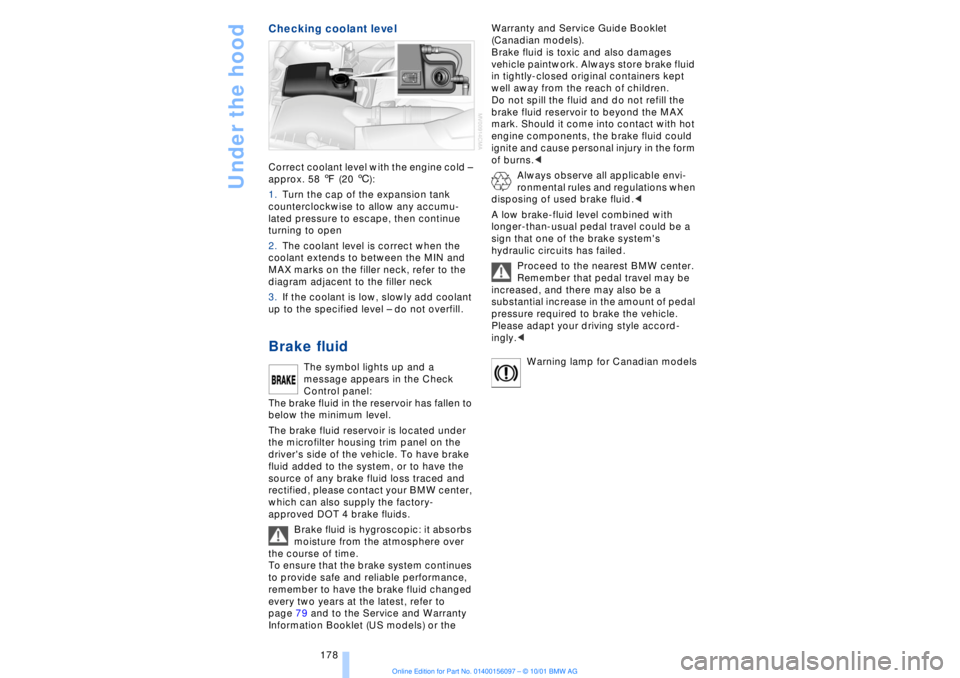
Checking coolant level Correct coolant level with the engine cold Ð
approx. 58 7 (20 6):
1.Turn the cap of the expansion tank
counterclockwise to allow any accumu-
lated pressure to escape, then continue
turning to open
2.The coolant level is correct when the
coolant extends to between the MIN and
MAX marks on the filler neck, refer to the
diagram adjacent to the filler neck
3.If the coolant is low, slowly add coolant
up to the specified level Ð do not overfill. Brake fluid
The symbol lights up and a
message appears in the Check
Control panel:
The brake fluid in the reservoir has fallen to
below the minimum level.
The brake fluid reservoir is located under
the microfilter housing trim panel on the
driver's side of the vehicle. To have brake
fluid added to the system, or to have the
source of any brake fluid loss traced and
rectified, please contact your BMW center,
which can also supply the factory-
approved DOT 4 brake fluids.
Brake fluid is hygroscopic: it absorbs
moisture from the atmosphere over
the course of time.
To ensure that the brake system continues
to provide safe and reliable performance,
remember to have the brake fluid changed
every two years at the latest, refer to
page 79 and to the Service and Warranty
Information Booklet (US models) or the Warranty and Service Guide Booklet
(Canadian models).
Brake fluid is toxic and also damages
vehicle paintwork. Always store brake fluid
in tightly-closed original containers kept
well away from the reach of children.
Do not spill the fluid and do not refill the
brake fluid reservoir to beyond the MAX
mark. Should it come into contact with hot
engine components, the brake fluid could
ignite and cause personal injury in the form
of burns.<
Always observe all applicable envi-
ronmental rules and regulations when
disposing of used brake fluid.<
A low brake-fluid level combined with
longer-than-usual pedal travel could be a
sign that one of the brake system's
hydraulic circuits has failed.
Proceed to the nearest BMW center.
Remember that pedal travel may be
increased, and there may also be a
substantial increase in the amount of pedal
pressure required to brake the vehicle.
Please adapt your driving style accord-
ingly.<
Warning lamp for Canadian models
Page 200 of 208
199
At a glanceControlsDriving tipsCommunicationsNavigationEntertainmentMobilityReference
HHandbrake, refer to Parking
brake 62
Hand lamp 111
Hands-free
microphone 161
Hands-free system 161
Hazard warning flashers 16
Headlamp control 96
Headlamp flasher 71
Headlamps, low beam 96
Headlamp washers 72, 73
Head restraints 48
Ð front head restraints,
active 48
Heated steering wheel 53
Heating and ventilation 99
Heating while stopped 101
Height 193
Height adjustment
Ð seats 46
Ð steering column 53
"Help" 19, 22
Help texts in Control
Display 23
High beams 97
Ð bulb replacement 182
High-mount brake
lamp 183
Home address 135
Hood release 175
Horn 13
Hydraulic Brake Assistant,
refer to DBC 91IIce warning 77
Ignition key 34
Ignition lock 61
"Indep. ventil." 106
Indicator lamps 15
"Individual" 104
Individual button assign-
ments on steering
wheel 53
Inflation pressure 170
Inflation pressure control,
tires 92
Info Display 14"Information" for
navigation 129
Instrument cluster, refer to
Info Display 14
Instrument lighting 97
Instrument panel 12, 16
Instrument panel switch 71
Interior lamps 97
Ð remote control 36
Interior motion sensor 41
Interior protection
Ð deactivating 36, 41
Interior rearview mirror 52
Ð automatic dimming 52
Intermittent wipe 71
JJack 184
Jump-starting 187KKey Memory 59
Key Pad control
buttons 160
Key Pad digit buttons 160
Key Pad with mobile
phone 160
Keys 34
Ð adapter for spare key 34
Kickdown 68L"Last" 164
"Last destin." 130
LATCH, refer to LATCH
child-restraint system 58
"Left"
Ð for heated seats 51
Ð with automatic climate
control 103
Length 193
Level control system 94
License plate lamp, bulb
replacement 183
Lighter 113
Lights on warning 96
Light switch 96
"Limit" 84Limit selection,
adjustment 84
Litter container 111
L mode on automatic
transmission 66
Loading 120
Loading the vehicle 120
"LOCATION" 135
"Location" 129, 135
Lock Code 162
Locking
Ð from the outside 35
Louvers 99
Low beams
Ð automatic 96
Lower back support, refer
to lumbar support 46
Lug bolts 185
Luggage compartment
capacity 194
Luggage compartment lid
Ð emergency release 40
Ð locking separately 39
Ð opening from the
inside 39
Ð opening from the
outside 38
Ð operating via remote
control 36
Luggage compartment lid
operation,
automatic 36, 39
Luggage compartment
net 40
Luggage rack, refer to
Roof-mounted luggage
rack 120
Lug wrench 184
Lumbar support 46
MM+S tires 173
Maintenance 179
Make-up mirror 53
Malfunction displays 80
"M AM" 144, 145
Manually controlled recir-
culated air 101