2002 BMW 745LI SEDAN tire pressure
[x] Cancel search: tire pressurePage 4 of 208
At a glanceControlsDriving tipsCommunicationsNavigationEntertainmentMobilityReference
73Programmable cruise control
Everything under control
77Odometer, outside temperature
display, clock
77Tachometer
78Service Interval Display
80Check Control
81Computer
86Changing settings
Technology for comfort,
convenience and safety
88PDC Park Distance Control*
89Driving stability control/
DSC Dynamic Stability Control
91Driving stability control/ABS Antilock
Brake System
91Dynamic Drive
92EDC Electronic Damping Control*
92RDC Tire Pressure Monitor*
94Self-leveling suspension*
94Adaptive brake lamp
Lamps
96Parking lamps/low beams
97Instrument lighting
97High beams/standing lamps
97Front fog lamps
97Interior lamps
A congenial climate
99Automatic climate control
105Rear air conditioner*
106Parked-car ventilation system
Practical interior accessories
108Universal Garage Door Opener*
109Sun blinds*
110Rear cooler*
110Glove compartment
111Storage compartments
112Beverage holders
112Ashtray, front
113Cigarette lighter, front
113Power socket
113Ashtray, rear
113Cigarette lighter, rear113Center armrest
114Ski bag*
Things to remember when driving
118Break-in procedures
118General driving notes
119Brake system
120Cargo loading
120Roof-mounted luggage rack*
Navigation
124Safety
124GPS
124Map CD
125Starting the navigation system
125Display in assistance window*
126Selection options
126Destination entry
126Manual entry of destination address
128Select the town or city and the street
from the directory
128Map-guided destination selection
129Selecting destination in Information
129Selecting interesting destinations
130Recent destinations
130Destination list
130Route selection
131Starting the destination guidance
system
132Displaying route
133Select new route
133Voice messages
134Terminate/interrupt active guidance
134Creating a directory
135Location
136Wordmatch principle
136What to do if É
Sound system
140Controls
140Care instructions
140To switch on/off
140Using with ignition off
141Volume adjustment
141Tone control
Page 5 of 208
Inhaltsverzeichnis
Radio
143Select the frequency band
143Station selection
144Storing and retrieving a station
145Weather Band
CD Compact Disc
146Using the buttons to search for music
tracks
147Searching for music tracks in the
Control Display
CD changer
149Starting and stopping the CD changer
149Status displays
149Searching for music tracks in the
Control Display
150Using the buttons to search for music
tracks
MiniDisc MD
151Using the buttons to search for music
tracks
152Searching for music tracks in the
Control Display
Cassette
153Noise suppression
154Music track search
Using your mobile phone
158Safety notice
159Care instructions
159Operation
161Hands-free system
161To make SOS call
161Initial operation
162Getting started
162Telephone directory
163To select a number from the Top 8 list
164Redialing, including numbers not
initially reached
164Missed calls
Refueling
168Fuel filler door
169Fuel specifications
Wheels and tires
170Tire inflation pressure
171Tire condition
172Tire replacement
173Wheel and tire combinations
173Special characteristics of winter tires
173Snow chains*
Under the hood
175Hood
176Engine compartment
176Engine oil
177Coolant
178Brake fluid
Maintenance
179The BMW Maintenance System
179Care
Rules and regulations
180California Proposition 65 Warning
180OBD connector
Replacing components
181Onboard tool kit
181Windshield wiper blades
181Lamps and bulbs
183Changing a tire
185Battery
186Fuses
Help Ð Giving and receiving
187Warning triangle*
187First-aid kit*
187Jump-starting
188Towing
Technical data
192Engine specifications
193Dimensions
194Weights
194Capacities
Everything from A to Z
195Contents
Page 28 of 208
At a glanceControlsDriving tipsCommunicationsNavigationEntertainmentMobilityReference
27
Notices
Do not use the voice command
system to make emergency SOS
calls. Your voice and habitual tone could be
affected by stressful situations, as a result
of which the process of establishing the
telephone connection could be unneces-
sarily delayed. Instead, you should use the
emergency SOS button located adjacent to
the rearview mirror, refer to page 161.<
Environmental conditionsThe voice command system uses a special
microphone located on the front headliner
of your vehicle. Although the system is
designed to filter out ambient noise, you
can help ensure that your commands will
be understood by observing the following
instructions:
>Speak smoothly and clearly, at a normal
volume. Do not place any unusual stress on
individual syllables, and avoid pauses
>Do not speak while the voice command
system is talking
>Keep the doors, windows and sunroof
closed to prevent interference from
ambient noise
>Avoid other sources of noise in the
vehicle while speaking, and ask other
vehicle occupants to refrain from talking
while you are using the system.
>The hands-free microphone is aimed
toward the driver. This means that the
system may be unable to register the
voices of other vehicle occupants properly;
passengers should use the mobile phone
instead.
The notebookRecording a note
>>Record note<<<
You can store approx. ten minutes of
spoken text Ð either as a single entry or as
multiple entries of any desired length.
To terminate recording:
Apply extended pressure to
the button.
The voice command system does not
respond to the commands
>>Cancel<< and >>Exit<< while you are
recording a note. The standard utility that
scans for system commands is deactivated
in the note mode to allow you to record any
text desired, without artificial restrictions.
This feature saves you from having to
concentrate on avoiding these words while
recording.<
To listen to a notebook entryListening to recorded notebook entries:
1.>>Read out (note)<<
or >>Listen to (note)<<
The system plays back roughly the first
3 seconds of the first memorandum.
2.Respond to the query >Note and then<
by selecting the desired function
>To listen to the entire note:
>>Read (note)<<
(>>Listen to (note)<<)
>To hear the next notebook entry:
>>Next note<< (>>(Note) next<<)
>To hear the entry again:
>>(Note) back<<
or
>>Once again<< (>>Repeat<<, >>Read
out<<).<
Page 51 of 208
Adjustments
50
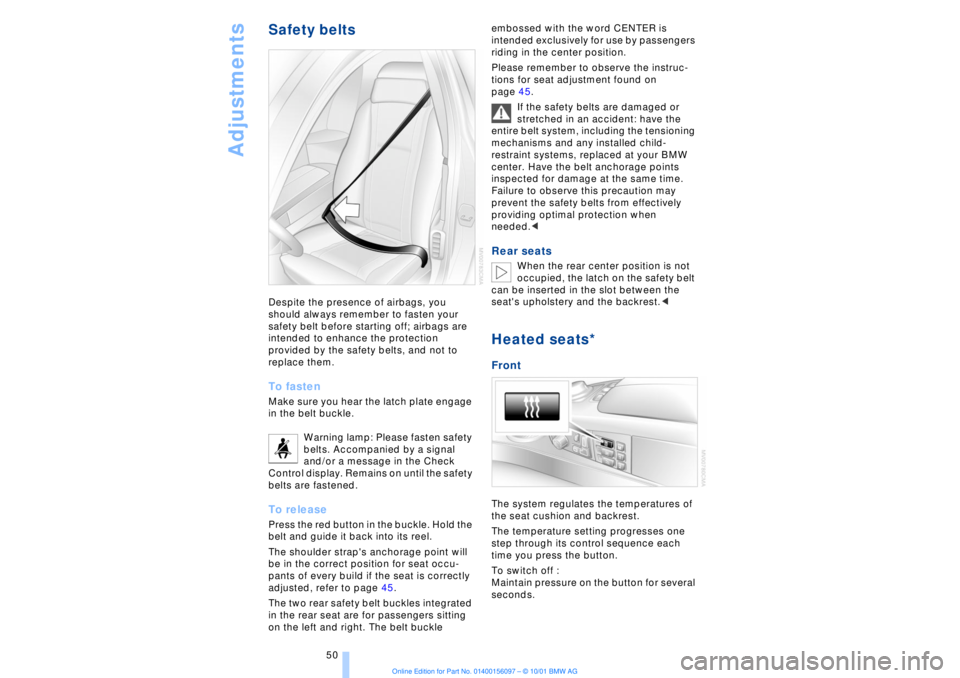
Safety beltsDespite the presence of airbags, you
should always remember to fasten your
safety belt before starting off; airbags are
intended to enhance the protection
provided by the safety belts, and not to
replace them. To fastenMake sure you hear the latch plate engage
in the belt buckle.
Warning lamp: Please fasten safety
belts. Accompanied by a signal
and/or a message in the Check
Control display. Remains on until the safety
belts are fastened. To releasePress the red button in the buckle. Hold the
belt and guide it back into its reel.
The shoulder strap's anchorage point will
be in the correct position for seat occu-
pants of every build if the seat is correctly
adjusted, refer to page 45.
The two rear safety belt buckles integrated
in the rear seat are for passengers sitting
on the left and right. The belt buckle embossed with the word CENTER is
intended exclusively for use by passengers
riding in the center position.
Please remember to observe the instruc-
tions for seat adjustment found on
page 45.
If the safety belts are damaged or
stretched in an accident: have the
entire belt system, including the tensioning
mechanisms and any installed child-
restraint systems, replaced at your BMW
center. Have the belt anchorage points
inspected for damage at the same time.
Failure to observe this precaution may
prevent the safety belts from effectively
providing optimal protection when
needed.<
Rear seats
When the rear center position is not
occupied, the latch on the safety belt
can be inserted in the slot between the
seat's upholstery and the backrest.<
Heated seats*Front The system regulates the temperatures of
the seat cushion and backrest.
The temperature setting progresses one
step through its control sequence each
time you press the button.
To switch off :
Maintain pressure on the button for several
seconds.
Page 67 of 208
Driving
66
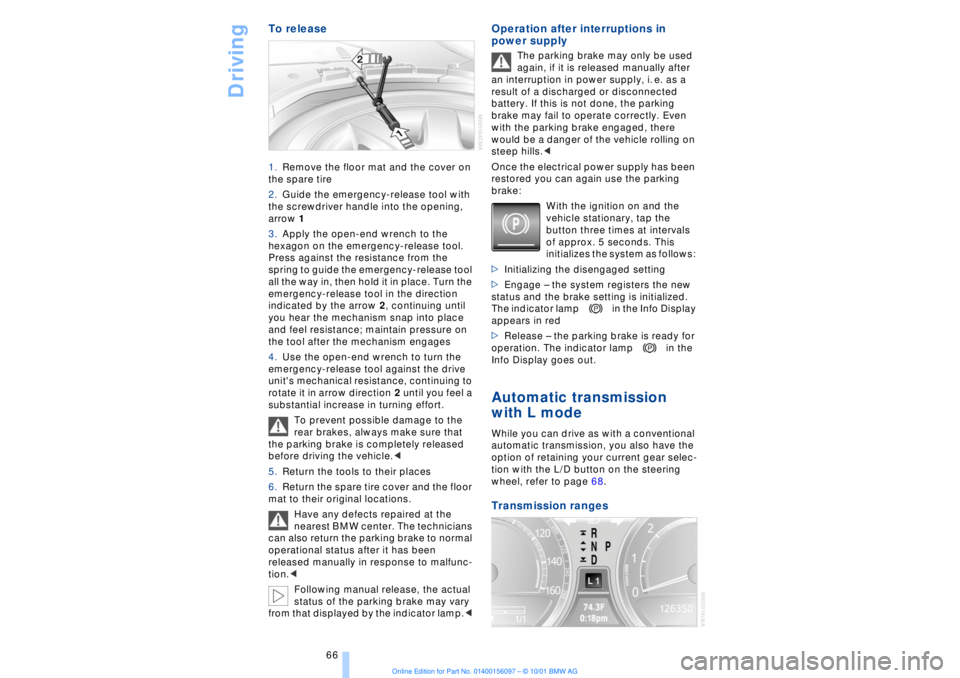
To release 1.Remove the floor mat and the cover on
the spare tire
2.Guide the emergency-release tool with
the screwdriver handle into the opening,
arrow 1
3.Apply the open-end wrench to the
hexagon on the emergency-release tool.
Press against the resistance from the
spring to guide the emergency-release tool
all the way in, then hold it in place. Turn the
emergency-release tool in the direction
indicated by the arrow 2, continuing until
you hear the mechanism snap into place
and feel resistance; maintain pressure on
the tool after the mechanism engages
4.Use the open-end wrench to turn the
emergency-release tool against the drive
unit's mechanical resistance, continuing to
rotate it in arrow direction 2 until you feel a
substantial increase in turning effort.
To prevent possible damage to the
rear brakes, always make sure that
the parking brake is completely released
before driving the vehicle.<
5.Return the tools to their places
6.Return the spare tire cover and the floor
mat to their original locations.
Have any defects repaired at the
nearest BMW center. The technicians
can also return the parking brake to normal
operational status after it has been
released manually in response to malfunc-
tion.<
Following manual release, the actual
status of the parking brake may vary
from that displayed by the indicator lamp.<
Operation after interruptions in
power supply
The parking brake may only be used
again, if it is released manually after
an interruption in power supply, i. e. as a
result of a discharged or disconnected
battery. If this is not done, the parking
brake may fail to operate correctly. Even
with the parking brake engaged, there
would be a danger of the vehicle rolling on
steep hills.<
Once the electrical power supply has been
restored you can again use the parking
brake:
With the ignition on and the
vehicle stationary, tap the
button three times at intervals
of approx. 5 seconds. This
initializes the system as follows:
>Initializing the disengaged setting
>Engage Ð the system registers the new
status and the brake setting is initialized.
The indicator lamp in the Info Display
appears in red
>Release Ð the parking brake is ready for
operation. The indicator lamp in the
Info Display goes out.
Automatic transmission
with L mode While you can drive as with a conventional
automatic transmission, you also have the
option of retaining your current gear selec-
tion with the L/D button on the steering
wheel, refer to page 68. Transmission ranges
Page 93 of 208
Technology for comfort, convenience and safety
92 Active stabilizers at the front and rear axles
form the basis for Dynamic Drive. Suspen-
sion compliance adapts to suit driving
conditions, varying from performance-
oriented during cornering to smooth and
comfort-oriented when the vehicle is
proceeding in a straight line.
The system assumes operational status
each time you start the engine.
Driving with Dynamic Drive During vehicle operation, the system
continuously runs through closed-loop
control cycles lasting only fractions of a
second. In case of malfunction
The symbol will light up, accompa-
nied by a status message in the
Check Control panel. Please take
note of the additional information in the
Control Display panel.
You can find more detailed information on
the Check Control starting on page 80.
If the Dynamic Drive system switches
off in response to malfunction, please
remember to adapt your speed accord-
ingly, especially in curves.
The suspension will be noticeably softer
and the vehicle will display a greater
tendency to tilt during cornering and in
crosswinds.
If a status message appears in the Check
Control panel, accompanied by a red
symbol, the hydraulic fluid in the reservoir
may have fallen to below the minimum
level, possibly owing to leakage in the
hydraulic system. Stop the vehicle and
switch off the engine immediately.
Please observe the additional instructions
provided in the Control Display panel.<
EDC Electronic Damping
Control*
The suspension responds to changes in
factors such as road surface, or operating
conditions such as steering and braking, by
adapting to the new conditions within frac-
tions of a second.Comfort program The system automatically assumes opera-
tion in its Comfort mode each time you start
the engine; this mode is suitable for use
throughout the vehicle's entire speed range
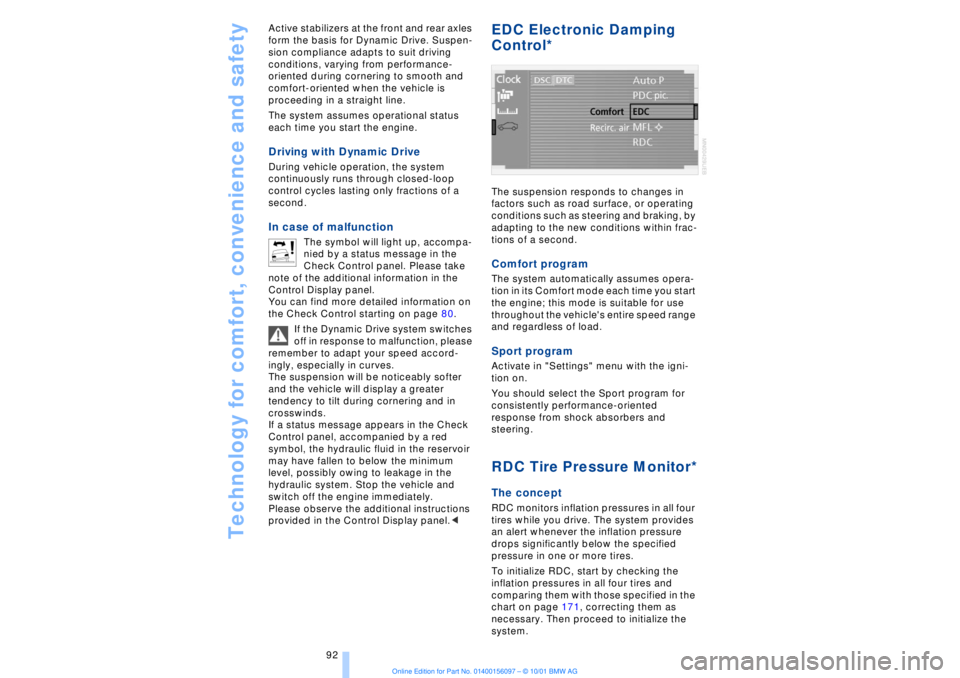
and regardless of load. Sport programActivate in "Settings" menu with the igni-
tion on.
You should select the Sport program for
consistently performance-oriented
response from shock absorbers and
steering. RDC Tire Pressure Monitor*The conceptRDC monitors inflation pressures in all four
tires while you drive. The system provides
an alert whenever the inflation pressure
drops significantly below the specified
pressure in one or more tires.
To initialize RDC, start by checking the
inflation pressures in all four tires and
comparing them with those specified in the
chart on page 171, correcting them as
necessary. Then proceed to initialize the
system.
Page 94 of 208
At a glanceControlsDriving tipsCommunicationsNavigationEntertainmentMobilityReference
93
This symbol will appear in the
Check Control panel to inform you
when the inflation pressure varies
from that stored in the system. A text
message appears at the same time. Please
take note of the additional information in
the Control Display panel.
You can find more information on the
Check Control starting on page 80.
The RDC cannot alert you to severe
and sudden tire damage caused by
external factors.<
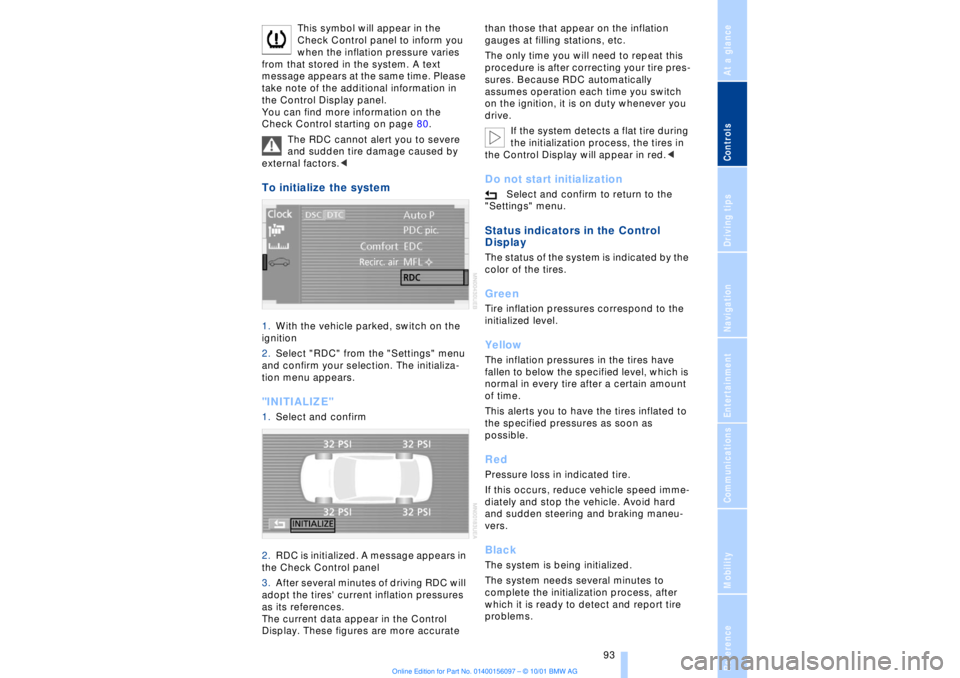
To initialize the system 1.With the vehicle parked, switch on the
ignition
2.Select "RDC" from the "Settings" menu
and confirm your selection. The initializa-
tion menu appears. "INITIALIZE" 1.Select and confirm
2.RDC is initialized. A message appears in
the Check Control panel
3.After several minutes of driving RDC will
adopt the tires' current inflation pressures
as its references.
The current data appear in the Control
Display. These figures are more accurate than those that appear on the inflation
gauges at filling stations, etc.
The only time you will need to repeat this
procedure is after correcting your tire pres-
sures. Because RDC automatically
assumes operation each time you switch
on the ignition, it is on duty whenever you
drive.
If the system detects a flat tire during
the initialization process, the tires in
the Control Display will appear in red.<
Do not start initialization
Select and confirm to return to the
"Settings" menu.
Status indicators in the Control
Display The status of the system is indicated by the
color of the tires. GreenTire inflation pressures correspond to the
initialized level.YellowThe inflation pressures in the tires have
fallen to below the specified level, which is
normal in every tire after a certain amount
of time.
This alerts you to have the tires inflated to
the specified pressures as soon as
possible. RedPressure loss in indicated tire.
If this occurs, reduce vehicle speed imme-
diately and stop the vehicle. Avoid hard
and sudden steering and braking maneu-
vers. BlackThe system is being initialized.
The system needs several minutes to
complete the initialization process, after
which it is ready to detect and report tire
problems.
Page 95 of 208
Technology for comfort, convenience and safety
94
In the event of loss in tire pressure If the indicator lamp symbol in the Check
Control lights up in yellow, and a message
also appears, this indicates that the infla-
tion pressures in the tires have fallen to
below the specified level, which is normal
in every tire after a certain amount of time.
This alerts you to have the tires inflated to
the specified pressures as soon as
possible.
Please take note of the additional informa-
tion in the Control Display panel.
If you are prompted to check the tire
pressure shortly after a correction has
been made, this indicates that the
corrected values were not accurate. Please
check the inflation pressure again and
make corrections according to the inflation
pressure table. Then reinitialize the
system.< Flat tire If you have a flat tire, the indicator lamp
symbol in the Check Control will light up in
red, and a message will appear. In addition,
a gong sounds.
If this occurs, reduce vehicle speed imme-
diately and stop the vehicle. Avoid hard
and sudden steering and braking maneu-
vers. Replace the damaged tire.
The spare tire provided with your
vehicle is equipped with the elec-
tronics required to support RDC operation;
once the spare tire is installed, the pressure
in this tire will also be monitored following
system initialization.
Have the tires changed at your BMW
center. Your BMW center has the informa-
tion needed for working with RDC and is
equipped with the necessary special
tools.
ference signals that may prevent the
system from operating as intended. The symbol will appear in yellow in the
Check Control panel and a message will
appear.
You will also see the same message
>in the event of a system fault
>if a wheel is mounted without the
appropriate electronics
>if, in addition to the spare tire, additional
wheels with RDC electronics are on board.
Please refer to the additional information
supplied in the Control Display, and have
the system inspected at your BMW center.
Self-leveling suspension*
In the event of malfunction
A Check Control message
appearing together with this symbol
indicates a malfunction in the self-
leveling suspension. Please take note of
the additional information in the Control
Display panel.
Stop and inspect the vehicle. If the rear of
the vehicle is visibly lower than the front,
possibly accompanied by a tilt noticeable
when you compare the left rear with the
right rear, you should respond by immedi-
ately proceeding to the nearest BMW
center. Drive with appropriate caution in
the meantime. The vehicle has reduced
ground clearance and driving comfort may
be noticeably reduced. Even if the attitude
of the vehicle is normal, you should consult
the nearest BMW center if the warning
lamp indicates a system fault.
Adaptive brake lamp The adaptive brake lamp indicates the
intensity with which you are applying your
brakes to drivers of following vehicles.