2002 BMW 745LI SEDAN ESP
[x] Cancel search: ESPPage 9 of 208
Notes
8
For you own safety
Use unleaded gasoline only. Fuels
containing up to and including 10 %
ethanol or other oxygenates with up to
2.8 % oxygen by weight Ð that is, 15 %
MTBE or 3% methanol plus an equivalent
amount of co-solvent Ð will not void the
applicable warranties respecting defects in
materials or workmanship. Field experi-
ence has indicated significant differences
in fuel quality Ð volatility, composition, addi-
tives, etc. Ð among gasolines offered for
sale in the United States and Canada. The
use of poor quality fuels may result in drive-
ability, starting and stalling problems espe-
cially under certain environmental
conditions such as high ambient tempera-
ture and high altitude.
Should you encounter driveability prob-
lems which you suspect could be related to
the fuel you are using, we recommend that
you respond by switching to a recognized
high-quality brand.
Failure to comply with these recommenda-
tions may result in unscheduled mainte-
nance.
Follow the relevant safety rules when you
are handling gasoline.
<
Important safety information
For your own safety, use genuine
parts and accessories approved by
BMW.
When you purchase accessories tested
and approved by BMW and Original BMW
Parts, you simultaneously acquire the
assurance that they have been thoroughly
tested by BMW to ensure optimum perfor-
mance when installed on your vehicle.
BMW warrants these parts to be free from
defects in material and workmanship.
BMW will not accept any liability for
damage resulting from installation of parts
and accessories not approved by BMW.
BMW cannot test every product made by
other manufacturers to verify if it can be
used on a BMW safely and without risk to
either the vehicle, its operation, or its occu-
pants. Original BMW Parts, BMW Accesso-
ries and other products approved by BMW,
together with professional advice on using
these items, are available from all BMW
centers.
Installation and operation of non-BMW
approved accessories such as alarms,
radios, amplifiers, radar detectors, wheels,
suspension components, brake dust
shields, telephones Ð including operation of
any portable cellular phone from within the
vehicle without using an externally
mounted antenna Ð or transceiver equip-
ment, for instance, CBs, walkie-talkie, ham
radio or similar accessories, may cause
extensive damage to the vehicle, compro-
mise its safety, interfere with the vehicle's
electrical system or affect the validity of the
BMW Limited Warranty. See your BMW
center for additional information.
<
Maintenance, replacement, or repair
of the emission control devices and
systems may be performed by any automo-
tive repair establishment or individual using
any certified automotive part.
<
Page 16 of 208
At a glanceControlsDriving tipsCommunicationsNavigationEntertainmentMobilityReference
15
Indicator and warning lamps
Technology that monitors itself
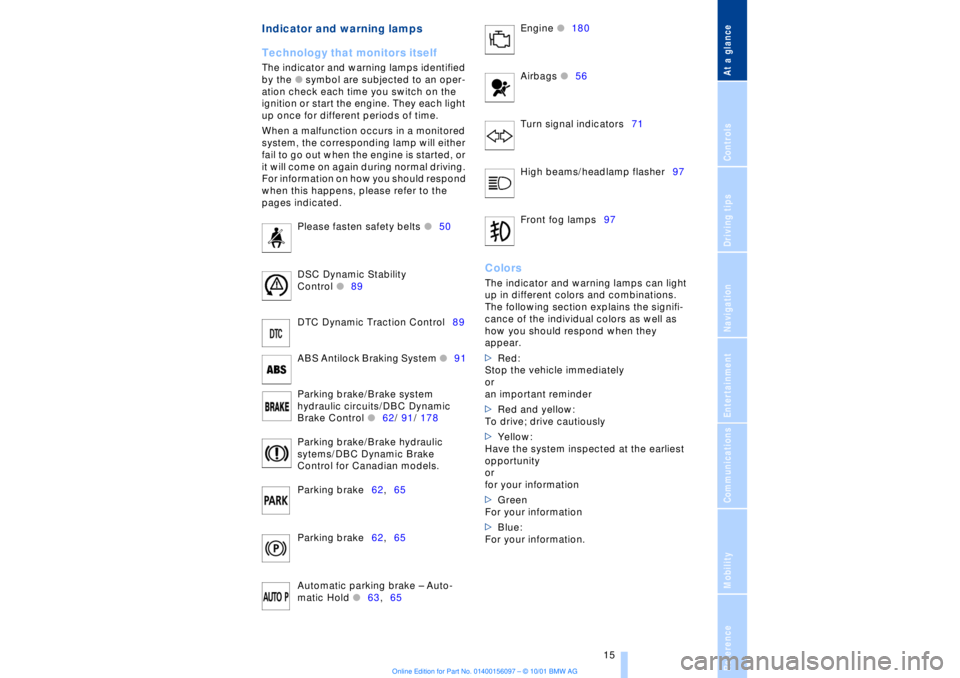
The indicator and warning lamps identified
by the
l
symbol are subjected to an oper-
ation check each time you switch on the
ignition or start the engine. They each light
up once for different periods of time.
When a malfunction occurs in a monitored
system, the corresponding lamp will either
fail to go out when the engine is started, or
it will come on again during normal driving.
For information on how you should respond
when this happens, please refer to the
pages indicated.
Please fasten safety belts
l
50
DSC Dynamic Stability
Control
l
89
DTC Dynamic Traction Control89
ABS Antilock Braking System
l
91
Parking brake/Brake system
hydraulic circuits/DBC Dynamic
Brake Control
l
62/ 91/ 178
Parking brake/Brake hydraulic
sytems/DBC Dynamic Brake
Control for Canadian models.
Parking brake62,65
Parking brake62,65
Automatic parking brake Ð Auto-
matic Hold
l
63,65 Engine
l
180
Airbags
l56
Turn signal indicators71
High beams/headlamp flasher97
Front fog lamps97
ColorsThe indicator and warning lamps can light
up in different colors and combinations.
The following section explains the signifi-
cance of the individual colors as well as
how you should respond when they
appear.
>Red:
Stop the vehicle immediately
or
an important reminder
>Red and yellow:
To drive; drive cautiously
>Yellow:
Have the system inspected at the earliest
opportunity
or
for your information
>Green
For your information
>Blue:
For your information.
Page 27 of 208
Voice command
26 The button must be used to terminate
unrestricted, open dialogs in which any text
might occur, such as those containing
names, notes, etc.
The system automatically switches
over to its telephone mode if you
receive a call during a dialog. The system
issues the voice message >Cancelled< and
"PROCESS TERMINATED" appears in the
Info Display, see Status displays below.<
Voice commandsThe voice command system operates on
the basis of specific, predefined
commands; these commands should be
spoken precisely as indicated. You can
listen to a selection from the command list
by activating the system, refer to page 26
and issuing the command >>Options<< or
>>What now<<.
The voice command system also features
an entry-level >>Main menu<< that allows
you to select individual accessories, refer
to page 26.Brief commandsAt the >>Main menu<< level you can use
"brief commands," refer to page 30 to
initiate direct execution of selected func-
tions without first proceeding to the
"systems" level.Special commands Special commands are available for
specific systems. In this Owner's Manual
you will find these commands in the
sections describing the individual systems.
Instructions for using the voice
command system are always identi-
fied by this pictogram.
>>>Pardon<< or >>Repeat<<
Repeats the last message issued by the
voice command system>>>Cancel<< or >>Exit<<
Terminates the voice command system
>>>Standard dialog<<
or >>Extended dialog<<
Comprehensive instructions and error
reports guide you through the system
>>>Short dialog<<
In this setting your guidance through the
system is provided exclusively in the form
of brief statements
>>>Help<<
Allows you to request information on
various systems
>>>Options<< or >>What now<<
Provides you with a listing of the
commands available for the selected
system. A corresponding list simulta-
neously appears in the Info Display, see
Status displays below
>>>Main menu<<
Provides access to submenus.
To make it easier for you to become
acquainted with the system, it is
preset to the >>Standard dialog<< or
>>Extended dialog<< mode at the
factory.<
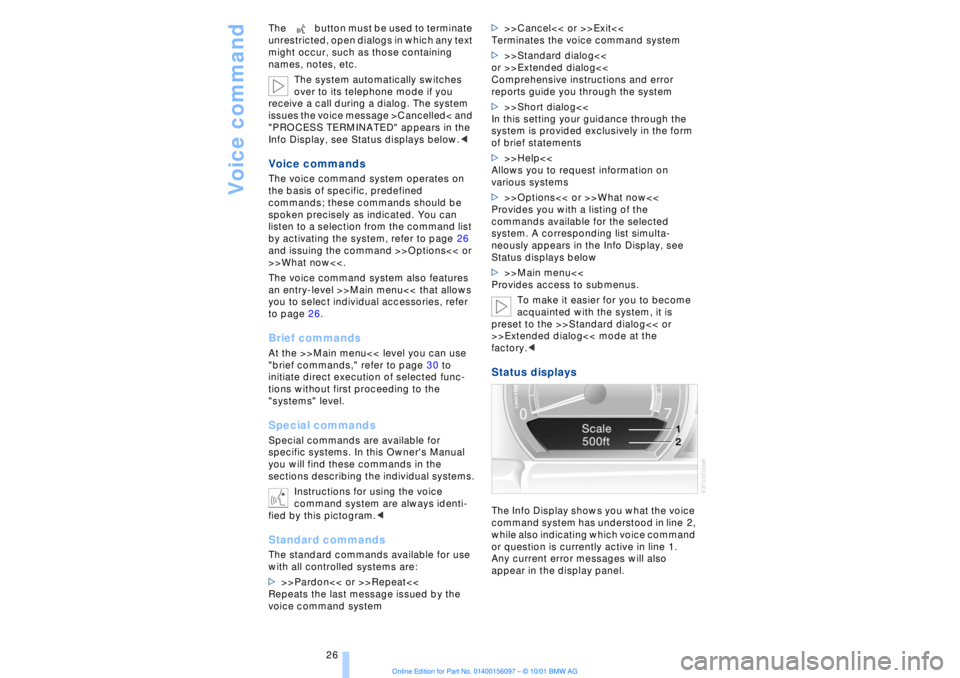
Status displaysThe Info Display shows you what the voice
command system has understood in line 2,
while also indicating which voice command
or question is currently active in line 1.
Any current error messages will also
appear in the display panel.
Page 28 of 208
At a glanceControlsDriving tipsCommunicationsNavigationEntertainmentMobilityReference
27
Notices
Do not use the voice command
system to make emergency SOS
calls. Your voice and habitual tone could be
affected by stressful situations, as a result
of which the process of establishing the
telephone connection could be unneces-
sarily delayed. Instead, you should use the
emergency SOS button located adjacent to
the rearview mirror, refer to page 161.<
Environmental conditionsThe voice command system uses a special
microphone located on the front headliner
of your vehicle. Although the system is
designed to filter out ambient noise, you
can help ensure that your commands will
be understood by observing the following
instructions:
>Speak smoothly and clearly, at a normal
volume. Do not place any unusual stress on
individual syllables, and avoid pauses
>Do not speak while the voice command
system is talking
>Keep the doors, windows and sunroof
closed to prevent interference from
ambient noise
>Avoid other sources of noise in the
vehicle while speaking, and ask other
vehicle occupants to refrain from talking
while you are using the system.
>The hands-free microphone is aimed
toward the driver. This means that the
system may be unable to register the
voices of other vehicle occupants properly;
passengers should use the mobile phone
instead.
The notebookRecording a note
>>Record note<<<
You can store approx. ten minutes of
spoken text Ð either as a single entry or as
multiple entries of any desired length.
To terminate recording:
Apply extended pressure to
the button.
The voice command system does not
respond to the commands
>>Cancel<< and >>Exit<< while you are
recording a note. The standard utility that
scans for system commands is deactivated
in the note mode to allow you to record any
text desired, without artificial restrictions.
This feature saves you from having to
concentrate on avoiding these words while
recording.<
To listen to a notebook entryListening to recorded notebook entries:
1.>>Read out (note)<<
or >>Listen to (note)<<
The system plays back roughly the first
3 seconds of the first memorandum.
2.Respond to the query >Note and then<
by selecting the desired function
>To listen to the entire note:
>>Read (note)<<
(>>Listen to (note)<<)
>To hear the next notebook entry:
>>Next note<< (>>(Note) next<<)
>To hear the entry again:
>>(Note) back<<
or
>>Once again<< (>>Repeat<<, >>Read
out<<).<
Page 37 of 208

Opening and closing
36
To unlock the vehiclePress button 1.
The interior lamps and the door-mounted
proximity lamps come on.
Press the button once to unlock the driver's
door only; press a second time to unlock all
remaining doors as well as the luggage
compartment lid and the fuel filler door. Convenience opening mode Maintain pressure on button 1. The
windows and the sliding/tilt sunroof open.
The sunroof will not be retracted if it is
already in its raised position. To lock and secure Press button 2. To switch off the tilt alarm sensor
and interior motion sensor Press button 2 again immediately after
locking.
For more detailed information, refer to
page 41. To switch on interior lamps and door-
mounted proximity lamps With the vehicle locked, press button 2.To switch on the interior lamps Press button 4.Panic mode By pressing and holding button 4 for more
than approx. two seconds, you can trigger
the alarm system in response to any
impending danger.
To switch off the alarm: press any of the
buttons.To open the luggage compartment
lidPress button 3.
The luggage compartment lid opens
slightly, regardless of whether it was previ-
ously locked or unlocked. During opening the luggage compart-
ment lid pivots upward and to the
rear. Ensure that adequate clearance is
available before opening.
To avoid being inadvertently locked out,
never lay the remote control unit down in
the luggage compartment. If the luggage
compartment lid was locked earlier, it will
relock automatically when closed.<
Automatic luggage compartment lid
operation*
To open the luggage compartment
lidPress button 3.
The luggage compartment lid opens all the
way, regardless of whether it was previ-
ously locked or unlocked.
To interrupt the opening process:
Press the button again while opening is in
progress.
During opening the luggage compart-
ment lid pivots upward and to the
rear. Ensure that adequate clearance is
available before opening.
To avoid being inadvertently locked out,
never lay the remote control unit down in
the luggage compartment. If the luggage
compartment lid was locked earlier, it will
relock automatically when closed.< External systems External systems or devices may cause
local interference in the functions of the
remote control.
Should the remote control unit fail to
operate owing to interference of this kind,
you can respond by using the key to unlock
your vehicle at one of the doors. For US owners only The transmitter and receiver units comply
with Section 15 of the FCC/Federal
Communication Commission regulations.
Operation is governed by the following:
FCC ID: LX8765S
LX8765E
LX8CAS
Page 41 of 208
Opening and closing
40 >press the button on the outside of the
luggage compartment lid, refer to page 38
>press the button 3on the remote
control unit, refer to page 36.
During opening the luggage compart-
ment lid pivots upward and to the
rear. Ensure that adequate clearance is
available before opening.<
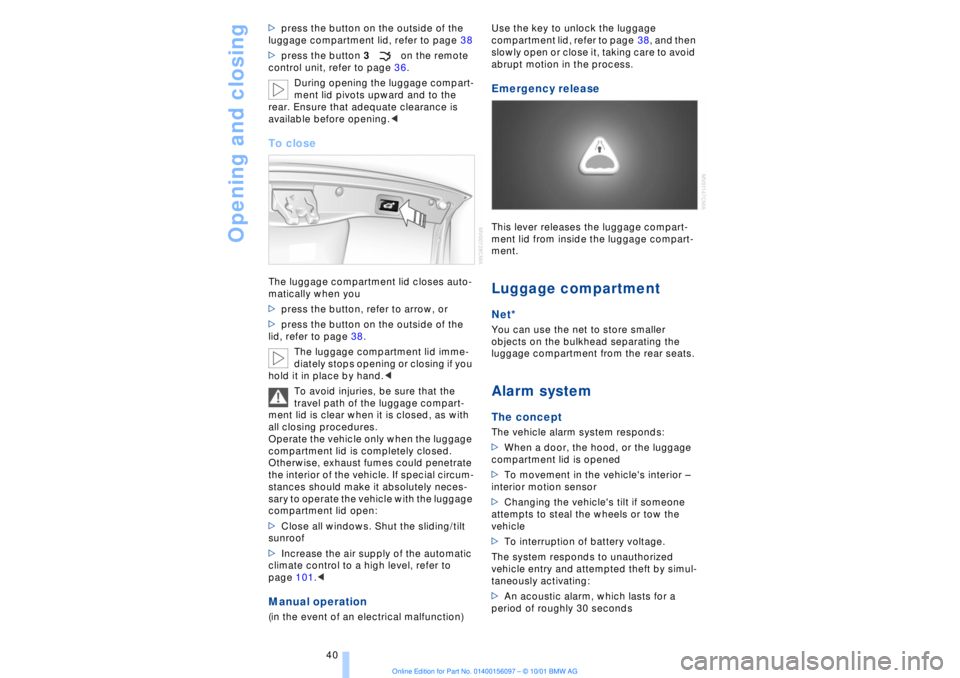
To closeThe luggage compartment lid closes auto-
matically when you
>press the button, refer to arrow, or
>press the button on the outside of the
lid, refer to page 38.
The luggage compartment lid imme-
diately stops opening or closing if you
hold it in place by hand.<
To avoid injuries, be sure that the
travel path of the luggage compart-
ment lid is clear when it is closed, as with
all closing procedures.
Operate the vehicle only when the luggage
compartment lid is completely closed.
Otherwise, exhaust fumes could penetrate
the interior of the vehicle. If special circum-
stances should make it absolutely neces-
sary to operate the vehicle with the luggage
compartment lid open:
>Close all windows. Shut the sliding/tilt
sunroof
>Increase the air supply of the automatic
climate control to a high level, refer to
page 101.< Manual operation(in the event of an electrical malfunction) Use the key to unlock the luggage
compartment lid, refer to page 38, and then
slowly open or close it, taking care to avoid
abrupt motion in the process.
Emergency release This lever releases the luggage compart-
ment lid from inside the luggage compart-
ment. Luggage compartmentNet*You can use the net to store smaller
objects on the bulkhead separating the
luggage compartment from the rear seats. Alarm system The conceptThe vehicle alarm system responds:
>When a door, the hood, or the luggage
compartment lid is opened
>To movement in the vehicle's interior Ð
interior motion sensor
>Changing the vehicle's tilt if someone
attempts to steal the wheels or tow the
vehicle
>To interruption of battery voltage.
The system responds to unauthorized
vehicle entry and attempted theft by simul-
taneously activating:
>An acoustic alarm, which lasts for a
period of roughly 30 seconds
Page 43 of 208
Opening and closing
42
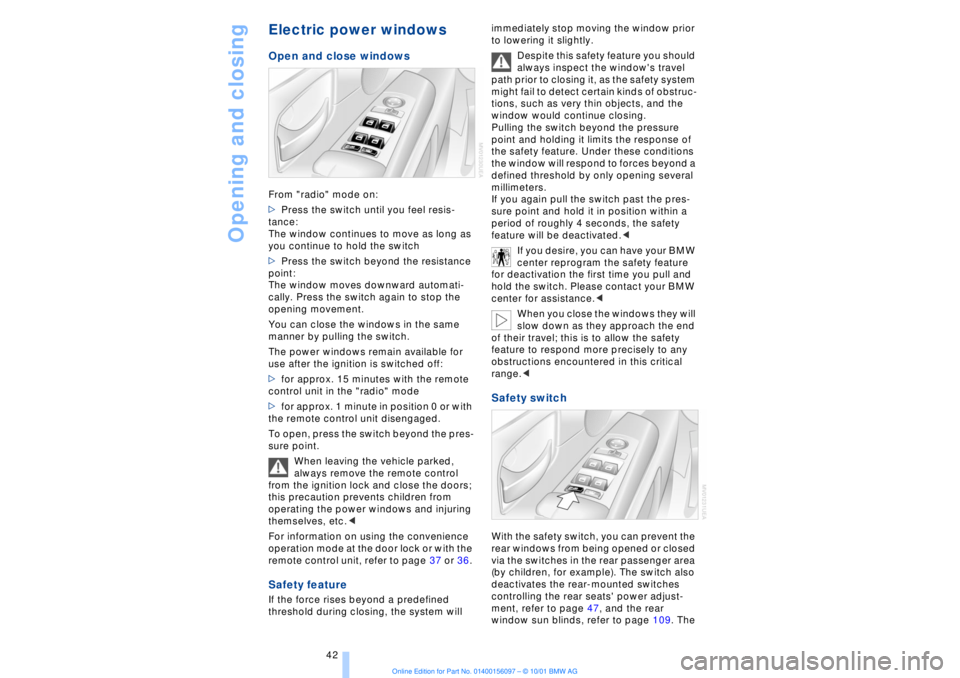
Electric power windows Open and close windowsFrom "radio" mode on:
>Press the switch until you feel resis-
tance:
The window continues to move as long as
you continue to hold the switch
>Press the switch beyond the resistance
point:
The window moves downward automati-
cally. Press the switch again to stop the
opening movement.
You can close the windows in the same
manner by pulling the switch.
The power windows remain available for
use after the ignition is switched off:
>for approx. 15 minutes with the remote
control unit in the "radio" mode
>for approx. 1 minute in position 0 or with
the remote control unit disengaged.
To open, press the switch beyond the pres-
sure point.
When leaving the vehicle parked,
always remove the remote control
from the ignition lock and close the doors;
this precaution prevents children from
operating the power windows and injuring
themselves, etc.<
For information on using the convenience
operation mode at the door lock or with the
remote control unit, refer to page 37 or 36. Safety featureIf the force rises beyond a predefined
threshold during closing, the system will immediately stop moving the window prior
to lowering it slightly.
Despite this safety feature you should
always inspect the window's travel
path prior to closing it, as the safety system
might fail to detect certain kinds of obstruc-
tions, such as very thin objects, and the
window would continue closing.
Pulling the switch beyond the pressure
point and holding it limits the response of
the safety feature. Under these conditions
the window will respond to forces beyond a
defined threshold by only opening several
millimeters.
If you again pull the switch past the pres-
sure point and hold it in position within a
period of roughly 4 seconds, the safety
feature will be deactivated.<
If you desire, you can have your BMW
center reprogram the safety feature
for deactivation the first time you pull and
hold the switch. Please contact your BMW
center for assistance.<
When you close the windows they will
slow down as they approach the end
of their travel; this is to allow the safety
feature to respond more precisely to any
obstructions encountered in this critical
range.<
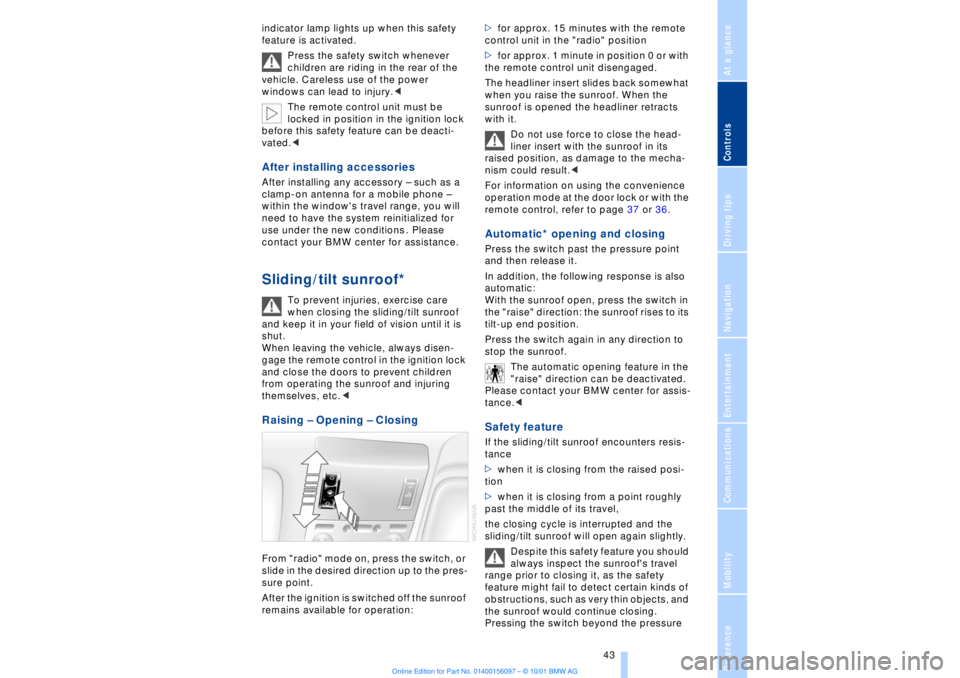
Safety switch With the safety switch, you can prevent the
rear windows from being opened or closed
via the switches in the rear passenger area
(by children, for example). The switch also
deactivates the rear-mounted switches
controlling the rear seats' power adjust-
ment, refer to page 47, and the rear
window sun blinds, refer to page 109. The
Page 44 of 208
At a glanceControlsDriving tipsCommunicationsNavigationEntertainmentMobilityReference
43
indicator lamp lights up when this safety
feature is activated.
Press the safety switch whenever
children are riding in the rear of the
vehicle. Careless use of the power
windows can lead to injury.<
The remote control unit must be
locked in position in the ignition lock
before this safety feature can be deacti-
vated.< After installing accessories After installing any accessory Ð such as a
clamp-on antenna for a mobile phone Ð
within the window's travel range, you will
need to have the system reinitialized for
use under the new conditions . Please
contact your BMW center for assistance. Sliding/tilt sunroof*
To prevent injuries, exercise care
when closing the sliding/tilt sunroof
and keep it in your field of vision until it is
shut.
When leaving the vehicle, always disen-
gage the remote control in the ignition lock
and close the doors to prevent children
from operating the sunroof and injuring
themselves, etc.<
Raising Ð Opening Ð Closing From "radio" mode on, press the switch, or
slide in the desired direction up to the pres-
sure point.
After the ignition is switched off the sunroof
remains available for operation:>for approx. 15 minutes with the remote
control unit in the "radio" position
>for approx. 1 minute in position 0 or with
the remote control unit disengaged.
The headliner insert slides back somewhat
when you raise the sunroof. When the
sunroof is opened the headliner retracts
with it.
Do not use force to close the head-
liner insert with the sunroof in its
raised position, as damage to the mecha-
nism could result.<
For information on using the convenience
operation mode at the door lock or with the
remote control, refer to page 37 or 36.
Automatic* opening and closing Press the switch past the pressure point
and then release it.
In addition, the following response is also
automatic:
With the sunroof open, press the switch in
the "raise" direction: the sunroof rises to its
tilt-up end position.
Press the switch again in any direction to
stop the sunroof.
The automatic opening feature in the
"raise" direction can be deactivated.
Please contact your BMW center for assis-
tance.< Safety feature If the sliding/tilt sunroof encounters resis-
tance
>when it is closing from the raised posi-
tion
>when it is closing from a point roughly
past the middle of its travel,
the closing cycle is interrupted and the
sliding/tilt sunroof will open again slightly.
Despite this safety feature you should
always inspect the sunroof's travel
range prior to closing it, as the safety
feature might fail to detect certain kinds of
obstructions, such as very thin objects, and
the sunroof would continue closing.
Pressing the switch beyond the pressure