2002 BMW 745LI SEDAN rear entertainment
[x] Cancel search: rear entertainmentPage 50 of 208
At a glanceControlsDriving tipsCommunicationsNavigationEntertainmentMobilityReference
49
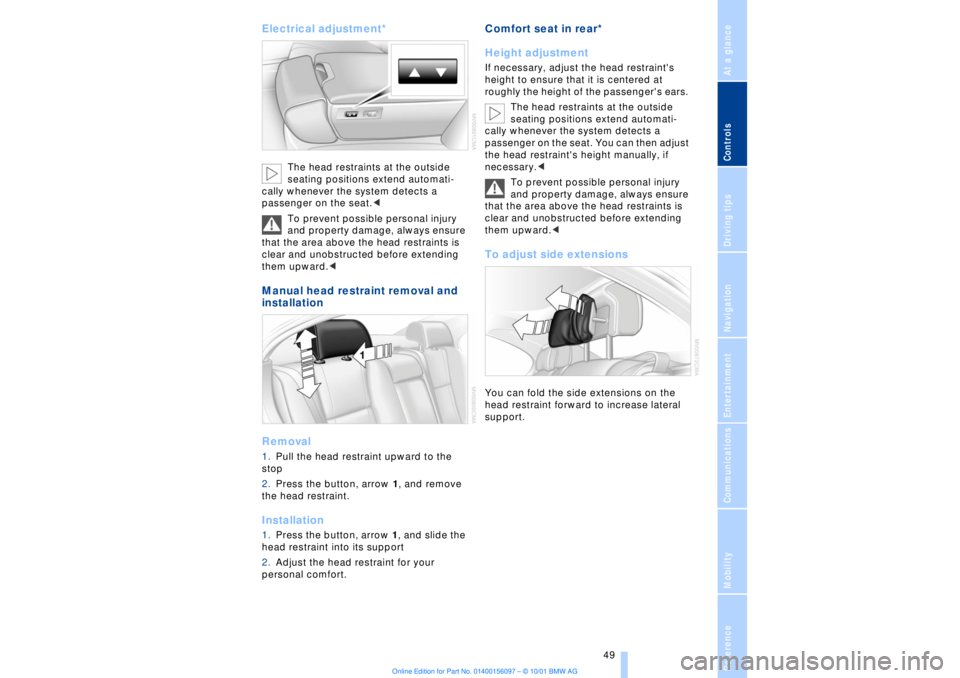
Electrical adjustment*
The head restraints at the outside
seating positions extend automati-
cally whenever the system detects a
passenger on the seat.<
To prevent possible personal injury
and property damage, always ensure
that the area above the head restraints is
clear and unobstructed before extending
them upward.<
Manual head restraint removal and
installation
Removal1.Pull the head restraint upward to the
stop
2.Press the button, arrow 1, and remove
the head restraint. Installation1.Press the button, arrow 1, and slide the
head restraint into its support
2.Adjust the head restraint for your
personal comfort.
Comfort seat in rear*
Height adjustment If necessary, adjust the head restraint's
height to ensure that it is centered at
roughly the height of the passenger's ears.
The head restraints at the outside
seating positions extend automati-
cally whenever the system detects a
passenger on the seat. You can then adjust
the head restraint's height manually, if
necessary.<
To prevent possible personal injury
and property damage, always ensure
that the area above the head restraints is
clear and unobstructed before extending
them upward.< To adjust side extensionsYou can fold the side extensions on the
head restraint forward to increase lateral
support.
Page 52 of 208
At a glanceControlsDriving tipsCommunicationsNavigationEntertainmentMobilityReference
51
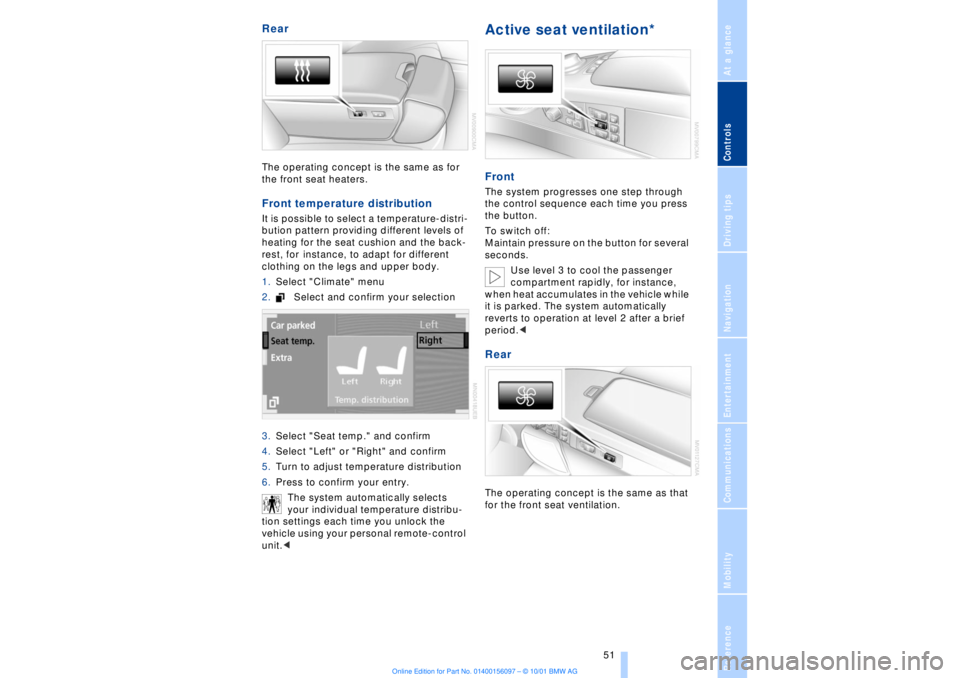
Rear The operating concept is the same as for
the front seat heaters. Front temperature distribution It is possible to select a temperature-distri-
bution pattern providing different levels of
heating for the seat cushion and the back-
rest, for instance, to adapt for different
clothing on the legs and upper body.
1.Select "Climate" menu
2.Select and confirm your selection
3.Select "Seat temp." and confirm
4.Select "Left" or "Right" and confirm
5.Turn to adjust temperature distribution
6.Press to confirm your entry.
The system automatically selects
your individual temperature distribu-
tion settings each time you unlock the
vehicle using your personal remote-control
unit.<
Active seat ventilation* FrontThe system progresses one step through
the control sequence each time you press
the button.
To switch off:
Maintain pressure on the button for several
seconds.
Use level 3 to cool the passenger
compartment rapidly, for instance,
when heat accumulates in the vehicle while
it is parked. The system automatically
reverts to operation at level 2 after a brief
period.< RearThe operating concept is the same as that
for the front seat ventilation.
Page 54 of 208
At a glanceControlsDriving tipsCommunicationsNavigationEntertainmentMobilityReference
53
Lighted vanity mirror
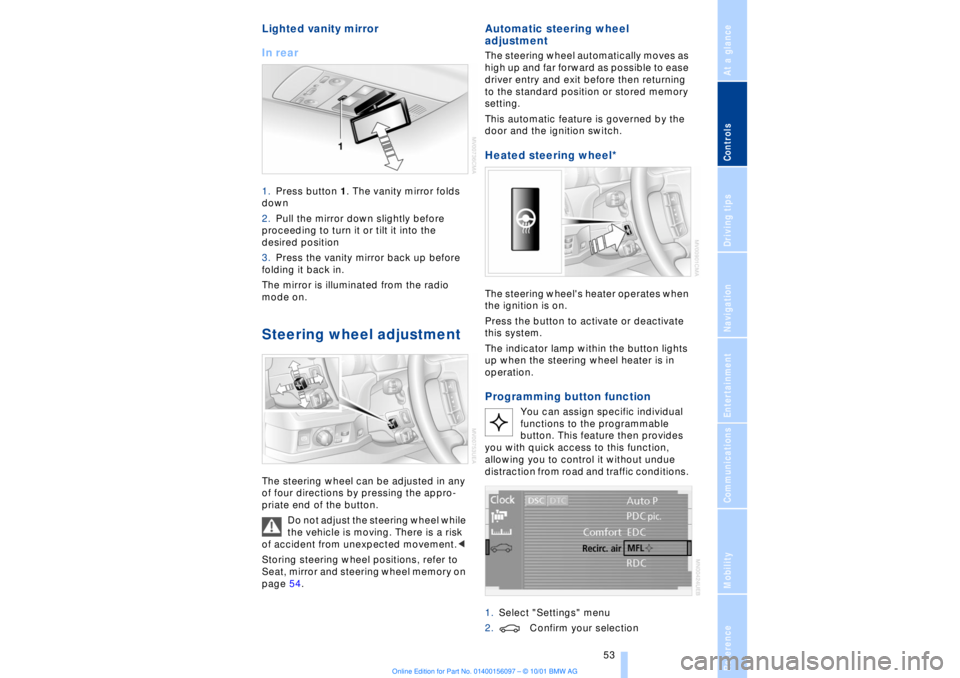
In rear 1.Press button 1. The vanity mirror folds
down
2.Pull the mirror down slightly before
proceeding to turn it or tilt it into the
desired position
3.Press the vanity mirror back up before
folding it back in.
The mirror is illuminated from the radio
mode on. Steering wheel adjustment The steering wheel can be adjusted in any
of four directions by pressing the appro-
priate end of the button.
Do not adjust the steering wheel while
the vehicle is moving. There is a risk
of accident from unexpected movement.<
Storing steering wheel positions, refer to
Seat, mirror and steering wheel memory on
page 54.
Automatic steering wheel
adjustment The steering wheel automatically moves as
high up and far forward as possible to ease
driver entry and exit before then returning
to the standard position or stored memory
setting.
This automatic feature is governed by the
door and the ignition switch. Heated steering wheel*
The steering wheel's heater operates when
the ignition is on.
Press the button to activate or deactivate
this system.
The indicator lamp within the button lights
up when the steering wheel heater is in
operation.Programming button function
You can assign specific individual
functions to the programmable
button. This feature then provides
you with quick access to this function,
allowing you to control it without undue
distraction from road and traffic conditions.
1.Select "Settings" menu
2.Confirm your selection
Page 56 of 208
At a glanceControlsDriving tipsCommunicationsNavigationEntertainmentMobilityReference
55
1.Select the driver's door mirror with the
switch
2.When you tap the selector lever to select
reverse, the door mirror on the passenger
side tilts downward. This allows the driver
to see the area immediately adjacent to the
vehicle Ð such as a curb Ð when parking,
etc.
You can deactivate this automatic feature:
Slide the mirror selection switch to the
"passenger's side" position.
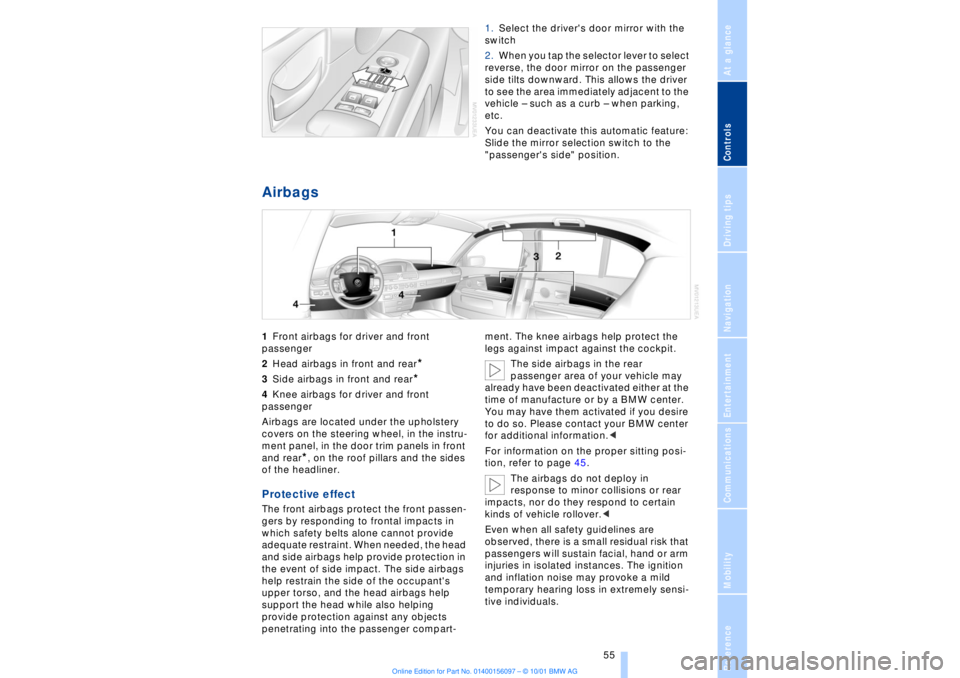
Airbags 1Front airbags for driver and front
passenger
2Head airbags in front and rear
*
3Side airbags in front and rear*
4Knee airbags for driver and front
passenger
Airbags are located under the upholstery
covers on the steering wheel, in the instru-
ment panel, in the door trim panels in front
and rear
*, on the roof pillars and the sides
of the headliner.
Protective effect The front airbags protect the front passen-
gers by responding to frontal impacts in
which safety belts alone cannot provide
adequate restraint. When needed, the head
and side airbags help provide protection in
the event of side impact. The side airbags
help restrain the side of the occupant's
upper torso, and the head airbags help
support the head while also helping
provide protection against any objects
penetrating into the passenger compart-ment. The knee airbags help protect the
legs against impact against the cockpit.
The side airbags in the rear
passenger area of your vehicle may
already have been deactivated either at the
time of manufacture or by a BMW center.
You may have them activated if you desire
to do so. Please contact your BMW center
for additional information.<
For information on the proper sitting posi-
tion, refer to page 45.
The airbags do not deploy in
response to minor collisions or rear
impacts, nor do they respond to certain
kinds of vehicle rollover.<
Even when all safety guidelines are
observed, there is a small residual risk that
passengers will sustain facial, hand or arm
injuries in isolated instances. The ignition
and inflation noise may provoke a mild
temporary hearing loss in extremely sensi-
tive individuals.
Page 58 of 208
At a glanceControlsDriving tipsCommunicationsNavigationEntertainmentMobilityReference
57
A system malfunction could prevent the
system from responding to an impact
occurring within its normal response range.
Please respond to any signs of malfunction
by having the airbag system inspected
immediately at a BMW center. Transporting children safely Commercially-available child-restraint
systems are designed to be secured with a
lap belt or with the lap belt portion of a
combination lap/shoulder belt. Improperly
or inadequately installed restraint systems
can increase the risk of injury to children.
Always read and follow the instructions that
come with the system. Child-restraint system with tether
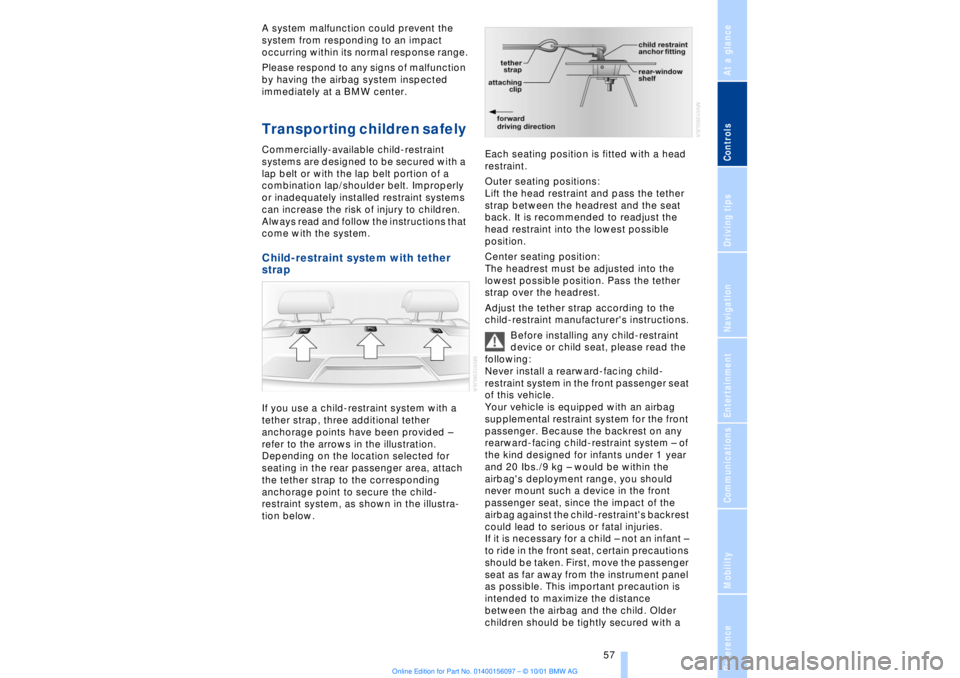
strap If you use a child-restraint system with a
tether strap, three additional tether
anchorage points have been provided Ð
refer to the arrows in the illustration.
Depending on the location selected for
seating in the rear passenger area, attach
the tether strap to the corresponding
anchorage point to secure the child-
restraint system, as shown in the illustra-
tion below. Each seating position is fitted with a head
restraint.
Outer seating positions:
Lift the head restraint and pass the tether
strap between the headrest and the seat
back. It is recommended to readjust the
head restraint into the lowest possible
position.
Center seating position:
The headrest must be adjusted into the
lowest possible position. Pass the tether
strap over the headrest.
Adjust the tether strap according to the
child-restraint manufacturer's instructions.
Before installing any child-restraint
device or child seat, please read the
following:
Never install a rearward-facing child-
restraint system in the front passenger seat
of this vehicle.
Your vehicle is equipped with an airbag
supplemental restraint system for the front
passenger. Because the backrest on any
rearward-facing child-restraint system Ð of
the kind designed for infants under 1 year
and 20 Ibs./9 kg Ð would be within the
airbag's deployment range, you should
never mount such a device in the front
passenger seat, since the impact of the
airbag against the child-restraint's backrest
could lead to serious or fatal injuries.
If it is necessary for a child Ð not an infant Ð
to ride in the front seat, certain precautions
should be taken. First, move the passenger
seat as far away from the instrument panel
as possible. This important precaution is
intended to maximize the distance
between the airbag and the child. Older
children should be tightly secured with a
Page 60 of 208
At a glanceControlsDriving tipsCommunicationsNavigationEntertainmentMobilityReference
59
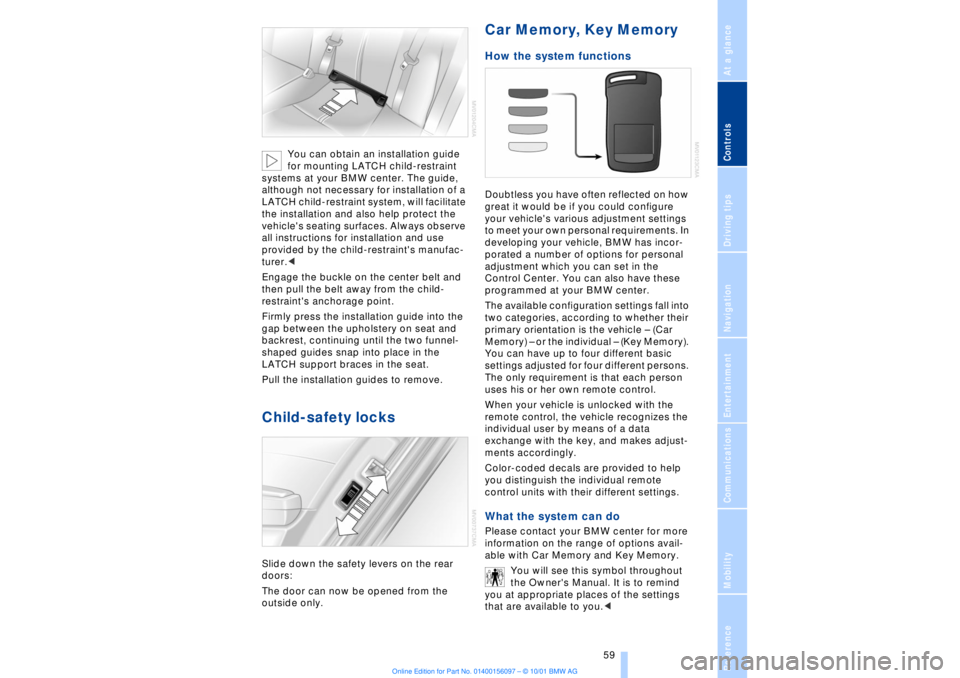
You can obtain an installation guide
for mounting LATCH child-restraint
systems at your BMW center. The guide,
although not necessary for installation of a
LATCH child-restraint system, will facilitate
the installation and also help protect the
vehicle's seating surfaces. Always observe
all instructions for installation and use
provided by the child-restraint's manufac-
turer.<
Engage the buckle on the center belt and
then pull the belt away from the child-
restraint's anchorage point.
Firmly press the installation guide into the
gap between the upholstery on seat and
backrest, continuing until the two funnel-
shaped guides snap into place in the
LATCH support braces in the seat.
Pull the installation guides to remove.
Child-safety locks Slide down the safety levers on the rear
doors:
The door can now be opened from the
outside only.
Car Memory, Key Memory How the system functions Doubtless you have often reflected on how
great it would be if you could configure
your vehicle's various adjustment settings
to meet your own personal requirements. In
developing your vehicle, BMW has incor-
porated a number of options for personal
adjustment which you can set in the
Control Center. You can also have these
programmed at your BMW center.
The available configuration settings fall into
two categories, according to whether their
primary orientation is the vehicle Ð (Car
Memory) Ð or the individual Ð (Key Memory).
You can have up to four different basic
settings adjusted for four different persons.
The only requirement is that each person
uses his or her own remote control.
When your vehicle is unlocked with the
remote control, the vehicle recognizes the
individual user by means of a data
exchange with the key, and makes adjust-
ments accordingly.
Color-coded decals are provided to help
you distinguish the individual remote
control units with their different settings. What the system can do Please contact your BMW center for more
information on the range of options avail-
able with Car Memory and Key Memory.
You will see this symbol throughout
the Owner's Manual. It is to remind
you at appropriate places of the settings
that are available to you.<
Page 64 of 208
At a glanceControlsDriving tipsCommunicationsNavigationEntertainmentMobilityReference
63
You have two separate options for
engaging the parking brake:
>Manually, by briefly pressing the button
>Automatically, through activation of the
Automatic Hold mode, refer to next
column.
An electrohydraulic mechanism then
engages the parking brakes to prevent the
rear wheels from turning whenever you
switch off the engine.
When the engine is running, parking brake
engagement is controlled by the brake
system's hydraulic circuits, which act on
the disc brakes at the front and rear
wheels. Brake pedal feel Because this function is activated using the
brake system's hydraulic circuits, the
response of the brake pedal may change
slightly. Engagement may also be accom-
panied by activation noise Ð this is normal. Manual engagement
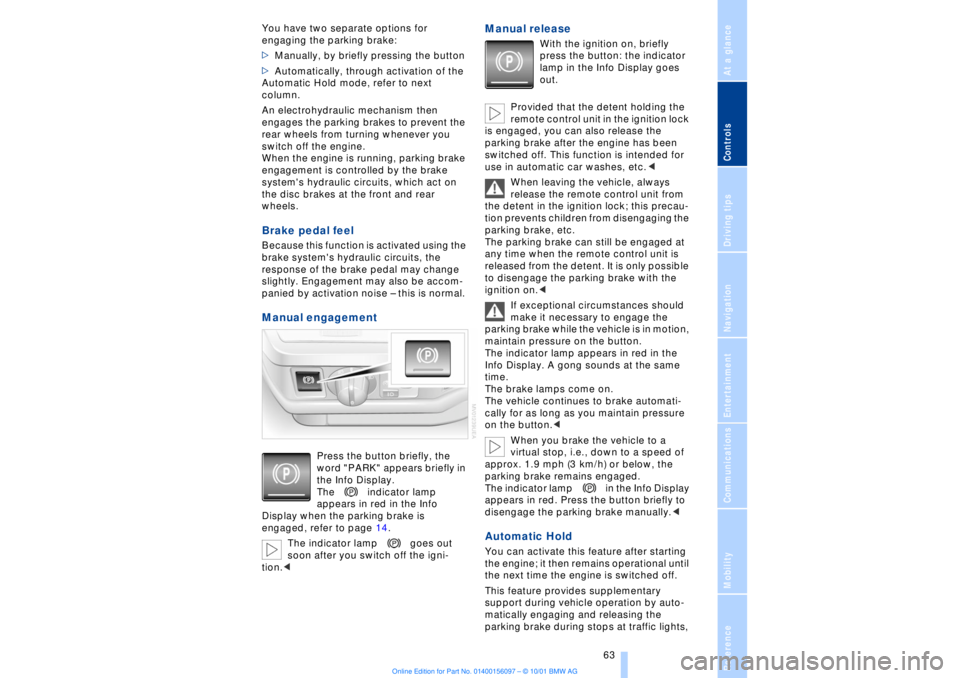
Press the button briefly, the
word "PARK" appears briefly in
the Info Display.
The indicator lamp
appears in red in the Info
Display when the parking brake is
engaged, refer to page 14.
The indicator lamp goes out
soon after you switch off the igni-
tion.<
Manual release
With the ignition on, briefly
press the button: the indicator
lamp in the Info Display goes
out.
Provided that the detent holding the
remote control unit in the ignition lock
is engaged, you can also release the
parking brake after the engine has been
switched off. This function is intended for
use in automatic car washes, etc.<
When leaving the vehicle, always
release the remote control unit from
the detent in the ignition lock; this precau-
tion prevents children from disengaging the
parking brake, etc.
The parking brake can still be engaged at
any time when the remote control unit is
released from the detent. It is only possible
to disengage the parking brake with the
ignition on.<
If exceptional circumstances should
make it necessary to engage the
parking brake while the vehicle is in motion,
maintain pressure on the button.
The indicator lamp appears in red in the
Info Display. A gong sounds at the same
time.
The brake lamps come on.
The vehicle continues to brake automati-
cally for as long as you maintain pressure
on the button.<
When you brake the vehicle to a
virtual stop, i.e., down to a speed of
approx. 1.9 mph (3 km/h) or below, the
parking brake remains engaged.
The indicator lamp in the Info Display
appears in red. Press the button briefly to
disengage the parking brake manually.<
Automatic Hold You can activate this feature after starting
the engine; it then remains operational until
the next time the engine is switched off.
This feature provides supplementary
support during vehicle operation by auto-
matically engaging and releasing the
parking brake during stops at traffic lights,
Page 68 of 208
At a glanceControlsDriving tipsCommunicationsNavigationEntertainmentMobilityReference
67
P R N D Program displayL1 Ð L6 Buttons on steering wheel L/D Ð Selecting transmission range
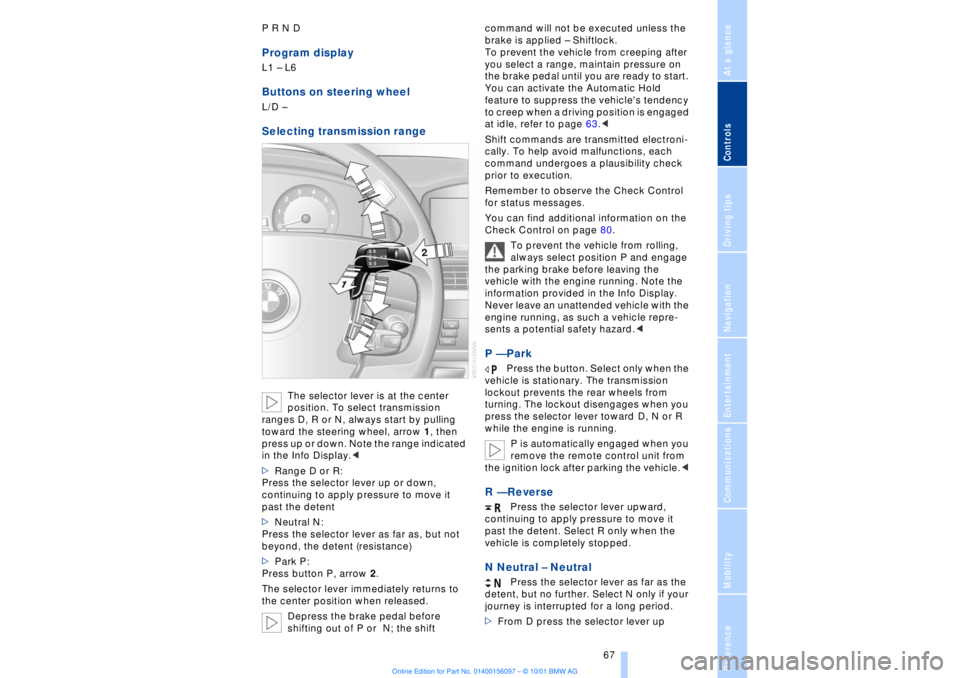
The selector lever is at the center
position. To select transmission
ranges D, R or N, always start by pulling
toward the steering wheel, arrow 1, then
press up or down. Note the range indicated
in the Info Display.<
>Range D or R:
Press the selector lever up or down,
continuing to apply pressure to move it
past the detent
>Neutral N:
Press the selector lever as far as, but not
beyond, the detent (resistance)
>Park P:
Press button P, arrow 2.
The selector lever immediately returns to
the center position when released.
Depress the brake pedal before
shifting out of P or N; the shift command will not be executed unless the
brake is applied Ð Shiftlock.
To prevent the vehicle from creeping after
you select a range, maintain pressure on
the brake pedal until you are ready to start.
You can activate the Automatic Hold
feature to suppress the vehicle's tendency
to creep when a driving position is engaged
at idle, refer to page 63.<
Shift commands are transmitted electroni-
cally. To help avoid malfunctions, each
command undergoes a plausibility check
prior to execution.
Remember to observe the Check Control
for status messages.
You can find additional information on the
Check Control on page 80.
To prevent the vehicle from rolling,
always select position P and engage
the parking brake before leaving the
vehicle with the engine running. Note the
information provided in the Info Display.
Never leave an unattended vehicle with the
engine running, as such a vehicle repre-
sents a potential safety hazard.<
P Ñ Park
Press the button. Select only when the
vehicle is stationary. The transmission
lockout prevents the rear wheels from
turning. The lockout disengages when you
press the selector lever toward D, N or R
while the engine is running.
P is automatically engaged when you
remove the remote control unit from
the ignition lock after parking the vehicle.<
R Ñ Reverse
Press the selector lever upward,
continuing to apply pressure to move it
past the detent. Select R only when the
vehicle is completely stopped.
N Neutral Ð Neutral
Press the selector lever as far as the
detent, but no further. Select N only if your
journey is interrupted for a long period.
>From D press the selector lever up