2002 BMW 745LI SEDAN low beam
[x] Cancel search: low beamPage 4 of 208
At a glanceControlsDriving tipsCommunicationsNavigationEntertainmentMobilityReference
73Programmable cruise control
Everything under control
77Odometer, outside temperature
display, clock
77Tachometer
78Service Interval Display
80Check Control
81Computer
86Changing settings
Technology for comfort,
convenience and safety
88PDC Park Distance Control*
89Driving stability control/
DSC Dynamic Stability Control
91Driving stability control/ABS Antilock
Brake System
91Dynamic Drive
92EDC Electronic Damping Control*
92RDC Tire Pressure Monitor*
94Self-leveling suspension*
94Adaptive brake lamp
Lamps
96Parking lamps/low beams
97Instrument lighting
97High beams/standing lamps
97Front fog lamps
97Interior lamps
A congenial climate
99Automatic climate control
105Rear air conditioner*
106Parked-car ventilation system
Practical interior accessories
108Universal Garage Door Opener*
109Sun blinds*
110Rear cooler*
110Glove compartment
111Storage compartments
112Beverage holders
112Ashtray, front
113Cigarette lighter, front
113Power socket
113Ashtray, rear
113Cigarette lighter, rear113Center armrest
114Ski bag*
Things to remember when driving
118Break-in procedures
118General driving notes
119Brake system
120Cargo loading
120Roof-mounted luggage rack*
Navigation
124Safety
124GPS
124Map CD
125Starting the navigation system
125Display in assistance window*
126Selection options
126Destination entry
126Manual entry of destination address
128Select the town or city and the street
from the directory
128Map-guided destination selection
129Selecting destination in Information
129Selecting interesting destinations
130Recent destinations
130Destination list
130Route selection
131Starting the destination guidance
system
132Displaying route
133Select new route
133Voice messages
134Terminate/interrupt active guidance
134Creating a directory
135Location
136Wordmatch principle
136What to do if É
Sound system
140Controls
140Care instructions
140To switch on/off
140Using with ignition off
141Volume adjustment
141Tone control
Page 14 of 208

At a glanceControlsDriving tipsCommunicationsNavigationEntertainmentMobilityReference
13
1
Rear window sun blind109
2
Rear window safety switch42
3
Electric power windows42
4
Exterior mirrors52
5
Parking brake62
6
Parking lamps and low beams96
7
Instrument lighting97
8
Turn signal indicators71
High beams, headlamp flasher97
Computer81,
Check Control80
Computer81
Standing lamps97
9
Steering wheel18
10
Info Display14
11
Automatic transmission lever66
12
Ignition lock61
13
Switching ignition on and off,
starting the engine62
14
Windshield wipers71
Rain sensor71
15
Park Distance Control (PDC)88
16
Horn: the entire surface
17
Steering wheel heating53
Steering wheel adjustment53
18
Unlocking the luggage
compartment39
19
Programmable cruise control73
20
Front fog lamps97
Front fog lamps
21
Opening the hood175
Page 16 of 208
At a glanceControlsDriving tipsCommunicationsNavigationEntertainmentMobilityReference
15
Indicator and warning lamps
Technology that monitors itself
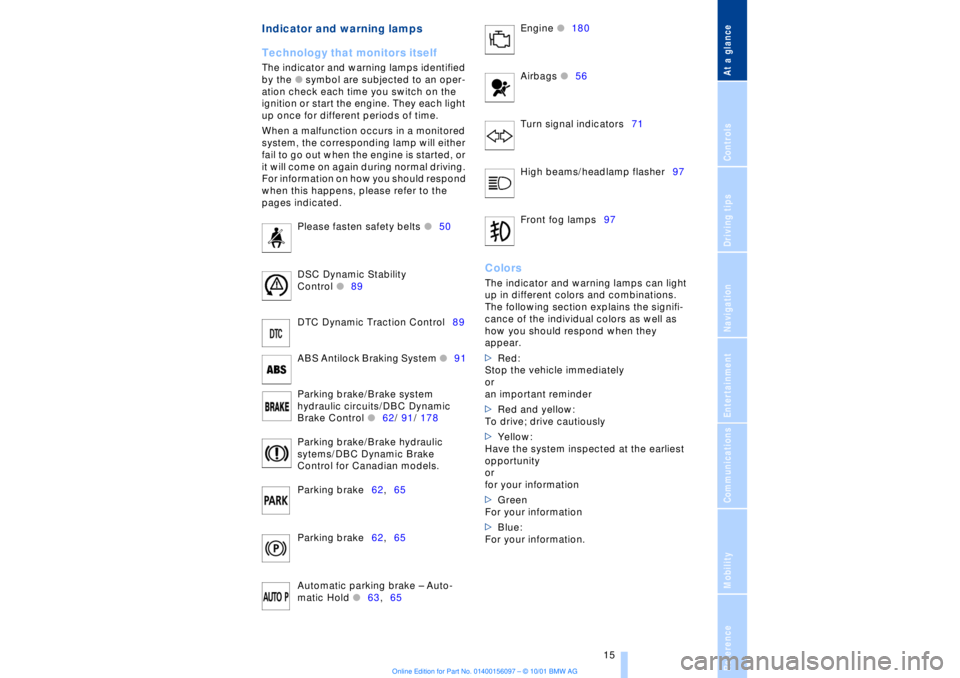
The indicator and warning lamps identified
by the
l
symbol are subjected to an oper-
ation check each time you switch on the
ignition or start the engine. They each light
up once for different periods of time.
When a malfunction occurs in a monitored
system, the corresponding lamp will either
fail to go out when the engine is started, or
it will come on again during normal driving.
For information on how you should respond
when this happens, please refer to the
pages indicated.
Please fasten safety belts
l
50
DSC Dynamic Stability
Control
l
89
DTC Dynamic Traction Control89
ABS Antilock Braking System
l
91
Parking brake/Brake system
hydraulic circuits/DBC Dynamic
Brake Control
l
62/ 91/ 178
Parking brake/Brake hydraulic
sytems/DBC Dynamic Brake
Control for Canadian models.
Parking brake62,65
Parking brake62,65
Automatic parking brake Ð Auto-
matic Hold
l
63,65 Engine
l
180
Airbags
l56
Turn signal indicators71
High beams/headlamp flasher97
Front fog lamps97
ColorsThe indicator and warning lamps can light
up in different colors and combinations.
The following section explains the signifi-
cance of the individual colors as well as
how you should respond when they
appear.
>Red:
Stop the vehicle immediately
or
an important reminder
>Red and yellow:
To drive; drive cautiously
>Yellow:
Have the system inspected at the earliest
opportunity
or
for your information
>Green
For your information
>Blue:
For your information.
Page 39 of 208
Opening and closing
38 then pull the release handle above the
armrest
or
>pull the release handle for each door
twice: the first pull unlocks the door, and
the second one opens it.
When the low beams are switched on,
the interior door handles are also
lighted. The intensity of the lighting is
adjusted together the instrument lighting,
refer to page 97.<
To engage locks >Use the central locking button to lock all
of the doors simultaneously,
or
>press the individual safety lock buttons
down. To prevent the driver from being
inadvertently locked out of the vehicle, the
lock button on the driver's door automati-
cally extends again after a brief period if the
door remains open.
Do not use the safety lock buttons to
engage the locks for driving, as they
would then fail to disengage automatically
in the event of an accident.
Because any persons or animals left unat-
tended in a parked vehicle could lock the
doors from the inside, you should always
keep the remote control unit with you; this
precaution ensures that you will remain
able to unlock the vehicle from the outside
at all times.< Doors Soft Close Automatic* Apply gentle pressure to the door to close
it. The closing process will then be carried
out automatically.
To avoid injuries, ensure that the
door's travel path is completely free
and clear before closing.<
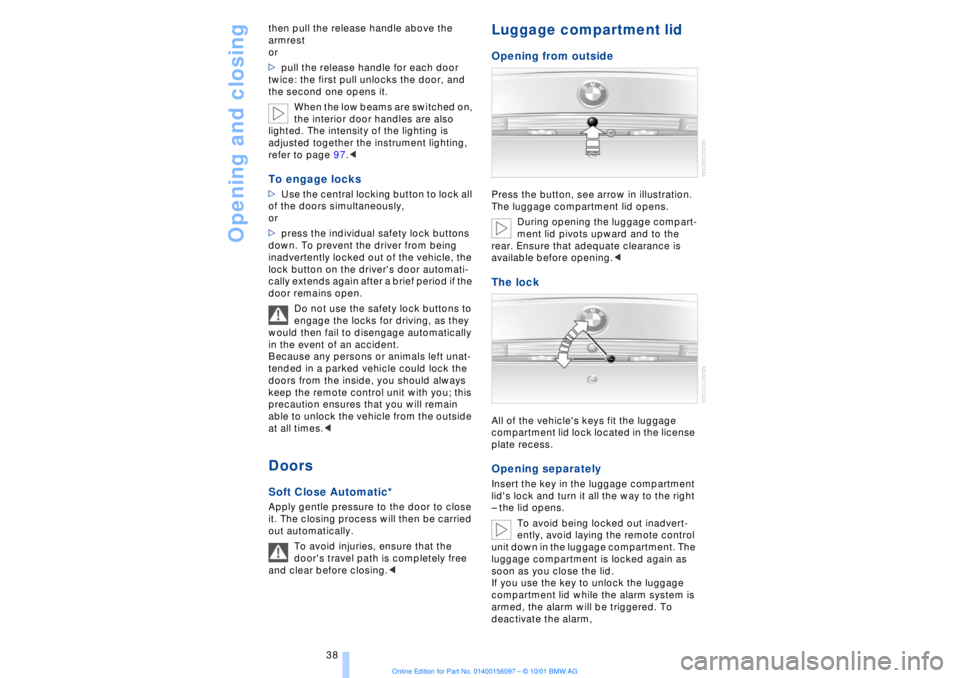
Luggage compartment lid Opening from outsidePress the button, see arrow in illustration.
The luggage compartment lid opens.
During opening the luggage compart-
ment lid pivots upward and to the
rear. Ensure that adequate clearance is
available before opening.
plate recess. Opening separately Insert the key in the luggage compartment
lid's lock and turn it all the way to the right
Ð the lid opens.
To avoid being locked out inadvert-
ently, avoid laying the remote control
unit down in the luggage compartment. The
luggage compartment is locked again as
soon as you close the lid.
If you use the key to unlock the luggage
compartment lid while the alarm system is
armed, the alarm will be triggered. To
deactivate the alarm,
Page 42 of 208

At a glanceControlsDriving tipsCommunicationsNavigationEntertainmentMobilityReference
41
>The hazard warning flashers for approx.
five minutes
>The high beams, which flash on and off
in the same rhythm.To arm and disarm the alarm system When you lock (or unlock) the vehicle,
either with the remote control unit or at the
door lock, the alarm system is armed (or
disarmed) at the same time.
The system indicates that is has been
correctly armed by switching on the hazard
warning flashers for a single cycle and by
emitting an acoustic signal.
You can have different acknowledg-
ment signals set to confirm arming
and disarming.<
Even with the alarm system armed, you can
open the luggage compartment lid using
the button 3on the remote control
unit, refer to page 36. The alarm system will
start to monitor the luggage compartment
lid again as soon as it is reclosed. Indicator lamp displays>The indicator lamp below the interior
rearview mirror flashes continuously: the
system is armed
>The indicator lamp flashes when the
system is armed: door(s), the hood or
luggage compartment lid are not
completely closed. Even if you do not close
the alerted area, the system begins to
monitor the remaining areas, and the indi-
cator lamp flashes continuously after
10 seconds. However, the interior motion
sensor is not activated >If the indicator lamp goes out when the
system is disarmed: no manipulation or
attempted intrusions have been detected in
the period since the system was armed
>If the indicator lamp flashes for roughly
5 minutes when you disarm the system, or
until the remote control unit is inserted in
the ignition lock: an attempted entry has
been detected in the period since the
system was armed.
Following triggering of an alarm, the indi-
cator lamp will flash continuously.
Avoiding unintentional alarms The tilt alarm sensor and interior motion
sensor may be switched off at the same
time. You can do this to prevent a false
alarm from being triggered (in garages with
elevator ramps, for instance), or when the
vehicle is transported by trailer or train:
Lock the vehicle, i. e., arm the alarm system
twice in a row by pressing button 2 on the
remote control unit twice in succession,
refer to page 36, or lock the vehicle twice
using the key, refer to page 37.
The indicator lamp flashes briefly and then
flashes continuously. The tilt alarm sensor
and the interior motion sensor are switched
off long as the system is armed.
If you desire, the
>tilt alarm sensor, and
>interior motion sensor
can be switched off permanently. Please
contact your BMW center for assistance.< Interior motion sensor In order for the interior motion sensor to
function properly, the windows and sliding/
tilt sunroof must be completely closed.
Be sure to deactivate the interior motion
sensor, see section on Avoiding uninten-
tional alarms, when you wish to leave the
windows or sliding/tilt sunroof open.
Page 97 of 208
Lamps
96
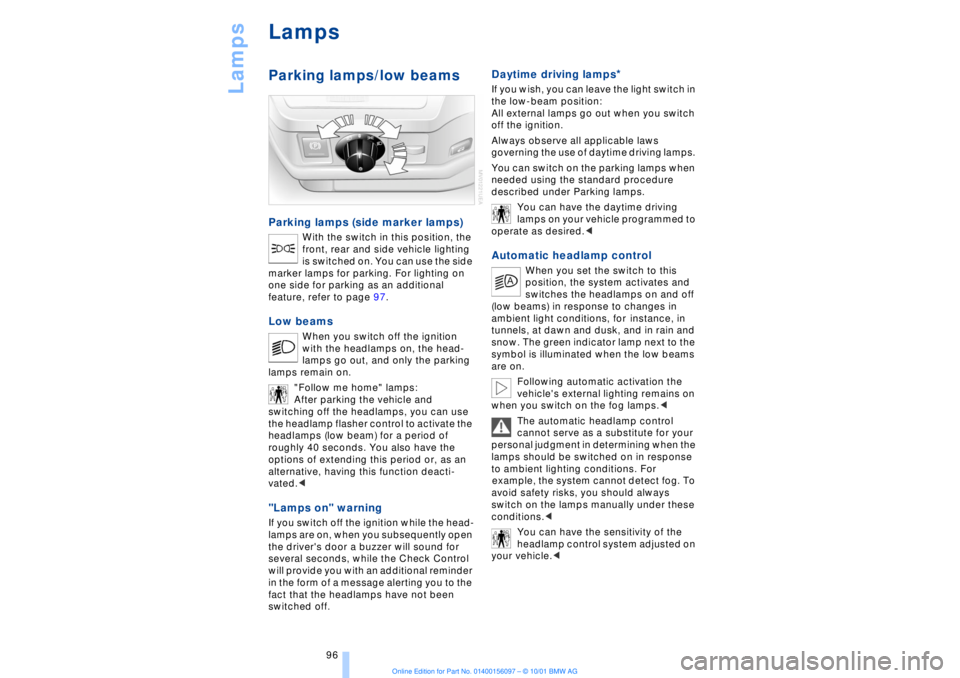
LampsParking lamps/low beams Parking lamps (side marker lamps)
With the switch in this position, the
front, rear and side vehicle lighting
is switched on. You can use the side
marker lamps for parking. For lighting on
one side for parking as an additional
feature, refer to page 97.
Low beams
When you switch off the ignition
with the headlamps on, the head-
lamps go out, and only the parking
lamps remain on.
"Follow me home" lamps:
After parking the vehicle and
switching off the headlamps, you can use
the headlamp flasher control to activate the
headlamps (low beam) for a period of
roughly 40 seconds. You also have the
options of extending this period or, as an
alternative, having this function deacti-
vated.<
"Lamps on" warning If you switch off the ignition while the head-
lamps are on, when you subsequently open
the driver's door a buzzer will sound for
several seconds, while the Check Control
will provide you with an additional reminder
in the form of a message alerting you to the
fact that the headlamps have not been
switched off
.
Daytime driving lamps
*
If you wish, you can leave the light switch in
the low-beam position:
All external lamps go out when you switch
off the ignition.
Always observe all applicable laws
governing the use of daytime driving lamps.
You can switch on the parking lamps when
needed using the standard procedure
described under Parking lamps.
You can have the daytime driving
lamps on your vehicle programmed to
operate as desired.< Automatic headlamp control
When you set the switch to this
position, the system activates and
switches the headlamps on and off
(low beams) in response to changes in
ambient light conditions, for instance, in
tunnels, at dawn and dusk, and in rain and
snow. The green indicator lamp next to the
symbol is illuminated when the low beams
are on.
Following automatic activation the
vehicle's external lighting remains on
when you switch on the fog lamps.<
The automatic headlamp control
cannot serve as a substitute for your
personal judgment in determining when the
lamps should be switched on in response
to ambient lighting conditions. For
example, the system cannot detect fog. To
avoid safety risks, you should always
switch on the lamps manually under these
conditions.<
You can have the sensitivity of the
headlamp control system adjusted on
your vehicle.<
Page 98 of 208
At a glanceControlsDriving tipsCommunicationsNavigationEntertainmentMobilityReference
97
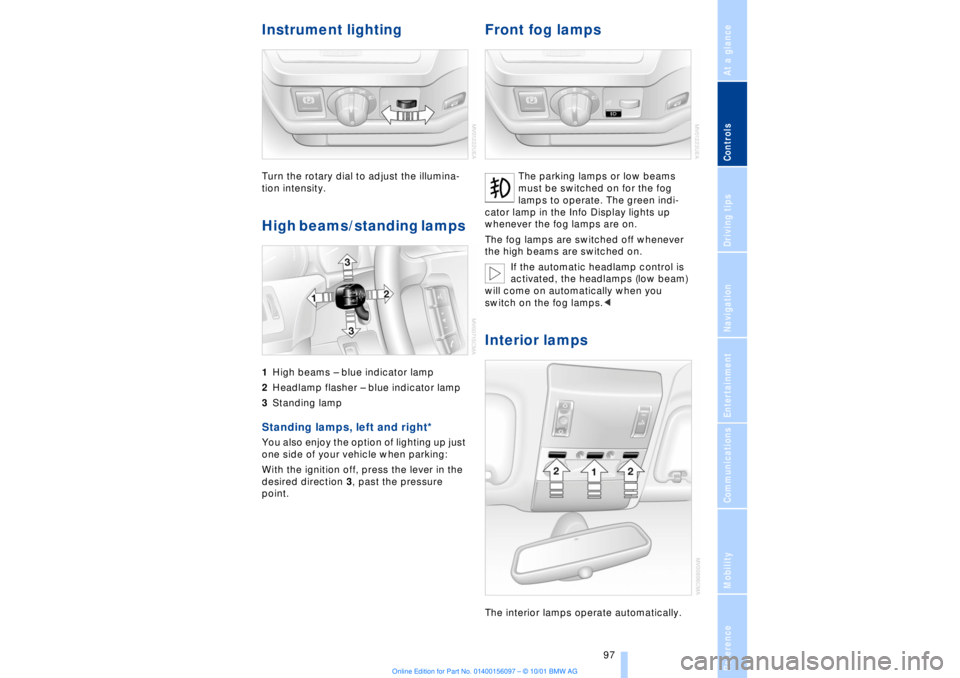
Instrument lighting Turn the rotary dial to adjust the illumina-
tion intensity. High beams/standing lamps 1High beams Ð blue indicator lamp
2Headlamp flasher Ð blue indicator lamp
3Standing lamp Standing lamps, left and right*
You also enjoy the option of lighting up just
one side of your vehicle when parking:
With the ignition off, press the lever in the
desired direction 3, past the pressure
point.
Front fog lamps
The parking lamps or low beams
must be switched on for the fog
lamps to operate. The green indi-
cator lamp in the Info Display lights up
whenever the fog lamps are on.
The fog lamps are switched off whenever
the high beams are switched on.
If the automatic headlamp control is
activated, the headlamps (low beam)
will come on automatically when you
switch on the fog lamps.<
Interior lamps The interior lamps operate automatically.
Page 183 of 208
Replacing components
182
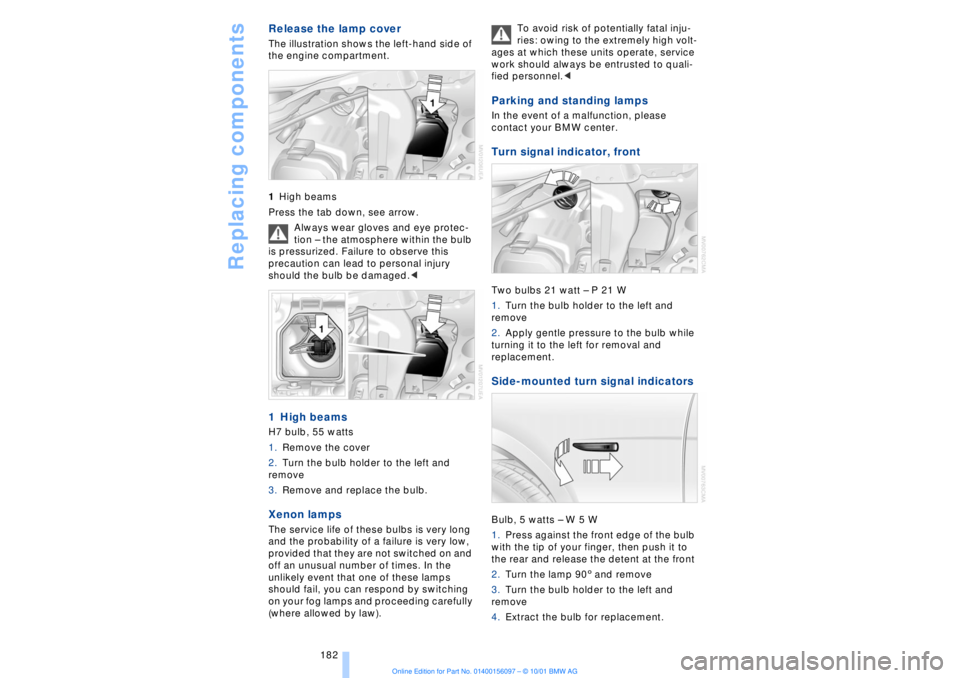
Release the lamp cover The illustration shows the left-hand side of
the engine compartment.
1High beams
Press the tab down, see arrow.
Always wear gloves and eye protec-
tion Ð the atmosphere within the bulb
is pressurized. Failure to observe this
precaution can lead to personal injury
should the bulb be damaged.< 1 High beams H7 bulb, 55 watts
1.Remove the cover
2.Turn the bulb holder to the left and
remove
3.Remove and replace the bulb. Xenon lamps
The service life of these bulbs is very long
and the probability of a failure is very low,
provided that they are not switched on and
off an unusual number of times. In the
unlikely event that one of these lamps
should fail, you can respond by switching
on your fog lamps and proceeding carefully
(where allowed by law). To avoid risk of potentially fatal inju-
ries: owing to the extremely high volt-
ages at which these units operate, service
work should always be entrusted to quali-
fied personnel.<
Parking and standing lamps In the event of a malfunction, please
contact your BMW center. Turn signal indicator, front Two bulbs 21 watt Ð P 21 W
1.Turn the bulb holder to the left and
remove
2.Apply gentle pressure to the bulb while
turning it to the left for removal and
replacement. Side-mounted turn signal indicators Bulb, 5 watts Ð W 5 W
1.Press against the front edge of the bulb
with the tip of your finger, then push it to
the rear and release the detent at the front
2.Turn the lamp 903 and remove
3.Turn the bulb holder to the left and
remove
4.Extract the bulb for replacement.