Page 4 of 208
At a glanceControlsDriving tipsCommunicationsNavigationEntertainmentMobilityReference
73Programmable cruise control
Everything under control
77Odometer, outside temperature
display, clock
77Tachometer
78Service Interval Display
80Check Control
81Computer
86Changing settings
Technology for comfort,
convenience and safety
88PDC Park Distance Control*
89Driving stability control/
DSC Dynamic Stability Control
91Driving stability control/ABS Antilock
Brake System
91Dynamic Drive
92EDC Electronic Damping Control*
92RDC Tire Pressure Monitor*
94Self-leveling suspension*
94Adaptive brake lamp
Lamps
96Parking lamps/low beams
97Instrument lighting
97High beams/standing lamps
97Front fog lamps
97Interior lamps
A congenial climate
99Automatic climate control
105Rear air conditioner*
106Parked-car ventilation system
Practical interior accessories
108Universal Garage Door Opener*
109Sun blinds*
110Rear cooler*
110Glove compartment
111Storage compartments
112Beverage holders
112Ashtray, front
113Cigarette lighter, front
113Power socket
113Ashtray, rear
113Cigarette lighter, rear113Center armrest
114Ski bag*
Things to remember when driving
118Break-in procedures
118General driving notes
119Brake system
120Cargo loading
120Roof-mounted luggage rack*
Navigation
124Safety
124GPS
124Map CD
125Starting the navigation system
125Display in assistance window*
126Selection options
126Destination entry
126Manual entry of destination address
128Select the town or city and the street
from the directory
128Map-guided destination selection
129Selecting destination in Information
129Selecting interesting destinations
130Recent destinations
130Destination list
130Route selection
131Starting the destination guidance
system
132Displaying route
133Select new route
133Voice messages
134Terminate/interrupt active guidance
134Creating a directory
135Location
136Wordmatch principle
136What to do if É
Sound system
140Controls
140Care instructions
140To switch on/off
140Using with ignition off
141Volume adjustment
141Tone control
Page 15 of 208
Cockpit
14
Info Display
1
To view odometer display and reset trip
odometer to zero77
2
Speedometer with:
>
Display for programmable cruise
control73
>
Speed limit display84
3
Indicator and warning lamps15
4
Tachometer77
with navigation system guidance
display132
5
Display panel for
>
Computer 81
or
>
Check Control text messages80
or
>
Voice command system26
6
Transmission range selection66
7
Display panel for
>
Automatic transmission program
display66
8
Indicator for
>
Outside temperature77
>
Clock86
or
>
Indicator and warning lamps80
9
Fuel gauge and computer81
10
Fog lamps97
Page 16 of 208
At a glanceControlsDriving tipsCommunicationsNavigationEntertainmentMobilityReference
15
Indicator and warning lamps
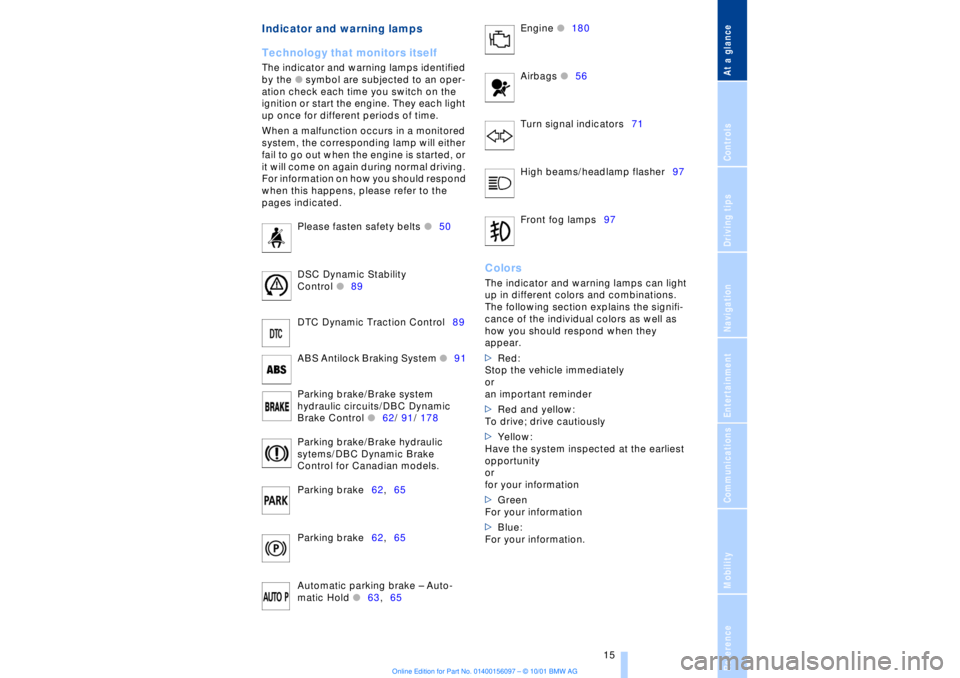
Technology that monitors itself
The indicator and warning lamps identified
by the
l
symbol are subjected to an oper-
ation check each time you switch on the
ignition or start the engine. They each light
up once for different periods of time.
When a malfunction occurs in a monitored
system, the corresponding lamp will either
fail to go out when the engine is started, or
it will come on again during normal driving.
For information on how you should respond
when this happens, please refer to the
pages indicated.
Please fasten safety belts
l
50
DSC Dynamic Stability
Control
l
89
DTC Dynamic Traction Control89
ABS Antilock Braking System
l
91
Parking brake/Brake system
hydraulic circuits/DBC Dynamic
Brake Control
l
62/ 91/ 178
Parking brake/Brake hydraulic
sytems/DBC Dynamic Brake
Control for Canadian models.
Parking brake62,65
Parking brake62,65
Automatic parking brake Ð Auto-
matic Hold
l
63,65 Engine
l
180
Airbags
l56
Turn signal indicators71
High beams/headlamp flasher97
Front fog lamps97
ColorsThe indicator and warning lamps can light
up in different colors and combinations.
The following section explains the signifi-
cance of the individual colors as well as
how you should respond when they
appear.
>Red:
Stop the vehicle immediately
or
an important reminder
>Red and yellow:
To drive; drive cautiously
>Yellow:
Have the system inspected at the earliest
opportunity
or
for your information
>Green
For your information
>Blue:
For your information.
Page 18 of 208
At a glanceControlsDriving tipsCommunicationsNavigationEntertainmentMobilityReference
17
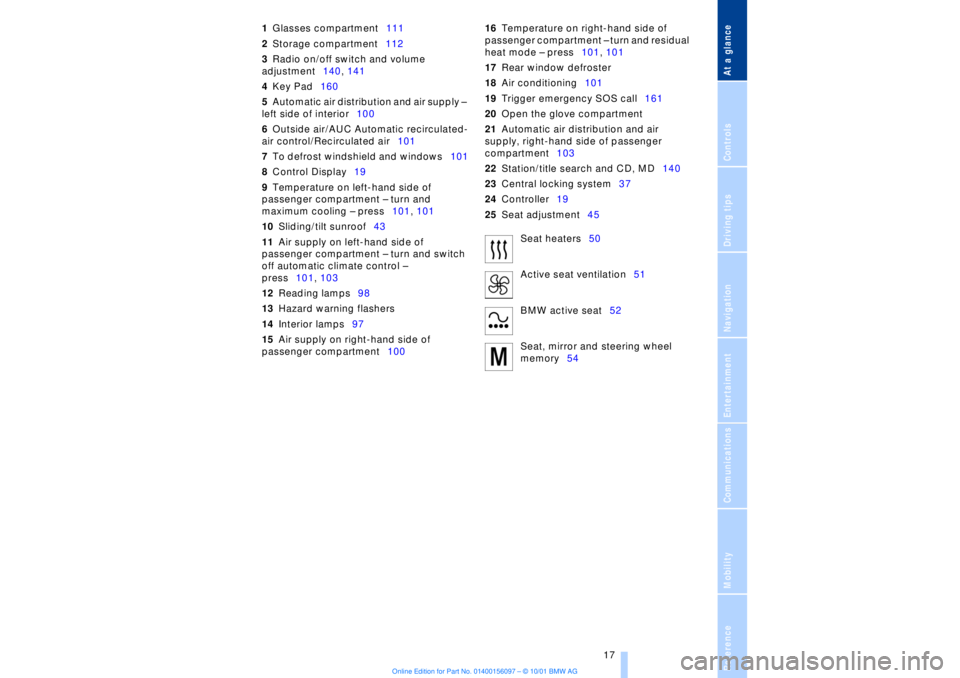
1Glasses compartment111
2Storage compartment112
3Radio on/off switch and volume
adjustment140, 141
4Key Pad160
5Automatic air distribution and air supply Ð
left side of interior100
6Outside air/AUC Automatic recirculated-
air control/Recirculated air101
7To defrost windshield and windows101
8Control Display19
9Temperature on left-hand side of
passenger compartment Ð turn and
maximum cooling Ð press101, 101
10Sliding/tilt sunroof43
11Air supply on left-hand side of
passenger compartment Ð turn and switch
off automatic climate control Ð
press101, 103
12Reading lamps98
13Hazard warning flashers
14Interior lamps97
15Air supply on right-hand side of
passenger compartment10016Temperature on right-hand side of
passenger compartment Ð turn and residual
heat mode Ð press101, 101
17Rear window defroster
18Air conditioning101
19Trigger emergency SOS call161
20Open the glove compartment
21Automatic air distribution and air
supply, right-hand side of passenger
compartment103
22Station/title search and CD, MD140
23Central locking system37
24Controller19
25Seat adjustment45
Seat heaters50
Active seat ventilation51
BMW active seat52
Seat, mirror and steering wheel
memory54
Page 20 of 208
At a glanceControlsDriving tipsCommunicationsNavigationEntertainmentMobilityReference
19
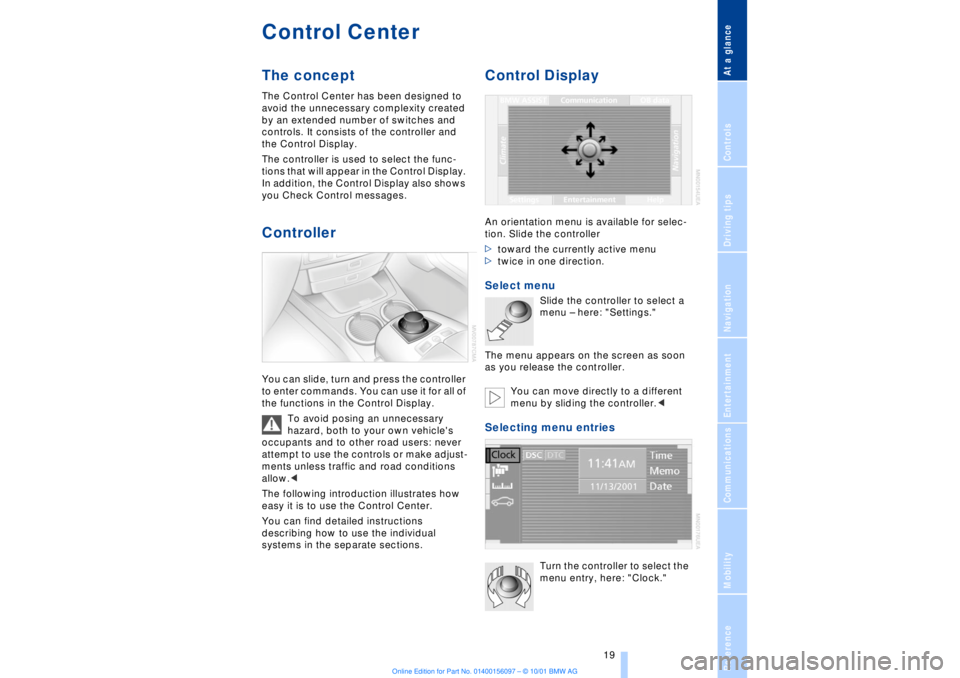
Control CenterThe concept The Control Center has been designed to
avoid the unnecessary complexity created
by an extended number of switches and
controls. It consists of the controller and
the Control Display.
The controller is used to select the func-
tions that will appear in the Control Display.
In addition, the Control Display also shows
you Check Control messages.Controller You can slide, turn and press the controller
to enter commands. You can use it for all of
the functions in the Control Display.
To avoid posing an unnecessary
hazard, both to your own vehicle's
occupants and to other road users: never
attempt to use the controls or make adjust-
ments unless traffic and road conditions
allow.<
The following introduction illustrates how
easy it is to use the Control Center.
You can find detailed instructions
describing how to use the individual
systems in the separate sections.
Control DisplayAn orientation menu is available for selec-
tion. Slide the controller
>toward the currently active menu
>twice in one direction. Select menu
Slide the controller to select a
menu Ð here: "Settings."
The menu appears on the screen as soon
as you release the controller.
You can move directly to a different
menu by sliding the controller.<
Selecting menu entries
Turn the controller to select the
menu entry, here: "Clock."
Page 23 of 208
Control Center
22
Menus in Control Display You can select from an extended range of
functions and setting options:
1BMW ASSIST Ð refer to the separate
manual
2Communications
>Using the mobile phone158
>Cellular phone, refer to separate
Owner's manual
3OB data
>Computer81
>Limit84
>Stopwatch85
>Service Interval Display78
>To access Check Control messages80
4Navigation1245Help
>Brief "help" text displays24
>Menu name for menu change
6Entertainment
>Radio143
>Cassette153
>CD146, 148
>MD151
7Settings
>Time and date86
>Language86
>Units of measure and display format86
8Climate
>Automatic climate control99
>Seat heating50
>Parked-car ventilation system106
Page 24 of 208
At a glanceControlsDriving tipsCommunicationsNavigationEntertainmentMobilityReference
23
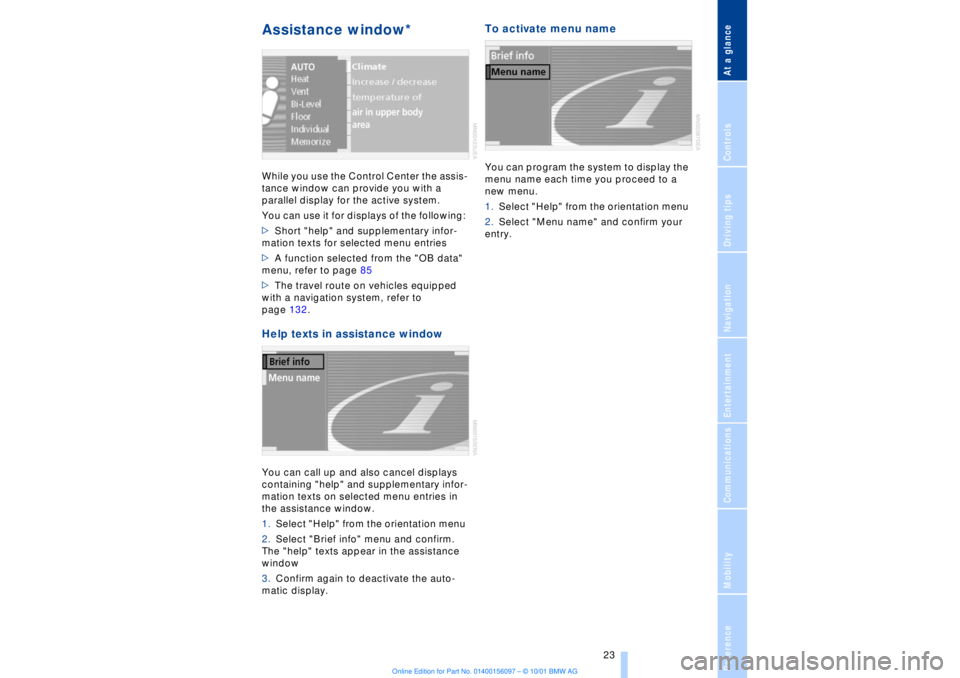
Assistance window* While you use the Control Center the assis-
tance window can provide you with a
parallel display for the active system.
You can use it for displays of the following:
>Short "help" and supplementary infor-
mation texts for selected menu entries
>A function selected from the "OB data"
menu, refer to page 85
>The travel route on vehicles equipped
with a navigation system, refer to
page 132.Help texts in assistance windowYou can call up and also cancel displays
containing "help" and supplementary infor-
mation texts on selected menu entries in
the assistance window.
1.Select "Help" from the orientation menu
2.Select "Brief info" menu and confirm.
The "help" texts appear in the assistance
window
3.Confirm again to deactivate the auto-
matic display.
To activate menu nameYou can program the system to display the
menu name each time you proceed to a
new menu.
1.Select "Help" from the orientation menu
2.Select "Menu name" and confirm your
entry.
Page 25 of 208
Control Center
24
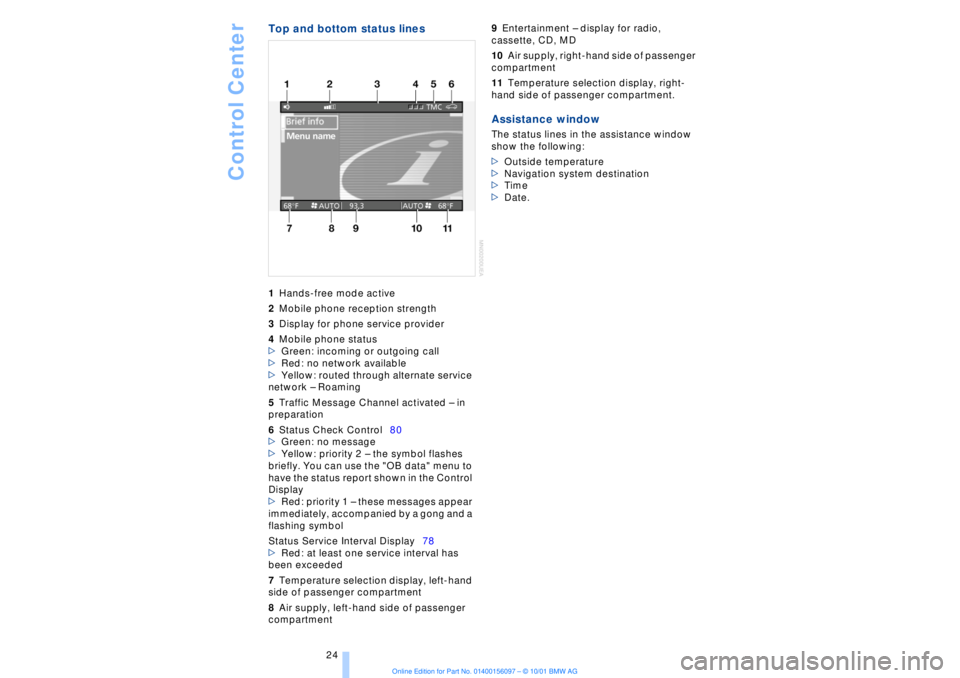
Top and bottom status lines1Hands-free mode active
2Mobile phone reception strength
3Display for phone service provider
4Mobile phone status
>Green: incoming or outgoing call
>Red: no network available
>Yellow: routed through alternate service
network Ð Roaming
5Traffic Message Channel activated Ð in
preparation
6Status Check Control80
>Green: no message
>Yellow: priority 2 Ð the symbol flashes
briefly. You can use the "OB data" menu to
have the status report shown in the Control
Display
>Red: priority 1 Ð these messages appear
immediately, accompanied by a gong and a
flashing symbol
Status Service Interval Display78
>Red: at least one service interval has
been exceeded
7Temperature selection display, left-hand
side of passenger compartment
8Air supply, left-hand side of passenger
compartment 9Entertainment Ð display for radio,
cassette, CD, MD
10Air supply, right-hand side of passenger
compartment
11Temperature selection display, right-
hand side of passenger compartment. Assistance windowThe status lines in the assistance window
show the following:
>Outside temperature
>Navigation system destination
>Time
>Date.