Page 177 of 208

Under the hood
176
Engine compartment 1Engine oil dipstick, refer to next column
2Brake fluid reservoir, located beneath
the microfilter cover178
3Reservoir for windshield and headlamp
washer system73
4Engine oil filler neck177
5Coolant expansion tank178
6Jump-starting terminal187 Engine oilChecking oil level1.Park the vehicle on a level surface
2.Switch the engine off after it has
reached normal operating temperature 3.After approx. 5 minutes, pull the dipstick
out and wipe it off with a clean lint-free
cloth, paper towel, or similar material
4.Carefully push the dipstick all the way
into the guide tube and pull it out again
5.The oil should extend to between the
two marks on the disptick
As is the case with fuel economy, the rate
at which the engine uses oil is strongly
influenced by driving style and operating
conditions.
The space between the two marks on
the dipstick corresponds to approx.
1.1 US quarts (1 litre). Do not fill beyond
the upper mark on the dipstick. Excess oil
can damage the engine.
Page 178 of 208

At a glanceControlsDriving tipsCommunicationsNavigationEntertainmentMobilityReference
177
Adding engine oil Wait until the level has dropped to just
above the lower mark before adding oil.
BMW engines are designed to
operate without additives, and their
use could even lead to damage in some
cases. This also applies to the automatic
transmission, the differential and the power
steering system.<
Recommendation: have your oil changed at
your BMW center.
Continuous exposure to used oil has
caused cancer in laboratory testing.
For this reason, any skin areas that come
into contact with oil should be thoroughly
washed with soap and water.
Always store oil, grease, etc., well out of
the reach of children; always observe all
warning labels on the containers.<
Please observe all environmental-
protection rules and regulations when
disposing of used oil.< Specified engine oils The quality of the engine oil selected has
critical significance for the operation and
service life of an engine. BMW approves
only specific oils after confirming their suit-
ability for use in its vehicles with extensive
testing.
Use only approved BMW High Perfor-
mance Synthetic Oil.
If you are unable to obtain BMW High
Performance Synthetic Oil, you can add
small amounts of another synthetic oil
between oil changes. Use only oils with the
API SH specification or higher. Ask your BMW center for details
concerning the specific BMW High
Performance Synthetic Oil or synthetic oils
which have been approved.<
You can also call BMW of North America at
1-800-831-1117 or visit this website:
www.bmwusa.com to obtain this informa-
tion.
Viscosity ratingsViscosity is the oil flow rating as defined in
SAE classes.
The selection of the correct SAE class
depends on the climatic conditions in the
area where you typically drive your BMW.
Approved oils are in SAE classes
5W-40 and 5W-30.<
These oils may be used for driving in all
ambient temperatures.Coolant
Do not add coolant to the cooling
system when the engine is hot.
Escaping coolant can cause burns.
To avoid the possibility of damage later on,
never use anything other than factory-
approved, nitrite and amino-free extended-
duty antifreeze with corrosion inhibitor.
Your BMW center is familiar with the official
specifications.
Antifreeze and anticorrosion agents are
hazardous to health. Always store these
agents in tightly-closed original containers
kept well away from the reach of children.
Extended-duty antifreeze with corrosion
inhibitor contains ethylene glycol Ð a flam-
mable substance. For this reason, do not
spill antifreeze with corrosion inhibitor on
hot engine parts. It could ignite and cause
serious burns.<
Always observe all applicable rules
and regulations for environmental
protection when disposing of used
extended-duty antifreeze with corrosion
inhibitor.<
Page 179 of 208
:
1.Turn the cap of the expansion tank
counterclockwise to allow any accumu-
lated pressur")
Under the hood
178
Checking coolant level Correct coolant level with the engine cold Ð
approx. 58 7 (20 6):
1.Turn the cap of the expansion tank
counterclockwise to allow any accumu-
lated pressure to escape, then continue
turning to open
2.The coolant level is correct when the
coolant extends to between the MIN and
MAX marks on the filler neck, refer to the
diagram adjacent to the filler neck
3.If the coolant is low, slowly add coolant
up to the specified level Ð do not overfill. Brake fluid
The symbol lights up and a
message appears in the Check
Control panel:
The brake fluid in the reservoir has fallen to
below the minimum level.
The brake fluid reservoir is located under
the microfilter housing trim panel on the
driver's side of the vehicle. To have brake
fluid added to the system, or to have the
source of any brake fluid loss traced and
rectified, please contact your BMW center,
which can also supply the factory-
approved DOT 4 brake fluids.
Brake fluid is hygroscopic: it absorbs
moisture from the atmosphere over
the course of time.
To ensure that the brake system continues
to provide safe and reliable performance,
remember to have the brake fluid changed
every two years at the latest, refer to
page 79 and to the Service and Warranty
Information Booklet (US models) or the Warranty and Service Guide Booklet
(Canadian models).
Brake fluid is toxic and also damages
vehicle paintwork. Always store brake fluid
in tightly-closed original containers kept
well away from the reach of children.
Do not spill the fluid and do not refill the
brake fluid reservoir to beyond the MAX
mark. Should it come into contact with hot
engine components, the brake fluid could
ignite and cause personal injury in the form
of burns.<
Always observe all applicable envi-
ronmental rules and regulations when
disposing of used brake fluid.<
A low brake-fluid level combined with
longer-than-usual pedal travel could be a
sign that one of the brake system's
hydraulic circuits has failed.
Proceed to the nearest BMW center.
Remember that pedal travel may be
increased, and there may also be a
substantial increase in the amount of pedal
pressure required to brake the vehicle.
Please adapt your driving style accord-
ingly.<
Warning lamp for Canadian models
Page 180 of 208

At a glanceControlsDriving tipsCommunicationsNavigationEntertainmentMobilityReference
179
Maintenance The BMW Maintenance
System The BMW Maintenance System is
designed to ensure that your vehicle will
continue to furnish consistent reliability
combined with optimal safety. The service
schedule also includes operations related
to the vehicle's comfort and convenience
features, such as replacement of the filters
for the inside air. The ultimate objective is
to furnish economical maintenance by
providing the ideal service for your indi-
vidual vehicle.
Should the day come when you decide to
sell your BMW, you will find that a complete
dealer service history is an asset of great
value. CBS Condition Based Service CBS is a more advanced version of the
Service Interval Display. Sensors combine
with highly-specialized algorithms to
supply service information that reflects
your vehicle's actual operating conditions
more precisely than ever before.
The system now furnishes individual
displays of the times remaining until the
deadlines for specific service operations as
well as official state inspections:
>Engine oil
>Brakes Ð separate for front and rear
>Microfilter/activated-charcoal filter
>Brake fluid >Coolant
>Spark plugs
>Vehicle check
>Official state inspections
CBS monitors both current and upcoming
service requirements. After accessing the
data stored in the vehicle's key, your BMW
service advisor is able to suggest precisely
the right array of service procedures for
your own individual vehicle.
By letting you define a service and mainte-
nance regimen that reflects your own indi-
vidual requirements, Condition Based
Service builds the basis for troublefree
driving.
You can find more detailed information on
the Service Interval Display on page 78.
Service and Warranty Information
Booklet (US models) and Service
Guide Booklet (Canadian models) Please consult your Service and Warranty
Information Booklet (US models) and
Service Guide Booklet (Canadian models)
for additional information on service
requirements.
Have service and repair operations
performed at your BMW center.
Take the time to ensure that these service
procedures are confirmed by entries in
your vehicle's Service and Warranty Infor-
mation Booklet (US models) and Service
Guide Booklet (Canadian models). These
entries verify that your vehicle has received
the specified regular maintenance, and
may also be required when submitting
warranty claims.< Care You can find everything you need to know
on this topic by consulting the separate
"Car care" manual.
Page 181 of 208

Rules and regulations
180
Rules and regulationsCalifornia Proposition 65
Warning California laws require us to state the
following warning:
Engine exhausts, some of its constit-
uents, and certain vehicle compo-
nents contain or emit chemicals known to
the State of California to cause cancer and
birth defects or other reproductive harm.< OBD connector The Onboard Diagnostic (OBD) interface
socket is located on the left of the driverÕs
side under the instrument panel and under
a cover.
The cover has the letters OBD on it.
The purpose of the OBD system is to
ensure proper operation of the emission
control system for the vehicleÕs lifetime.
The system monitors emission-related
components and systems for deterioriation
and malfunction.
An illuminated lamp informs you of
the need for service, not of the need
to stop the vehicle. However, the
systems should be checked by your BMW
center at the earliest possible opportunity.
Under certain conditions, the indicator will
blink or flash. This indicates a rather severe
level of engine misfire. When this occurs,
you should reduce speed and consult the nearest BMW center as soon as possible.
Severe engine misfire over only a short
period of time can seriously damage emis-
sions control components, especially the
catalytic converter.
When the fuel filler cap is not properly
tightened, the OBD system can
detect the vapor leak and the indicator will
light up. If the filler cap is subsequently
tightened, the indicator should go out
within a few days.<
Page 182 of 208

OverviewControlsDriving tipsCommunicationsNavigationEntertainmentMobilityReference
181
Replacing componentsOnboard tool kitThe onboard tool kit is located in the
luggage compartment lid.
Loosen the wingnut to open. Windshield wiper blades To replace the blades, start by folding the
wipers out and away from the windshield,
refer to page 72.
Use only wiper blades that have been
approved by BMW.< Lamps and bulbsThe lamps and bulbs are essential factors
contributing to the safety of your vehicle.
Therefore, comply fully with the following
instructions during bulb replacement. If you
are not familiar with the specified proce-
dures, have the replacements carried out at
your BMW center.
Never touch the glass on new bulbs
with your bare fingers, as even minute
amounts of contamination will burn into the
bulb's surface and reduce its service life.
Use a clean cloth, napkin, etc., or hold the
bulb by its metal socket.<
You can obtain a selection of replacement
bulbs at your BMW center.
To prevent short circuits, before
working on any electrical system,
equipment or accessory you should always switch it off and disconnect the cable from
the battery's negative terminal before
starting.
To avoid possible injury or equipment
damage when changing bulbs, always
observe any instructions provided by the
bulb manufacturer.<
When caring for your headlamps:
>Do not clean by wiping with a dry
cloth (scratches). Never use abrasives or
strong solvents to clean the covers
>Remove contaminants such as dead
insects by soaking with BMW Shampoo
and then washing off with plenty of water
>Remove ice by thawing with a deicer
spray Ð never use an ice scraper.<
Headlamps Engine compartment, left side:
Turn the quick-release clamps, see arrows,
905 counterclockwise and remove the
cover.
After replacing the bulb return the cover to
its original position and press the quick-
release clamps down.
Page 183 of 208

Replacing components
182
Release the lamp cover The illustration shows the left-hand side of
the engine compartment.
1High beams
Press the tab down, see arrow.
Always wear gloves and eye protec-
tion Ð the atmosphere within the bulb
is pressurized. Failure to observe this
precaution can lead to personal injury
should the bulb be damaged.< 1 High beams H7 bulb, 55 watts
1.Remove the cover
2.Turn the bulb holder to the left and
remove
3.Remove and replace the bulb. Xenon lamps
The service life of these bulbs is very long
and the probability of a failure is very low,
provided that they are not switched on and
off an unusual number of times. In the
unlikely event that one of these lamps
should fail, you can respond by switching
on your fog lamps and proceeding carefully
(where allowed by law). To avoid risk of potentially fatal inju-
ries: owing to the extremely high volt-
ages at which these units operate, service
work should always be entrusted to quali-
fied personnel.<
Parking and standing lamps In the event of a malfunction, please
contact your BMW center. Turn signal indicator, front Two bulbs 21 watt Ð P 21 W
1.Turn the bulb holder to the left and
remove
2.Apply gentle pressure to the bulb while
turning it to the left for removal and
replacement. Side-mounted turn signal indicators Bulb, 5 watts Ð W 5 W
1.Press against the front edge of the bulb
with the tip of your finger, then push it to
the rear and release the detent at the front
2.Turn the lamp 903 and remove
3.Turn the bulb holder to the left and
remove
4.Extract the bulb for replacement.
Page 184 of 208

OverviewControlsDriving tipsCommunicationsNavigationEntertainmentMobilityReference
183
Side marker lamps, front and rear Please contact your BMW center for
replacement. Tail lamps 1Rear lamp, red
2Brake lamp, red
3Backup lamp, gray or white
4Turn signal indicator, yellow or white
5Reflector, redTail lamps and brake lamps These lamps use LED technology for oper-
ation. Please contact a BMW center in case
of a malfunction. Fender-mounted lamps The illustration shows the recess on the left
side of the luggage compartment.Rear turn signal indicatorBulb, 21 watts Ð P 21 W
1.Use the handle at the top to swivel down
the side trim panel
2.Turn the bulb holder to the left and
remove 3.Apply gentle pressure to the bulb while
turning it to the left for removal and
replacement.
Lamps in luggage compartment lid Remove the trim panel from the luggage
compartment lid.
1Backup lamp
2License plate lamp Replacing backup lamps and license
plate lamps Backup lamp: bulb, 16 watts Ð W 16 W
License plate lamp: bulb, 5 watts Ð W 5 W
1.Pull the bulb holder out
2.Extract the bulb for replacement. Changing a tire
Safety precautions to observe in the
event of a flat tire and during all tire
changes: park the vehicle as far as possible
from passing traffic. Park on a firm, flat,
surface. Switch on the hazard warning
flashers.
Engage the parking brake and move the
transmission's selector lever to P.
Have all vehicle occcupants get out of the
vehicle and ensure that they remain outside
the immediate area in a safe place, such as
behind a guardrail. If a warning triangle or
portable hazard warning lamp is required,
set it up on the roadside at an appropriate
distance from the rear of the vehicle.
Comply with all safety guidelines and regu-
lations.
Change the wheel only on a level, firm
surface which is not slippery. The vehicle or
 1
1 2
2 3
3 4
4 5
5 6
6 7
7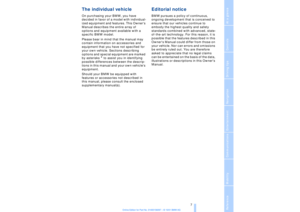 8
8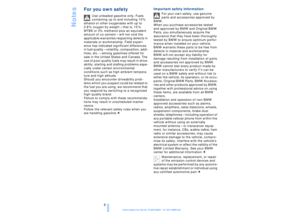 9
9 10
10 11
11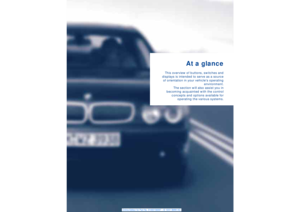 12
12 13
13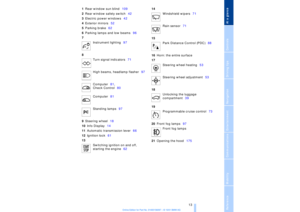 14
14 15
15 16
16 17
17 18
18 19
19 20
20 21
21 22
22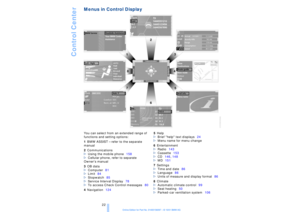 23
23 24
24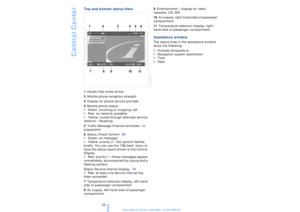 25
25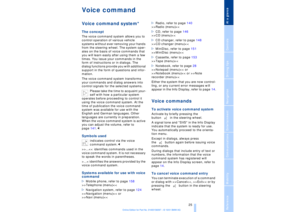 26
26 27
27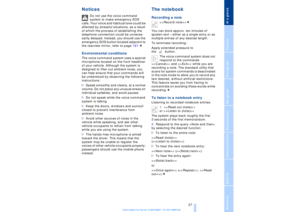 28
28 29
29 30
30 31
31 32
32 33
33 34
34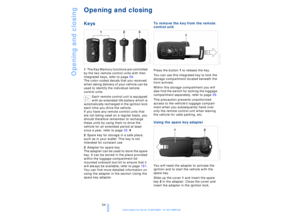 35
35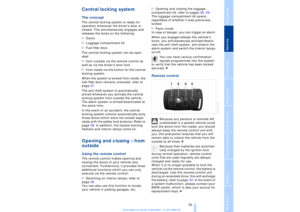 36
36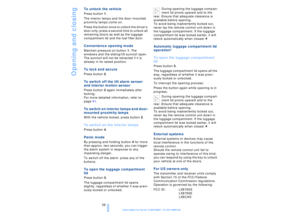 37
37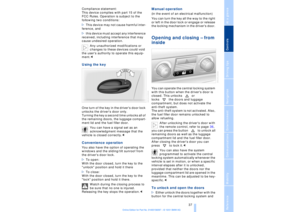 38
38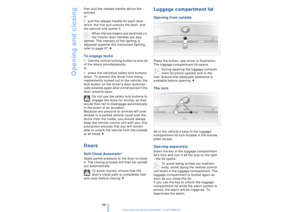 39
39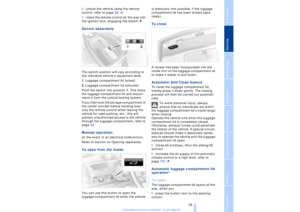 40
40 41
41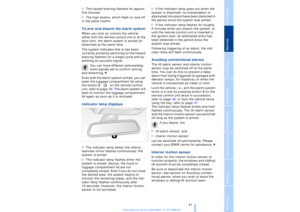 42
42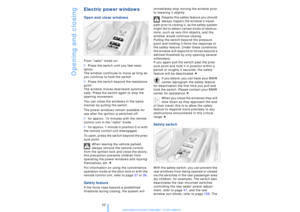 43
43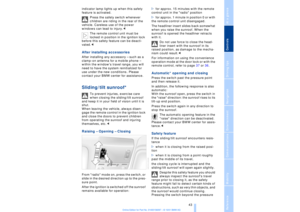 44
44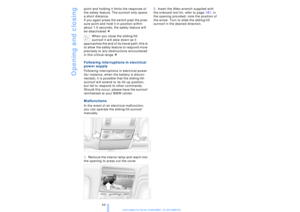 45
45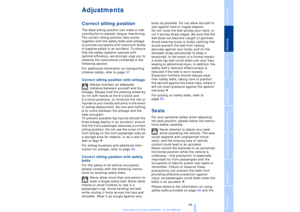 46
46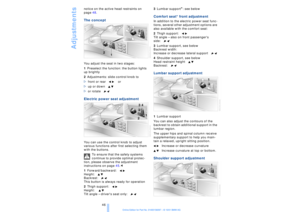 47
47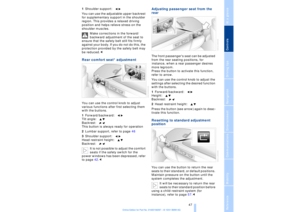 48
48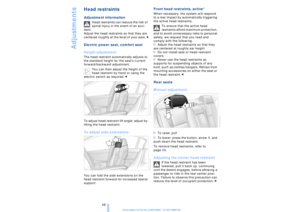 49
49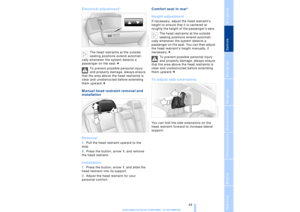 50
50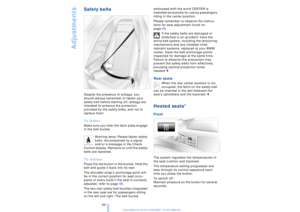 51
51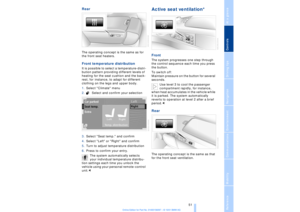 52
52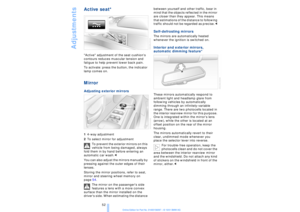 53
53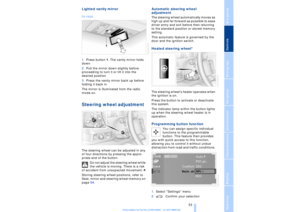 54
54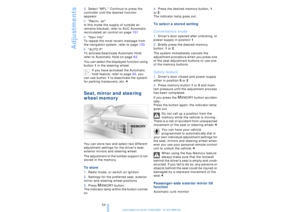 55
55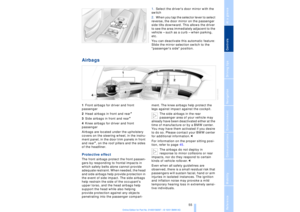 56
56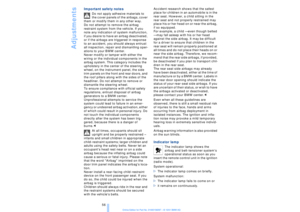 57
57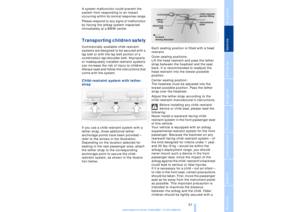 58
58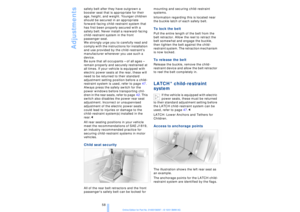 59
59 60
60 61
61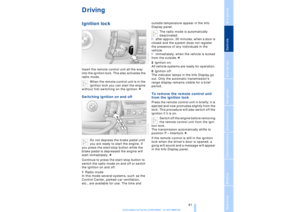 62
62 63
63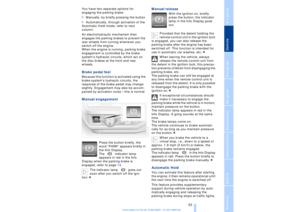 64
64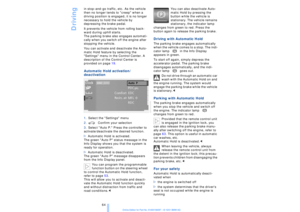 65
65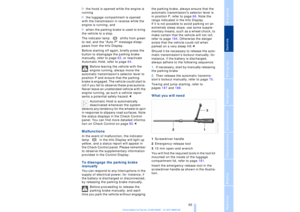 66
66 67
67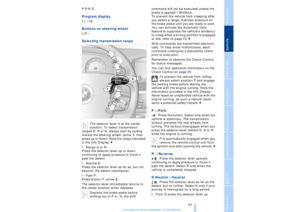 68
68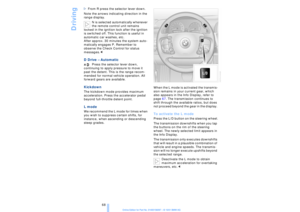 69
69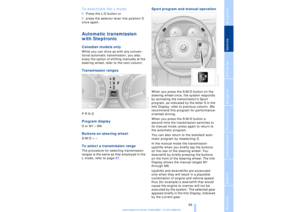 70
70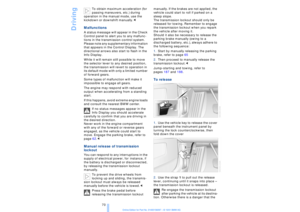 71
71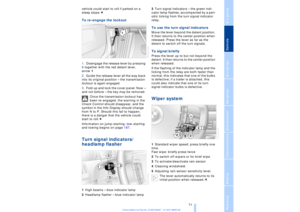 72
72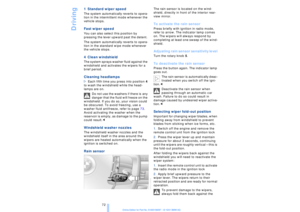 73
73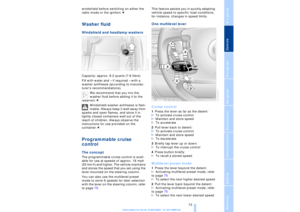 74
74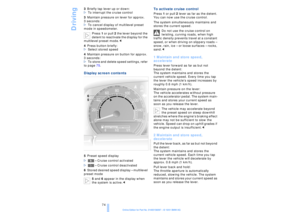 75
75 76
76 77
77 78
78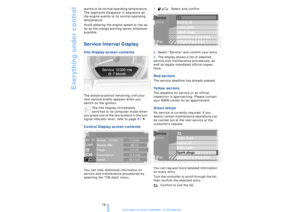 79
79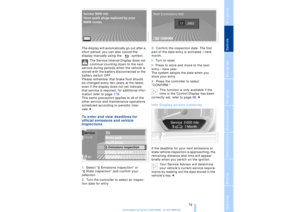 80
80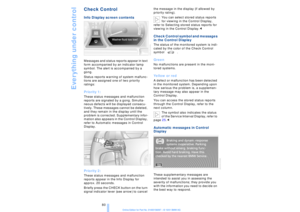 81
81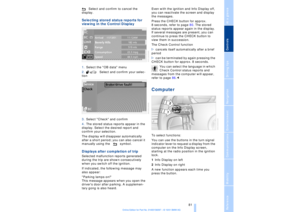 82
82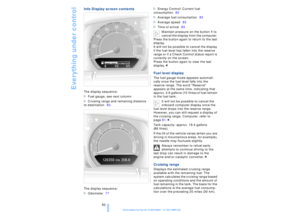 83
83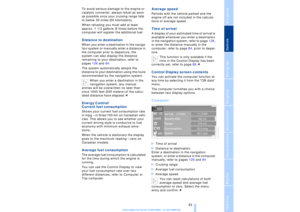 84
84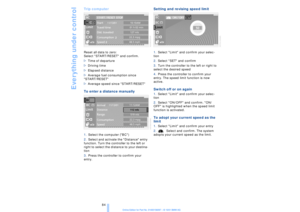 85
85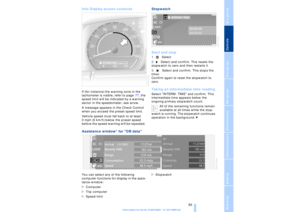 86
86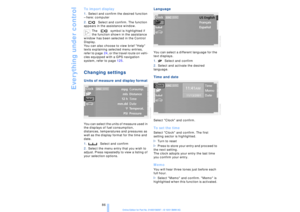 87
87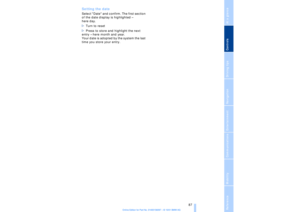 88
88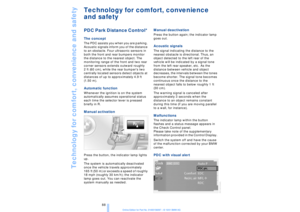 89
89 90
90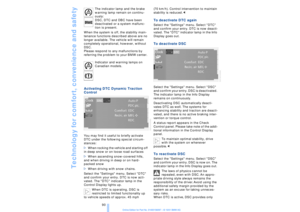 91
91 92
92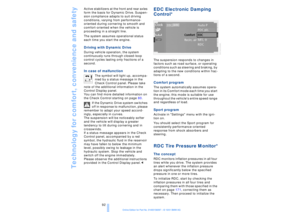 93
93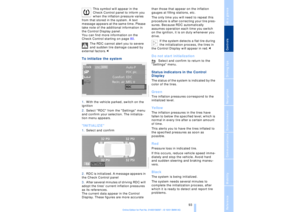 94
94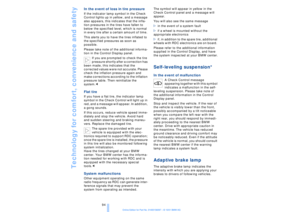 95
95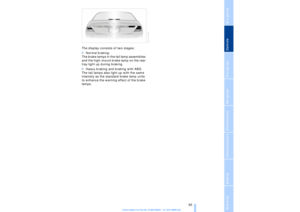 96
96 97
97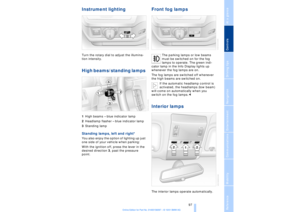 98
98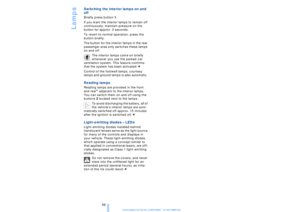 99
99 100
100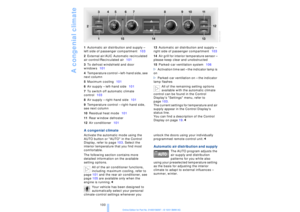 101
101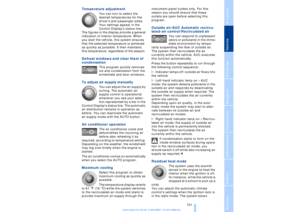 102
102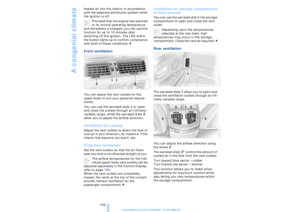 103
103 104
104 105
105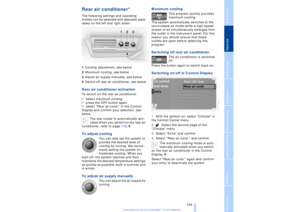 106
106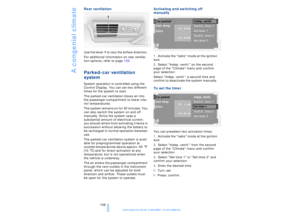 107
107 108
108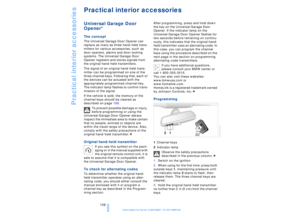 109
109 110
110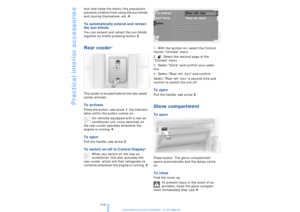 111
111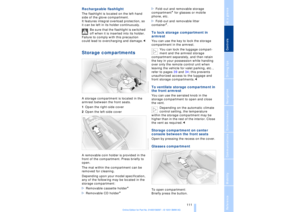 112
112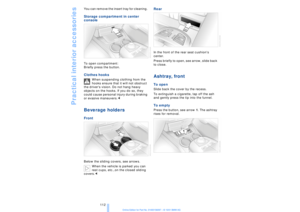 113
113 114
114 115
115 116
116 117
117 118
118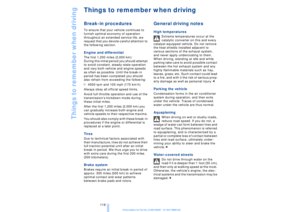 119
119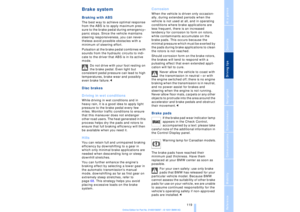 120
120 121
121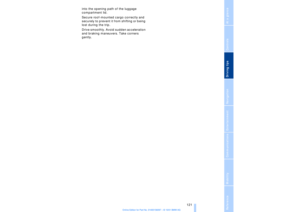 122
122 123
123 124
124 125
125 126
126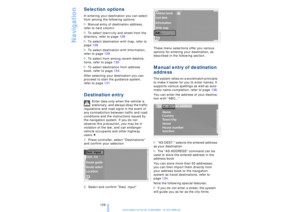 127
127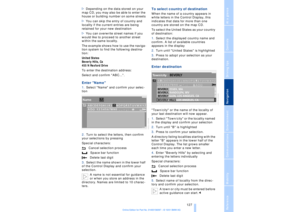 128
128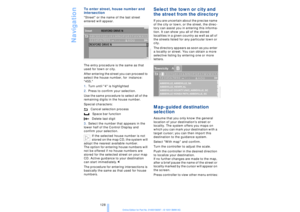 129
129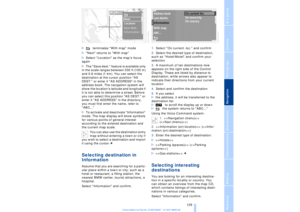 130
130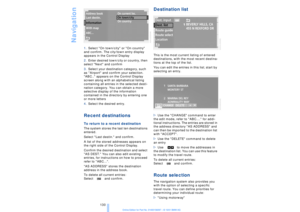 131
131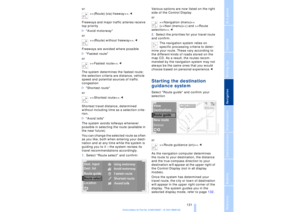 132
132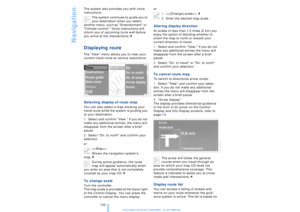 133
133 134
134 135
135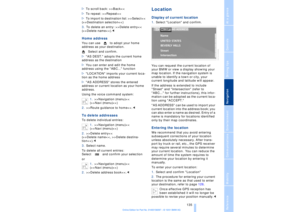 136
136 137
137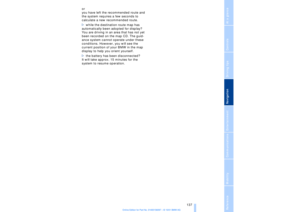 138
138 139
139 140
140 141
141 142
142 143
143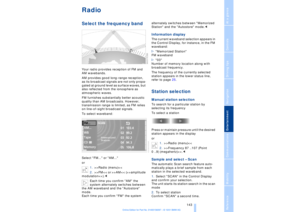 144
144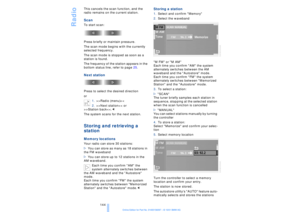 145
145 146
146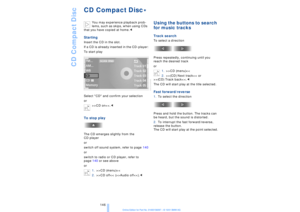 147
147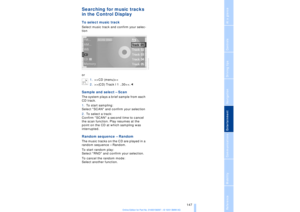 148
148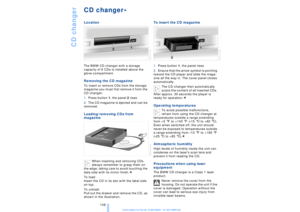 149
149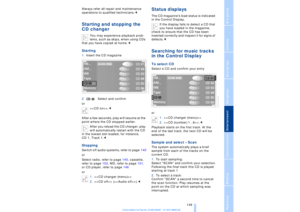 150
150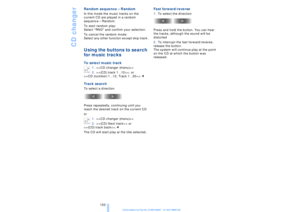 151
151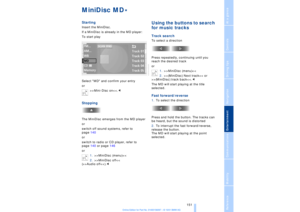 152
152 153
153 154
154 155
155 156
156 157
157 158
158 159
159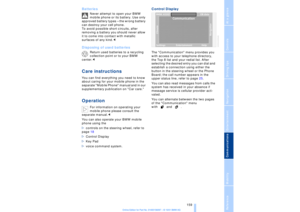 160
160 161
161 162
162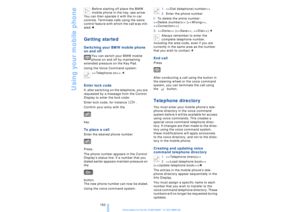 163
163 164
164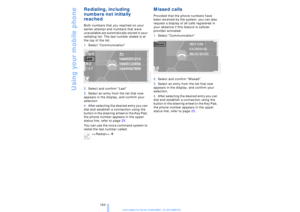 165
165 166
166 167
167 168
168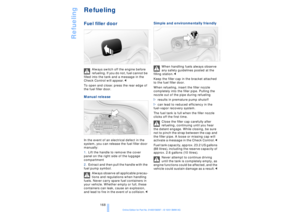 169
169 170
170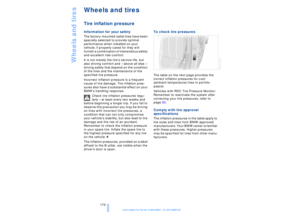 171
171 172
172 173
173 174
174 175
175 176
176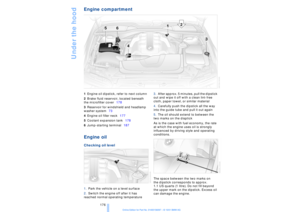 177
177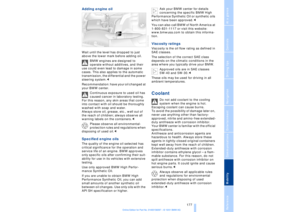 178
178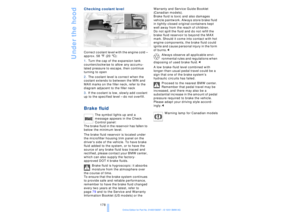 179
179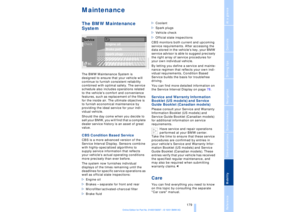 180
180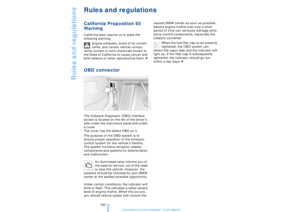 181
181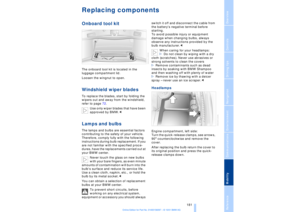 182
182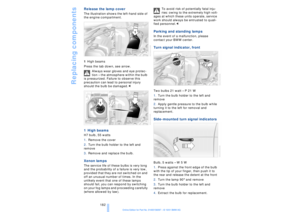 183
183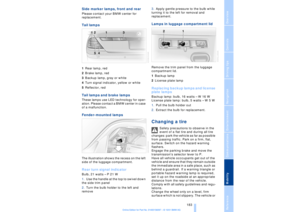 184
184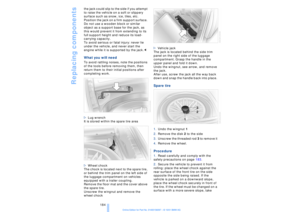 185
185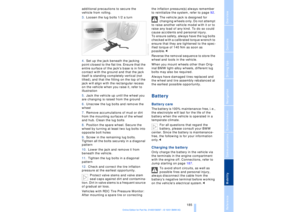 186
186 187
187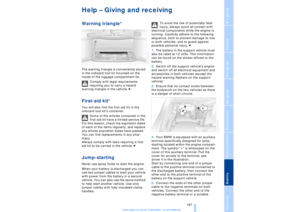 188
188 189
189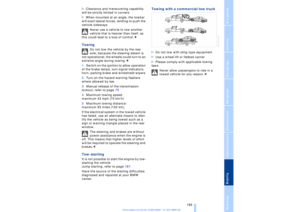 190
190 191
191 192
192 193
193 194
194 195
195 196
196 197
197 198
198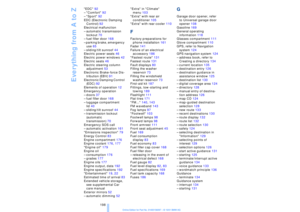 199
199 200
200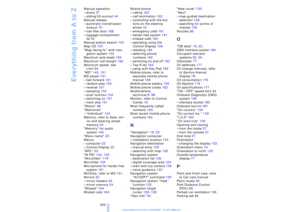 201
201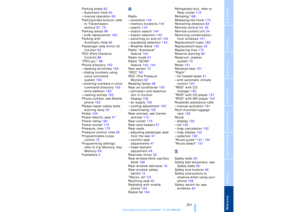 202
202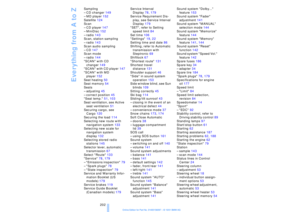 203
203 204
204 205
205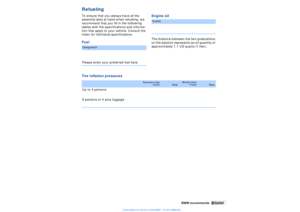 206
206 207
207