Page 2632 of 4323
EM0L1±09
A03191SST
A03192
± ENGINE MECHANICALCYLINDER HEAD
EM±45
2624 Author�: Date�:
2005 SEQUOIA (RM1146U)
DISASSEMBLY
1. REMOVE VALVE LIFTERS AND SHIMS
HINT:
Arrange the valve lifters and shims in correct order.
2. REMOVE VALVES
(a) Using SST, compress the valve spring and remove the 2
keepers.
SST 09202±70020 (09202±00010)
(b) Remove the spring retainer, the valve spring, the valve
and the spring seat.
HINT:
Arrange the valves, valve springs, spring seats and spring re-
tainers incorrect order.
(c) Using needle±nose pliers, remove the oil seal.
Page 3013 of 4323

SA3213
AB
Front
C D
R13228
R13229
FA0018
AB
FrontA
B
A: Inside
B: Outside
± SUSPENSION AND AXLEFRONT WHEEL ALIGNMENT
SA±9
3005 Author�: Date�:
2005 SEQUOIA (RM1146U)
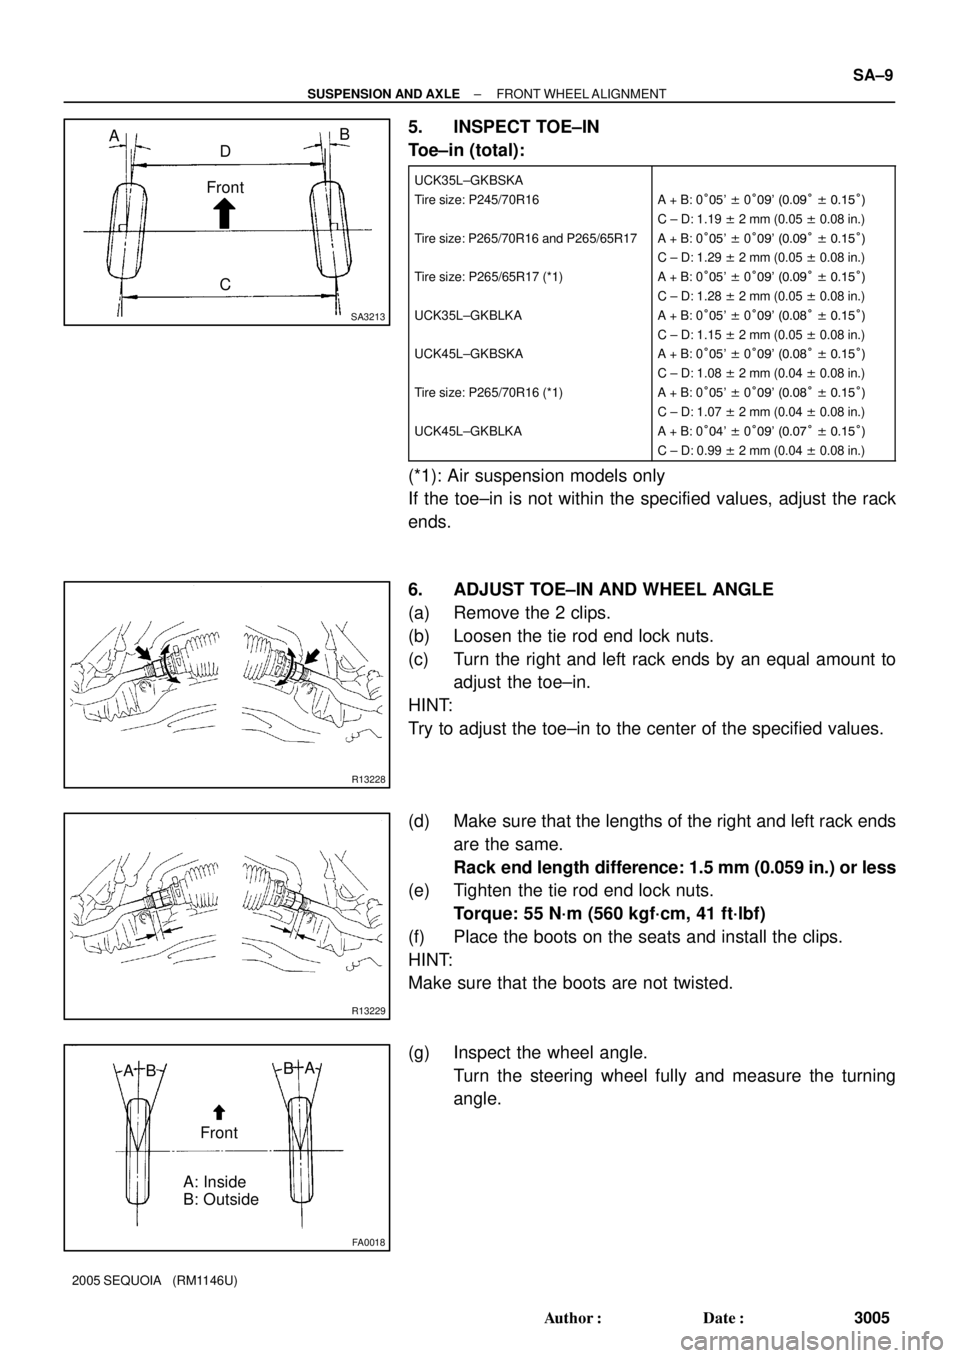
5. INSPECT TOE±IN
Toe±in (total):
UCK35L±GKBSKA
Tire size: P245/70R16
Tire size: P265/70R16 and P265/65R17
Tire size: P265/65R17 (*1)
UCK35L±GKBLKA
UCK45L±GKBSKA
Tire size: P265/70R16 (*1)
UCK45L±GKBLKA
A + B: 0°05' ± 0°09' (0.09° ± 0.15°)
C ± D: 1.19 ± 2 mm (0.05 ± 0.08 in.)
A + B: 0°05' ± 0°09' (0.09° ± 0.15°)
C ± D: 1.29 ± 2 mm (0.05 ± 0.08 in.)
A + B: 0°05' ± 0°09' (0.09° ± 0.15°)
C ± D: 1.28 ± 2 mm (0.05 ± 0.08 in.)
A + B: 0°05' ± 0°09' (0.08° ± 0.15°)
C ± D: 1.15 ± 2 mm (0.05 ± 0.08 in.)
A + B: 0°05' ± 0°09' (0.08° ± 0.15°)
C ± D: 1.08 ± 2 mm (0.04 ± 0.08 in.)
A + B: 0°05' ± 0°09' (0.08° ± 0.15°)
C ± D: 1.07 ± 2 mm (0.04 ± 0.08 in.)
A + B: 0°04' ± 0°09' (0.07° ± 0.15°)
C ± D: 0.99 ± 2 mm (0.04 ± 0.08 in.)
(*1): Air suspension models only
If the toe±in is not within the specified values, adjust the rack
ends.
6. ADJUST TOE±IN AND WHEEL ANGLE
(a) Remove the 2 clips.
(b) Loosen the tie rod end lock nuts.
(c) Turn the right and left rack ends by an equal amount to
adjust the toe±in.
HINT:
Try to adjust the toe±in to the center of the specified values.
(d) Make sure that the lengths of the right and left rack ends
are the same.
Rack end length difference: 1.5 mm (0.059 in.) or less
(e) Tighten the tie rod end lock nuts.
Torque: 55 N´m (560 kgf´cm, 41 ft´lbf)
(f) Place the boots on the seats and install the clips.
HINT:
Make sure that the boots are not twisted.
(g) Inspect the wheel angle.
Turn the steering wheel fully and measure the turning
angle.
Page 3915 of 4323

05_SEQUOIA_U (L/O 0408)
56
2005 SEQUOIA from Aug. '04 Prod. (OM34424U)
From front
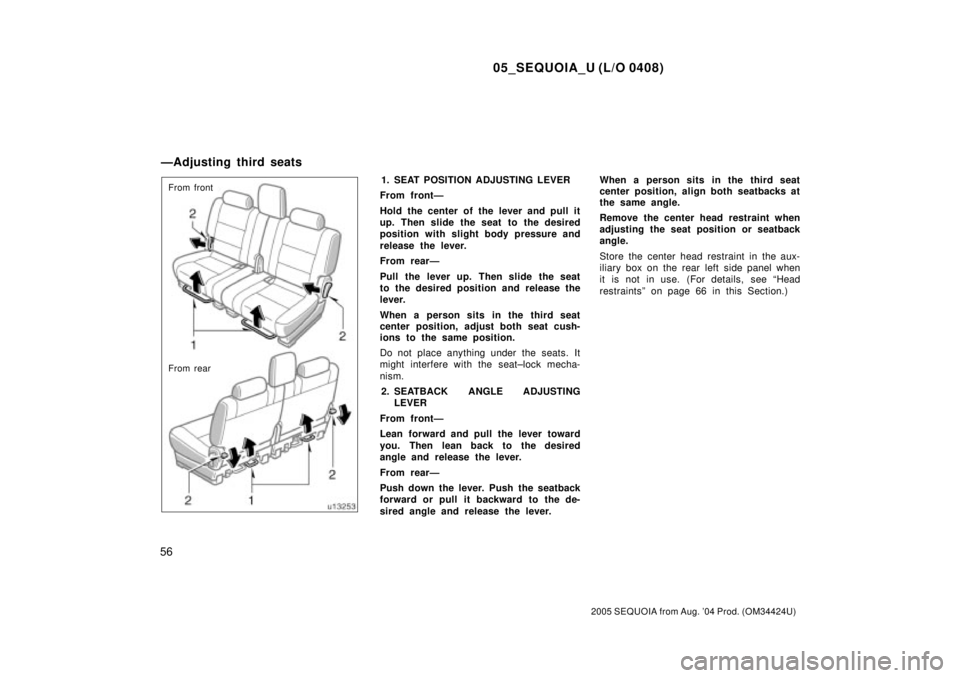
From rear1. SEAT POSITION ADJUSTING LEVER
From frontÐ
Hold the center of the lever and pull it
up. Then slide the seat to the desired
position with slight body pressure and
release the lever.
From rearÐ
Pull the lever up. Then slide the seat
to the desired position and release the
lever.
When a person sits in the third seat
center position, adjust both seat cush-
ions to the same position.
Do not place anything under the seats. It
might interfere with the seat±lock mecha-
nism.
2. SEATBACK ANGLE ADJUSTING
LEVER
From frontÐ
Lean forward and pull the lever toward
you. Then lean back to the desired
angle and release the lever.
From rearÐ
Push down the lever. Push the seatback
forward or pull it backward to the de-
sired angle and release the lever.When a person sits in the third seat
center position, align both seatbacks at
the same angle.
Remove the center head restraint when
adjusting the seat position or seatback
angle.
Store the center head restraint in the aux-
iliary box on the rear left side panel when
it is not in use. (For details, see ªHead
restraintsº on page 66 in this Section.)
ÐAdjusting third seats
Page 3916 of 4323

05_SEQUOIA_U (L/O 0408)
57
2005 SEQUOIA from Aug. '04 Prod. (OM34424U)
CAUTION
�Adjust both seat cushions to the
same position and align both seat-
backs at the same angle when a
person sits in the third seat center
position. Otherwise, the person can-
not wear the seat belt properly and
this may cause serious injuries in
a collision.
�Avoid reclining the seatback any
more than needed. The seat belts
provide maximum protection in a
frontal or rear collision when the
passengers are sitting up straight
and well back in the seats. If you
are reclined, the lap belt may slide
past your hips and apply restraint
forces directly to the abdomen or
your neck may contact the shoulder
belt. In the event of a frontal colli-
sion, the more the seat is reclined,
the greater the risk of death or per-
sonal injury.
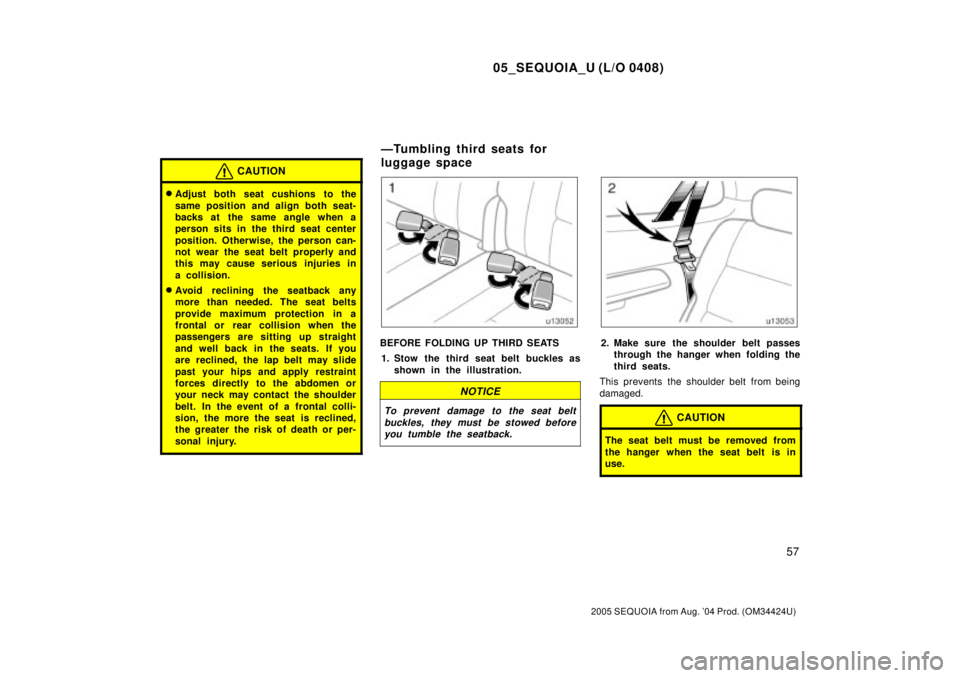
BEFORE FOLDING UP THIRD SEATS
1. Stow the third seat belt buckles as
shown in the illustration.
NOTICE
To prevent damage to the seat belt
buckles, they must be stowed before
you tumble the seatback.
2. Make sure the shoulder belt passes
through the hanger when folding the
third seats.
This prevents the shoulder belt from being
damaged.
CAUTION
The seat belt must be removed from
the hanger when the seat belt is in
use.
ÐTumbling third seats for
luggage space
Page 3917 of 4323
05_SEQUOIA_U (L/O 0408)
58
2005 SEQUOIA from Aug. '04 Prod. (OM34424U)
3. To stow the center seat belt, pull it
slightly out of its cover. It will auto-
matically roll back partway. Roll the
seat belt backwards as shown above
and insert it into the slot of its cov-
er. Make sure the tabs are securely
locked in the cover.
NOTICE
The seat belt must be stowed before
you fold the seatback.
CAUTION
When tumbling the third seats, do not
fold down or up the second seats.
TUMBLING THIRD SEATS
1. Remove the center head restraint.
Page 3921 of 4323
05_SEQUOIA_U (L/O 0408)
62
2005 SEQUOIA from Aug. '04 Prod. (OM34424U)
BEFORE REMOVING THIRD SEATS
1. Stow the third seat belt buckles as
shown in the illustration.
NOTICE
To prevent damage to the seat belt
buckles, they must be stowed before
you tumble the seatback.
2. When removing the third seats, pass
the third seat belts through the
hangers.
This prevents the shoulder belt from being
damaged.
CAUTION
The seat belt must be removed from
the hanger when the seat belts is in
use.
3. To stow the center seat belt, pull it
slightly out of its cover. It will auto-
matically roll back partway. Roll the
seat belt backwards as shown above
and insert it into the slot of its cov-
er. Make sure the tabs are securely
locked in the cover.
NOTICE
The seat belt must be stowed before
you fold the seatback.
ÐRemoving third seats
Page 3922 of 4323
05_SEQUOIA_U (L/O 0408)
63
2005 SEQUOIA from Aug. '04 Prod. (OM34424U)
REMOVING THIRD SEATS
1. Remove the center head restraint.
The removed head restraint can be
stored in the auxiliary box on the rear
left side panel. For details, see ªHead
restraintsº on page 66 in this Section.
Store the head restraint in the auxiliary
box when it is not in use.
Page 3924 of 4323

05_SEQUOIA_U (L/O 0408)
65
2005 SEQUOIA from Aug. '04 Prod. (OM34424U)
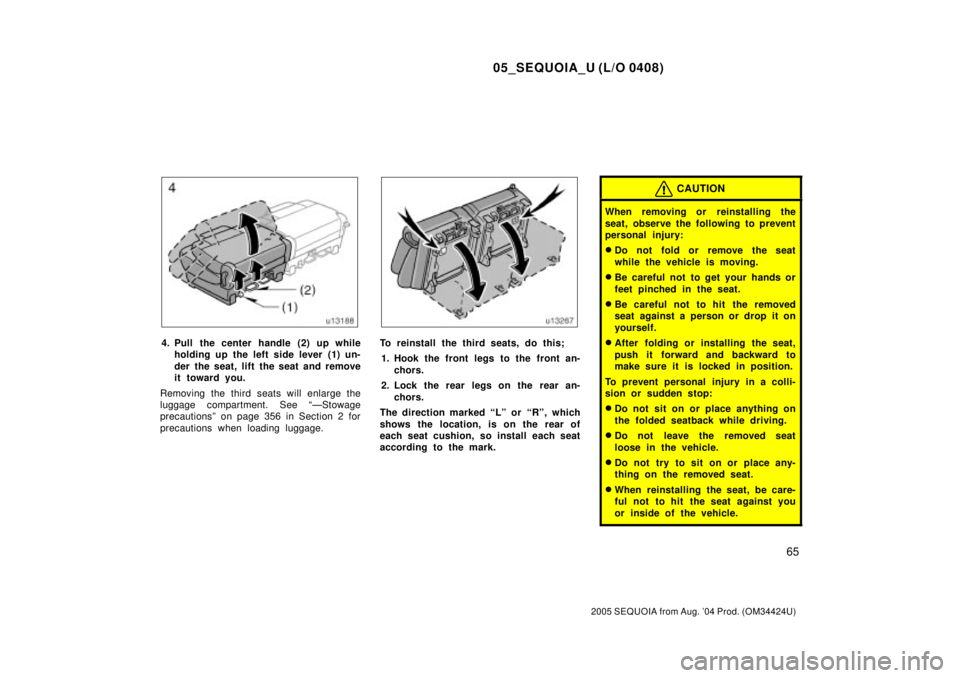
4. Pull the center handle (2) up while
holding up the left side lever (1) un-
der the seat, lift the seat and remove
it toward you.
Removing the third seats will enlarge the
luggage compartment. See ªÐStowage
precautionsº on page 356 in Section 2 for
precautions when loading luggage.To reinstall the third seats, do this;
1. Hook the front legs to the front an-
chors.
2. Lock the rear legs on the rear an-
chors.
The direction marked ªLº or ªRº, which
shows the location, is on the rear of
each seat cushion, so install each seat
according to the mark.
CAUTION
When removing or reinstalling the
seat, observe the following to prevent
personal injury:
�Do not fold or remove the seat
while the vehicle is moving.
�Be careful not to get your hands or
feet pinched in the seat.
�Be careful not to hit the removed
seat against a person or drop it on
yourself.
�After folding or installing the seat,
push it forward and backward to
make sure it is locked in position.
To prevent personal injury in a colli-
sion or sudden stop:
�Do not sit on or place anything on
the folded seatback while driving.
�Do not leave the removed seat
loose in the vehicle.
�Do not try to sit on or place any-
thing on the removed seat.
�When reinstalling the seat, be care-
ful not to hit the seat against you
or inside of the vehicle.