Page 3926 of 4323

05_SEQUOIA_U (L/O 0408)
67
2005 SEQUOIA from Aug. '04 Prod. (OM34424U)
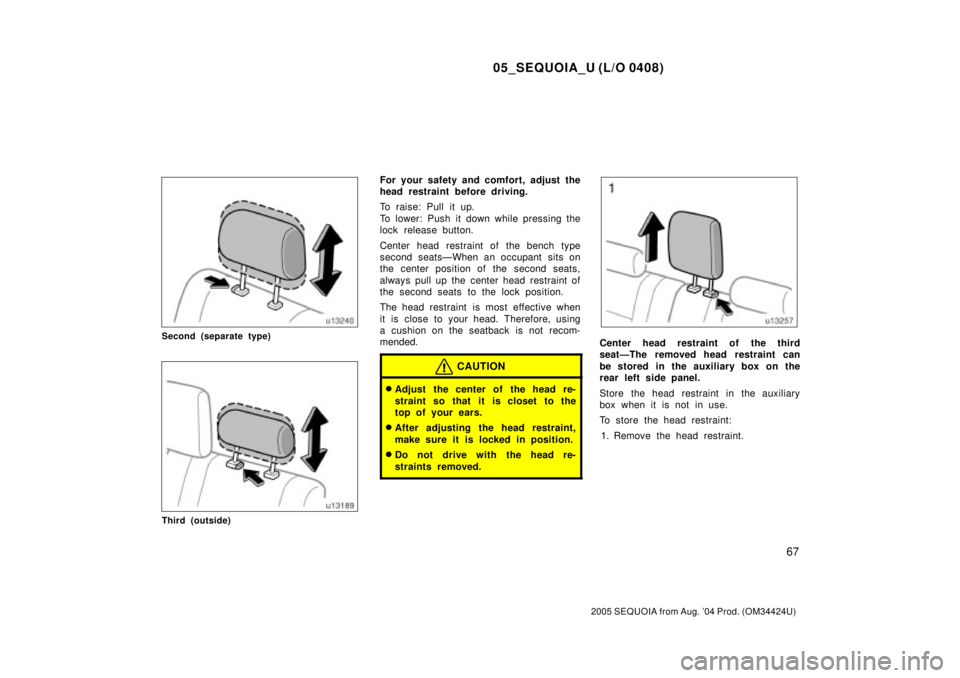
Second (separate type)
Third (outside)
For your safety and comfort, adjust the
head restraint before driving.
To raise: Pull it up.
To lower: Push it down while pressing the
lock release button.
Center head restraint of the bench type
second seatsÐWhen an occupant sits on
the center position of the second seats,
always pull up the center head restraint of
the second seats to the lock position.
The head restraint is most effective when
it is close to your head. Therefore, using
a cushion on the seatback is not recom-
mended.
CAUTION
�Adjust the center of the head re-
straint so that it is closet to the
top of your ears.
�After adjusting the head restraint,
make sure it is locked in position.
�Do not drive with the head re-
straints removed.
Center head restraint of the third
seatÐThe removed head restraint can
be stored in the auxiliary box on the
rear left side panel.
Store the head restraint in the auxiliary
box when it is not in use.
To store the head restraint:
1. Remove the head restraint.
Page 3980 of 4323
05_SEQUOIA_U (L/O 0408)
121
2005 SEQUOIA from Aug. '04 Prod. (OM34424U)
2. To remove the child restraint system,
press the buckle release button and
allow the belt to retract.Follow the procedure below for a child
restraint system that requires the use
of a top strap.
Anchor brackets
Use one anchor bracket on the rear of
second seats and two anchor brackets on
the floor as shown above to attach the top
strap.
Anchor bracket is installed for each sec-
ond seating position.
Ð U sin g a to p st rap
(for bench type second seats)
Page 3984 of 4323
05_SEQUOIA_U (L/O 0408)
125
2005 SEQUOIA from Aug. '04 Prod. (OM34424U)
Follow the procedure below for a child
restraint system that requires the use
of a top strap.
Anchor brackets Symbol mark
Use the anchor brackets on the back of
the third seats to attach the top strap.
Anchor bracket is installed for right side
and center seating positions.
This symbol indicates the locations of
user ready anchor bracket.TO USE THE ANCHOR BRACKET (right
side):
1. Remove the head restraint.
Ð U sin g a to p st rap
(for third seats)
Page 3989 of 4323

05_SEQUOIA_U (L/O 0408)
130
2005 SEQUOIA from Aug. '04 Prod. (OM34424U)
2. Left side: Turn up the cover for the
lower anchorages. Confirm the posi-
tion of the lower anchorages below
the button on the cover.
Center: Turn up the cover for the left
lower anchorage and remove the cap
for the right lower anchorage. Con-
firm the position of the lower an-
chorages below the button on the
cover.
3. Type AÐLatch the hooks of lower
straps onto the anchorages and
tighten the lower straps.
Type BÐLatch the buckles onto the
anchorages.
For owners in CanadaÐThe symbol on
a child restraint system indicates the pres-
ence of a lower connector system.
If your child restraint system has a top
strap, it should be anchored. (For the
installation of the top strap, see ªÐUsing
a top strap (for bench type second seats)º
on page 121 in this Section.)
For installation details, refer to the instruc-
tion manual equipped with each product.CAUTION
�When using the lower anchorages
for the child restraint system, be
sure that there are no irregular ob-
jects around the anchorages or that
the seat belt is not caught.
�Push and pull the child restraint
system in different directions to be
sure it is secure. Follow all the
installation instructions provided by
its manufacturer.
�After securing the child restraint
system, never recline the seat.
�Do not install a child restraint sys-
tem on the second seat if it inter-
feres with the lock mechanism of
the front seats. Otherwise, the child
or front seat occupant(s) may be
killed or seriously injured in case
of sudden braking or a collision.
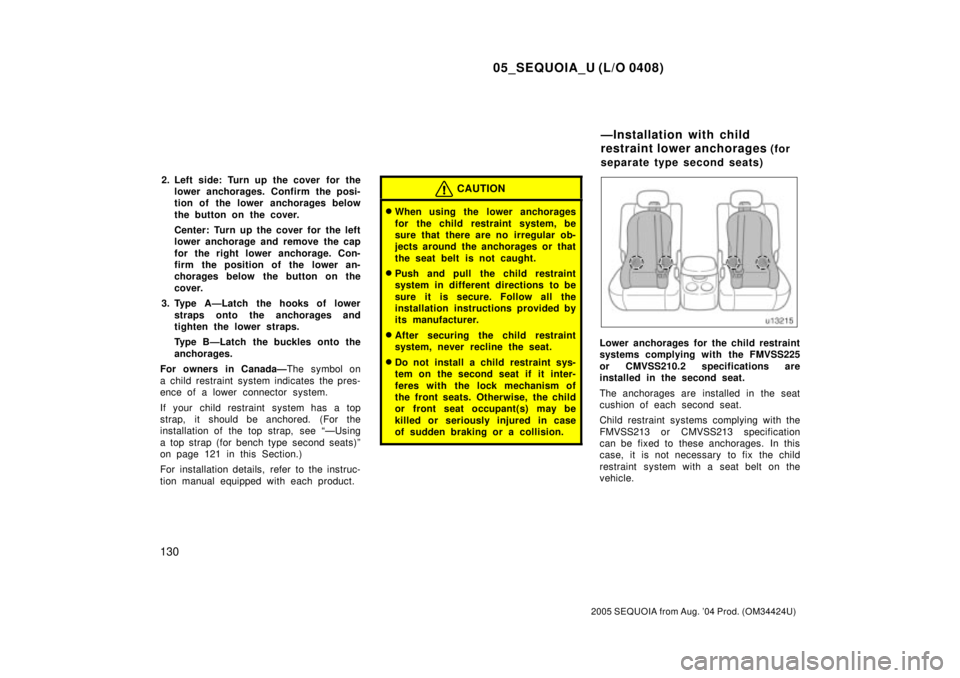
Lower anchorages for the child restraint
systems complying with the FMVSS225
or CMVSS210.2 specifications are
installed in the second seat.
The anchorages are installed in the seat
cushion of each second seat.
Child restraint systems complying with the
FMVSS213 or CMVSS213 specification
can be fixed to these anchorages. In this
case, it is not necessary to fix the child
restraint system with a seat belt on the
vehicle.
ÐInstallation with child
restraint lower anchorages
(for
separate type second seats)
Page 4217 of 4323

05_SEQUOIA_U (L/O 0408)
358
2005 SEQUOIA from Aug. '04 Prod. (OM34424U)
CAUTION
Even if the total load of occu-
pant's weight and the cargo load
is less than the total load capac-
ity, do not apply the load uneven-
ly. That may cause not only dam-
age to the tire but also deteriora-
tion to the steering ability due to
unbalance of the vehicle, causing
an accident.
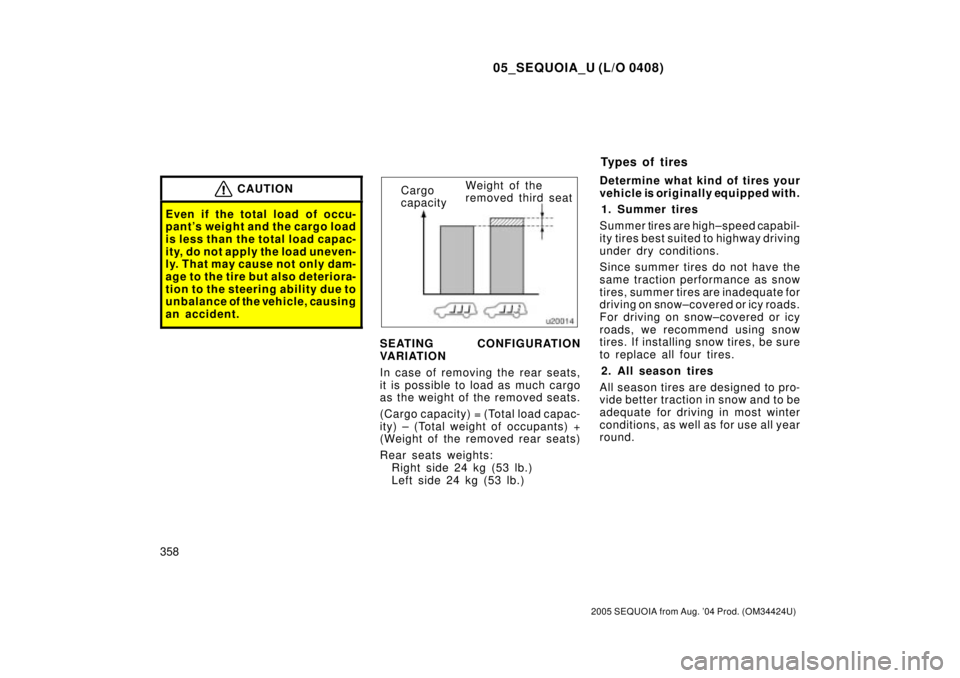
Cargo
capacityWeight of the
r em ov ed thir d seat
SEATING CONFIGURATION
VARIATION
In case of removing the rear seats,
it is possible to load as much cargo
as the weight of the removed seats.
(Cargo capacity) = (Total load capac-
ity) ± (Total weight of occupants) +
(Weight of the removed rear seats)
Rear seats weights:
Right side 24 kg (53 lb.)
Left side 24 kg (53 lb.)Determine what kind of tires your
vehicle is originally equipped with.
1. Summer tires
Summer tires are high±speed capabil-
ity tires best suited to highway driving
under dry conditions.
Since summer tires do not have the
same traction performance as snow
tires, summer tires are inadequate for
driving on snow±covered or icy roads.
For driving on snow±covered or icy
roads, we recommend using snow
tires. If installing snow tires, be sure
to replace all four tires.
2. All season tires
All season tires are designed to pro-
vide better traction in snow and to be
adequate for driving in most winter
conditions, as well as for use all year
round.
Types of tires
Page 4247 of 4323

05_SEQUOIA_U (L/O 0408)
388
2005 SEQUOIA from Aug. '04 Prod. (OM34424U)
�Make sure to set the jack prop-
erly in the jack point. Raising
the vehicle with jack improper-
ly positioned will damage the
vehicle or may allow the ve-
hicle to fall off the jack and
cause personal injury.
�Never get under the vehicle
when the vehicle is supported
by the jack alone.
�Use the jack only for lifting
your vehicle during wheel
changing.
�Do not raise the vehicle with
someone in the vehicle.
�When raising the vehicle, do
not place any objects on top
of or underneath the jack.
�Raise the vehicle only high
enough to remove and change
the tire.NOTICE
�Do not continue driving with
a deflated tire. Driving even a
short distance can damage a
tire and wheel beyond repair.
�Vehicles with rear height con-
trol air suspension system:
When jacking up or installing
tire chains, be sure to set
manual control mode by
pushing the mode select
switch and stop the engine.
Otherwise, the vehicle height
may change because of the
automatic leveling function,
resulting in an accident.
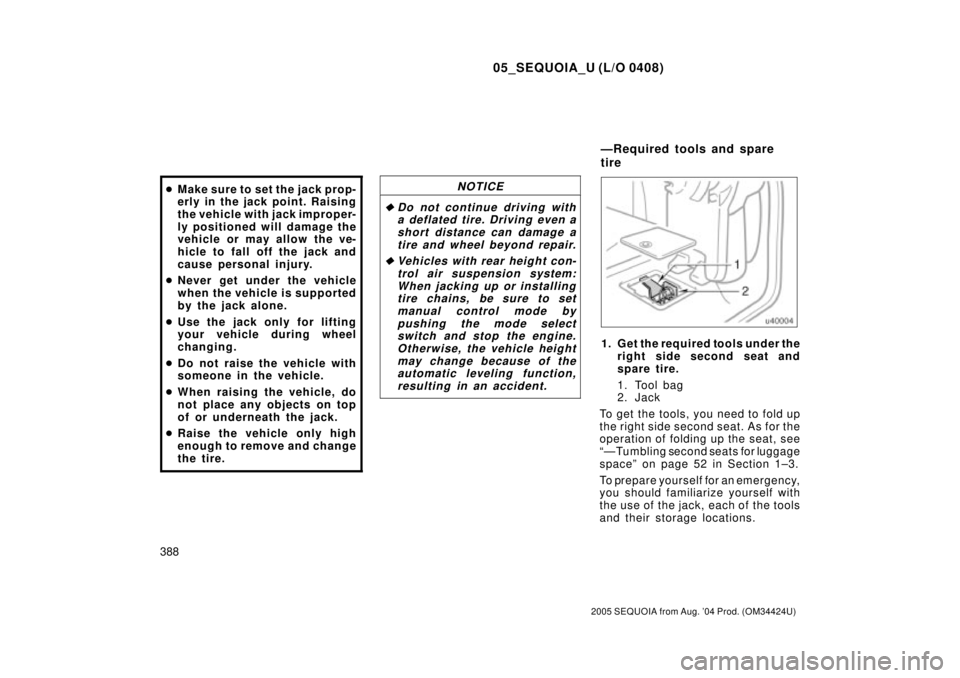
1. Get the required tools under the
right side second seat and
spare tire.
1. Tool bag
2. Jack
To get the tools, you need to fold up
the right side second seat. As for the
operation of folding up the seat, see
ªÐTumbling second seats for luggage
spaceº on page 52 in Section 1±3.
To prepare yourself for an emergency,
you should familiarize yourself with
the use of the jack, each of the tools
and their storage locations.
Ð R eq u ired to o ls an d sp are
tire