Page 803 of 2898
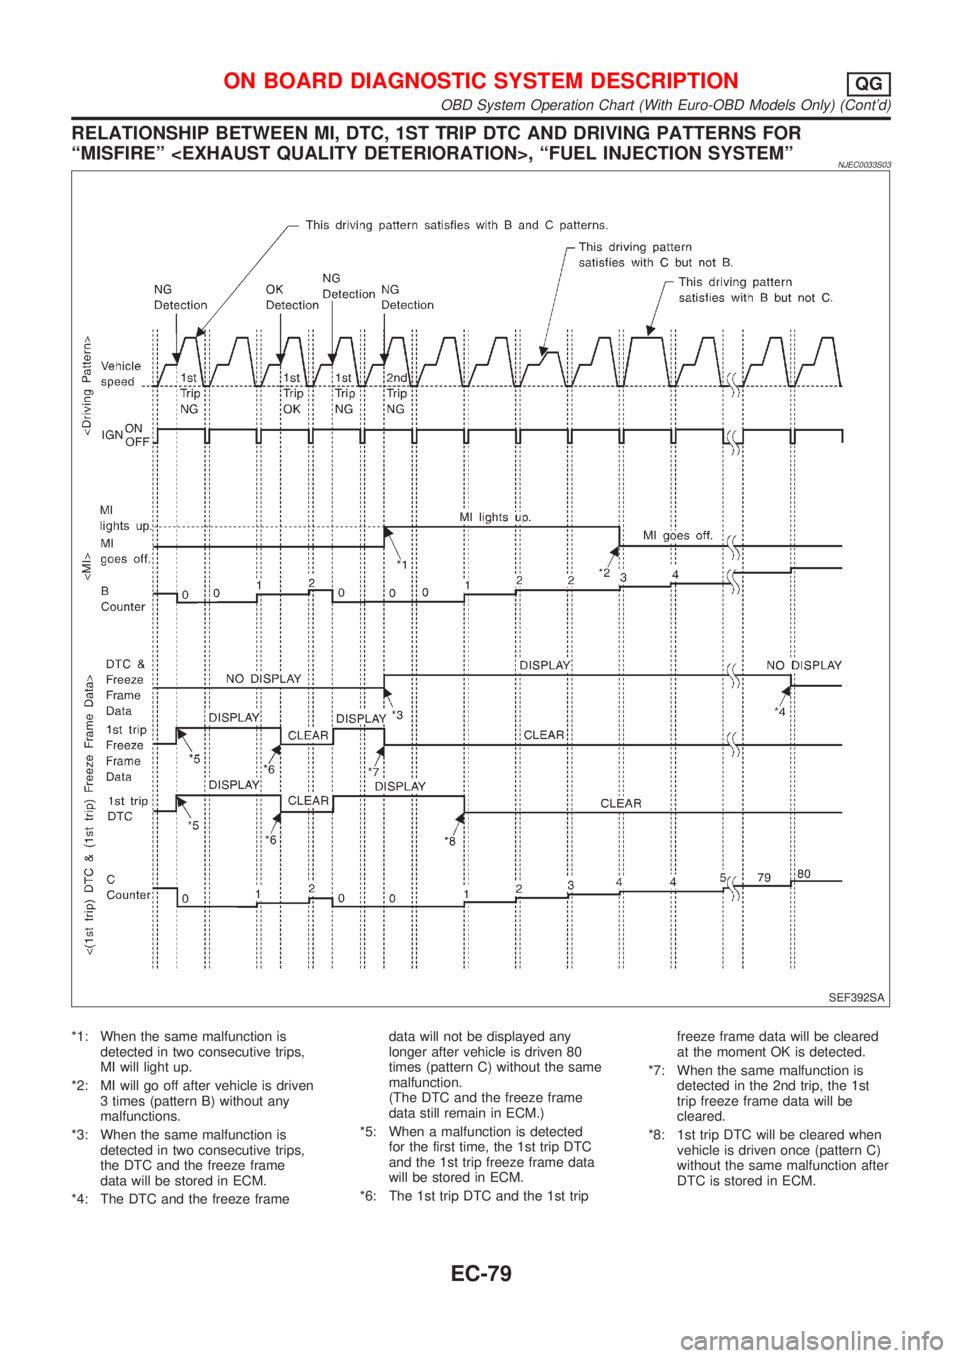
RELATIONSHIP BETWEEN MI, DTC, 1ST TRIP DTC AND DRIVING PATTERNS FOR
ªMISFIREº , ªFUEL INJECTION SYSTEMº
NJEC0033S03
SEF392SA
*1: When the same malfunction is
detected in two consecutive trips,
MI will light up.
*2: MI will go off after vehicle is driven
3 times (pattern B) without any
malfunctions.
*3: When the same malfunction is
detected in two consecutive trips,
the DTC and the freeze frame
data will be stored in ECM.
*4: The DTC and the freeze framedata will not be displayed any
longer after vehicle is driven 80
times (pattern C) without the same
malfunction.
(The DTC and the freeze frame
data still remain in ECM.)
*5: When a malfunction is detected
for the first time, the 1st trip DTC
and the 1st trip freeze frame data
will be stored in ECM.
*6: The 1st trip DTC and the 1st tripfreeze frame data will be cleared
at the moment OK is detected.
*7: When the same malfunction is
detected in the 2nd trip, the 1st
trip freeze frame data will be
cleared.
*8: 1st trip DTC will be cleared when
vehicle is driven once (pattern C)
without the same malfunction after
DTC is stored in ECM.
ON BOARD DIAGNOSTIC SYSTEM DESCRIPTIONQG
OBD System Operation Chart (With Euro-OBD Models Only) (Cont'd)
EC-79
Page 805 of 2898
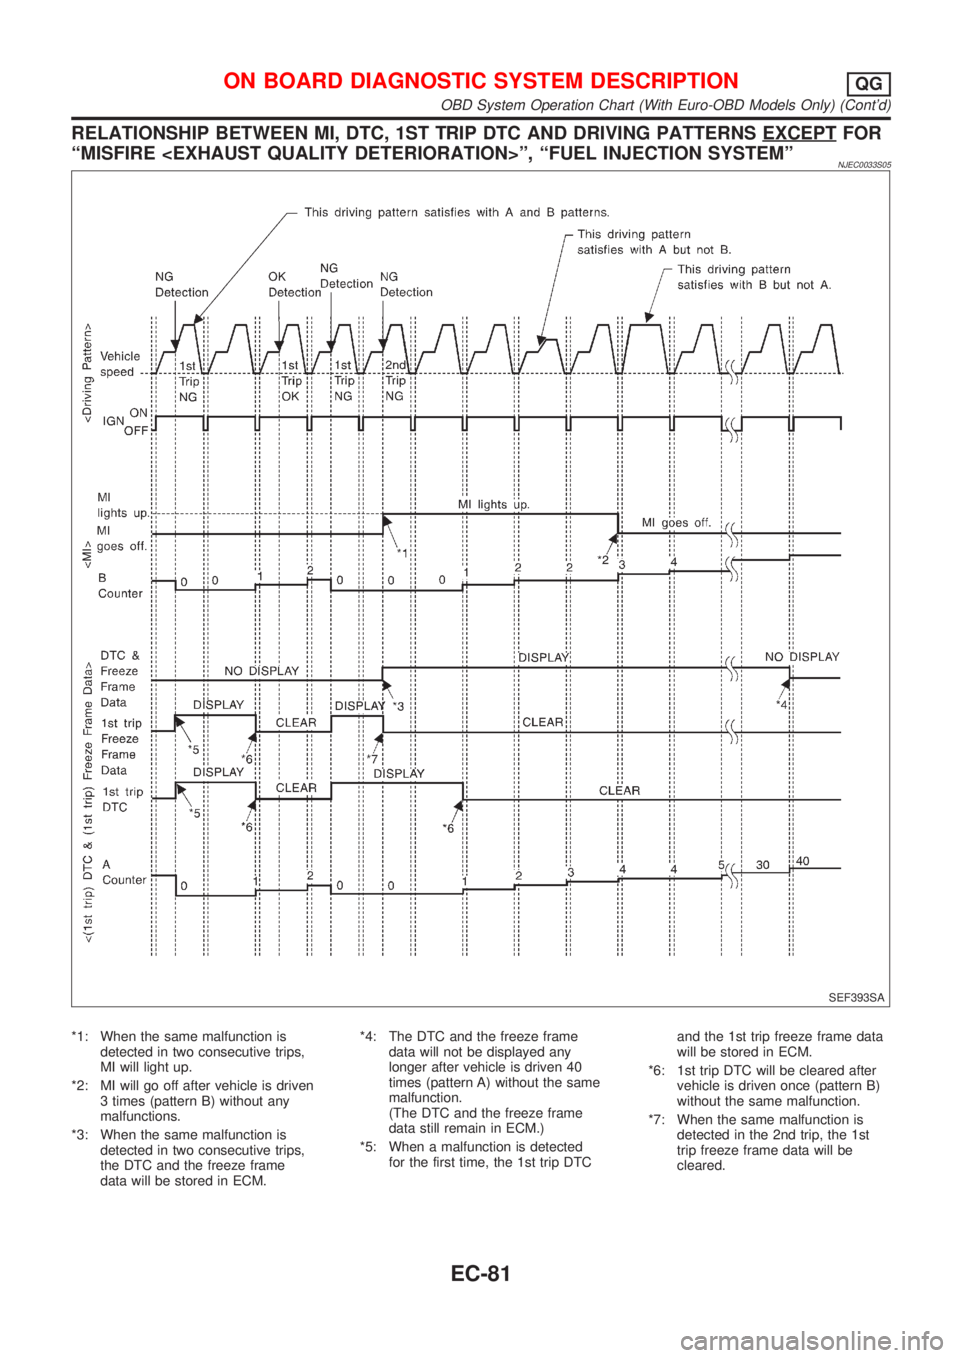
RELATIONSHIP BETWEEN MI, DTC, 1ST TRIP DTC AND DRIVING PATTERNS EXCEPTFOR
ªMISFIRE º, ªFUEL INJECTION SYSTEMº
NJEC0033S05
SEF393SA
*1: When the same malfunction is
detected in two consecutive trips,
MI will light up.
*2: MI will go off after vehicle is driven
3 times (pattern B) without any
malfunctions.
*3: When the same malfunction is
detected in two consecutive trips,
the DTC and the freeze frame
data will be stored in ECM.*4: The DTC and the freeze frame
data will not be displayed any
longer after vehicle is driven 40
times (pattern A) without the same
malfunction.
(The DTC and the freeze frame
data still remain in ECM.)
*5: When a malfunction is detected
for the first time, the 1st trip DTCand the 1st trip freeze frame data
will be stored in ECM.
*6: 1st trip DTC will be cleared after
vehicle is driven once (pattern B)
without the same malfunction.
*7: When the same malfunction is
detected in the 2nd trip, the 1st
trip freeze frame data will be
cleared.
ON BOARD DIAGNOSTIC SYSTEM DESCRIPTIONQG
OBD System Operation Chart (With Euro-OBD Models Only) (Cont'd)
EC-81
Page 835 of 2898
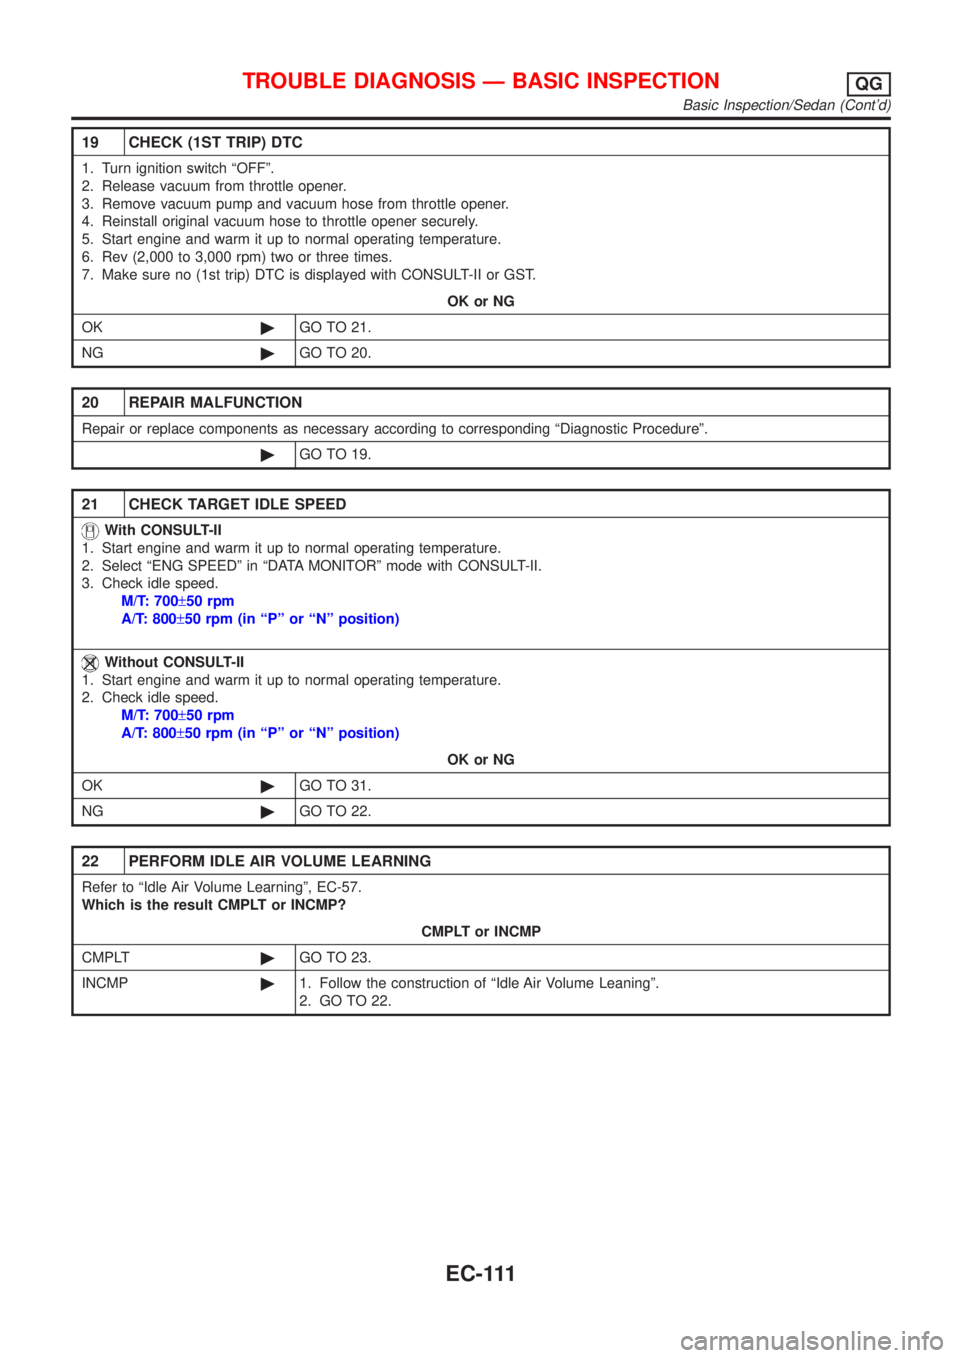
19 CHECK (1ST TRIP) DTC
1. Turn ignition switch ªOFFº.
2. Release vacuum from throttle opener.
3. Remove vacuum pump and vacuum hose from throttle opener.
4. Reinstall original vacuum hose to throttle opener securely.
5. Start engine and warm it up to normal operating temperature.
6. Rev (2,000 to 3,000 rpm) two or three times.
7. Make sure no (1st trip) DTC is displayed with CONSULT-II or GST.
OK or NG
OK©GO TO 21.
NG©GO TO 20.
20 REPAIR MALFUNCTION
Repair or replace components as necessary according to corresponding ªDiagnostic Procedureº.
©GO TO 19.
21 CHECK TARGET IDLE SPEED
With CONSULT-II
1. Start engine and warm it up to normal operating temperature.
2. Select ªENG SPEEDº in ªDATA MONITORº mode with CONSULT-II.
3. Check idle speed.
M/T: 700±50 rpm
A/T: 800±50 rpm (in ªPº or ªNº position)
Without CONSULT-II
1. Start engine and warm it up to normal operating temperature.
2. Check idle speed.
M/T: 700±50 rpm
A/T: 800±50 rpm (in ªPº or ªNº position)
OK or NG
OK©GO TO 31.
NG©GO TO 22.
22 PERFORM IDLE AIR VOLUME LEARNING
Refer to ªIdle Air Volume Learningº, EC-57.
Which is the result CMPLT or INCMP?
CMPLT or INCMP
CMPLT©GO TO 23.
INCMP©1. Follow the construction of ªIdle Air Volume Leaningº.
2. GO TO 22.
TROUBLE DIAGNOSIS Ð BASIC INSPECTIONQG
Basic Inspection/Sedan (Cont'd)
EC-111
Page 847 of 2898

17 RESET THROTTLE POSITION SENSOR IDLE POSITION MEMORY
Without CONSULT-II
NOTE:
Always warm up engine to normal operating temperature. If engine is cool, the throttle position sensor idle posi-
tion memory will not be reset correctly.
1. Confirm that proper vacuum is applied. Refer to Test No. 10.
2. Attach blind cap to vacuum port from which vacuum hose to throttle opener was disconnected.
3. Start engine.
4. Warm up engine to normal operating temperature.
5. Stop engine. (Turn ignition switch ªOFFº.)
6. Turn ignition switch ªONº and wait at least 5 seconds.
SEF864V
7. Turn ignition switch ªOFFº and wait at least 9 seconds.
8. Repeat steps 6 and 7, 20 times.
©GO TO 18.
18 CHECK (1ST TRIP) DTC
1. Turn ignition switch ªOFFº.
2. Release vacuum from throttle opener.
3. Remove vacuum pump and vacuum hose from throttle opener.
4. Reinstall original vacuum hose to throttle opener securely.
5. Start engine and warm it up to normal operating temperature.
6. Rev (2,000 to 3,000 rpm) two or three times.
7. Make sure no (1st trip) DTC is displayed with CONSULT-II or GST.
OK or NG
OK©GO TO 20.
NG©GO TO 19.
19 REPAIR MALFUNCTION
Repair or replace components as necessary according to corresponding ªDiagnostic Procedureº.
©GO TO 18.
TROUBLE DIAGNOSIS Ð BASIC INSPECTIONQG
Basic Inspection/Sedan (Cont'd)
EC-123
Page 864 of 2898
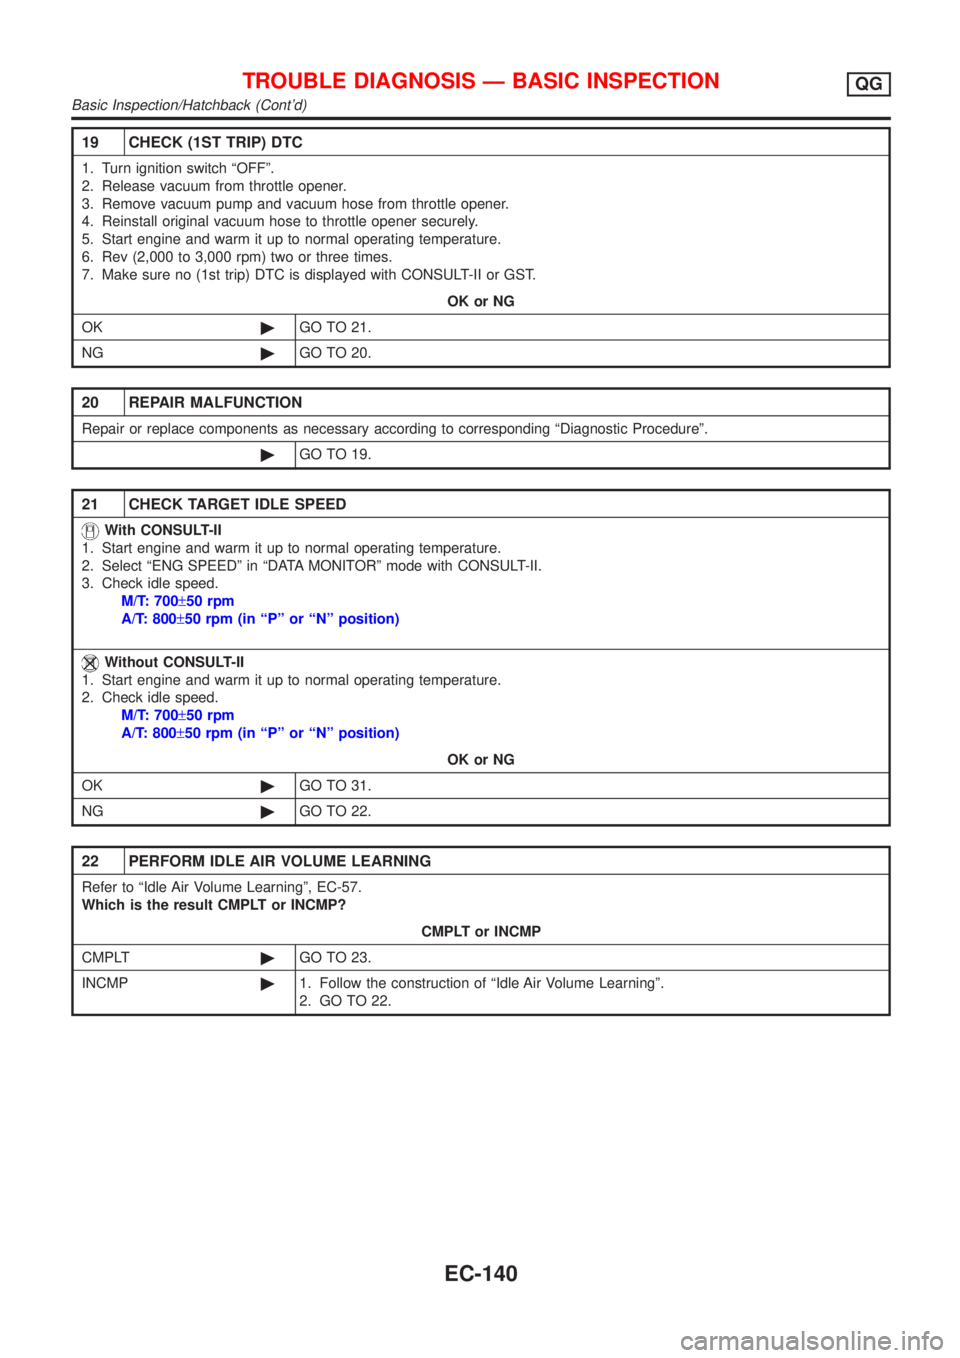
19 CHECK (1ST TRIP) DTC
1. Turn ignition switch ªOFFº.
2. Release vacuum from throttle opener.
3. Remove vacuum pump and vacuum hose from throttle opener.
4. Reinstall original vacuum hose to throttle opener securely.
5. Start engine and warm it up to normal operating temperature.
6. Rev (2,000 to 3,000 rpm) two or three times.
7. Make sure no (1st trip) DTC is displayed with CONSULT-II or GST.
OK or NG
OK©GO TO 21.
NG©GO TO 20.
20 REPAIR MALFUNCTION
Repair or replace components as necessary according to corresponding ªDiagnostic Procedureº.
©GO TO 19.
21 CHECK TARGET IDLE SPEED
With CONSULT-II
1. Start engine and warm it up to normal operating temperature.
2. Select ªENG SPEEDº in ªDATA MONITORº mode with CONSULT-II.
3. Check idle speed.
M/T: 700±50 rpm
A/T: 800±50 rpm (in ªPº or ªNº position)
Without CONSULT-II
1. Start engine and warm it up to normal operating temperature.
2. Check idle speed.
M/T: 700±50 rpm
A/T: 800±50 rpm (in ªPº or ªNº position)
OK or NG
OK©GO TO 31.
NG©GO TO 22.
22 PERFORM IDLE AIR VOLUME LEARNING
Refer to ªIdle Air Volume Learningº, EC-57.
Which is the result CMPLT or INCMP?
CMPLT or INCMP
CMPLT©GO TO 23.
INCMP©1. Follow the construction of ªIdle Air Volume Learningº.
2. GO TO 22.
TROUBLE DIAGNOSIS Ð BASIC INSPECTIONQG
Basic Inspection/Hatchback (Cont'd)
EC-140
Page 888 of 2898

SEF553Y
JEF096Y
SEF097Y
ECM Terminals and Reference ValueNJEC0044PREPARATIONNJEC0044S01Models with ECM in Engine CompartmentNJEC0044S01011. The ECM is located under the cowl panel on the passenger
side (behind the strut tower). Remove it from the engine room
side.
+Remove the bracket fixing ECM harness.
+Remove the quick connector of the ventilation hose in the ECM
compartment room by pressing in the direction of the arrow.
+Pull the ECM box out from under the cowl panel by removing
the two ECM box attaching bolts.
+Remove the five bolts on ECM box installation cover.
: 3.9 - 6.9 N´m (0.39 - 0.71 kg-m, 34 - 61 in-lb)
+Remove the three ECM installation bolts.
: 4.1 - 6.8 N´m (0.41 - 0.70 kg-m, 36 - 60 in-lb)
SEF098Y
2. Remove ECM harness protector.
SEF908W
+When connecting or disconnecting ECM harness
connector, use lever as shown.
When connecting, fasten connector securely with lever
moved until it stops.
TROUBLE DIAGNOSIS Ð GENERAL DESCRIPTIONQG
Major Sensor Reference Graph in Data Monitor Mode (Cont'd)
EC-164
Page 889 of 2898
SEF367I
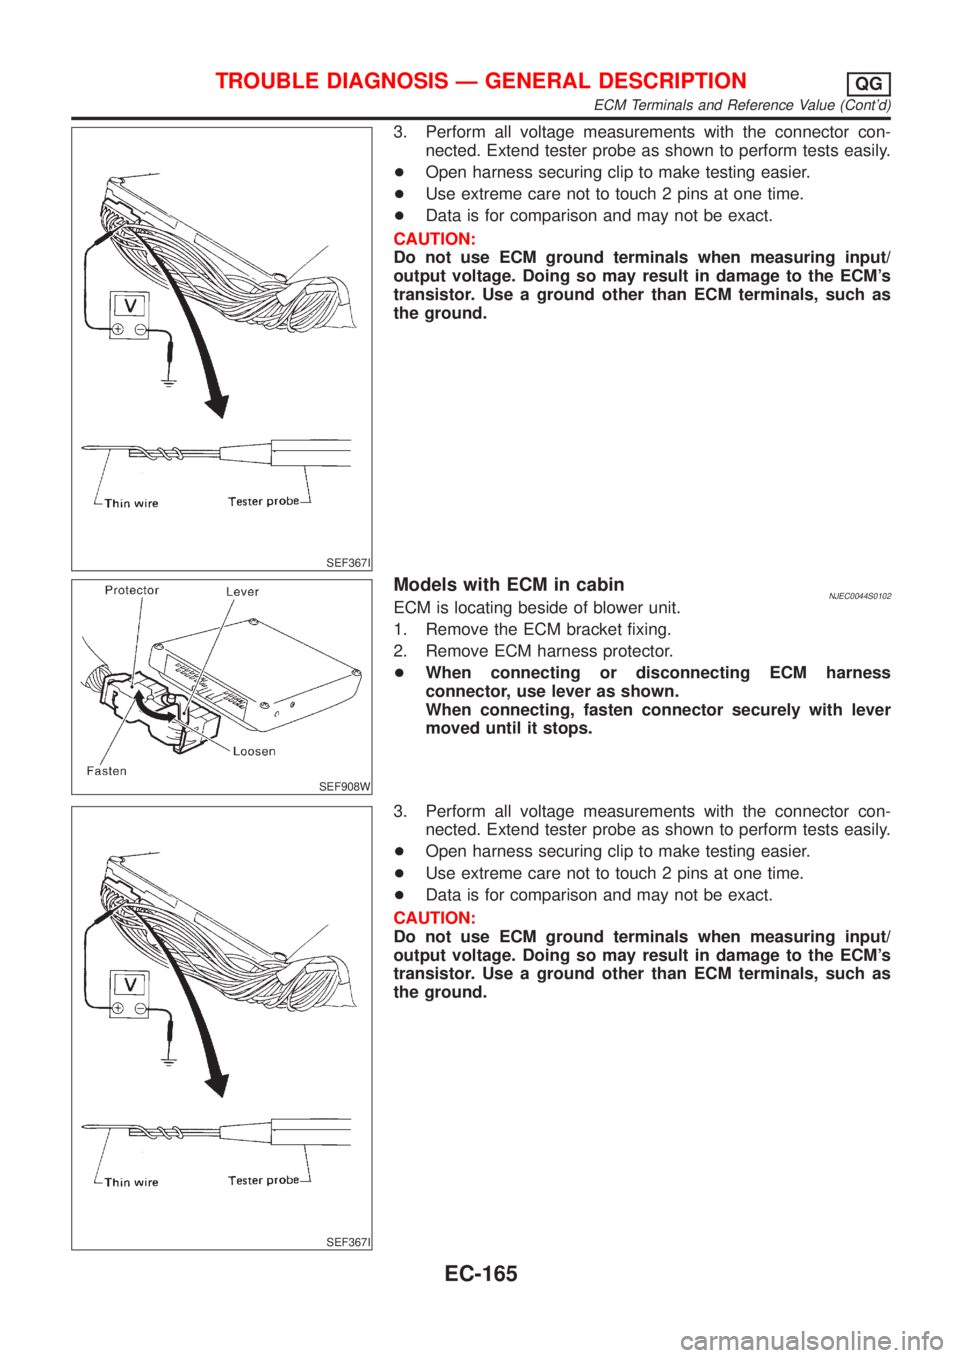
3. Perform all voltage measurements with the connector con-
nected. Extend tester probe as shown to perform tests easily.
+Open harness securing clip to make testing easier.
+Use extreme care not to touch 2 pins at one time.
+Data is for comparison and may not be exact.
CAUTION:
Do not use ECM ground terminals when measuring input/
output voltage. Doing so may result in damage to the ECM's
transistor. Use a ground other than ECM terminals, such as
the ground.
SEF908W
Models with ECM in cabinNJEC0044S0102ECM is locating beside of blower unit.
1. Remove the ECM bracket fixing.
2. Remove ECM harness protector.
+When connecting or disconnecting ECM harness
connector, use lever as shown.
When connecting, fasten connector securely with lever
moved until it stops.
SEF367I
3. Perform all voltage measurements with the connector con-
nected. Extend tester probe as shown to perform tests easily.
+Open harness securing clip to make testing easier.
+Use extreme care not to touch 2 pins at one time.
+Data is for comparison and may not be exact.
CAUTION:
Do not use ECM ground terminals when measuring input/
output voltage. Doing so may result in damage to the ECM's
transistor. Use a ground other than ECM terminals, such as
the ground.
TROUBLE DIAGNOSIS Ð GENERAL DESCRIPTIONQG
ECM Terminals and Reference Value (Cont'd)
EC-165
Page 901 of 2898
DescriptionNJEC0045Intermittent incidents (I/I) may occur. In many cases, the problem resolves itself (the part or circuit function
returns to normal without intervention). It is important to realize that the symptoms described in the custom-
er's complaint often do not recur on DTC (1st trip) visits. Realize also that the most frequent cause of I/I
occurrences is poor electrical connections. Because of this, the conditions under which the incident occurred
may not be clear. Therefore, circuit checks made as part of the standard diagnostic procedure may not indi-
cate the specific problem area.
COMMON I/I REPORT SITUATIONSNJEC0045S01
STEP in Work Flow Situation
IIThe CONSULT-II is used. The SELF-DIAG RESULTS screen shows time data other than ª0º or
ª1tº.
III The symptom described by the customer does not recur.
IV (1st trip) DTC data does not appear during the DTC Confirmation Procedure.
VI The Diagnostic Procedure for PXXXX does not indicate the problem area.
Diagnostic ProcedureNJEC0046
1 INSPECTION START
Erase (1st trip) DTCs. Refer to ªHow to Erase Emission-related Diagnostic Informationº, EC-70, EC-73.
©GO TO 2.
2 CHECK GROUND TERMINALS
Check ground terminals for corroding or loose connection. Refer to GI-27, ªGROUND INSPECTIONº.
OK or NG
OK©GO TO 3.
NG©Repair or replace.
3 SEARCH FOR ELECTRICAL INCIDENT
Perform GI-22, ªIncident Simulation Testsº.
OK or NG
OK©INSPECTION END
NG©Repair or replace.
TROUBLE DIAGNOSIS FOR INTERMITTENT INCIDENTQG
Description
EC-177