2001 CHRYSLER VOYAGER fuse
[x] Cancel search: fusePage 4034 of 4284

TEST ACTION APPLICABILITY
3WARNING: KEEP CLEAR OF THE ENGINE'S MOVING PARTS.
NOTE: The conditions that set the DTC are not present at this time. The
following list may help in identifying the intermittent condition.
With the engine running at normal operating temperature, monitor the DRB
parameters related to the DTC while wiggling the wiring harness. Look for param-
eter values to change and/or a DTC to set.
Review the DRB Freeze Frame information. If possible, try to duplicate the
conditions under which the DTC was set.
Refer to any Technical Service Bulletins (TSB) that may apply.
Visually inspect the related wiring harness. Look for any chafed, pierced, pinched, or
partially broken wires.
Visually inspect the related wiring harness connectors. Look for broken, bent, pushed
out, or corroded terminals.
Were any of the above conditions present?All
Ye s®Repair as necessary
Perform POWERTRAIN VERIFICATION TEST VER - 5.
No®Test Complete.
4 Turn the ignition off.
Remove the A/C Clutch Relay from the IPM.
Turn the ignition on.
Using a 12-volt test light connected to ground, probe the Fused Ignition Switch
circuit in the IPM.
Does the test light illuminate?All
Ye s®Go To 5
No®Go To 10
5 Turn the ignition off.
Remove the A/C Clutch Relay from the IPM.
Turn the ignition on.
Using a 12-volt test light connected to 12-volts, probe the A/C Clutch Relay circuit in
the IPM.
With the DRBIIIt, actuate the A/C Clutch Relay.
Does the test light flash on and off?All
Ye s®Replace the A/C Clutch Relay.
Perform POWERTRAIN VERIFICATION TEST VER - 5.
No®Go To 6
6 Turn the ignition off.
Disconnect the Intelligent Power Module C3 harness connector.
Turn the ignition on.
Using a 12-volt test light connected to 12-volts, probe the A/C Clutch Relay Control
circuit in the IPM harness connector.
With the DRBIIIt, actuate the A/C Clutch Relay.
Does the test light flash on and off?All
Ye s®Replace the IPM Fused & Relay Center.
Perform POWERTRAIN VERIFICATION TEST VER - 5.
No®Go To 7
240
HEATING & A/C
P0645-A/C CLUTCH RELAY CKT ÐContinued
Page 4035 of 4284
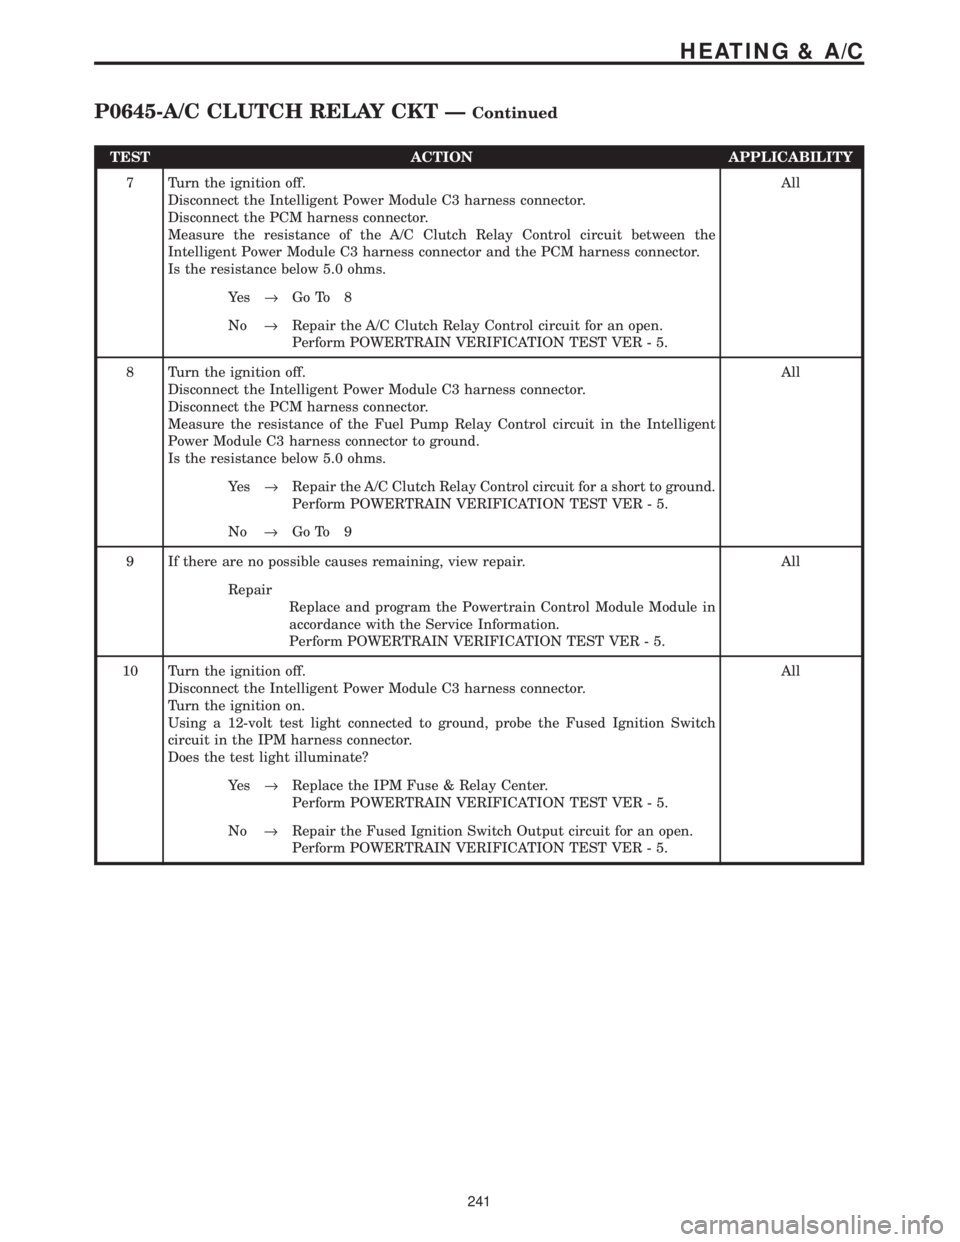
TEST ACTION APPLICABILITY
7 Turn the ignition off.
Disconnect the Intelligent Power Module C3 harness connector.
Disconnect the PCM harness connector.
Measure the resistance of the A/C Clutch Relay Control circuit between the
Intelligent Power Module C3 harness connector and the PCM harness connector.
Is the resistance below 5.0 ohms.All
Ye s®Go To 8
No®Repair the A/C Clutch Relay Control circuit for an open.
Perform POWERTRAIN VERIFICATION TEST VER - 5.
8 Turn the ignition off.
Disconnect the Intelligent Power Module C3 harness connector.
Disconnect the PCM harness connector.
Measure the resistance of the Fuel Pump Relay Control circuit in the Intelligent
Power Module C3 harness connector to ground.
Is the resistance below 5.0 ohms.All
Ye s®Repair the A/C Clutch Relay Control circuit for a short to ground.
Perform POWERTRAIN VERIFICATION TEST VER - 5.
No®Go To 9
9 If there are no possible causes remaining, view repair. All
Repair
Replace and program the Powertrain Control Module Module in
accordance with the Service Information.
Perform POWERTRAIN VERIFICATION TEST VER - 5.
10 Turn the ignition off.
Disconnect the Intelligent Power Module C3 harness connector.
Turn the ignition on.
Using a 12-volt test light connected to ground, probe the Fused Ignition Switch
circuit in the IPM harness connector.
Does the test light illuminate?All
Ye s®Replace the IPM Fuse & Relay Center.
Perform POWERTRAIN VERIFICATION TEST VER - 5.
No®Repair the Fused Ignition Switch Output circuit for an open.
Perform POWERTRAIN VERIFICATION TEST VER - 5.
241
HEATING & A/C
P0645-A/C CLUTCH RELAY CKT ÐContinued
Page 4047 of 4284
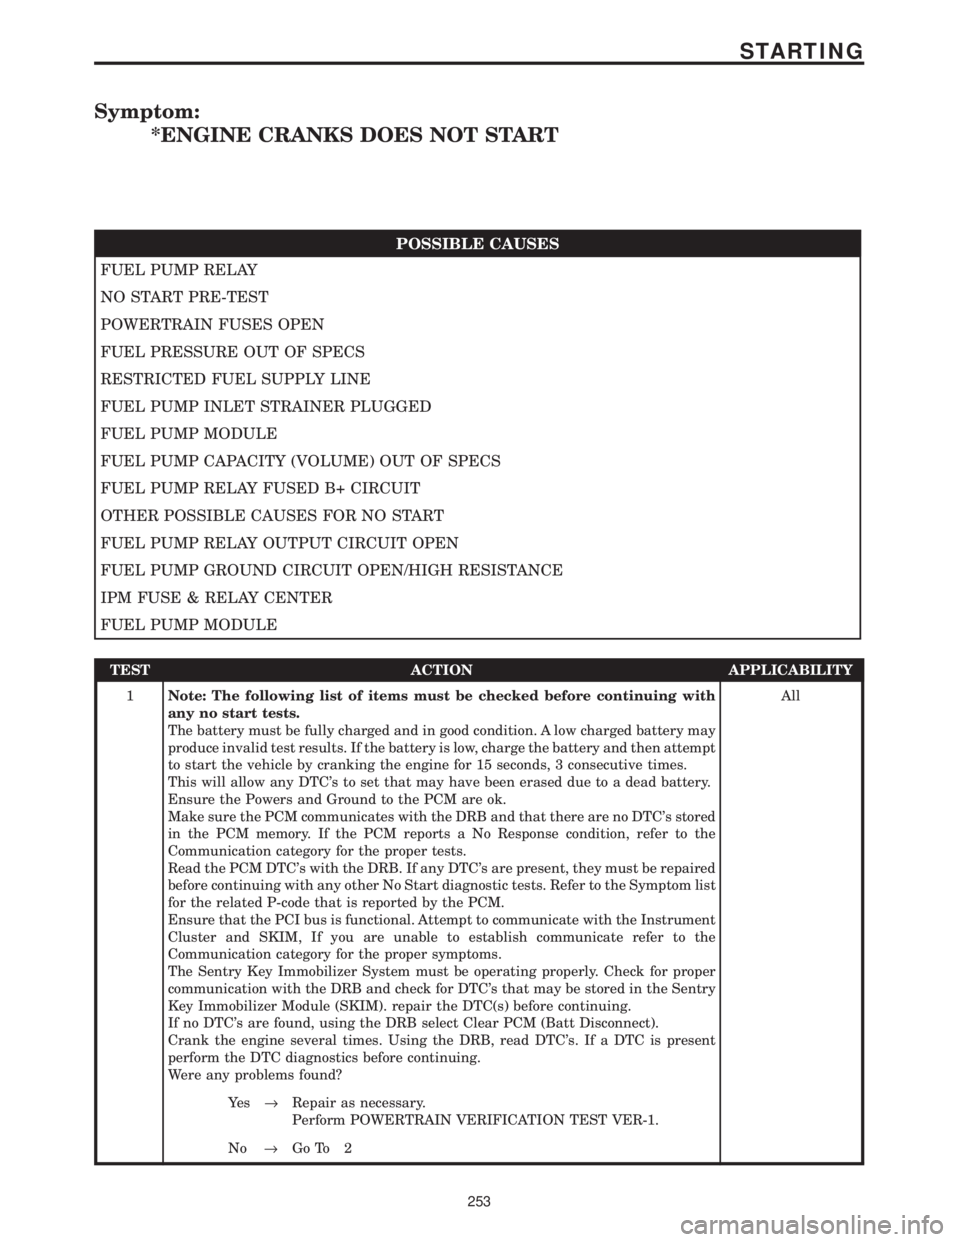
Symptom:
*ENGINE CRANKS DOES NOT START
POSSIBLE CAUSES
FUEL PUMP RELAY
NO START PRE-TEST
POWERTRAIN FUSES OPEN
FUEL PRESSURE OUT OF SPECS
RESTRICTED FUEL SUPPLY LINE
FUEL PUMP INLET STRAINER PLUGGED
FUEL PUMP MODULE
FUEL PUMP CAPACITY (VOLUME) OUT OF SPECS
FUEL PUMP RELAY FUSED B+ CIRCUIT
OTHER POSSIBLE CAUSES FOR NO START
FUEL PUMP RELAY OUTPUT CIRCUIT OPEN
FUEL PUMP GROUND CIRCUIT OPEN/HIGH RESISTANCE
IPM FUSE & RELAY CENTER
FUEL PUMP MODULE
TEST ACTION APPLICABILITY
1Note: The following list of items must be checked before continuing with
any no start tests.
The battery must be fully charged and in good condition. A low charged battery may
produce invalid test results. If the battery is low, charge the battery and then attempt
to start the vehicle by cranking the engine for 15 seconds, 3 consecutive times.
This will allow any DTC's to set that may have been erased due to a dead battery.
Ensure the Powers and Ground to the PCM are ok.
Make sure the PCM communicates with the DRB and that there are no DTC's stored
in the PCM memory. If the PCM reports a No Response condition, refer to the
Communication category for the proper tests.
Read the PCM DTC's with the DRB. If any DTC's are present, they must be repaired
before continuing with any other No Start diagnostic tests. Refer to the Symptom list
for the related P-code that is reported by the PCM.
Ensure that the PCI bus is functional. Attempt to communicate with the Instrument
Cluster and SKIM, If you are unable to establish communicate refer to the
Communication category for the proper symptoms.
The Sentry Key Immobilizer System must be operating properly. Check for proper
communication with the DRB and check for DTC's that may be stored in the Sentry
Key Immobilizer Module (SKIM). repair the DTC(s) before continuing.
If no DTC's are found, using the DRB select Clear PCM (Batt Disconnect).
Crank the engine several times. Using the DRB, read DTC's. If a DTC is present
perform the DTC diagnostics before continuing.
Were any problems found?All
Ye s®Repair as necessary.
Perform POWERTRAIN VERIFICATION TEST VER-1.
No®Go To 2
253
STARTING
Page 4048 of 4284
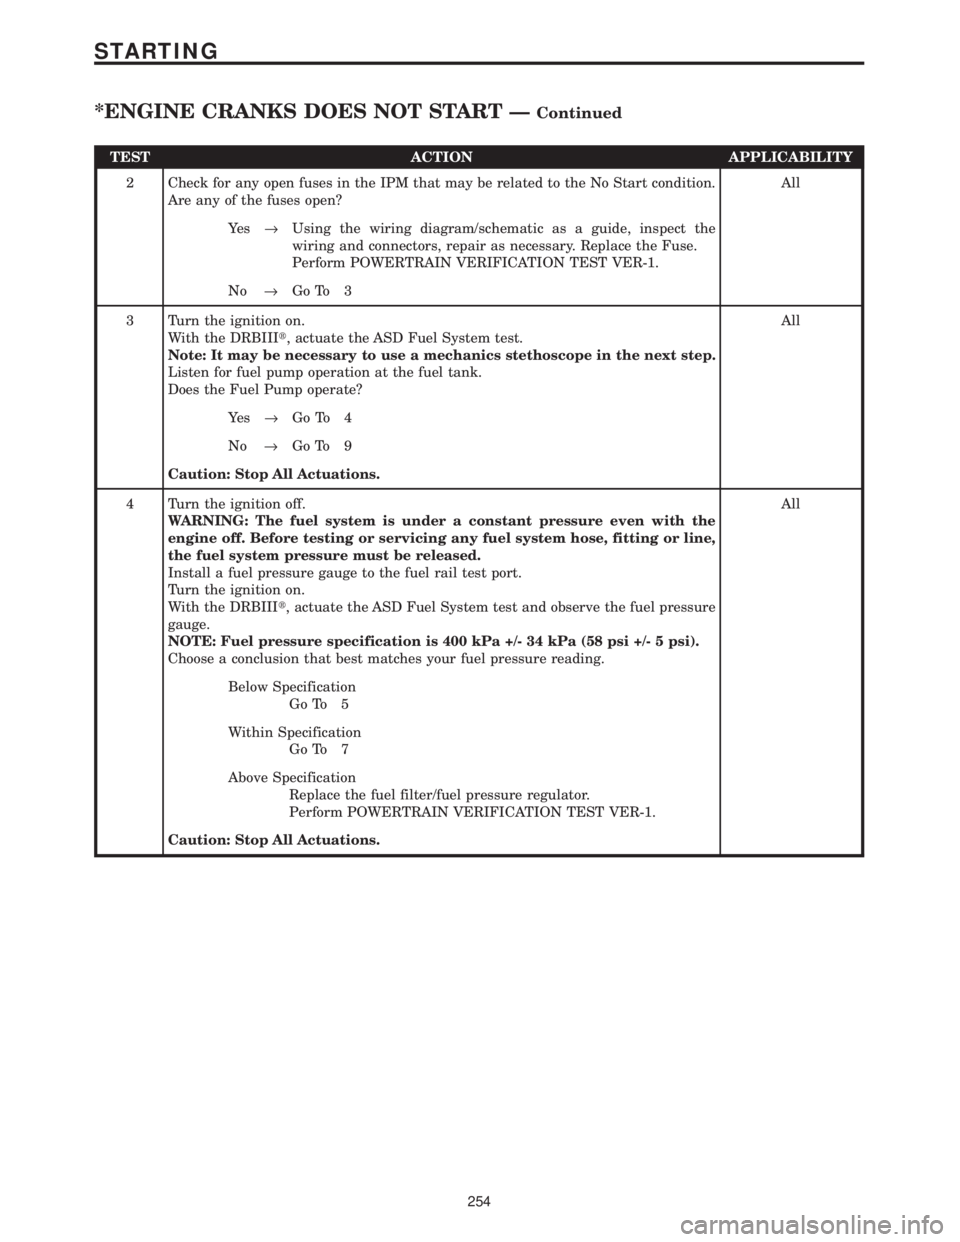
TEST ACTION APPLICABILITY
2 Check for any open fuses in the IPM that may be related to the No Start condition.
Are any of the fuses open?All
Ye s®Using the wiring diagram/schematic as a guide, inspect the
wiring and connectors, repair as necessary. Replace the Fuse.
Perform POWERTRAIN VERIFICATION TEST VER-1.
No®Go To 3
3 Turn the ignition on.
With the DRBIIIt, actuate the ASD Fuel System test.
Note: It may be necessary to use a mechanics stethoscope in the next step.
Listen for fuel pump operation at the fuel tank.
Does the Fuel Pump operate?All
Ye s®Go To 4
No®Go To 9
Caution: Stop All Actuations.
4 Turn the ignition off.
WARNING: The fuel system is under a constant pressure even with the
engine off. Before testing or servicing any fuel system hose, fitting or line,
the fuel system pressure must be released.
Install a fuel pressure gauge to the fuel rail test port.
Turn the ignition on.
With the DRBIIIt, actuate the ASD Fuel System test and observe the fuel pressure
gauge.
NOTE: Fuel pressure specification is 400 kPa +/- 34 kPa (58 psi +/- 5 psi).
Choose a conclusion that best matches your fuel pressure reading.All
Below Specification
Go To 5
Within Specification
Go To 7
Above Specification
Replace the fuel filter/fuel pressure regulator.
Perform POWERTRAIN VERIFICATION TEST VER-1.
Caution: Stop All Actuations.
254
STARTING
*ENGINE CRANKS DOES NOT START ÐContinued
Page 4050 of 4284

TEST ACTION APPLICABILITY
8 The following items need to be checked as a possible cause for a no start condition.
Refer to any Technical Service Bulletins that may apply to the symptom.
The spark plugs must be free from fuel, oil, coolant and/or any foreign material or
deposits.
The fuel must be free from contamination.
The exhaust may be free from restrictions.
The engine compression must be within specifications.
The engine valve timing must be within specifications.
The engine must be free from vacuum leaks.
Were any of the above conditions found?All
Ye s®Repair as necessary.
Perform POWERTRAIN VERIFICATION TEST VER-1.
No®Test Complete.
9 Turn the ignition off.
Disconnect the fuel pump module harness connector.
Turn the ignition on.
With the DRBIIIt, actuate the ASD Fuel System test.
Using a 12 volt test light connected to ground, probe the Fuel Pump Relay Output
circuit at the Fuel Pump Module harness connector.
Does the test light illuminate brightly?All
Ye s®Go To 10
No®Go To 12
Caution: Stop All Actuations.
10 Turn the ignition off.
Disconnect the Fuel Pump Module harness connector.
Note: Check connectors - It is critical that the connector is free from any
signs of corrosion or deformities - Clean/repair as necessary.
Using a test light connected to battery voltage, probe the Fuel Pump ground circuit
at the Fuel Pump Module harness connector.
Does the test light illuminate brightly?All
Ye s®Go To 11
No®Repair the open/high resistance in the fuel pump ground circuit.
Perform POWERTRAIN VERIFICATION TEST VER-1.
11 If there are no possible causes remaining, view repair. All
Repair
Replace the Fuel Pump Module.
Perform POWERTRAIN VERIFICATION TEST VER-1.
12 Turn the ignition off.
Remove the Fuel Pump Relay from the IPM.
With a 12 volt test light connected to ground, probe the Fuel Pump Relay Fused B+
circuit in the IPM.
Does the test light illuminate?All
Ye s®Go To 13
No®Check for an open Fuel Pump fuse, repair cause of open. If OK,
replace the IPM Fuse & Relay Center.
Perform POWERTRAIN VERIFICATION TEST VER-1.
256
STARTING
*ENGINE CRANKS DOES NOT START ÐContinued
Page 4051 of 4284
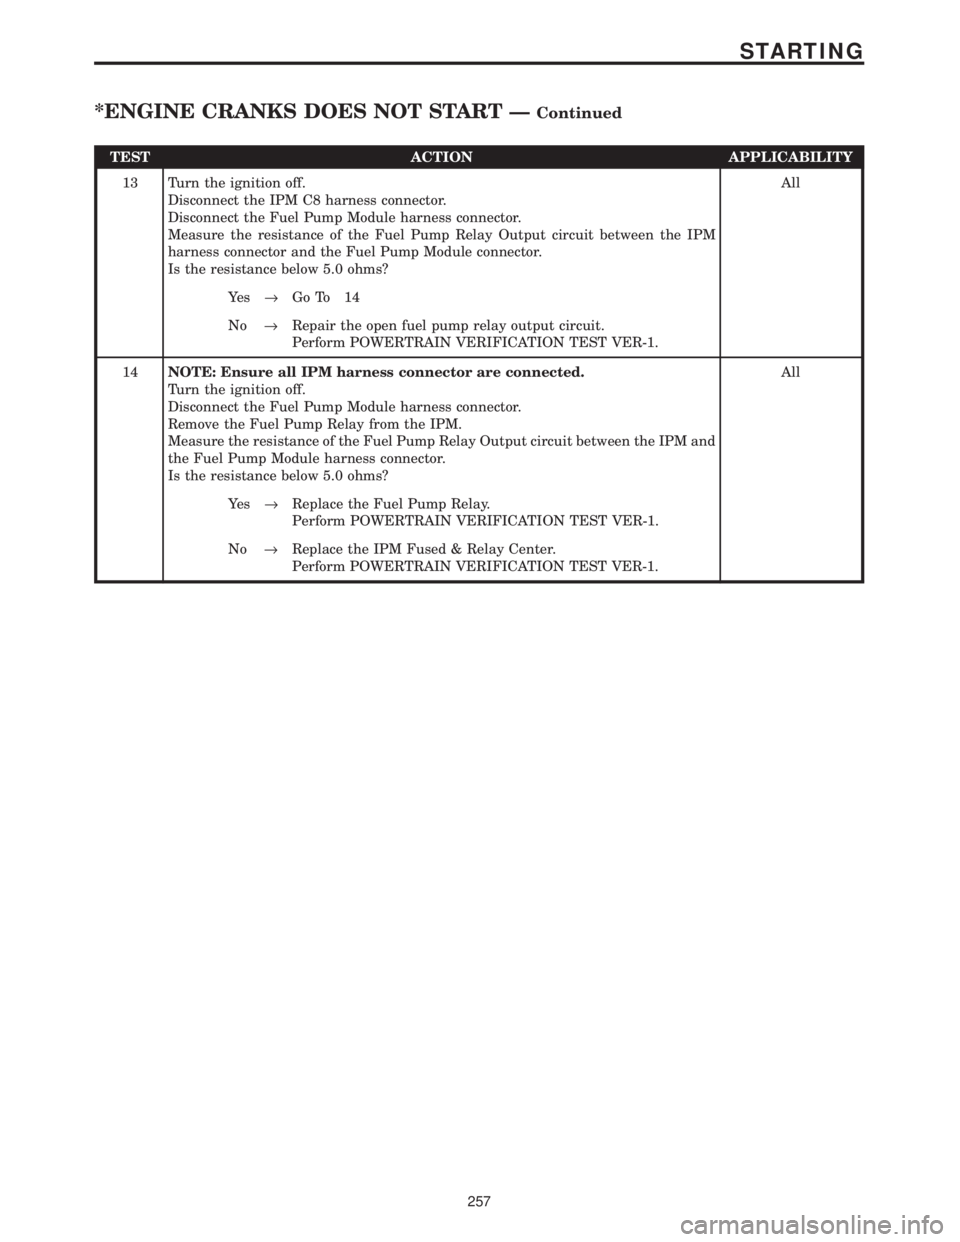
TEST ACTION APPLICABILITY
13 Turn the ignition off.
Disconnect the IPM C8 harness connector.
Disconnect the Fuel Pump Module harness connector.
Measure the resistance of the Fuel Pump Relay Output circuit between the IPM
harness connector and the Fuel Pump Module connector.
Is the resistance below 5.0 ohms?All
Ye s®Go To 14
No®Repair the open fuel pump relay output circuit.
Perform POWERTRAIN VERIFICATION TEST VER-1.
14NOTE: Ensure all IPM harness connector are connected.
Turn the ignition off.
Disconnect the Fuel Pump Module harness connector.
Remove the Fuel Pump Relay from the IPM.
Measure the resistance of the Fuel Pump Relay Output circuit between the IPM and
the Fuel Pump Module harness connector.
Is the resistance below 5.0 ohms?All
Ye s®Replace the Fuel Pump Relay.
Perform POWERTRAIN VERIFICATION TEST VER-1.
No®Replace the IPM Fused & Relay Center.
Perform POWERTRAIN VERIFICATION TEST VER-1.
257
STARTING
*ENGINE CRANKS DOES NOT START ÐContinued
Page 4052 of 4284
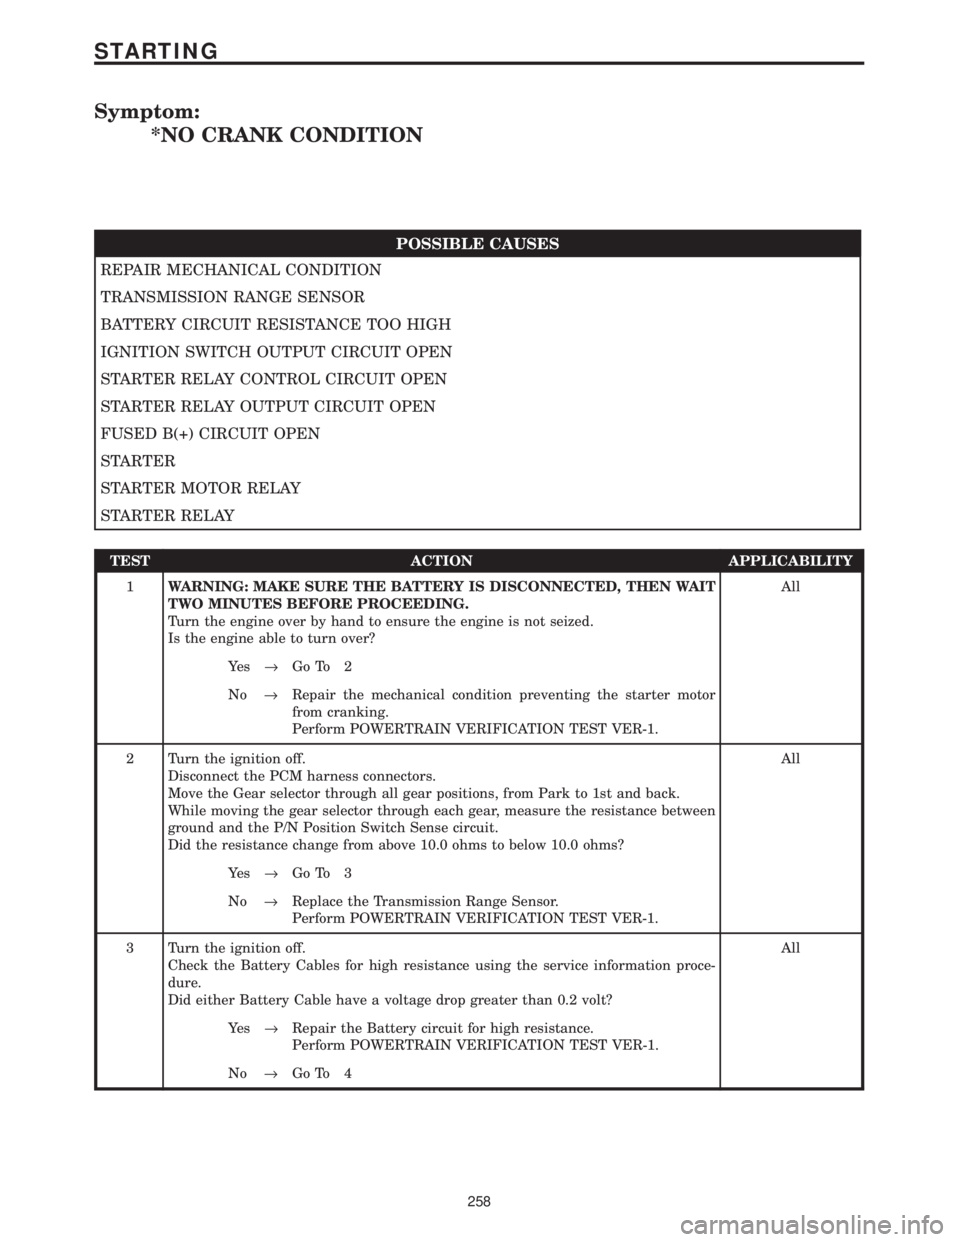
Symptom:
*NO CRANK CONDITION
POSSIBLE CAUSES
REPAIR MECHANICAL CONDITION
TRANSMISSION RANGE SENSOR
BATTERY CIRCUIT RESISTANCE TOO HIGH
IGNITION SWITCH OUTPUT CIRCUIT OPEN
STARTER RELAY CONTROL CIRCUIT OPEN
STARTER RELAY OUTPUT CIRCUIT OPEN
FUSED B(+) CIRCUIT OPEN
STARTER
STARTER MOTOR RELAY
STARTER RELAY
TEST ACTION APPLICABILITY
1WARNING: MAKE SURE THE BATTERY IS DISCONNECTED, THEN WAIT
TWO MINUTES BEFORE PROCEEDING.
Turn the engine over by hand to ensure the engine is not seized.
Is the engine able to turn over?All
Ye s®Go To 2
No®Repair the mechanical condition preventing the starter motor
from cranking.
Perform POWERTRAIN VERIFICATION TEST VER-1.
2 Turn the ignition off.
Disconnect the PCM harness connectors.
Move the Gear selector through all gear positions, from Park to 1st and back.
While moving the gear selector through each gear, measure the resistance between
ground and the P/N Position Switch Sense circuit.
Did the resistance change from above 10.0 ohms to below 10.0 ohms?All
Ye s®Go To 3
No®Replace the Transmission Range Sensor.
Perform POWERTRAIN VERIFICATION TEST VER-1.
3 Turn the ignition off.
Check the Battery Cables for high resistance using the service information proce-
dure.
Did either Battery Cable have a voltage drop greater than 0.2 volt?All
Ye s®Repair the Battery circuit for high resistance.
Perform POWERTRAIN VERIFICATION TEST VER-1.
No®Go To 4
258
STARTING
Page 4054 of 4284

TEST ACTION APPLICABILITY
8 Turn ignition off.
Remove the Starter Relay from the PDC.
Disconnect the Starter Relay Output connector from the Starter Solenoid.
Measure the resistance of the Starter Relay Output circuit between the Relay and the
Solenoid harness connector.
Is the resistance below 5.0 ohms?All
Ye s®Go To 9
No®Repair Starter Relay Output circuit for an open.
Perform POWERTRAIN VERIFICATION TEST VER-1.
9 Turn the ignition off.
Remove the Starter Relay from the PDC.
Using a 12-volt test light connected to ground, probe the Fused B+ circuit at the
Starter Relay terminal.
Does the test light illuminate brightly?All
Ye s®Go To 10
No®Repair the Fused B(+) Circuit for an open or high resistance.
Perform POWERTRAIN VERIFICATION TEST VER-1.
10 If there are no other possible causes remaining, review repair. All
Repair
Replace the Starter.
Perform POWERTRAIN VERIFICATION TEST VER-1.
260
STARTING
*NO CRANK CONDITION ÐContinued