Page 174 of 447
7B-132 AUTOMATIC TRANSMISSION (4 A/T)
56) Install valve body assembly (1) to transmission case.
First match the pin of the manual valve to the slot of the
manual shift shaft.
To fix valve body assembly (1) to transmission case, first
tighten bolt B (3), then tighten other bolts.
Tightening torque
Valve body to transmission case bolts
: 10 N·m (1.0 kg-m, 7.5 lb-ft)
57) Connect couplers of wire-to-solenoid to solenoid valves.Bolt Length “a”Pieces
A 30 mm (1.20 in.) 7
B 31 mm (1.22 in.) 2
C 25 mm (0.98 in.) 2
2. Bolt A
4. Bolt C
5. Manual valve pin
6. Slot of manual shift shaft
Solenoid Valve Wire Color
A (No.1) White
B (No.2) Black
C (No.3) Red
D (No.4) Yellow
E (No.5) Brown
TCC (Lock-up) Orange
1. Solenoid valve No.1
2. Solenoid valve No.2
3. Solenoid valve No.3
4. Solenoid valve No.4
5. Solenoid valve No.5
6. Lock-up solenoid
Page 175 of 447
AUTOMATIC TRANSMISSION (4 A/T) 7B-133
58) Install O-ring to oil strainer assembly (1). Make sure that O-
ring is not twisted.
59) Install oil strainer assembly to the top of valve body assem-
bly.
Connect transmission temperature sensor (2) coupler.
Fix transmission temperature sensor and oil strainer assem-
bly with bolts.
Tightening torque
Transmission temperature sensor bolt
(a) : 10 N·m (1.0 kg-m, 7.5 lb-ft)
60) Install magnet (1) in oil pan (2).
61) Install gasket to transmission case and install oil pan (1).
Tightening torque
A/T oil pan bolts (a) : 7.5 N·m (0.75 kg-m, 5.5 lb-ft)
62) Install oil cooler (1) and ground cable (2).
Tightening torque
A/T oil cooler bolt (a): 60 N·m (6.0 kg-m, 43.5 lb-ft)
NOTE:
If metal particles are attached to the magnet, clean them
before installing.
Page 176 of 447
7B-134 AUTOMATIC TRANSMISSION (4 A/T)
63) Install vehicle speed sensor (for speedometer) (1), shift
cable bracket (2) and connector clamp bracket (3).
Tightening torque
Vehicle speed sensor bolt
(a) : 5.5 N·m (0.55 kg-m, 4.0 lb-ft)
Shift cable bracket bolts
(b) : 13 N·m (1.3 kg-m, 9.5 lb-ft)
Connector clamp bracket bolt : 8 N·m (0.8 kg-m, 6.0 lb-ft)
64) Install A/T fluid filler tube (2) and level gauge (1).
Tightening torque
A/T fluid filler tube bolt (a) : 19.5 N·m (1.95 kg-m, 14.5 lb-ft)
65) Install output shaft speed sensor (1) and input shaft speed
sensor (2).
Apply grease to O-ring of each sensor.
Tightening torque
Output shaft speed sensor bolt
(a) : 8 N·m (0.8 kg-m, 6.0 lb-ft)
Input shaft speed sensor bolt
(b) : 8 N·m (0.8 kg-m, 6.0 Ib-ft)
Grease : 99000-25030
66) Install engine mounting LH bracket.
Tightening torque
Engine mounting LH bracket bolts
(a) : 55 N·m (5.5 kg-m, 40.0 lb-ft)
Page 177 of 447

AUTOMATIC TRANSMISSION (4 A/T) 7B-135
67) Install breather sensor hose (1).
68) Install transmission range sensor (2).
Install it temporarily so that the adjustment can be done after
installing assembly back to the vehicle.
Tightening torque
Transmission range sensor bolt
(a) : 18 N·m (1.8 kg-m, 13.0 lb-ft)
69) Install torque converter (1) to input shaft.
Install torque converter, using care not to damage oil seal of
oil pump.
After installing torque converter, check to make sure that dis-
tance “a” is within specification.
Torque converter installing position
“a” : More than 19.9 mm (0.783 in.)
Check torque converter for smooth rotation.
Apply grease around cup at the center of torque converter.
“C” : Grease 99000-25010
CAUTION:
Before installing converter, make sure that its pump
hub portion is free from nicks, burrs or damage which
may cause oil seal to leak.
Be very careful not to drop converter on oil pump gear.
Damage in gear, should it occur, may cause a critical
trouble.
2. Flange nut
3. Torque converter housing
4. Cup
Page 178 of 447

7B-136 AUTOMATIC TRANSMISSION (4 A/T)
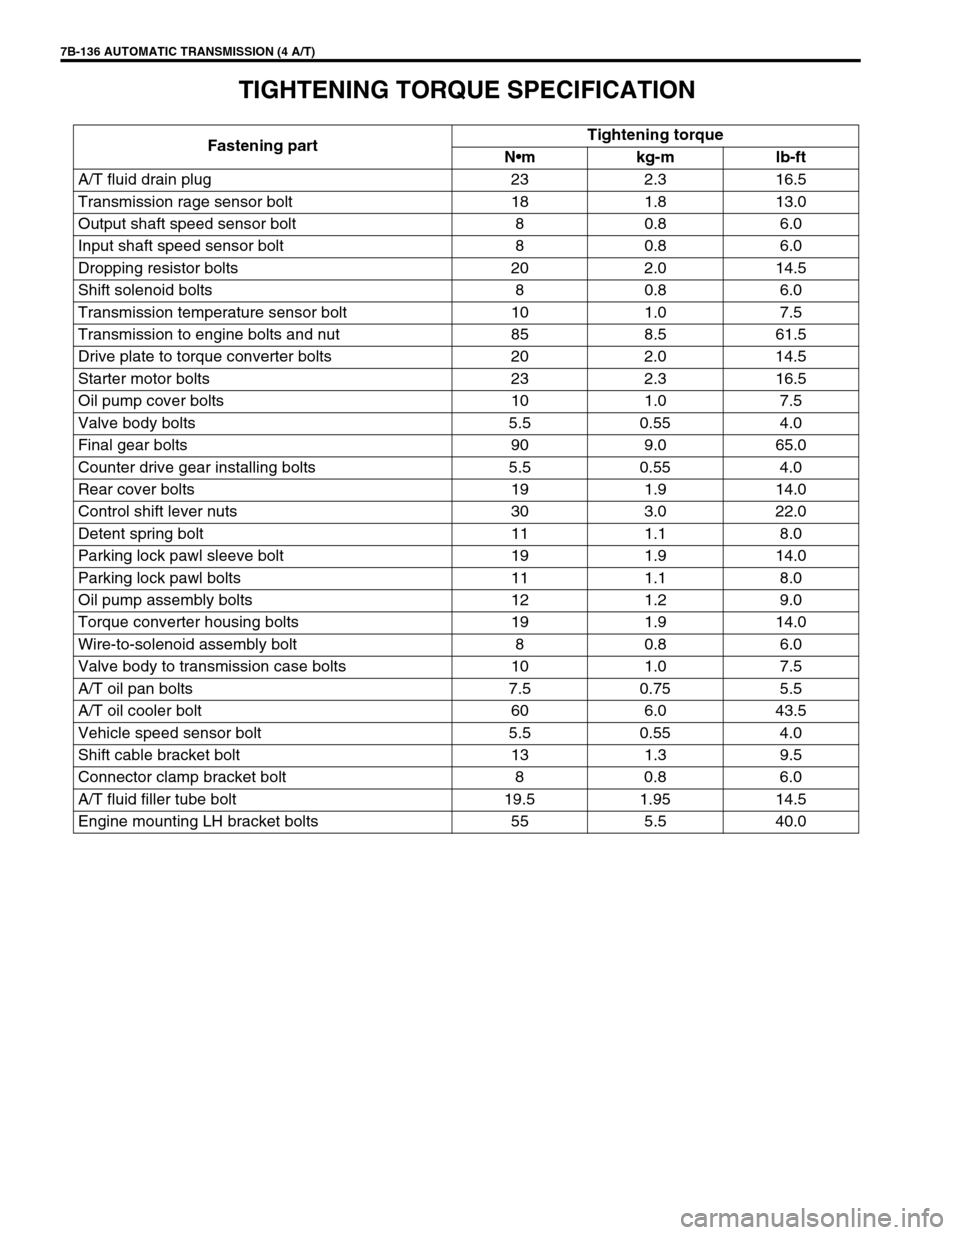
TIGHTENING TORQUE SPECIFICATION
Fastening partTightening torque
Nm kg-m lb-ft
A/T fluid drain plug 23 2.3 16.5
Transmission rage sensor bolt 18 1.8 13.0
Output shaft speed sensor bolt 8 0.8 6.0
Input shaft speed sensor bolt 8 0.8 6.0
Dropping resistor bolts 20 2.0 14.5
Shift solenoid bolts 8 0.8 6.0
Transmission temperature sensor bolt 10 1.0 7.5
Transmission to engine bolts and nut 85 8.5 61.5
Drive plate to torque converter bolts 20 2.0 14.5
Starter motor bolts 23 2.3 16.5
Oil pump cover bolts 10 1.0 7.5
Valve body bolts 5.5 0.55 4.0
Final gear bolts 90 9.0 65.0
Counter drive gear installing bolts 5.5 0.55 4.0
Rear cover bolts 19 1.9 14.0
Control shift lever nuts 30 3.0 22.0
Detent spring bolt 11 1.1 8.0
Parking lock pawl sleeve bolt 19 1.9 14.0
Parking lock pawl bolts 11 1.1 8.0
Oil pump assembly bolts 12 1.2 9.0
Torque converter housing bolts 19 1.9 14.0
Wire-to-solenoid assembly bolt 8 0.8 6.0
Valve body to transmission case bolts 10 1.0 7.5
A/T oil pan bolts 7.5 0.75 5.5
A/T oil cooler bolt 60 6.0 43.5
Vehicle speed sensor bolt 5.5 0.55 4.0
Shift cable bracket bolt 13 1.3 9.5
Connector clamp bracket bolt 8 0.8 6.0
A/T fluid filler tube bolt 19.5 1.95 14.5
Engine mounting LH bracket bolts 55 5.5 40.0
Page 181 of 447
AUTOMATIC TRANSMISSION (4 A/T) 7B-139
REQUIRED SERVICE MATERIAL
NOTE:
This kit includes the following items.
1. Storage case, 2. Operator’s manual, 3. SUZUKI scan tool (Tech-1A), 4. DLC cable,
5. Test lead / probe, 6. Power source cable, 7. DLC cable adaptor, 8. Self-test adaptor
MaterialRecommended SUZUKI product
(Part Number)Use
Automatic transmission fluid
An equivalent of DEXRON
®-III or
DEXRONR
®-IIEAutomatic transmission
Parts lubrication when installing
Sealant SUZUKI BOND No. 1215
(99000-31110)Case housing star-shaped recess
bolts
(3 pcs only)
Lithium grease SUZUKI SUPER GREASE C
(99000-25030)Retaining parts in place when
assembling
Oil seal lips
D-rings
O-rings
SUZUKI SUPER GREASE A
(99000-25010)Cable ends
Converter center cup
Thread lock cement THREAD LOCK 1322
(99000-32110)Final gear bolts
Torque converter housing bolts
Page 183 of 447

CLUTCH 7C-1
6F1
6F2
6G
6H
6K
7A1
7B1
7C1
7D
7E
7C
8A
8B
8C
8D
8E
9
10
10A
10B
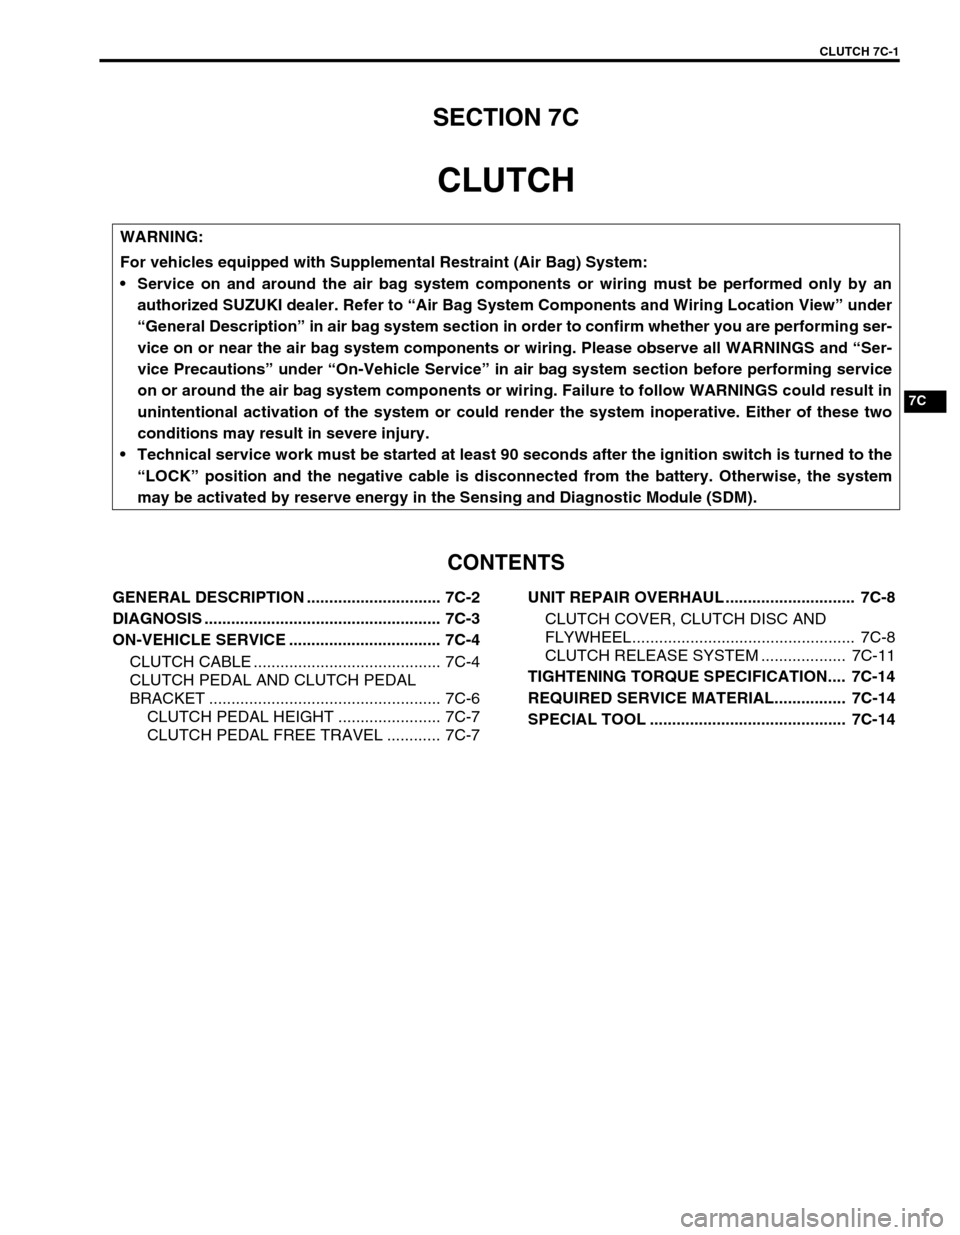
SECTION 7C
CLUTCH
CONTENTS
GENERAL DESCRIPTION .............................. 7C-2
DIAGNOSIS ..................................................... 7C-3
ON-VEHICLE SERVICE .................................. 7C-4
CLUTCH CABLE .......................................... 7C-4
CLUTCH PEDAL AND CLUTCH PEDAL
BRACKET .................................................... 7C-6
CLUTCH PEDAL HEIGHT ....................... 7C-7
CLUTCH PEDAL FREE TRAVEL ............ 7C-7UNIT REPAIR OVERHAUL ............................. 7C-8
CLUTCH COVER, CLUTCH DISC AND
FLYWHEEL.................................................. 7C-8
CLUTCH RELEASE SYSTEM ................... 7C-11
TIGHTENING TORQUE SPECIFICATION.... 7C-14
REQUIRED SERVICE MATERIAL................ 7C-14
SPECIAL TOOL ............................................ 7C-14
WARNING:
For vehicles equipped with Supplemental Restraint (Air Bag) System:
Service on and around the air bag system components or wiring must be performed only by an
authorized SUZUKI dealer. Refer to “Air Bag System Components and Wiring Location View” under
“General Description” in air bag system section in order to confirm whether you are performing ser-
vice on or near the air bag system components or wiring. Please observe all WARNINGS and “Ser-
vice Precautions” under “On-Vehicle Service” in air bag system section before performing service
on or around the air bag system components or wiring. Failure to follow WARNINGS could result in
unintentional activation of the system or could render the system inoperative. Either of these two
conditions may result in severe injury.
Technical service work must be started at least 90 seconds after the ignition switch is turned to the
“LOCK” position and the negative cable is disconnected from the battery. Otherwise, the system
may be activated by reserve energy in the Sensing and Diagnostic Module (SDM).
Page 186 of 447
7C-4 CLUTCH
ON-VEHICLE SERVICE
CLUTCH CABLE
REMOVAL
1) Disconnect negative cable at battery.
2) Remove clutch cable joint nut (1).
3) Remove joint pin (2) from clutch release lever (3).
4) Disconnect cable hook (1) from clutch pedal (4).
5) Remove clutch cable (3) from bracket (5) by turning cable
cap (2) about 90° as shown.
1. Clutch cable 6. Pedal bracket
2. Release lever 7. Adjusting bolt
3. Joint pin
: Apply grease 99000-25010 to joint pin.8. Lock nut
4. Joint nut 9. Clutch cable hook
: Apply grease 99000-25010 to cable hook.
5. Clutch pedal Tightening torque