Page 48 of 1111

AC0X0±01
I02397
I02398
I02399
AC±48
± AIR CONDITIONINGCONDENSER
2733 Author�: Date�:
2000 LEXUS GS300/GS400 (RM718U)
REMOVAL
1. DISCHARGE REFRIGERANT FROM REFRIGERATION
SYSTEM
HINT:
At the time of installation, please refer to the following item.
Evacuate air from refrigeration system.
Charge system with refrigerant and inspect for leakage of refrig-
erant.
Specified amount : 600 ± 50 g (21.16 ± 1.76 oz.)
2. REMOVE THESE PARTS:
(a) Air cleaner duct
(b) Air cleaner assembly
(c) 2 radiator upper supports
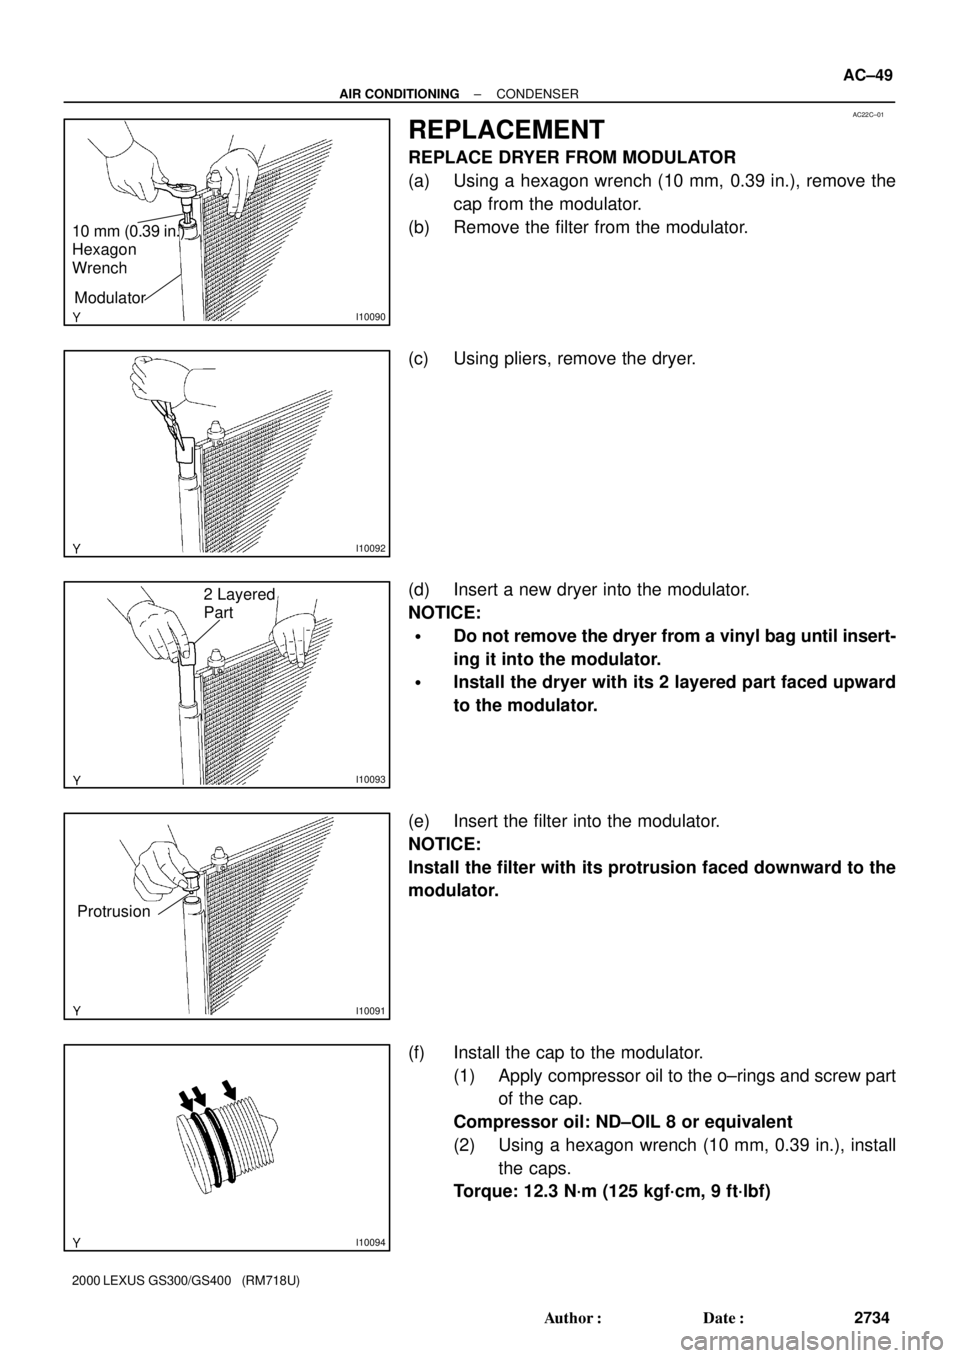
3. DISCONNECT DISCHARGE HOSE AND LIQUID TUBE
Remove the 2 bolts and disconnect the hose and tube.
Torque: 10 N´m (100 kgf´cm, 7 ft´lbf)
NOTICE:
Cap the open fittings immediately to keep moisture or dirt
out of the system.
HINT:
At the time of installation, please refer to the following item.
Lubricate 2 new O±rings with compressor oil and install them
to the hose and tube.
4. REMOVE CONDENSER
(a) Remove the 4 bolts and 2 brackets.
(b) Push the radiator toward engine.
(c) Push the condenser toward radiator and pull it upward.
HINT:
At the time of installation, please refer to the following item.
If condenser is replaced, add compressor oil to the condenser.
Add 40 cc (1.4 fl. oz)
Compressor oil: ND ± OIL 8 or equivalent
Page 49 of 1111
AC22C±01
I10090
10 mm (0.39 in.)
Hexagon
Wrench
Modulator
I10092
I10093
2 Layered
Part
I10091
Protrusion
I10094
± AIR CONDITIONINGCONDENSER
AC±49
2734 Author�: Date�:
2000 LEXUS GS300/GS400 (RM718U)
REPLACEMENT
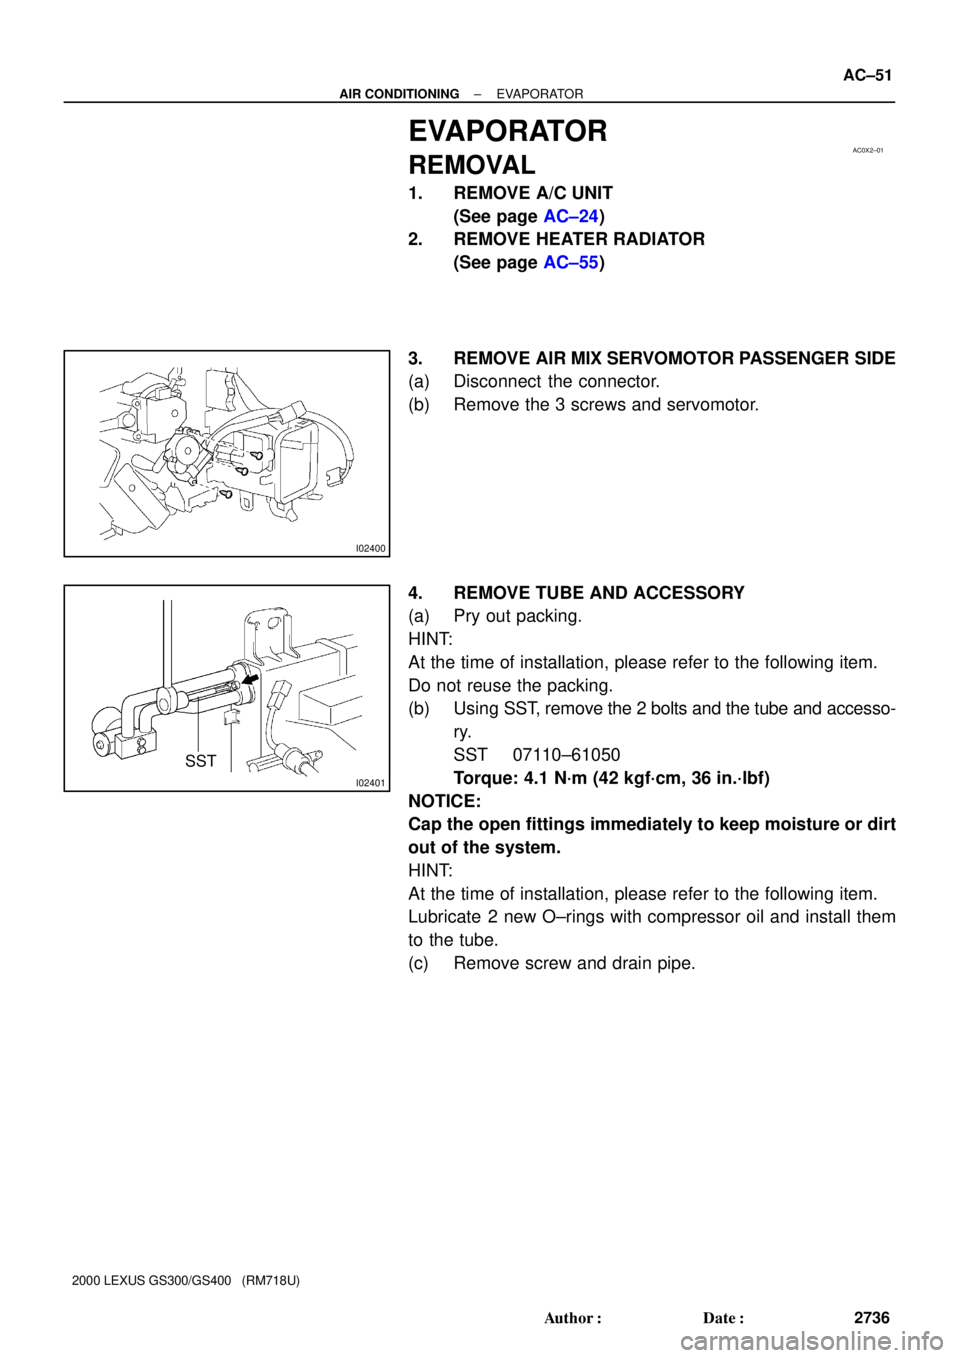
REPLACE DRYER FROM MODULATOR
(a) Using a hexagon wrench (10 mm, 0.39 in.), remove the
cap from the modulator.
(b) Remove the filter from the modulator.
(c) Using pliers, remove the dryer.
(d) Insert a new dryer into the modulator.
NOTICE:
�Do not remove the dryer from a vinyl bag until insert-
ing it into the modulator.
�Install the dryer with its 2 layered part faced upward
to the modulator.
(e) Insert the filter into the modulator.
NOTICE:
Install the filter with its protrusion faced downward to the
modulator.
(f) Install the cap to the modulator.
(1) Apply compressor oil to the o±rings and screw part
of the cap.
Compressor oil: ND±OIL 8 or equivalent
(2) Using a hexagon wrench (10 mm, 0.39 in.), install
the caps.
Torque: 12.3 N´m (125 kgf´cm, 9 ft´lbf)
Page 51 of 1111
AC0X2±01
I02400
I02401
SST
± AIR CONDITIONINGEVAPORATOR
AC±51
2736 Author�: Date�:
2000 LEXUS GS300/GS400 (RM718U)
EVAPORATOR
REMOVAL
1. REMOVE A/C UNIT
(See page AC±24)
2. REMOVE HEATER RADIATOR
(See page AC±55)
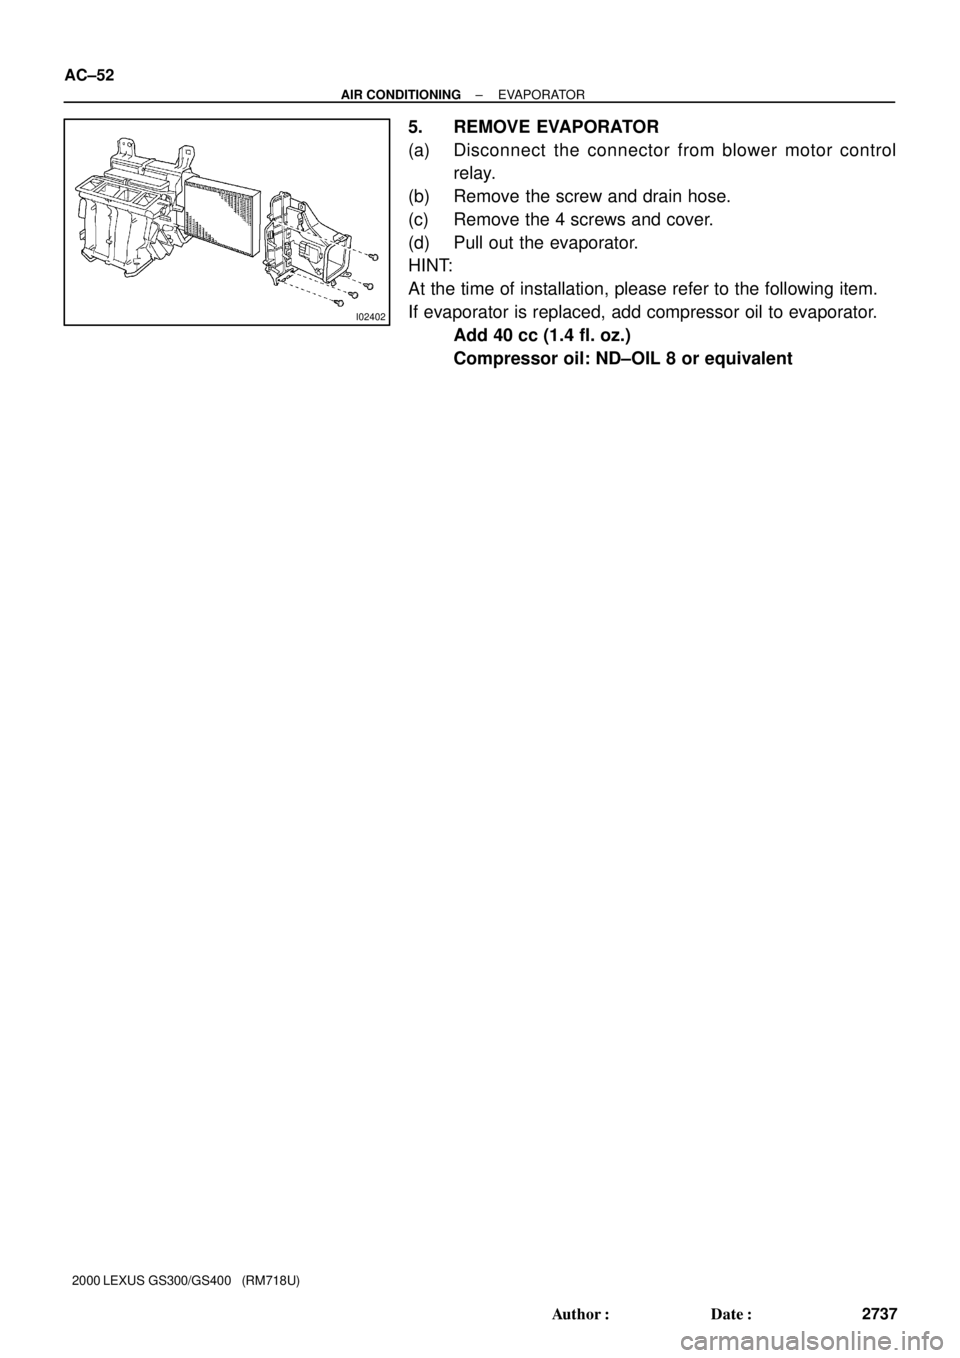
3. REMOVE AIR MIX SERVOMOTOR PASSENGER SIDE
(a) Disconnect the connector.
(b) Remove the 3 screws and servomotor.
4. REMOVE TUBE AND ACCESSORY
(a) Pry out packing.
HINT:
At the time of installation, please refer to the following item.
Do not reuse the packing.
(b) Using SST, remove the 2 bolts and the tube and accesso-
ry.
SST 07110±61050
Torque: 4.1 N´m (42 kgf´cm, 36 in.´lbf)
NOTICE:
Cap the open fittings immediately to keep moisture or dirt
out of the system.
HINT:
At the time of installation, please refer to the following item.
Lubricate 2 new O±rings with compressor oil and install them
to the tube.
(c) Remove screw and drain pipe.
Page 52 of 1111
I02402
AC±52
± AIR CONDITIONINGEVAPORATOR
2737 Author�: Date�:
2000 LEXUS GS300/GS400 (RM718U)
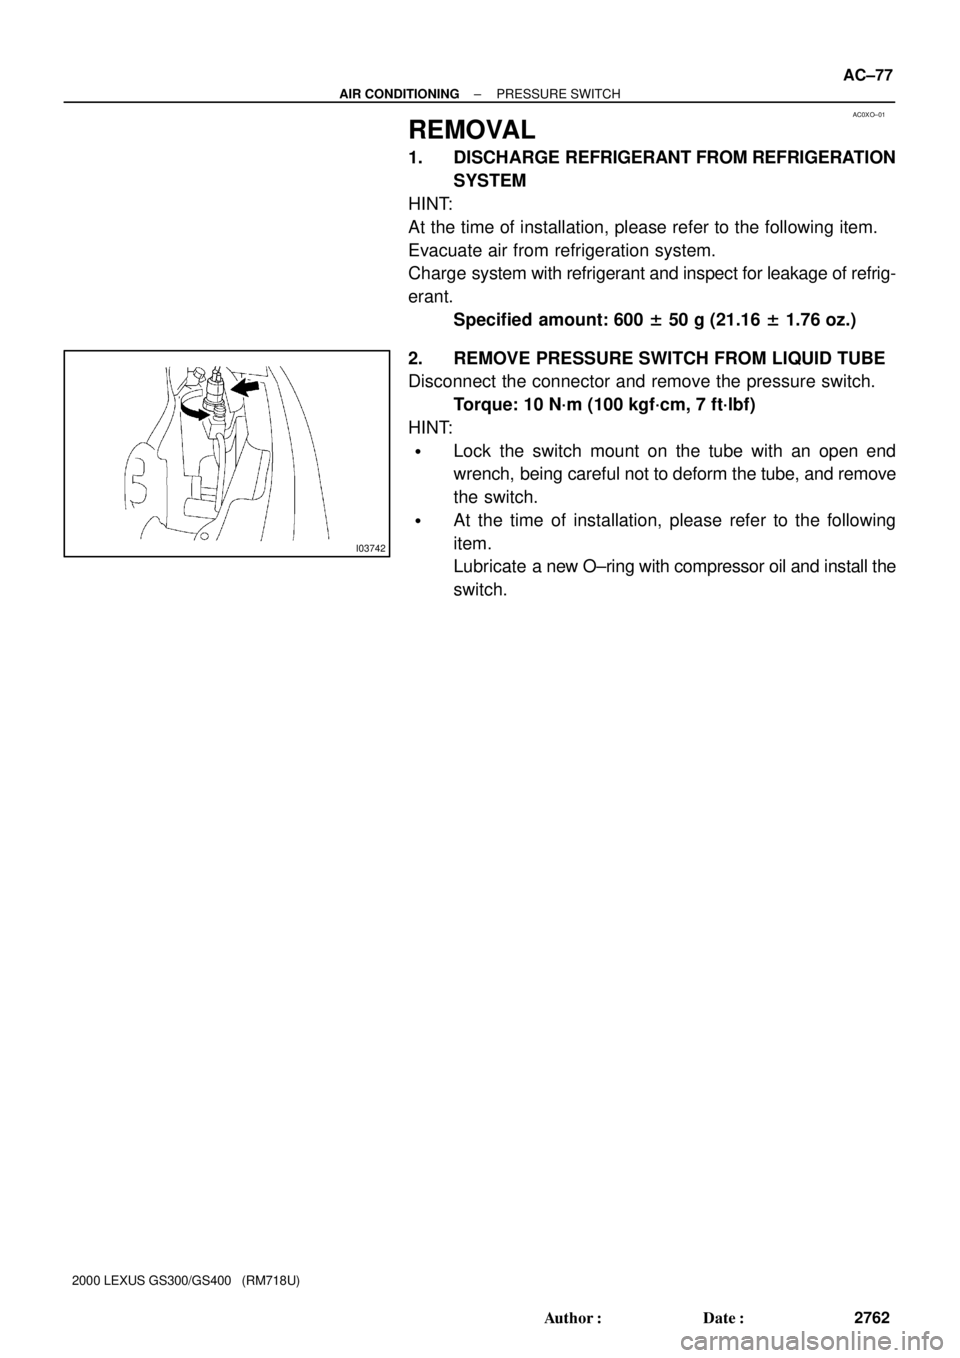
5. REMOVE EVAPORATOR
(a) Disconnect the connector from blower motor control
relay.
(b) Remove the screw and drain hose.
(c) Remove the 4 screws and cover.
(d) Pull out the evaporator.
HINT:
At the time of installation, please refer to the following item.
If evaporator is replaced, add compressor oil to evaporator.
Add 40 cc (1.4 fl. oz.)
Compressor oil: ND±OIL 8 or equivalent
Page 59 of 1111
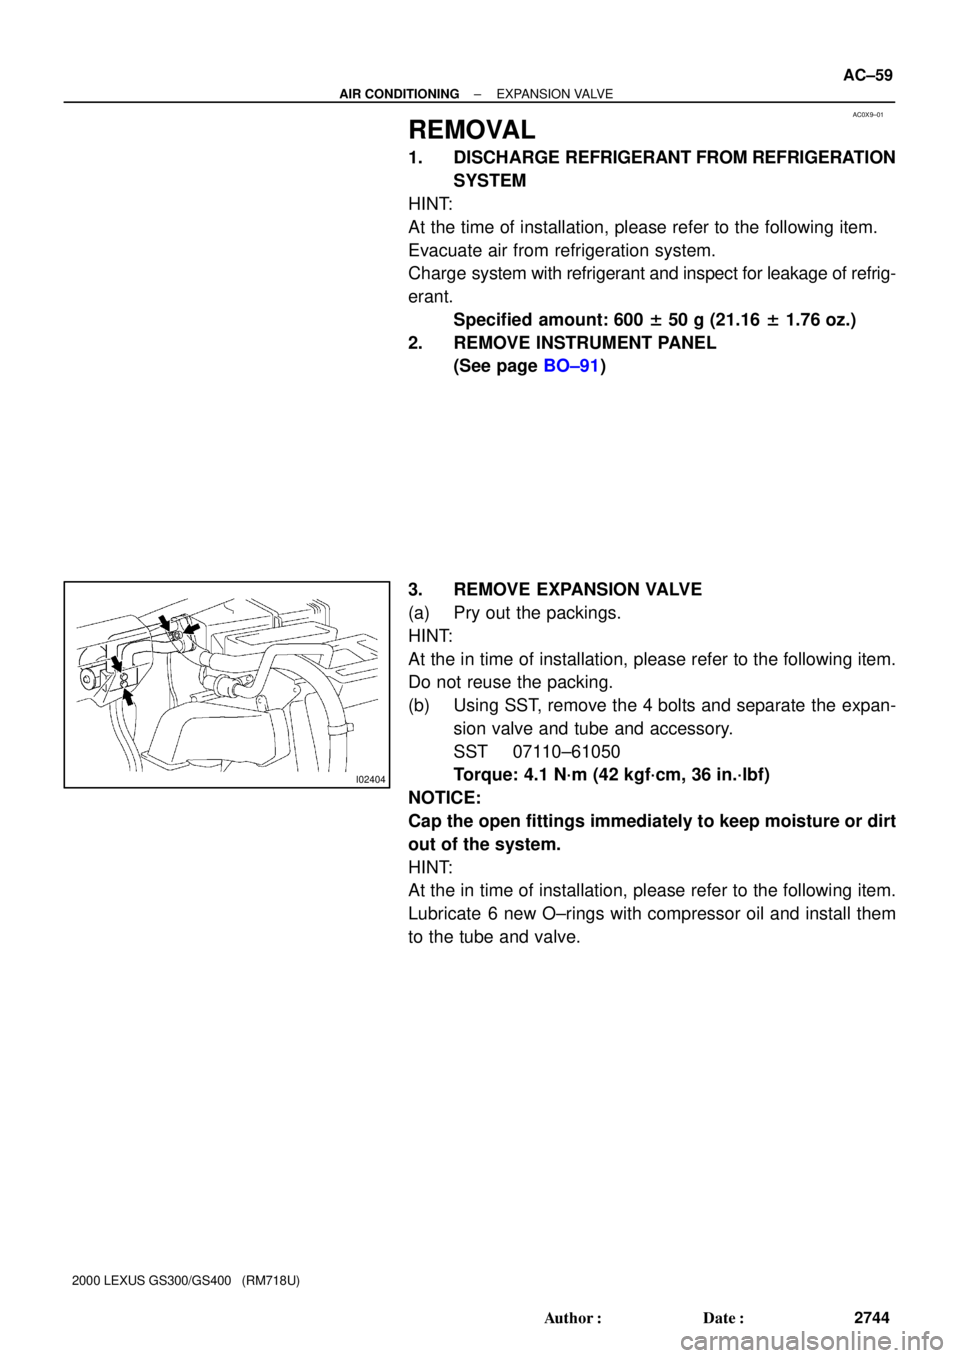
AC0X9±01
I02404
± AIR CONDITIONINGEXPANSION VALVE
AC±59
2744 Author�: Date�:
2000 LEXUS GS300/GS400 (RM718U)
REMOVAL
1. DISCHARGE REFRIGERANT FROM REFRIGERATION
SYSTEM
HINT:
At the time of installation, please refer to the following item.
Evacuate air from refrigeration system.
Charge system with refrigerant and inspect for leakage of refrig-
erant.
Specified amount: 600 ± 50 g (21.16 ± 1.76 oz.)
2. REMOVE INSTRUMENT PANEL
(See page BO±91)
3. REMOVE EXPANSION VALVE
(a) Pry out the packings.
HINT:
At the in time of installation, please refer to the following item.
Do not reuse the packing.
(b) Using SST, remove the 4 bolts and separate the expan-
sion valve and tube and accessory.
SST 07110±61050
Torque: 4.1 N´m (42 kgf´cm, 36 in.´lbf)
NOTICE:
Cap the open fittings immediately to keep moisture or dirt
out of the system.
HINT:
At the in time of installation, please refer to the following item.
Lubricate 6 new O±rings with compressor oil and install them
to the tube and valve.
Page 77 of 1111
AC0XO±01
I03742
± AIR CONDITIONINGPRESSURE SWITCH
AC±77
2762 Author�: Date�:
2000 LEXUS GS300/GS400 (RM718U)
REMOVAL
1. DISCHARGE REFRIGERANT FROM REFRIGERATION
SYSTEM
HINT:
At the time of installation, please refer to the following item.
Evacuate air from refrigeration system.
Charge system with refrigerant and inspect for leakage of refrig-
erant.
Specified amount: 600 ± 50 g (21.16 ± 1.76 oz.)
2. REMOVE PRESSURE SWITCH FROM LIQUID TUBE
Disconnect the connector and remove the pressure switch.
Torque: 10 N´m (100 kgf´cm, 7 ft´lbf)
HINT:
�Lock the switch mount on the tube with an open end
wrench, being careful not to deform the tube, and remove
the switch.
�At the time of installation, please refer to the following
item.
Lubricate a new O±ring with compressor oil and install the
switch.
Page 115 of 1111

AT067±01
D01040
� Gasket
Clamp
ClampAir Cleaner, MAF Meter and Intake
Air Connector Pipe Assembly
Exhaust Manifold with TWC
Connector and
Wire Harness Level Gauge
Filler PipeAdjusting WasherPropeller Shaft Assembly
Shift Control Rod
Torque Converter ClutchPlug for Line
Pressure TestHeat Insulator
Heated Oxygen Sensor
Front and Center
Exhaust PipeFront Floor
Center Brace
Engine Under Cover Pipe Support BracketO±Ring Heat Insulator
� Gasket� Starterx6x839 (400, 29)
44 (450, 33)
72 (730, 53)
37 (380, 27)
13 (130, 9)
79 (805, 58)
37 (375, 27)
7.4 (75, 65 in.´lbf)
44 (450, 33)
44 (450, 33)
37 (380, 27)
37 (380, 27)
Hole Plug
5.4 (55, 48 in.´lbf)
Oil Cooler Pipe
x5
� O±Ring
5.4 (55, 48 in.´lbf)
� Gasket
44 (450, 33)
�
5.4 (55, 48 in.´lbf)
N´m (kgf´cm,ft´lbf) : Specified torque
� Non±reusable part� Gasket
48 (490, 35)
26 (270, 20)
44 (450, 33)
44 (450, 33)
�
79 (805, 58)
± AUTOMATIC TRANSMISSIONAUTOMATIC TRANSMISSION UNIT (2JZ±GE)
AT±27
1975 Author�: Date�:
2000 LEXUS GS300/GS400 (RM718U)
AUTOMATIC TRANSMISSION UNIT (2JZ±GE)
COMPONENTS
Page 117 of 1111

D01043
D01044
D01045
D01046
± AUTOMATIC TRANSMISSIONAUTOMATIC TRANSMISSION UNIT (2JZ±GE)
AT±29
1977 Author�: Date�:
2000 LEXUS GS300/GS400 (RM718U)
(e) Remove the 4 bolts and 2 gaskets from the tail pipe.
Torque: 44 N´m (450 kgf´cm, 33 ft´lbf)
HINT:
At the time of installation, please refer to the following item.
Replace the used gaskets with new ones.
(f) Disconnect the front and center exhaust pipe from the O±
ring and remove it.
8. REMOVE 2 HEAT INSULATORS
(a) Remove the 6 bolts and heat insulator.
Torque: 5.4 N´m (55 kgf´cm, 48 in.´lbf)
(b) Remove the 4 bolts and heat insulator.
Torque: 5.4 N´m (55 kgf´cm, 48 in.´lbf)
9. REMOVE PROPELLER SHAFT
(See page PR±4)
10. DISCONNECT SHIFT CONTROL ROD
Remove the nut and disconnect the rod.
Torque: 13 N´m (130 kgf´cm, 9 ft´lbf)
11. DISCONNECT OIL COOLER PIPE
(a) Loosen the 2 union nuts from the transmission.
Torque: 44 N´m (450 kgf´cm, 33 ft´lbf)
NOTICE:
Be careful not to damage the oil cooler pipe.
(b) Disconnect the 3 set bolts of the clamp.
Torque: 5.4 N´m (55 kgf´cm, 48 in.´lbf)
(c) Disconnect the 2 oil cooler pipes from the transmission.