Page 49 of 65

60G-74E
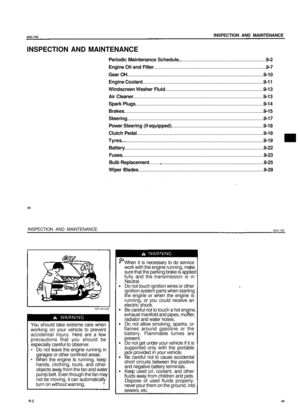
INSPECTION AND MAINTENANCE
70F-07-029
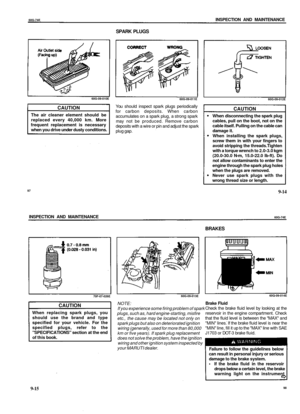
Do not use any fluid other than SAE
J1703 or DOT-3 brake fluid. Do not
use reclaimed fluid or fluid that has
been stored in old or open
containers. It is essential that foreign
particles and other liquids are kept
out of the brake fluid reservoir.
CAUTION
The brake fluid should be replaced
every two years or 20,000 km.
panel will come on (the engine must
be running with the parking brake
fully disengaged). Should the light
come on, immediately ask your
MARUTI dealer to inspect the brake
system.
A rapid fluid loss Indicates a leak in
the brake system which should be
inspected by your MARUTI dealer
immediately.
Brake fluid can harm your eyes and
damage painted surfaces. Use
caution when refilling the reservoir.
NOTE:
With disc brakes, the fluid level can be
expected to gradually fall as the brake pads
wear.
99
70F-07-030
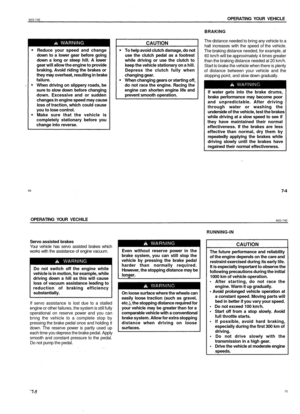
Brake Pedal
Check if the brake pedal stops at the regular
height without "spongy" feeling when you
depress it. If not, have the brake system
inspected by your MARUTI dealer. If you doubt
the brake pedal for the regular height, check
it as follows:
With the engine running, measure the distance
between the brake pedal and floor wall when
the pedal is depressed with approximately 30
kg (66 lbs) of force. The minimum distance
required is 80 mm (3.1 in). Since your vehicle's
brake system is self-adjusting, there is no need
for pedal adjustment. If the pedal to floor wall
distance as measured above is less than the
minimum distance required, have your vehicle
inspected by your MARUTI dealer.
9-16
INSPECTION AND MAINTENANCE
60G-74E
STEERING
60G-09-015E
NOTE:
When measuring the distance between the
brake pedal and floor wall, be sure not to
include any floor covering in the measurement.
If you experience any of the following
problems with your vehicle's brake
system, have the vehicle inspected
immediately by your MARUTI dealer.
Poor braking performance
Uneven braking (Brakes not working
uniformly on all wheels.)
Excessive pedal travel
Brake dragging
Excessive noise
Pedal pulsation (Pedal pulsates
when depressed.)
63B-09-00SE
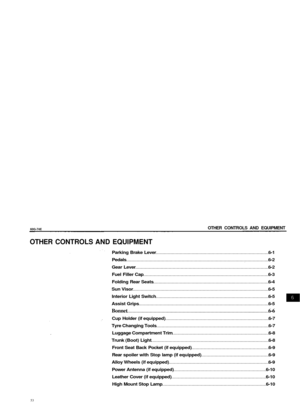
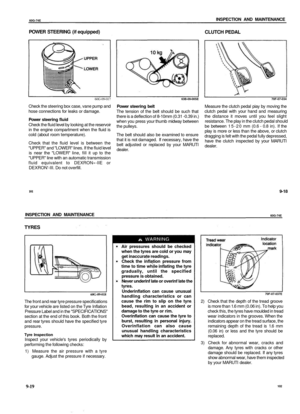
Parking brake
Check the parking brake for proper adjustment
by counting the number of clicks made by the
ratchet teeth as you slowly pull up on the
parking brake lever to the point of full
engagement. The parking brake lever should
stop between the 3rd and 5th ratchet tooth
and the rear wheels should be securely locked.
If the parking brake is not properly adjusted
or the brakes drag after the lever has been
fully released, have the parking brake
inspected and/or adjusted by your MARUTI
dealer.
60G-09-016
Check the play of the steering wheel by gently
turning it from left to right and measuring the
distance that it moves before you feel slight
resistance. The play should be between 0 -
30
mm
(0.0 -1.2 in).
Check that the steering wheel turns easily and
smoothly without rattling by turning it all the
way to the right and to the left while driving
very slowly in an open area. If the amount of
free play is outside the specification or you
find anything else to be wrong, an inspection
must be performed by your MARUTI dealer.
9-17
100
Page 50 of 65

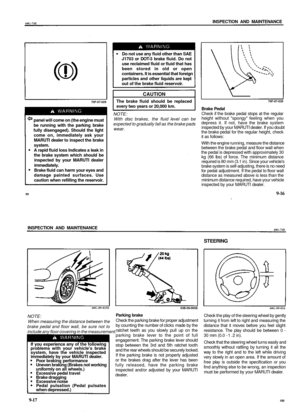
CLUTCH PEDAL
60G-09-017
Check the steering box case, vane pump and
hose connections for leaks or damage.
Power steering fluid
C")
60G-74E
INSPECTION AND MAINTENANCE
POWER STEERING (if equipped)
CLUTCH PEDAL
60G-09-017
Check the steering box case, vane pump and
hose connections for leaks or damage.
Power steering fluid
Check the fluid level by looking at the reservoir
in the engine compartment when the fluid is
cold (about room temperature).
Check that the fluid level is between the
"UPPER" and "LOWER" lines. If the fluid level
is near the "LOWER" line, fill it up to the
"UPPER" line with an automatic transmission
fluid equivalent to DEXRON»-IIE or
DEXRON'-III. Do not overfill.
63B-09-00SE
Power steering belt
The tension of the belt should be such that
there is a deflection of 8-10mm (0.31 -0.39 in.)
when you press your thumb midway between
the pulleys.
The belt should also be examined to ensure
that it is not damaged. If necessary, have the
belt adjusted or replaced by your MARUTI
dealer.
70F-07-034
Measure the clutch pedal piay by moving the
clutch pedal with your hand and measuring
the distance it moves until you feel slight
resistance. The play in the clutch pedal should
be between 15-20 mm (0.6 - 0.8 in). If the
play is more or less than the above, or clutch
dragging is felt with the pedal fully depressed,
have the clutch inspected by your MARUTI
dealer.
101
9-18
INSPECTION AND MAINTENANCE
60G-74E
TYRES
60G-09-018
The front and rear tyre pressure specifications
for your vehicle are listed on the Tyre Inflation
Pressure Label and in the "SPECIFICATIONS"
section at the end of this book. Both the front
and rear tyres should have the specified tyre
pressure.
Tyre Inspection
Inspect your vehicle's tyres periodically by
performing the following checks:
1) Measure the air pressure with a tyre
gauge. Adjust the pressure if necessary.
Air pressures should be checked
when the tyres are cold or you may
get inaccurate readings.
Check the inflation pressure from
time to time while inflating the tyre
gradually, until the specified
pressure is obtained.
Never underinf late or overinf late the
tyres.
Underinflation can cause unusual
handling characteristics or can
cause the rim to slip on the tyre
bead, resulting in an accident or
damage to the tyre or rim.
Overinflation can cause the tyre to
burst, resulting in personal injury.
Overinflation can also cause
unusual handling characteristics
which may result In an accident.
70F-07-037E
2) Check that the depth of the tread groove
is more than 1.6 mm (0.06 in). To help you
check this, the tyres have moulded in tread
wear indicators in the grooves. When the
indicators appear on the tread surface, the
remaining depth of the tread is 1.6 mm
(0.06 in) or less and the tyre should be
replaced.
3) Check for abnormal wear, cracks and
damage. Any tyres with cracks or other
damage should be replaced. If any tyres
show abnormal wear, have them inspected
by your MARUTI dealer.
9-19
102
Page 51 of 65

60G-74E
INSPECTION AND MAINTENANCE
Hitting curbs and running over rocks
can damage tyres and affect wheel
alignment. Be sure to have tyres and
wheel alignment checked periodically
by your MARUTI dealer.
4) Check for loose wheel nuts.
5) Check that there are no nails, stones, or
other objects sticking into the tyres.
Your MARUTI is equipped with tyres
which are all the same type and size.
This is important to ensure proper
steering and handling of the vehicle.
Never mix tyres of different size or type
on the four wheels of your vehicle. The
size and type of tyres used should be
only those approved by MARUTI as
standard or optional equipment for
your vehicle.
Replacing the wheels and tyres
equipped on your vehicle with certain
combinations of aftermarket wheels
and tyres can significantly change the
steering and handling characteristics
of your vehicle. Therefore, use only
those wheel and tyre combinations
approved by MARUTI as standard or
optional equipment for your vehicle.
CAUTION
Replacing the original tyres with tyres
of a different size may result in false
speedometer or odometer readings.
60G-09-019E
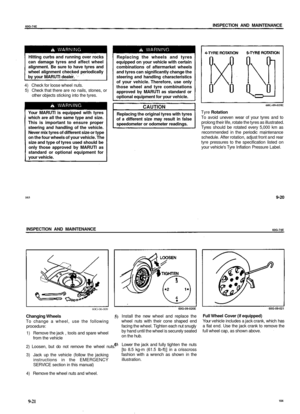
Tyre Rotation
To avoid uneven wear of your tyres and to
prolong their life, rotate the tyres as illustrated.
Tyres should be rotated every 5,000 km as
recommended in the periodic maintenance
schedule. After rotation, adjust front and rear
tyre pressures to the specification listed on
your vehicle's Tyre Inflation Pressure Label.
103
9-20
INSPECTION AND MAINTENANCE
60G-74E
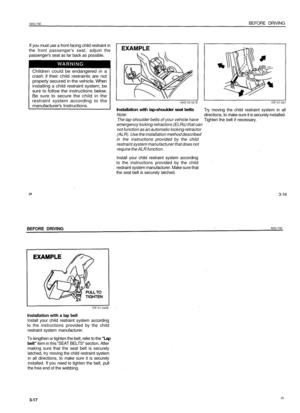
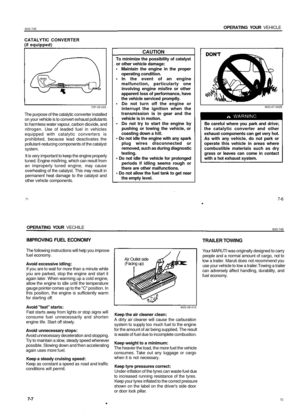
60G-06-009
5)
Changing Wheels
To change a wheel, use the following
procedure:
1) Remove the jack , tools and spare wheel
from the vehicle
2) Loosen, but do not remove the wheel nuts. '
3) Jack up the vehicle (follow the jacking
instructions in the EMERGENCY
SERVICE section in this manual)
4) Remove the wheel nuts and wheel.
60G-09-020E
Install the new wheel and replace the
wheel nuts with their cone shaped end
facing the wheel. Tighten each nut snugly
by hand until the wheel is securely seated
on the hub.
Lower the jack and fully tighten the nuts
[to 8.5 kg-m (61.5 Ib-ft)] in a crisscross
fashion with a wrench as shown in the
illustration.
60G-09-021
Full Wheel Cover (if equipped)
Your vehicle includes a jack crank, which has
a flat end. Use the jack crank to remove the
full wheel cap, as shown above.
9-21
104
Page 52 of 65

60G-74E
INSPECTION AND MAINTENANCE
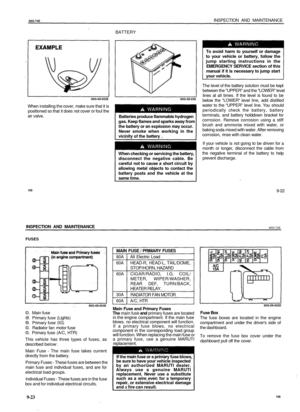
BATTERY
60G-09-022E
When installing the cover, make sure that it is
positioned so that it does not cover or foul the
air valve.
60G-09-038
Batteries produce flammable hydrogen
gas. Keep flames and sparks away from
the battery or an explosion may occur.
Never smoke when working in the
vicinity of the battery .
When checking or servicing the battery,
disconnect the negative cable. Be
careful not to cause a short circuit by
allowing metal objects to contact the
battery posts and the vehicle at the
same time.
To avoid harm to yourself or damage
to your vehicle or battery, follow the
jump starting instructions in the
EMERGENCY SERVICE section of this
manual if it is necessary to jump start
your vehicle.
The level of the battery solution must be kept
between the "UPPER" and the "LOWER" level
lines at all times. If the level is found to be
below the "LOWER" level line, add distilled
water to the "UPPER" level line. You should
periodically check the battery, battery
terminals, and battery holddown bracket for
corrosion. Remove corrosion using a stiff
brush and ammonia mixed with water, or
baking soda mixed with water. After removing
corrosion, rinse with clean water.
If your vehicle is not going to be driven for a
month or longer, disconnect the cable from
the negative terminal of the battery to help
prevent discharge.
105
9-22
INSPECTION AND MAINTENANCE
60G-74E
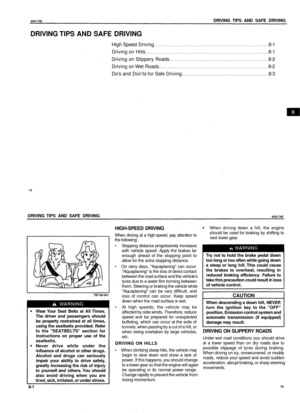
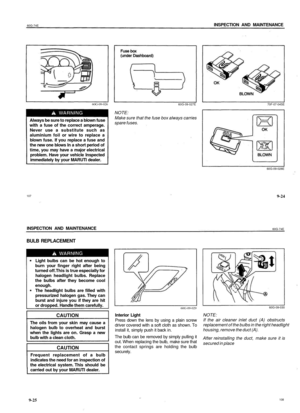
FUSES
60G-09-024E
©. Main fuse
®. Primary fuse (Lights)
®. Primary fuse (IG)
©. Radiator fan motor fuse
©. Primary fuse (A/C, HTR)
This vehicle has three types of fuses, as
described below:
Main Fuse - The main fuse takes current
directly from the battery.
Primary Fuses - These fuses are between the
main fuse and individual fuses, and are for
electrical load groups.
Individual Fuses - These fuses are in the fuse
box and for individual electrical circuits.
MAIN FUSE / PRIMARY FUSES
80A
60A
60A
30A
60A
All Electric Load
HEAD-R, HEAD-L, TAIL/DOME,
STOP/HORN, HAZARD
CIGAR/RADIO, I.G. COIL/
METER, WIPER/WASHER,
REAR DEF, TURN/BACK,
HEATER RELAY.
RADIATOR FAN MOTOR
A/C, HTR
Main Fuse and Primary Fuses
The main fuse and primary fuses are located
in the engine compartment. If the main fuse
blows, no electrical component will function.
If a primary fuse blows, no electrical
component in the corresponding load group
will function. When replacing the main fuse or
a primary fuse, use a genuine MARUTI
replacement.
If the main fuse or a primary fuse blows,
be sure to have your vehicle inspected
by an authorized MARUTI dealer.
Always use a genuine MARUTI
replacement. Never use a substitute
such as a wire even for a temporary
repair, or extensive electrical damage
and a fire can result.
60G-09-025E
Fuse Box
The fuse boxes are located in the engine
compartment and under the driver's side of
the dashboard.
To remove the fuse box cover under the
dashboard pull off the cover.
9-23
106
Page 53 of 65

60G-74E
INSPECTION AND MAINTENANCE
60G-09-026
Always be sure to replace a blown fuse
with a fuse of the correct amperage.
Never use a substitute such as
aluminium foil or wire to replace a
blown fuse. If you replace a fuse and
the new one blows In a short period of
time, you may have a major electrical
problem. Have your vehicle Inspected
immediately by your MARUTI dealer.
60G-09-027E
NOTE:
Make sure that the fuse box always carries
spare fuses.
70F-07-04SE
60G-09-028E
107
9-24
INSPECTION AND MAINTENANCE
60G-74E
BULB REPLACEMENT
Light bulbs can be hot enough to
burn your finger right after being
turned off.This is true especially for
halogen headlight bulbs. Replace
the bulbs after they become cool
enough.
The headlight bulbs are filled with
pressurized halogen gas. They can
burst and injure you if they are hit
or dropped. Handle them carefully.
CAUTION
The oils from your skin may cause a
halogen bulb to overheat and burst
when the lights are on. Grasp a new
bulb with a clean cloth.
CAUTION
Frequent replacement of a bulb
indicates the need for an inspection of
the electrical system. This should be
carried out by your MARUTI dealer.
60G-09-029
Interior Light
Press down the lens by using a plain screw
driver covered with a soft cloth as shown. To
install it, simply push it back in.
The bulb can be removed by simply pulling it
out. When replacing the bulb, make sure that
the contact springs are holding the bulb
securely.
60G-09-030
NOTE:
If the air cleaner inlet duct (A) obstructs
replacement of the bulbs in the right headlight
housing, remove the duct (A).
After reinstalling the duct, make sure it is
secured in place
9-25
108
Page 54 of 65

60G-74E
INSPECTION AND MAINTENANCE
60G-09-031
Headlights
Open the bonnet. Disconnect the coupler.Turn
the lock ring counterclockwise and remove it.
Remove the sealing rubber.
NOTE:
Your vehicle is provided with two spare
headlight bulbs for replacement in
emegency.
60G-09-037
Push the retaining spring forward and unhook
it. Then remove the bulb. Install a new bulb in
the reverse order of removal.
NOTE:
Your vehicle is provided with two spare
headlight bulbs for replacement in emergency
situations.
70F-07-0S0E
Front Clearance/Turn Signal Light, Side
Turn Signal Light, rear Combination
Light, Registration Plate Light.
To remove a bulb holder from a light housing,
turn the holder counterclockwise and pull it
out. To install the holder, push the holder in
and turn it clockwise.
Two types (small oval and round) of bulb are
used for these lights. To remove and install a
small oval bulb, simply pull out or push in the
bulb.
109
9-26
INSPECTION AND MAINTENANCE
60G-74E
70F-07-051E
To remove a round bulb from a bulb holder,
push in the bulb and turn it counterclockwise.
To install a new bulb, push it in and turn it
clockwise. You can access the individual bulb
holders as described above:
60G-09-032
Front clearance light (A)
Open the bonnet.
Front turn signal light (B)
Trust this replacement job to your authorized
MARUTI dealer as the front bumper and the
headlight housing must be removed for this
job.
70F-07-054
Side turn signal light
Remove the lens by using a plain screw driver
covered with a soft cloth.
9-27
110
Page 55 of 65
 light (if equipped)
signal, etc.) Undo the two")
60G-74E
INSPECTION AND MAINTENANCE
60G-09-033
60G-09-034
60G-09-035
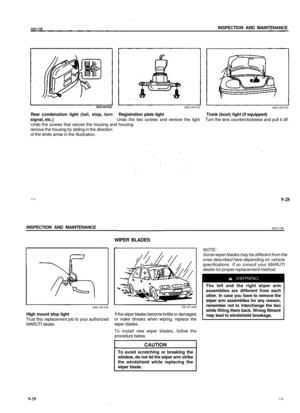
Rear combination light (tail, stop, turn Registration plate tight Trunk (boot) light (if equipped)
signal, etc.) Undo the two screws and remove the light Turn the lens counterclockwise and pull it off.
Undo the screws that secure the housing and housing.
remove the housing by sliding in the direction
of the white arrow in the illustration.
111
9-28
INSPECTION AND MAINTENANCE
60G-74E
WIPER BLADES
60G-09-036
High mount stop light
Trust this replacement job to your authorized
MARUTI dealer.
70F-07-059
If the wiper blades become brittle or damaged,
or make streaks when wiping, replace the
wiper blades.
To install new wiper blades, follow the
procedure below.
CAUTION
To avoid scratching or breaking the
window, do not let the wiper arm strike
the windshield while replacing the
wiper blade.
NOTE:
Some wiper blades may be different from the
ones described here depending on vehicle
specifications. If so consult your MARUTI
dealer for proper replacement method.
The left and the right wiper arm
assemblies are different from each
other. In case you have to remove the
wiper arm assemblies for any reason,
remember not to interchange the two
while fitting them back. Wrong fitment
may lead to windshield breakage.
9-29
112
Page 56 of 65
60G-74E
INSPECTION AND MAINTENANCE
70F-07-060
For windshield wipers:
1. Hold the wiper arm away from the
window.
72F-09-008
2. Squeeze lock lever (A) towards wiper arms
(B) and remove the wiper frame from the
arm as shown.
113
9-30
60G-74E
EMERGENCY SERVICE
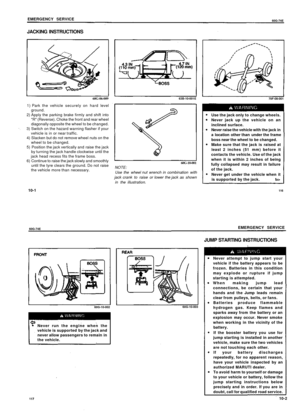
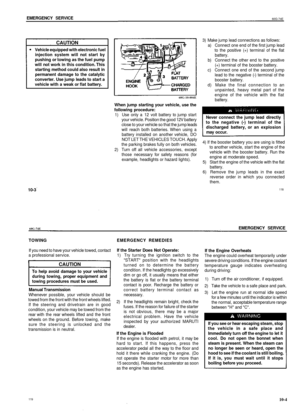
EMERGENCY SERVICE
Jacking Instructions 10-1
Jump Starting Instructions 10-2
Towing 10-4
Emergency Remedies 10-4
Warning Triangle 10-5
115


 towards wiper arms
(B) and remove the wip")