Page 516 of 3342
G2M0438
10) Installation is in the reverse order of removal.
�
1Main relay
�
2Fuel pump relay
B2M1254
18. Air Intake Chamber
A: REMOVAL AND INSTALLATION
1) Loosen clamps which connect air intake chamber to
throttle body and air intake duct.
2) Disconnect air hoses from air intake chamber.
3) Remove bolts which secure air intake chamber to stays.
4) Remove air intake chamber.
5) Installation is in the reverse order of removal.
Tightening torque:
4.9±0.5 N⋅m (0.5±0.05 kg-m, 3.6±0.4 ft-lb)
G6M0095
19. Knock Sensor
A: REMOVAL
1. 2200 cc MODEL
1) Disconnect battery ground cable from battery ground
terminal.
B2M1679
2) Remove air intake chamber.
34
2-7SERVICE PROCEDURE
17. Fuel Pump Relay - 19. Knock Sensor
Page 517 of 3342
B2M1680A
3) Remove band clip which fastens engine harness to
engine coolant hose.
B2M1681
4) Disconnect knock sensor connector.
B2M1682
5) Remove knock sensor from cylinder block.
G6M0095
2. 2500 cc MODEL
1) Disconnect battery ground cable from battery ground
terminal.
B2M1683
2) Remove air intake chamber.
35
2-7SERVICE PROCEDURE
19. Knock Sensor
Page 520 of 3342
G6M0095
5) Connect battery ground cable to battery ground termi-
nal.
B2M1682A
2. 2500 cc MODEL
1) Install knock sensor to cylinder block.
Tightening torque:
23.5±2.9 N⋅m (2.4±0.3 kg-m, 17.3±2.1 ft-lb)
NOTE:
The extraction area of the knock sensor cord must be posi-
tioned at a 45°angle relative to the engine rear.
B2M1686
2) Connect knock sensor connector.
B2M1688A
NOTE:
The connector must be connected to the engine front end
of the engine coolant hose.
B2M1689A
38
2-7SERVICE PROCEDURE
19. Knock Sensor
Page 521 of 3342
B2M1685A
3) Fasten engine harness to engine coolant hose with
band clip.
NOTE:
Make sure that the throttle linkage does not interfere with
other parts in the operating area.
B2M1179E
4) Install operating cylinder. (MT vehicle only)
Tightening torque:
37±3 N⋅m (3.8±0.3 kg-m, 27.3±2.2 ft-lb)
NOTE:
Apply grease to contact point of release lever and operat-
ing cylinder rod.
B2M1683
5) Install air intake chamber.
G6M0095
6) Connect battery ground cable to battery ground termi-
nal.
39
2-7SERVICE PROCEDURE
19. Knock Sensor
Page 530 of 3342
1. Precautions
WARNING:
�Place “No fire” signs near the working area.
�Disconnect ground terminal from battery.
�Be careful not to spill fuel on the floor.
G2M0340
A: RELEASING OF FUEL PRESSURE
1) Take off floor mat.
2) Remove access hole lid.
B2M0047
3) Disconnect connector from fuel pump.
4) Start the engine, and run it until it stalls.
5) After the engine stalls, crank it for five more seconds.
6) Turn ignition switch OFF.
G2M0340
B: DRAINING OF FUEL
1) Remove rear seat and seat back.
2) Remove access hole lid.
B2M0047
3) Disconnect connector from fuel pump.
4) Release fuel pressure.
10
2-8SERVICE PROCEDURE
1. Precautions
Page 544 of 3342

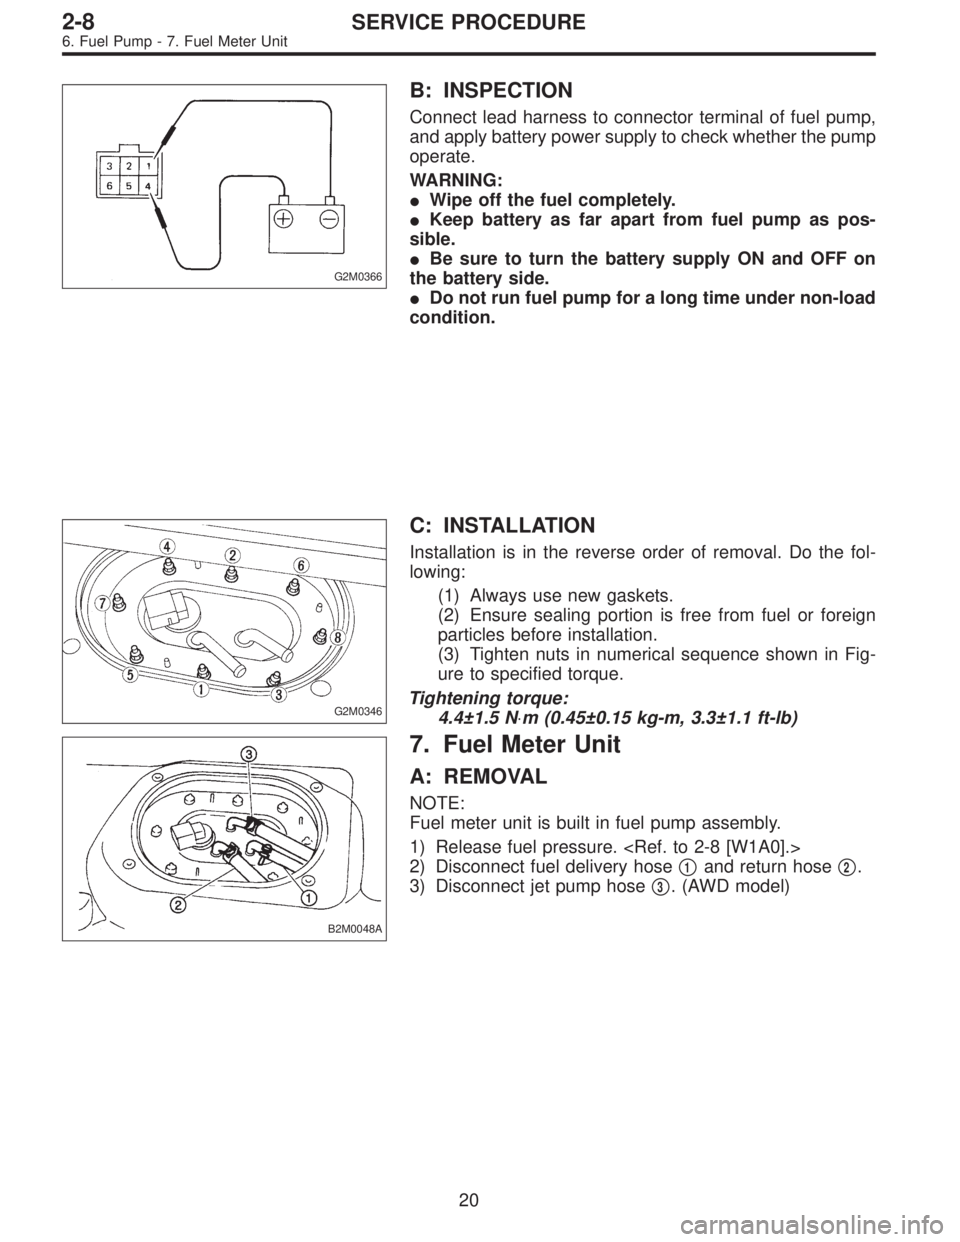
G2M0366
B: INSPECTION
Connect lead harness to connector terminal of fuel pump,
and apply battery power supply to check whether the pump
operate.
WARNING:
�Wipe off the fuel completely.
�Keep battery as far apart from fuel pump as pos-
sible.
�Be sure to turn the battery supply ON and OFF on
the battery side.
�Do not run fuel pump for a long time under non-load
condition.
G2M0346
C: INSTALLATION
Installation is in the reverse order of removal. Do the fol-
lowing:
(1) Always use new gaskets.
(2) Ensure sealing portion is free from fuel or foreign
particles before installation.
(3) Tighten nuts in numerical sequence shown in Fig-
ure to specified torque.
Tightening torque:
4.4±1.5 N⋅m (0.45±0.15 kg-m, 3.3±1.1 ft-lb)
B2M0048A
7. Fuel Meter Unit
A: REMOVAL
NOTE:
Fuel meter unit is built in fuel pump assembly.
1) Release fuel pressure.
2) Disconnect fuel delivery hose�
1and return hose�2.
3) Disconnect jet pump hose�
3. (AWD model)
20
2-8SERVICE PROCEDURE
6. Fuel Pump - 7. Fuel Meter Unit
Page 545 of 3342

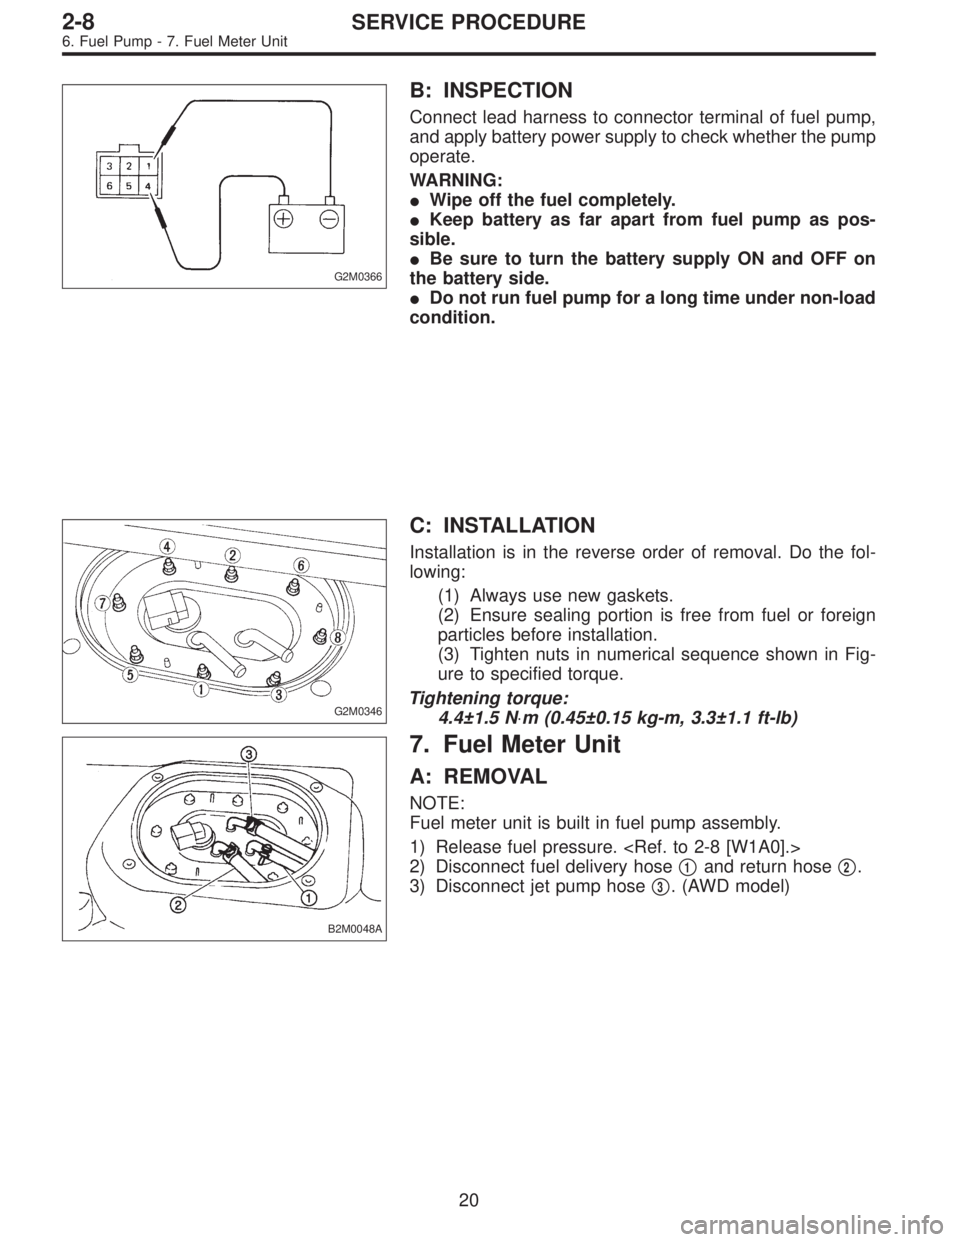
G2M0366
B: INSPECTION
Connect lead harness to connector terminal of fuel pump,
and apply battery power supply to check whether the pump
operate.
WARNING:
�Wipe off the fuel completely.
�Keep battery as far apart from fuel pump as pos-
sible.
�Be sure to turn the battery supply ON and OFF on
the battery side.
�Do not run fuel pump for a long time under non-load
condition.
G2M0346
C: INSTALLATION
Installation is in the reverse order of removal. Do the fol-
lowing:
(1) Always use new gaskets.
(2) Ensure sealing portion is free from fuel or foreign
particles before installation.
(3) Tighten nuts in numerical sequence shown in Fig-
ure to specified torque.
Tightening torque:
4.4±1.5 N⋅m (0.45±0.15 kg-m, 3.3±1.1 ft-lb)
B2M0048A
7. Fuel Meter Unit
A: REMOVAL
NOTE:
Fuel meter unit is built in fuel pump assembly.
1) Release fuel pressure.
2) Disconnect fuel delivery hose�
1and return hose�2.
3) Disconnect jet pump hose�
3. (AWD model)
20
2-8SERVICE PROCEDURE
6. Fuel Pump - 7. Fuel Meter Unit
Page 550 of 3342
G2M0373
9. Roll Over Valve
A: REMOVAL
1) Lift up the vehicle.
2) Remove roll over valve with bracket.
3) Disconnect hoses from roll over valve, and remove it
from bracket.
G2M0374
B: INSPECTION
1) Connect hoses to roll over valve as shown in Figure.
2) While blowing through open end of hose, tilt valve at
least 90° left and right from normal position.
3) Ensure that there is no air flow when hose is tilted
greater than 90°.
G2M0373
C: INSTALLATION
Installation is in the reverse order of removal.
CAUTION:
�Do not install top side of valve down.
�Before installing bracket on body, securely fit con-
cave part of bracket to hole in body.
G6M0095
10. Fuel Sub Meter Unit (AWD model
only)
A: REMOVAL AND INSTALLATION
1) Disconnect battery ground cable.
G2M0863
2) Remove rear seat.
3) Remove service hole cover.
25
2-8SERVICE PROCEDURE
9. Roll Over Valve - 10. Fuel Sub Meter Unit (Turbo model only)