Page 1732 of 2053

INSTRUMENTATION, DRIVER INFORMATION 9E-15
SSANGYONG MY2002
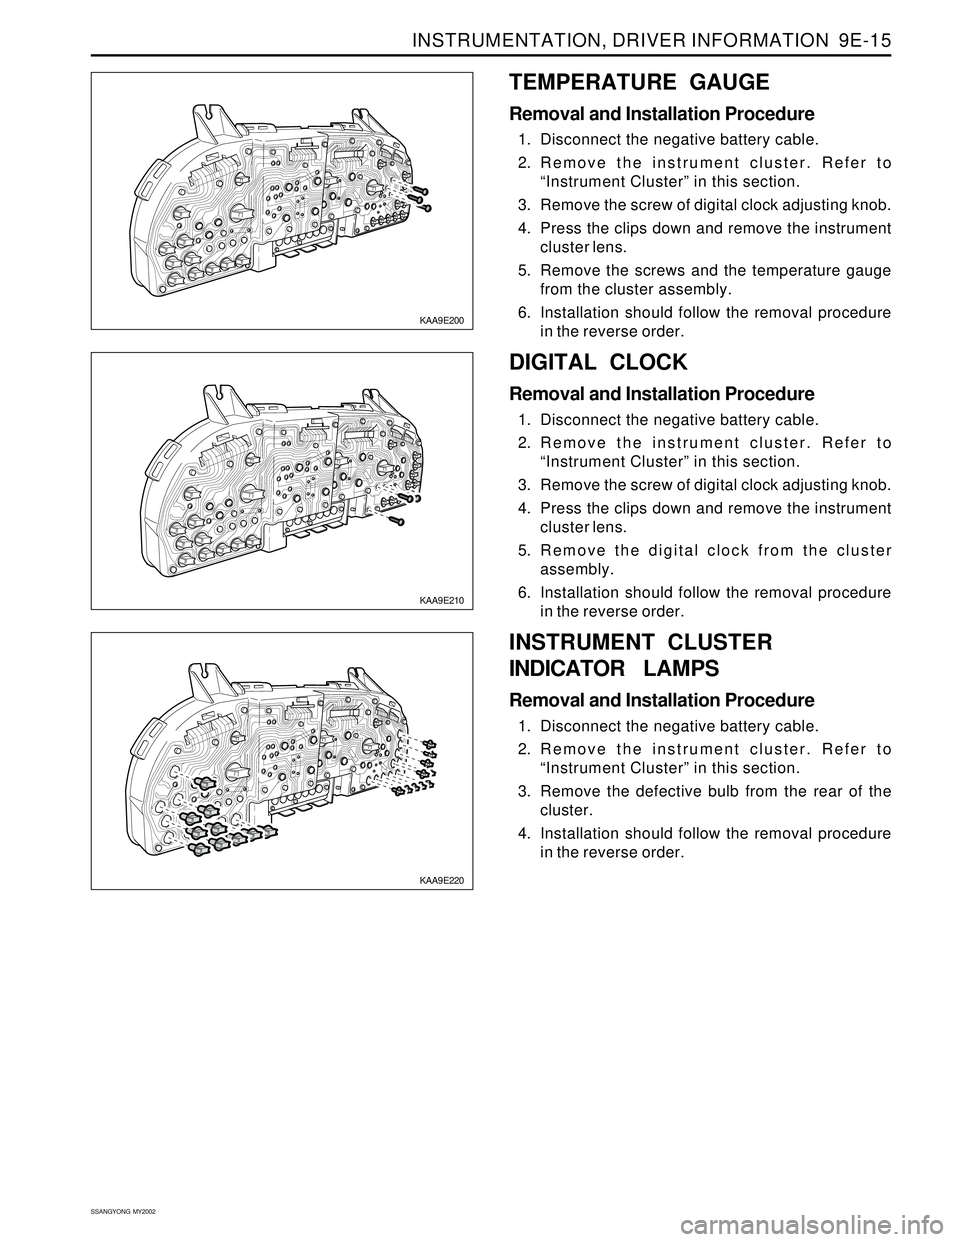
KAA9E210
KAA9E220
DIGITAL CLOCK
Removal and Installation Procedure
1. Disconnect the negative battery cable.
2. Remove the instrument cluster. Refer to
“Instrument Cluster” in this section.
3. Remove the screw of digital clock adjusting knob.
4. Press the clips down and remove the instrument
cluster lens.
5. Remove the digital clock from the cluster
assembly.
6. Installation should follow the removal procedure
in the reverse order.
KAA9E200
TEMPERATURE GAUGE
Removal and Installation Procedure
1. Disconnect the negative battery cable.
2. Remove the instrument cluster. Refer to
“Instrument Cluster” in this section.
3. Remove the screw of digital clock adjusting knob.
4. Press the clips down and remove the instrument
cluster lens.
5. Remove the screws and the temperature gauge
from the cluster assembly.
6. Installation should follow the removal procedure
in the reverse order.
INSTRUMENT CLUSTER
INDICATOR LAMPS
Removal and Installation Procedure
1. Disconnect the negative battery cable.
2. Remove the instrument cluster. Refer to
“Instrument Cluster” in this section.
3. Remove the defective bulb from the rear of the
cluster.
4. Installation should follow the removal procedure
in the reverse order.
Page 1733 of 2053

SSANGYONG MY2002
9E-16 INSTRUMENTATION, DRIVER INFORMATION
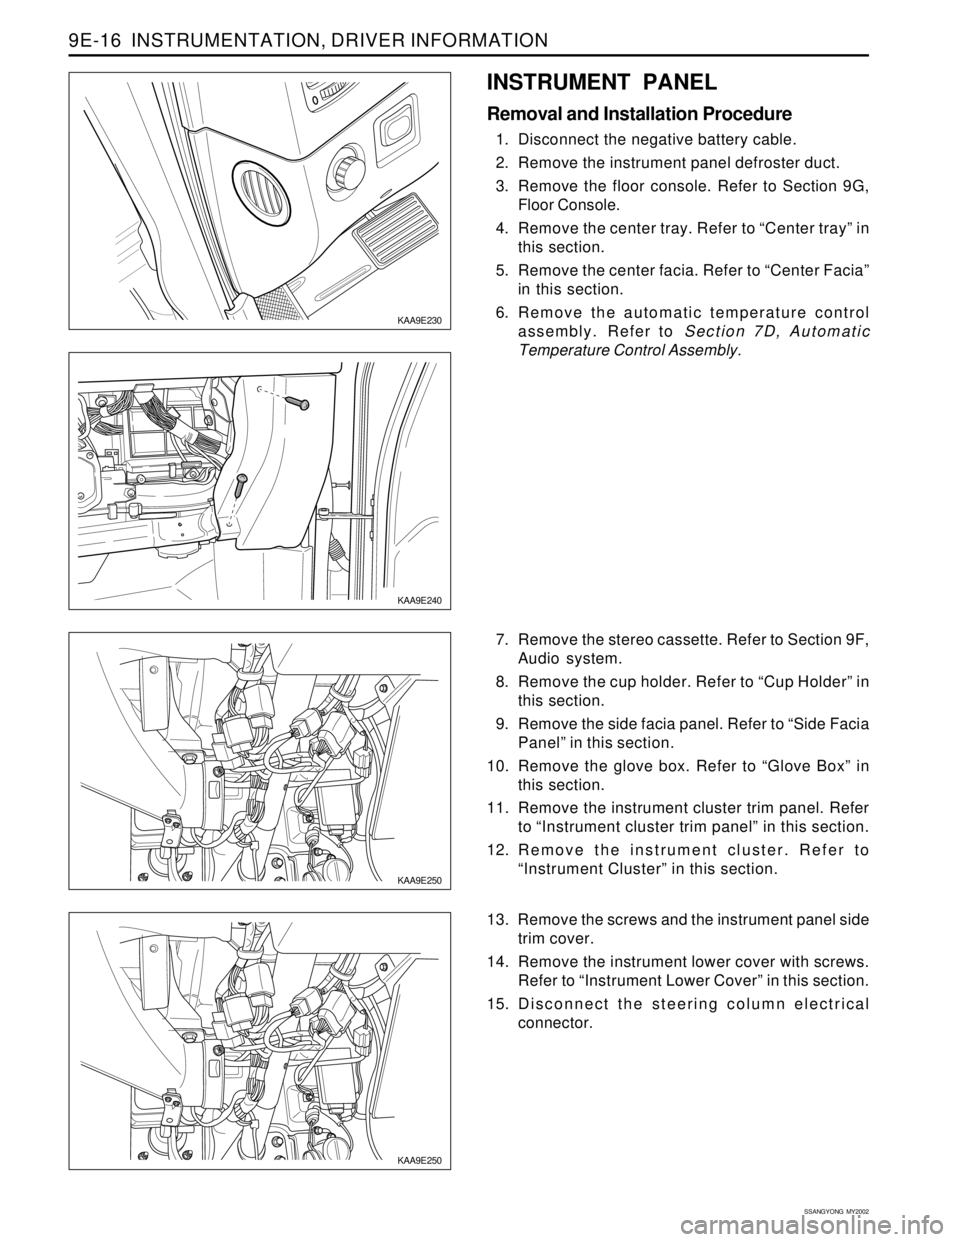
KAA9E250
KAA9E250
7. Remove the stereo cassette. Refer to Section 9F,
Audio system.
8. Remove the cup holder. Refer to “Cup Holder” in
this section.
9. Remove the side facia panel. Refer to “Side Facia
Panel” in this section.
10. Remove the glove box. Refer to “Glove Box” in
this section.
11. Remove the instrument cluster trim panel. Refer
to “Instrument cluster trim panel” in this section.
12. Remove the instrument cluster. Refer to
“Instrument Cluster” in this section.
13. Remove the screws and the instrument panel side
trim cover.
14. Remove the instrument lower cover with screws.
Refer to “Instrument Lower Cover” in this section.
15. Disconnect the steering column electrical
connector.
KAA9E240
INSTRUMENT PANEL
Removal and Installation Procedure
1. Disconnect the negative battery cable.
2. Remove the instrument panel defroster duct.
3. Remove the floor console. Refer to Section 9G,
Floor Console.
4. Remove the center tray. Refer to “Center tray” in
this section.
5. Remove the center facia. Refer to “Center Facia”
in this section.
6. Remove the automatic temperature control
assembly. Refer to Section 7D, Automatic
Temperature Control Assembly.
KAA9E230
Page 1737 of 2053
SSANGYONG MY2002
9E-20 INSTRUMENTATION, DRIVER INFORMATION
CLUSTER (VSS, METER & GAUGE) : DIESEL
KAA9E320
Page 1738 of 2053
INSTRUMENTATION, DRIVER INFORMATION 9E-21
SSANGYONG MY2002
CLUSTER (VSS, METER & GAUGE) : GASOLINE
KAA9E330
Page 1742 of 2053
INSTRUMENTATION, DRIVER INFORMATION 9E-25
SSANGYONG MY2002
DIGITAL CLOCK, WARNING CLUSTER ILLUMINATION
KAA9E370
Page 1781 of 2053

SQUEAKS AND RATTLES 9K-3
SSANGYONG MY2002
Check for a lack of lubrication of the door hinge pins.ChecksActionOperate the doors and listen for squeaks.
Lubricate the door hinge pins with light oil and coat
with lithium grease.
Squeak Coming From Console When Shifting Manual Transaxle
(Condition Occurs In Cold Weather with a Cold Engine)
Check the manual transaxle control lever lower boot.ChecksActionMove the control lever between gears and listen for
squeaks.
Remove the floor console and replace the lower shift
boot or apply talcum powder to the lower shift boot.
Squeak When Operating Doors
Check for vibration of the fuse box cover against the
instrument panel side trim.ChecksActionTap on thecoverwith a fingerandlisten fora buzz.
Apply 6.35 mm (0.250 inch) by 25.4 mm (1.00 inch)
felt pads to the side trim where the cover makes
contact.
Squeak Coming From Instrument Cluster Trim Plate
Check for rubbing of the cluster trim plate on the
instrument panel.ChecksActionTest drive the vehicle in order to verify this condi-
tion.
Remove the instrument cluster trim plate and install
felt tape to the edges.
Buzz From the Left Side of Instrument Panel
Check the door lock solenoid.
Check for rattling electrical connectors inside the door
trim panel.ChecksActionRemove the door trim panel and check if the sole-
noid is loose.
Tighten the solenoid bolts.
Tap on the trim panel and listen for a rattle.
Remove the trim panel and wrap foam padding
around the connectors as required.
Rattle Coming From Door