Page 145 of 224
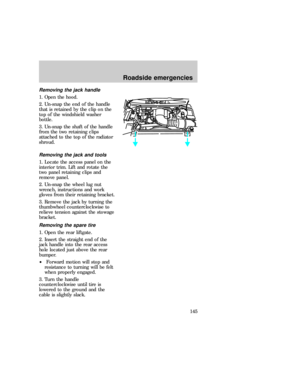
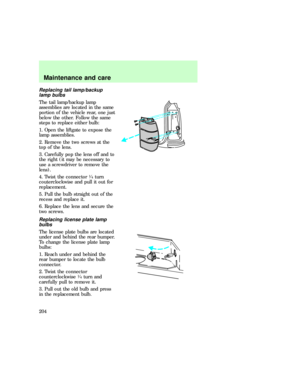
4. Remove the end of the cable
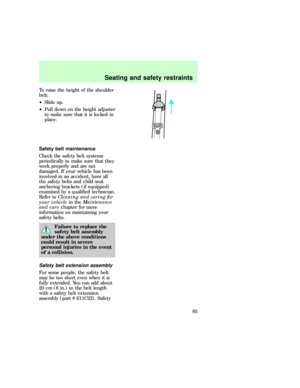
from the wheel and slide the spare
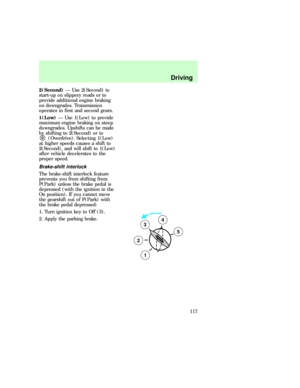
out from under the vehicle.
To re-install the spare tire or tools,
reverse the removal procedure.
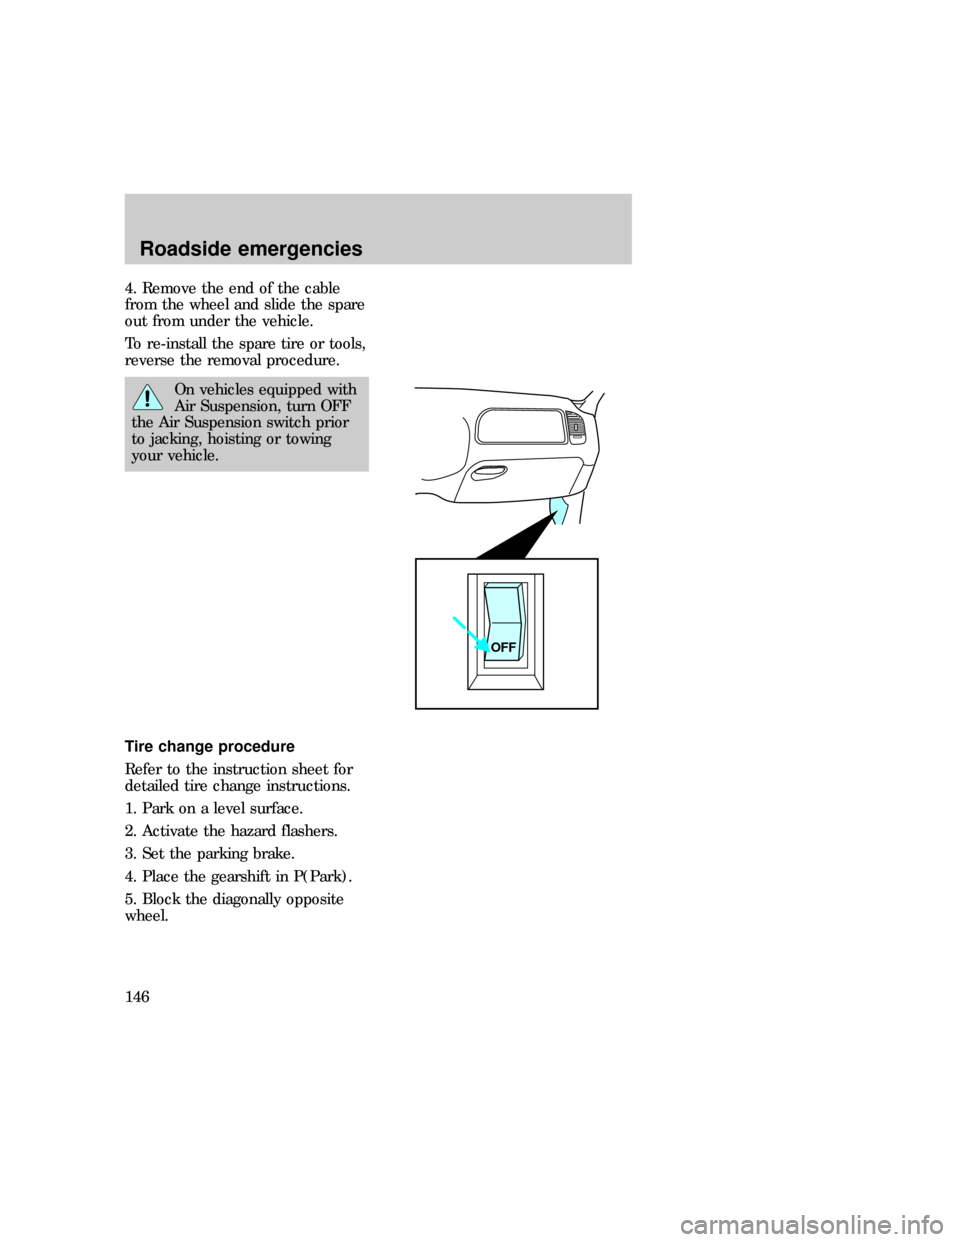
On vehicles equipped with
Air Suspension, turn OFF
the Air Suspension switch prior
to jacking, hoisting or towing
your vehicle.
Tire change procedure
Refer to the instruction sheet for
detailed tire change instructions.
1. Park on a level surface.
2. Activate the hazard flashers.
3. Set the parking brake.
4. Place the gearshift in P(Park).
5. Block the diagonally opposite
wheel.
OFF
exd_change_proc
exd_removing_flat
Roadside emergencies
146
Page 146 of 224
Removing flat tire and installing
spare
6. Use the tip of the lug wrench to
remove any wheel trim. Insert the
tapered end of the lug wrench
behind the wheel covers or
hubcaps and twist off.
7. Loosen the wheel nuts with the
lug wrench. Do not remove the lug
nuts until the tire has been raised
off the ground.
8. Insert the jack handle into the
jack and use the handle to slide
the jack under the vehicle.
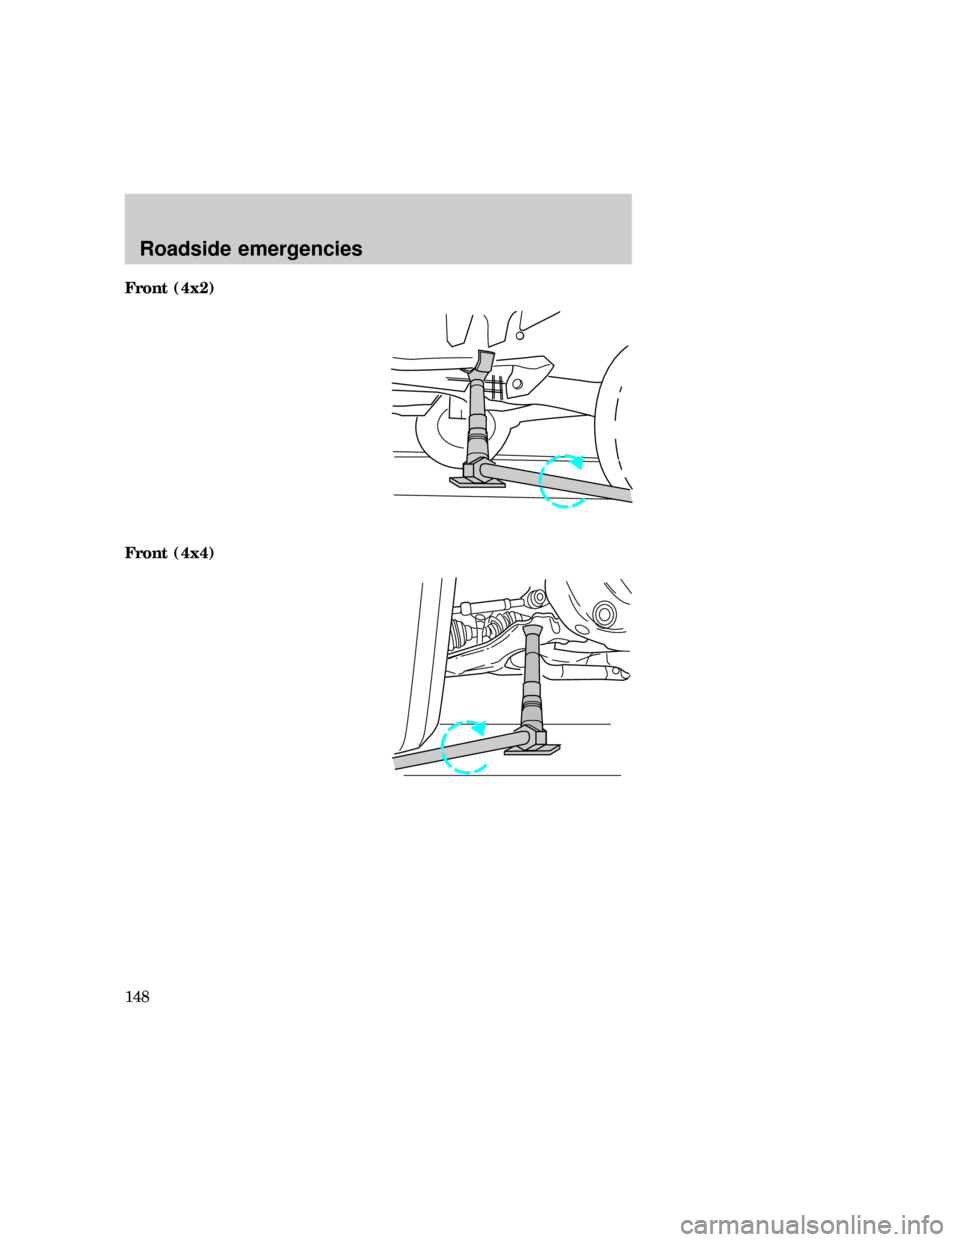
9. Position the jack according to
the following guides and turn the
jack handle clockwise until the
wheel is completely off the ground.
²When one of the back wheels is
off the ground, the transmission
alone will not prevent the
vehicle from moving or slipping
off the jack, even if the vehicle
is in P (Park). To prevent the
vehicle from moving when you
change the tire, be sure that the
parking brake is set and the
diagonally opposite wheel is
blocked. If the vehicle slips off
the jack, someone could be
seriously injured.
Roadside emergencies
147
Page 147 of 224
Front (4x2)
Front (4x4)
Roadside emergencies
148
Page 148 of 224
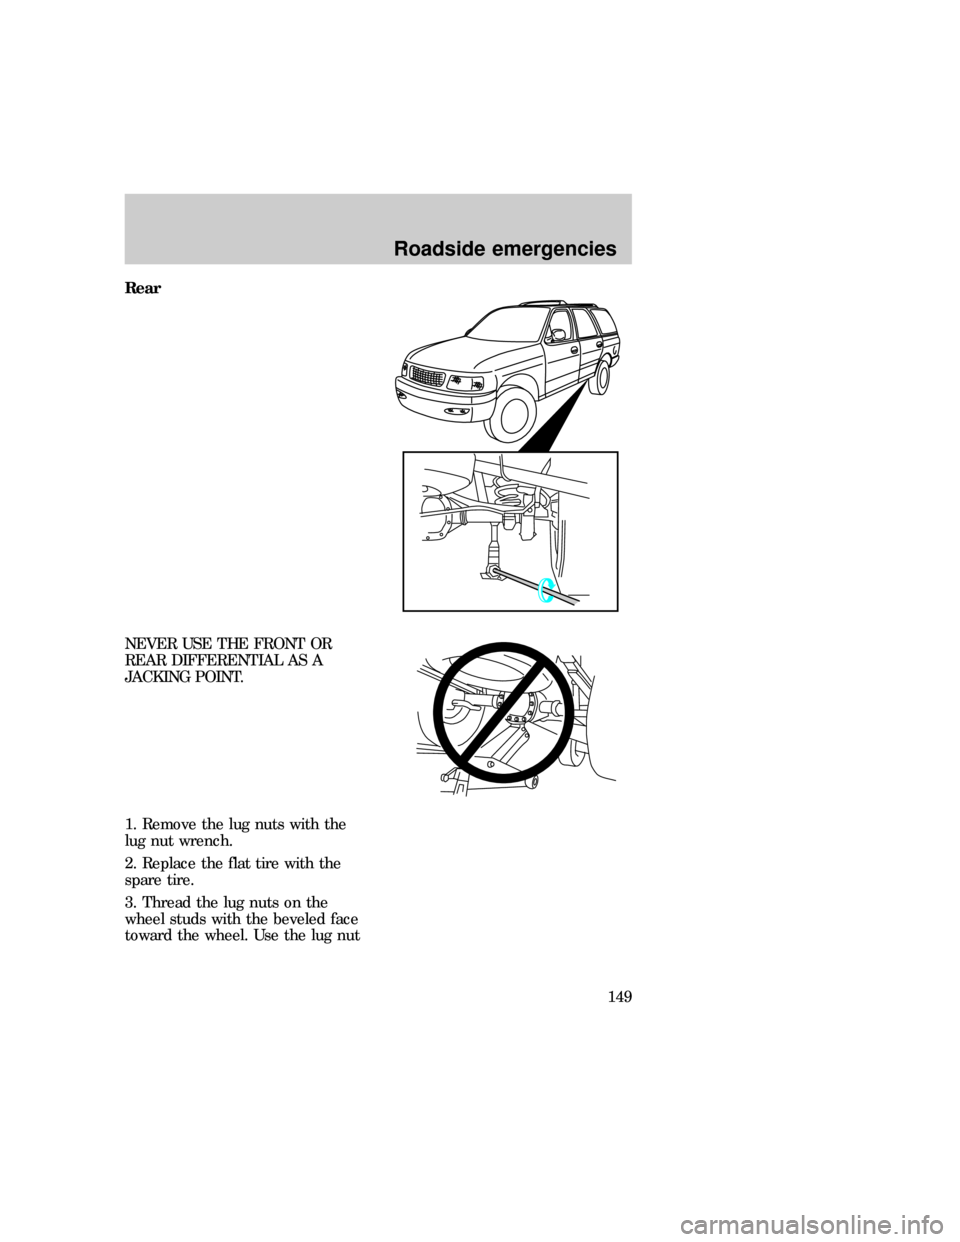
Rear
NEVER USE THE FRONT OR
REAR DIFFERENTIAL AS A
JACKING POINT.
1. Remove the lug nuts with the
lug nut wrench.
2. Replace the flat tire with the
spare tire.
3. Thread the lug nuts on the
wheel studs with the beveled face
toward the wheel. Use the lug nut
Roadside emergencies
149
Page 149 of 224

wrench to screw the lug nut snug
against the wheel, but do not
tighten.
4. Lower the vehicle by turning the
jack handle counterclockwise.
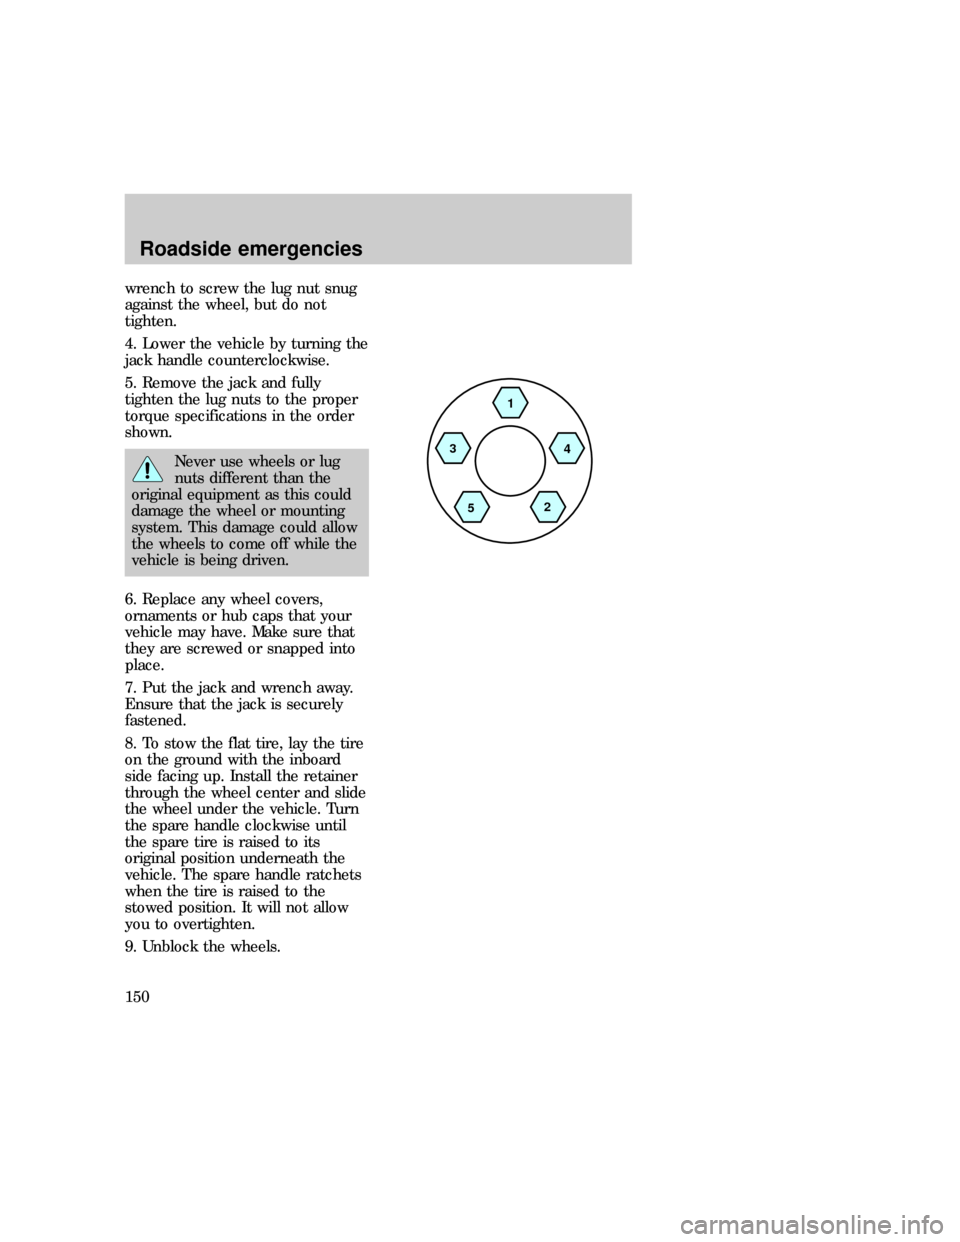
5. Remove the jack and fully
tighten the lug nuts to the proper
torque specifications in the order
shown.
Never use wheels or lug
nuts different than the
original equipment as this could
damage the wheel or mounting
system. This damage could allow
the wheels to come off while the
vehicle is being driven.
6. Replace any wheel covers,
ornaments or hub caps that your
vehicle may have. Make sure that
they are screwed or snapped into
place.
7. Put the jack and wrench away.
Ensure that the jack is securely
fastened.
8. To stow the flat tire, lay the tire
on the ground with the inboard
side facing up. Install the retainer
through the wheel center and slide
the wheel under the vehicle. Turn
the spare handle clockwise until
the spare tire is raised to its
original position underneath the
vehicle. The spare handle ratchets
when the tire is raised to the
stowed position. It will not allow
you to overtighten.
9. Unblock the wheels.
1
4
2
5 3
Roadside emergencies
150
Page 150 of 224
10. On vehicles equipped with air
suspension, turn ON the air
suspension switch.
11. Retighten the wheel lug nuts to
the specified torque at 800 km
(500 miles) of new vehicle
operation, after any wheel change
or any time the lug nuts are
loosened.
Failure to retighten wheel
lug nuts at mileages
specified could allow wheels to
come off while the vehicle is in
motion.
JUMP STARTING YOUR
BATTERY
Jump starting your vehicle
The gases around the
battery can explode if
exposed to flames, sparks, or lit
cigarettes. An explosion could
result in injury or vehicle
damage.
Do not push-start your
vehicle. You could damage
the catalytic converter. For
further information, seeJumper
Cablesin the Index.
Batteries contain sulfuric
acid which burns skin,
eyes, and clothing.
exd_jumping_title
com_jump-starting.01
com_connecting_cables.01
Roadside emergencies
151
Page 151 of 224
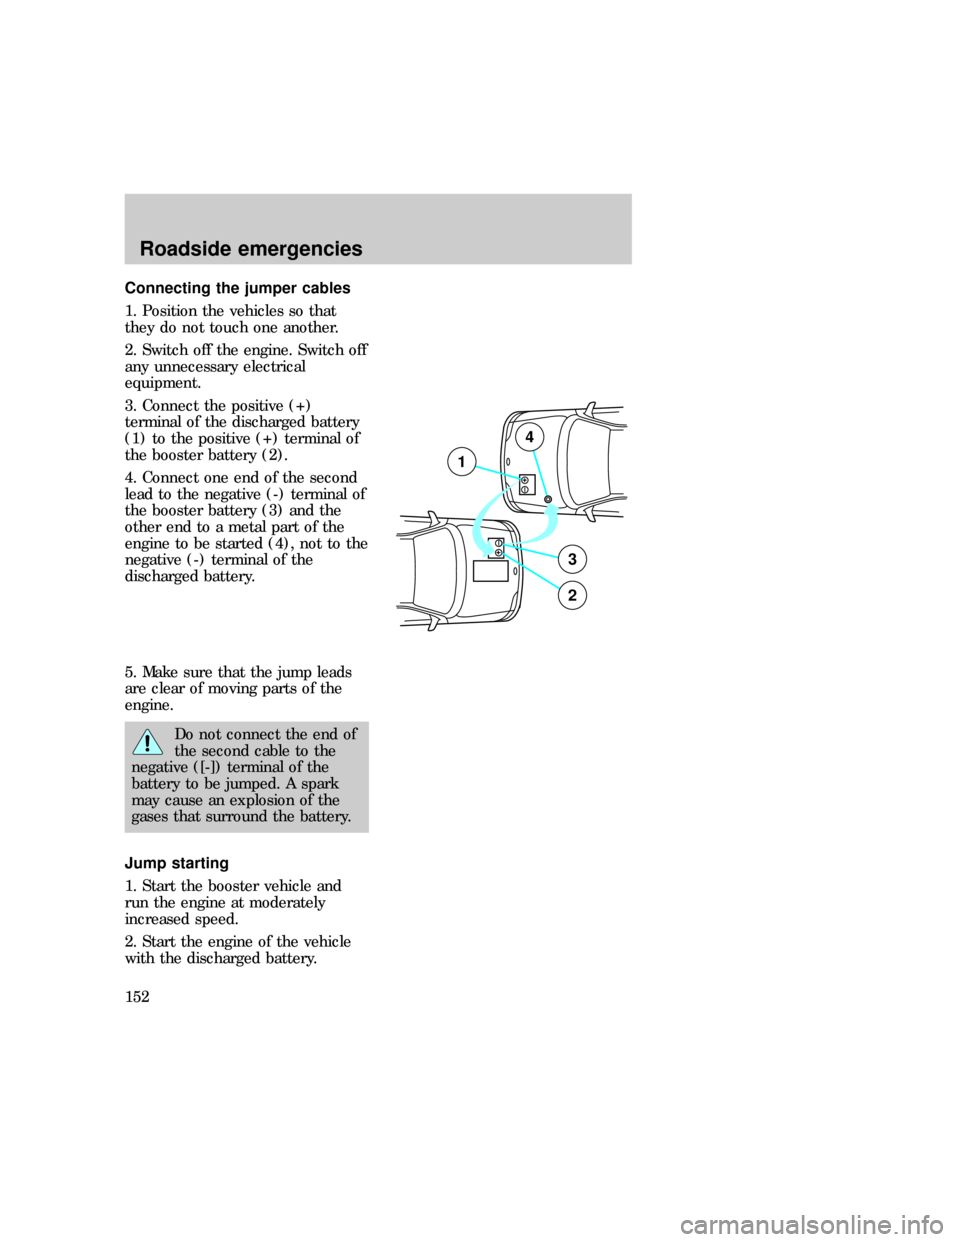
Connecting the jumper cables
1. Position the vehicles so that
they do not touch one another.
2. Switch off the engine. Switch off
any unnecessary electrical
equipment.
3. Connect the positive (+)
terminal of the discharged battery
(1) to the positive (+) terminal of
the booster battery (2).
4. Connect one end of the second
lead to the negative (-) terminal of
the booster battery (3) and the
other end to a metal part of the
engine to be started (4), not to the
negative (-) terminal of the
discharged battery.
5. Make sure that the jump leads
are clear of moving parts of the
engine.
Do not connect the end of
the second cable to the
negative ([-]) terminal of the
battery to be jumped. A spark
may cause an explosion of the
gases that surround the battery.
Jump starting
1. Start the booster vehicle and
run the engine at moderately
increased speed.
2. Start the engine of the vehicle
with the discharged battery.
+–
+–
3
2
1
4
com_jump_starting.01
Roadside emergencies
152
Page 152 of 224
3. Once the engine has been
started, run both vehicles for a
further three minutes before
disconnecting the leads.
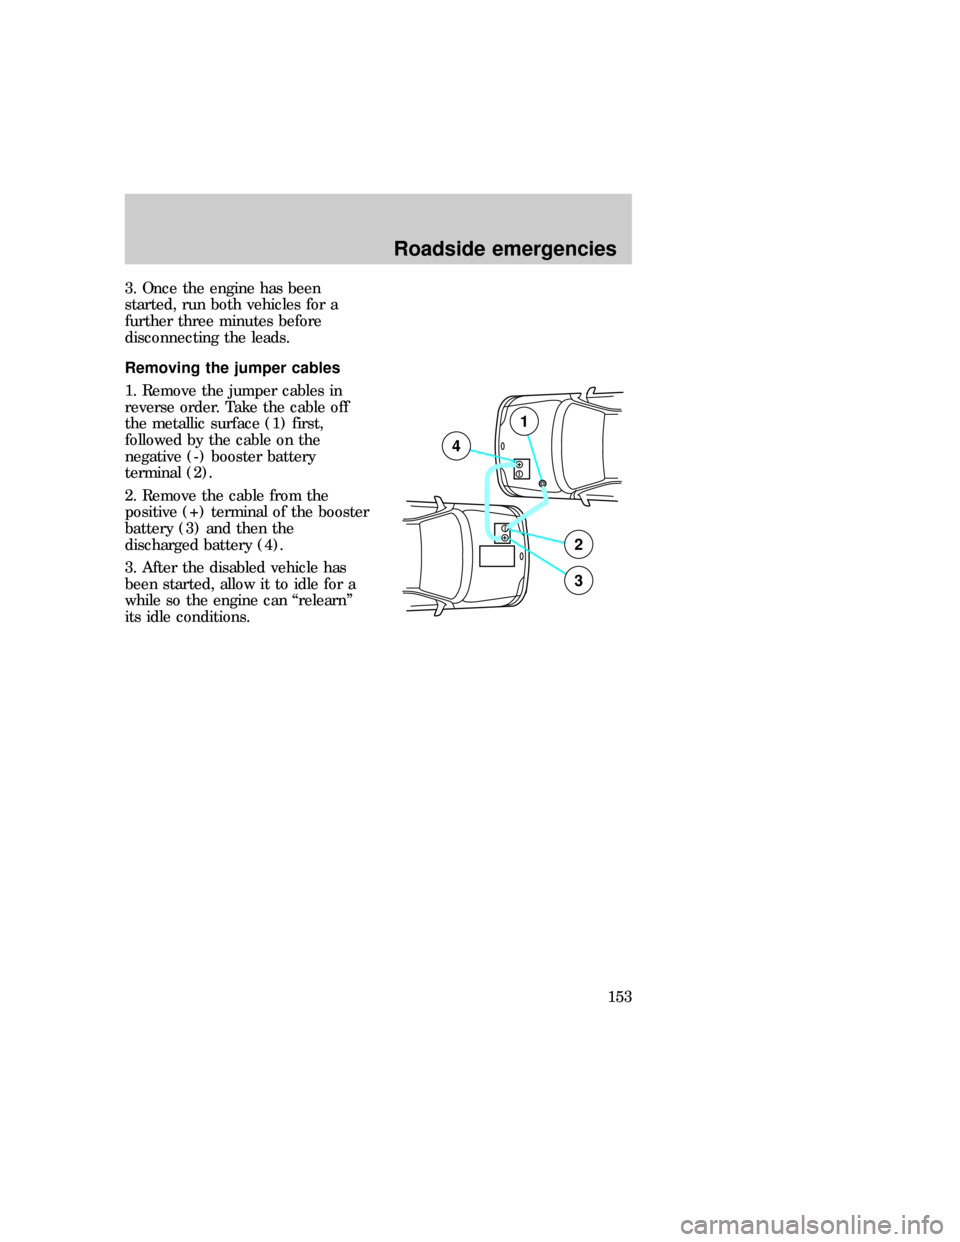
Removing the jumper cables
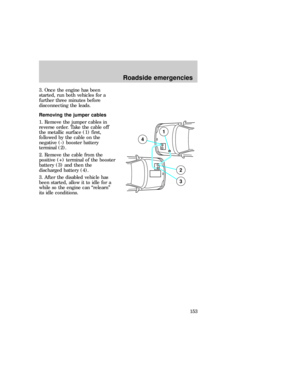
1. Remove the jumper cables in
reverse order. Take the cable off
the metallic surface (1) first,
followed by the cable on the
negative (-) booster battery
terminal (2).
2. Remove the cable from the
positive (+) terminal of the booster
battery (3) and then the
discharged battery (4).
3. After the disabled vehicle has
been started, allow it to idle for a
while so the engine can ªrelearnº
its idle conditions.
+–
+–
2
3
4
1
com_removing_cables.01
exd_wrecker_towing
Roadside emergencies
153