Page 1389 of 2543
± ENGINEENGINE MECHANICALEG±75
Page 1390 of 2543
EG±76± ENGINEENGINE MECHANICAL
Page 1391 of 2543
± ENGINEENGINE MECHANICALEG±77
Page 1392 of 2543

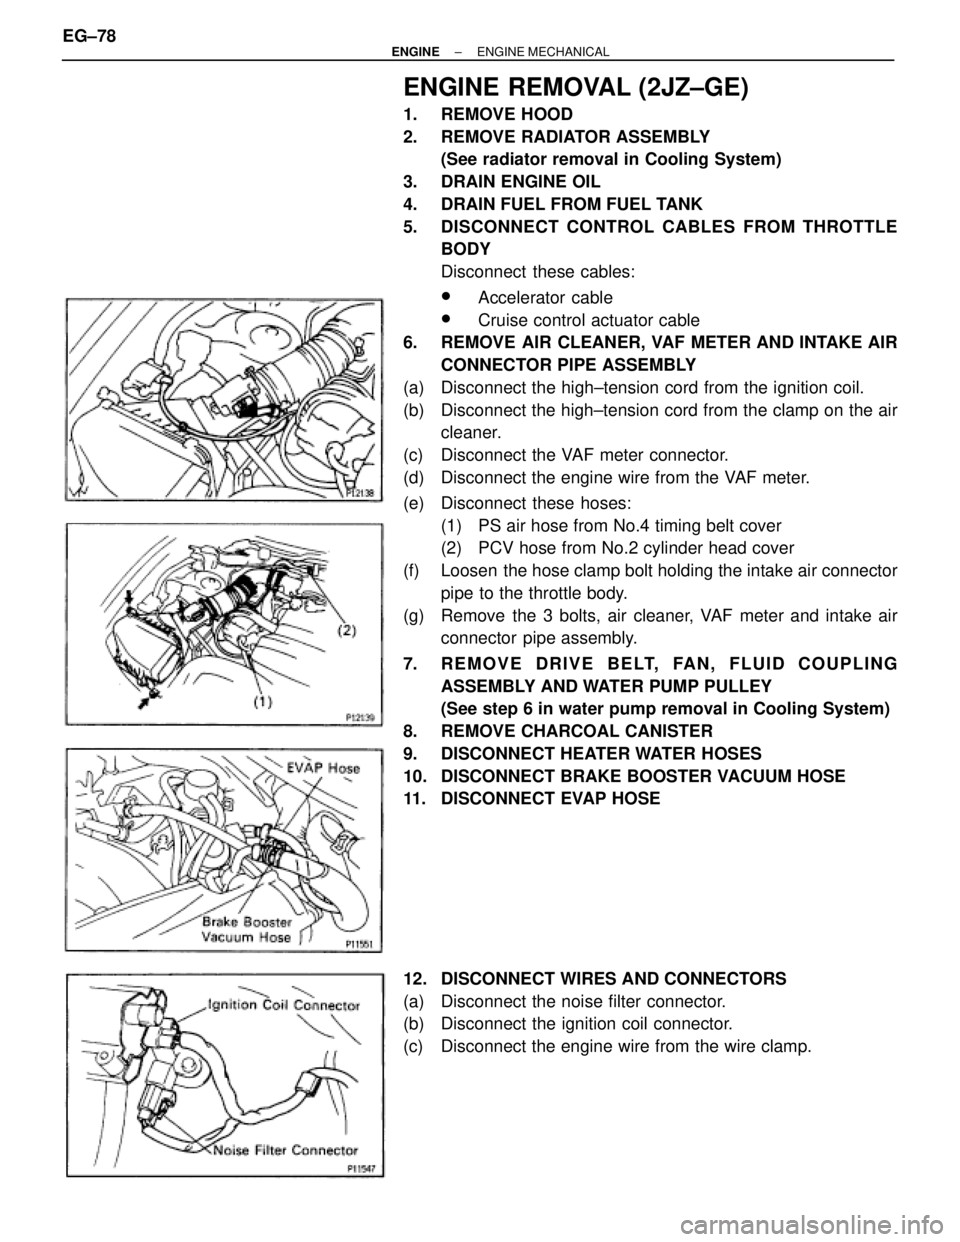
ENGINE REMOVAL (2JZ±GE)
1. REMOVE HOOD
2. REMOVE RADIATOR ASSEMBLY
(See radiator removal in Cooling System)
3. DRAIN ENGINE OIL
4. DRAIN FUEL FROM FUEL TANK
5. DISCONNECT CONTROL CABLES FROM THROTTLE
BODY
Disconnect these cables:
wAccelerator cable
wCruise control actuator cable
6. REMOVE AIR CLEANER, VAF METER AND INTAKE AIR
CONNECTOR PIPE ASSEMBLY
(a) Disconnect the high±tension cord from the ignition coil.
(b) Disconnect the high±tension cord from the clamp on the air
cleaner.
(c) Disconnect the VAF meter connector.
(d) Disconnect the engine wire from the VAF meter.
(e) Disconnect these hoses:
(1) PS air hose from No.4 timing belt cover
(2) PCV hose from No.2 cylinder head cover
(f) Loosen the hose clamp bolt holding the intake air connector
pipe to the throttle body.
(g) Remove the 3 bolts, air cleaner, VAF meter and intake air
connector pipe assembly.
7. REMOVE DRIVE BELT, FAN, FLUID COUPLING
ASSEMBLY AND WATER PUMP PULLEY
(See step 6 in water pump removal in Cooling System)
8. REMOVE CHARCOAL CANISTER
9. DISCONNECT HEATER WATER HOSES
10. DISCONNECT BRAKE BOOSTER VACUUM HOSE
11. DISCONNECT EVAP HOSE
12. DISCONNECT WIRES AND CONNECTORS
(a) Disconnect the noise filter connector.
(b) Disconnect the ignition coil connector.
(c) Disconnect the engine wire from the wire clamp. EG±78
± ENGINEENGINE MECHANICAL
Page 1393 of 2543
(d) Remove the rubber cap and nut, and disconnect the
generator wire.
(e) Disconnect these connectors:
(1) Connector from engine room main wire
(2) Igniter connector
(3) Theft deterrent horn connector
(f) Disconnect the engine wire from the 2 wire clamps.
(g) Disconnect the wire clamp and PS solenoid valve connector.
(h) Remove the bolt, and disconnect the ground strap from the
cylinder block.
(i) Remove the rubber cap and nut, and disconnect the starter
wire.
± ENGINEENGINE MECHANICALEG±79
Page 1394 of 2543
13. DISCONNECT FUEL HOSES
(a) Remove the union bolt and 2 gaskets, disconnect the fuel
inlet hose.
HINT:
wPut a suitable container or shop rag under the fuel pipe
support.
wSlowly loosen the union bolt.
(b) Suspend the hose union end upward.
(c) Disconnect the fuel return hose from the oil dipstick guide.
(d) Disconnect the fuel return hose from the fuel return hose.
Plug the hose end.
14. REMOVE ENGINE WIRE BRACKET
Remove the bolt and bracket, and disconnect the engine wire
from the intake manifold stay.
15. DISCONNECT PS PUMP WITHOUT DISCONNECTING
HOSES
(a) Remove the 3 bolts, plate washer and pump front bracket.
(b) Disconnect these hoses:
(1) Air hose from No.4 timing belt cover
(2) Air hose from air intake chamber
(c) Disconnect the pump housing from the pump bracket.
HINT: Put aside the pump housing, and suspend it.
(d) Remove the 2 bolts and pump rear stay.
(e) Remove the 2 bolts and pump bracket. EG±80
± ENGINEENGINE MECHANICAL
Page 1395 of 2543
16. DISCONNECT PS PRESSURE TUBE FROM ENGINE
Remove the 2 clamp bolts, and disconnect the pressure tube.
17. DISCONNECT A/C COMPRESSOR WITHOUT
DISCONNECTING HOSES
(a) Remove the 2 bolts.
(b) Disconnect the compressor connector.
(c) Remove the nut.
(d) Usin g a to rx so cke t (E 1 0 ), re mo ve th e stu d bo lt, an d
disconnect the compressor from the engine.
HINT: Put aside the compressor, and suspend it securely.
18. DISCONNECT ENGINE WIRE FROM COWL PANEL
(a) Remove the bolt, and disconnect the ground strap.
(b) Remove the 2 bolt, and disconnect the engine wire protector.
(c) Remove the 2 bolts holding the engine wire retainer to the
cowl panel.
± ENGINEENGINE MECHANICALEG±81
Page 1396 of 2543
19. DISCONNECT ENGINE WIRE FROM CABIN
(a) Remove the scuff plate.
(b) Take out the front side of the floor carpet.
(c) Remove the 2 nuts and ECM protector.
(d) Remove the nut, and disconnect the ECM from the floor
panel.
(e) Disconnect the 2 connectors from the ECM.
(f) Disconnect the connector from the instrument panel wire.
(g) Disconnect the connector from the connector cassette.
(h) Pull out the engine wire from the cabin.
20. M/T:
REMOVE UPPER CONSOLE PANEL, SHIFT LEVER
BOOTS AND HOLDING BOLTS
(a) Remove the shift lever knob.
(b) Using a screwdriver, pry out the upper console panel. EG±82
± ENGINEENGINE MECHANICAL